# 아이폰에서는 테마 편집창에 close 버튼 만들어주기
- 아이폰에서 화면을 가로모드로 바꾸면 시트를 아래로 내리는 제스처로 창을 닫을 수 없기 때믄에 따로 버튼을 달아준다.
PaletteEditor에viewmodifier인 척하는 메서드를 달아서close버튼을 단View로 바꿔준다.
import SwiftUI

struct PaletteChooser: View {
    func body(for palette: Palette) -> some View {
        HStack {
            Text(palette.name)
            ScrollingEmojisView(emojis: palette.emojis)
                .font(emojiFont)
        }
        .popover(item: $paletteToEdit) { palette in
            PaletteEditor(palette: $store.palettes[palette])
                .wrappedInNavigationViewToMakeDismissable { paletteToEdit = nil }
        }
    }
}- 버튼을 상단에 달아주기 위해서 먼저
Navigation View로 감싸준 다음,toolbar버튼을 달아줄거다!
extension View {
    @ViewBuilder
    func wrappedInNavigationViewToMakeDismissable(_ dismiss: (() -> Void)?) -> some View {
        if UIDevice.current.userInterfaceIdiom != .pad, let dismiss = dismiss {
            NavigationView {
                self
                    .navigationBarTitleDisplayMode(.inline)
                    .dismissable(dismiss)
            }
            .navigationViewStyle(StackNavigationViewStyle())
        } else {
            self
        }
    }

    @ViewBuilder
    func dismissable(_ dismiss: (() -> Void)?) -> some View {
        if UIDevice.current.userInterfaceIdiom != .pad, let dismiss = dismiss {
            self.toolbar {
                ToolbarItem(placement: .cancellationAction) {
                    Button("Close") { dismiss() }
                }
            }
        } else {
            self
        }
    }
}-
짚고 넘어갈 포인트는 3갠데 먼저 인자로 받는
dismiss 클로저를 옵셔널로 선언하면, 해당 기능이 불필요할 때는 그냥nil을 인자로 보낼 수 있다. 또 다른side-effect는 메서드 내부에서 옵셔널 언래핑을 해서 사용하면@escaping으로 선언하는 것을 피할 수 있다. -
두 메서드 모두
if-else문을 사용해 각 경우에 다른 결과를 리턴하므로@ViewBuilder라고 표시해줘야 한다. -
wrappedNavigationViewToMakeDismissable(_:)메서드에서 내비게이션 뷰 스타일을.navigationViewStyle(StackNavigationViewStyle())로 바꿔준 부분! 6주차 과제에서 아이패드특인줄 알았는데 가로 너비가 충분한 경우 디바이스에서 자동으로splitView를 적용한다고 한다. 따라서stackView스타일로 바꿔준다. -
별 건 아니지만
ToolbarItem의placement를.cancellationAction으로 지정했는데 이런 방식을semantic placement라고 한다.SwiftUI가placement설정과 더불어 툴바의 상태, 현재 플랫폼 등에 따라 알아서 적절한 위치에 넣어준다. -
참고로
PaletteManager의close버튼도 위의 두 메서드를 사용해서 리팩토링할 수 있다!toolbar가 중첩선언되는 거 아닌가 했는데 문제 없이 잘 적용된다
struct PaletteManager: View {

    var body: some View {
        NavigationView {
            List {
                // some code..
            }
            .navigationTitle("Manage Palettes")
            .navigationBarTitleDisplayMode(.inline)
            .dismissable { presentationMode.wrappedValue.dismiss() }  // 여기 적용
            .toolbar {
                ToolbarItem { EditButton() }
            }
        }
    }
}
# 좁으면 한 개고 넓으면 n개가 되는 것은...?
- 아이폰에서는 듀얼 모니터가 불가능하기 때문에 배경 이미지를 설정할 수 있는 방법들이 추가로 필요하다. 따라서 1) 클립보드 2) 사진 찍어서 배경으로 쓰기 3) 갤러리에 있는 사진 쓰기 의 3가지 방법을 추가해 줄건데 각 기능을 위해 버튼을 툴바에 추가해줄거다. 문제는 이제 툴바에
undo/redo버튼까지 총 4개가 들어가야 되는데 아이폰 세로모드의 경우 너비가 좁아서 버튼을 하나만 띄울 수 있다는 점이다...따라서 너비가 부족하면contextMenu가 뜨게 하고 충분한 경우 모든 버튼이 뜨도록하는ViewModifier를 만들어서 해결할거다!
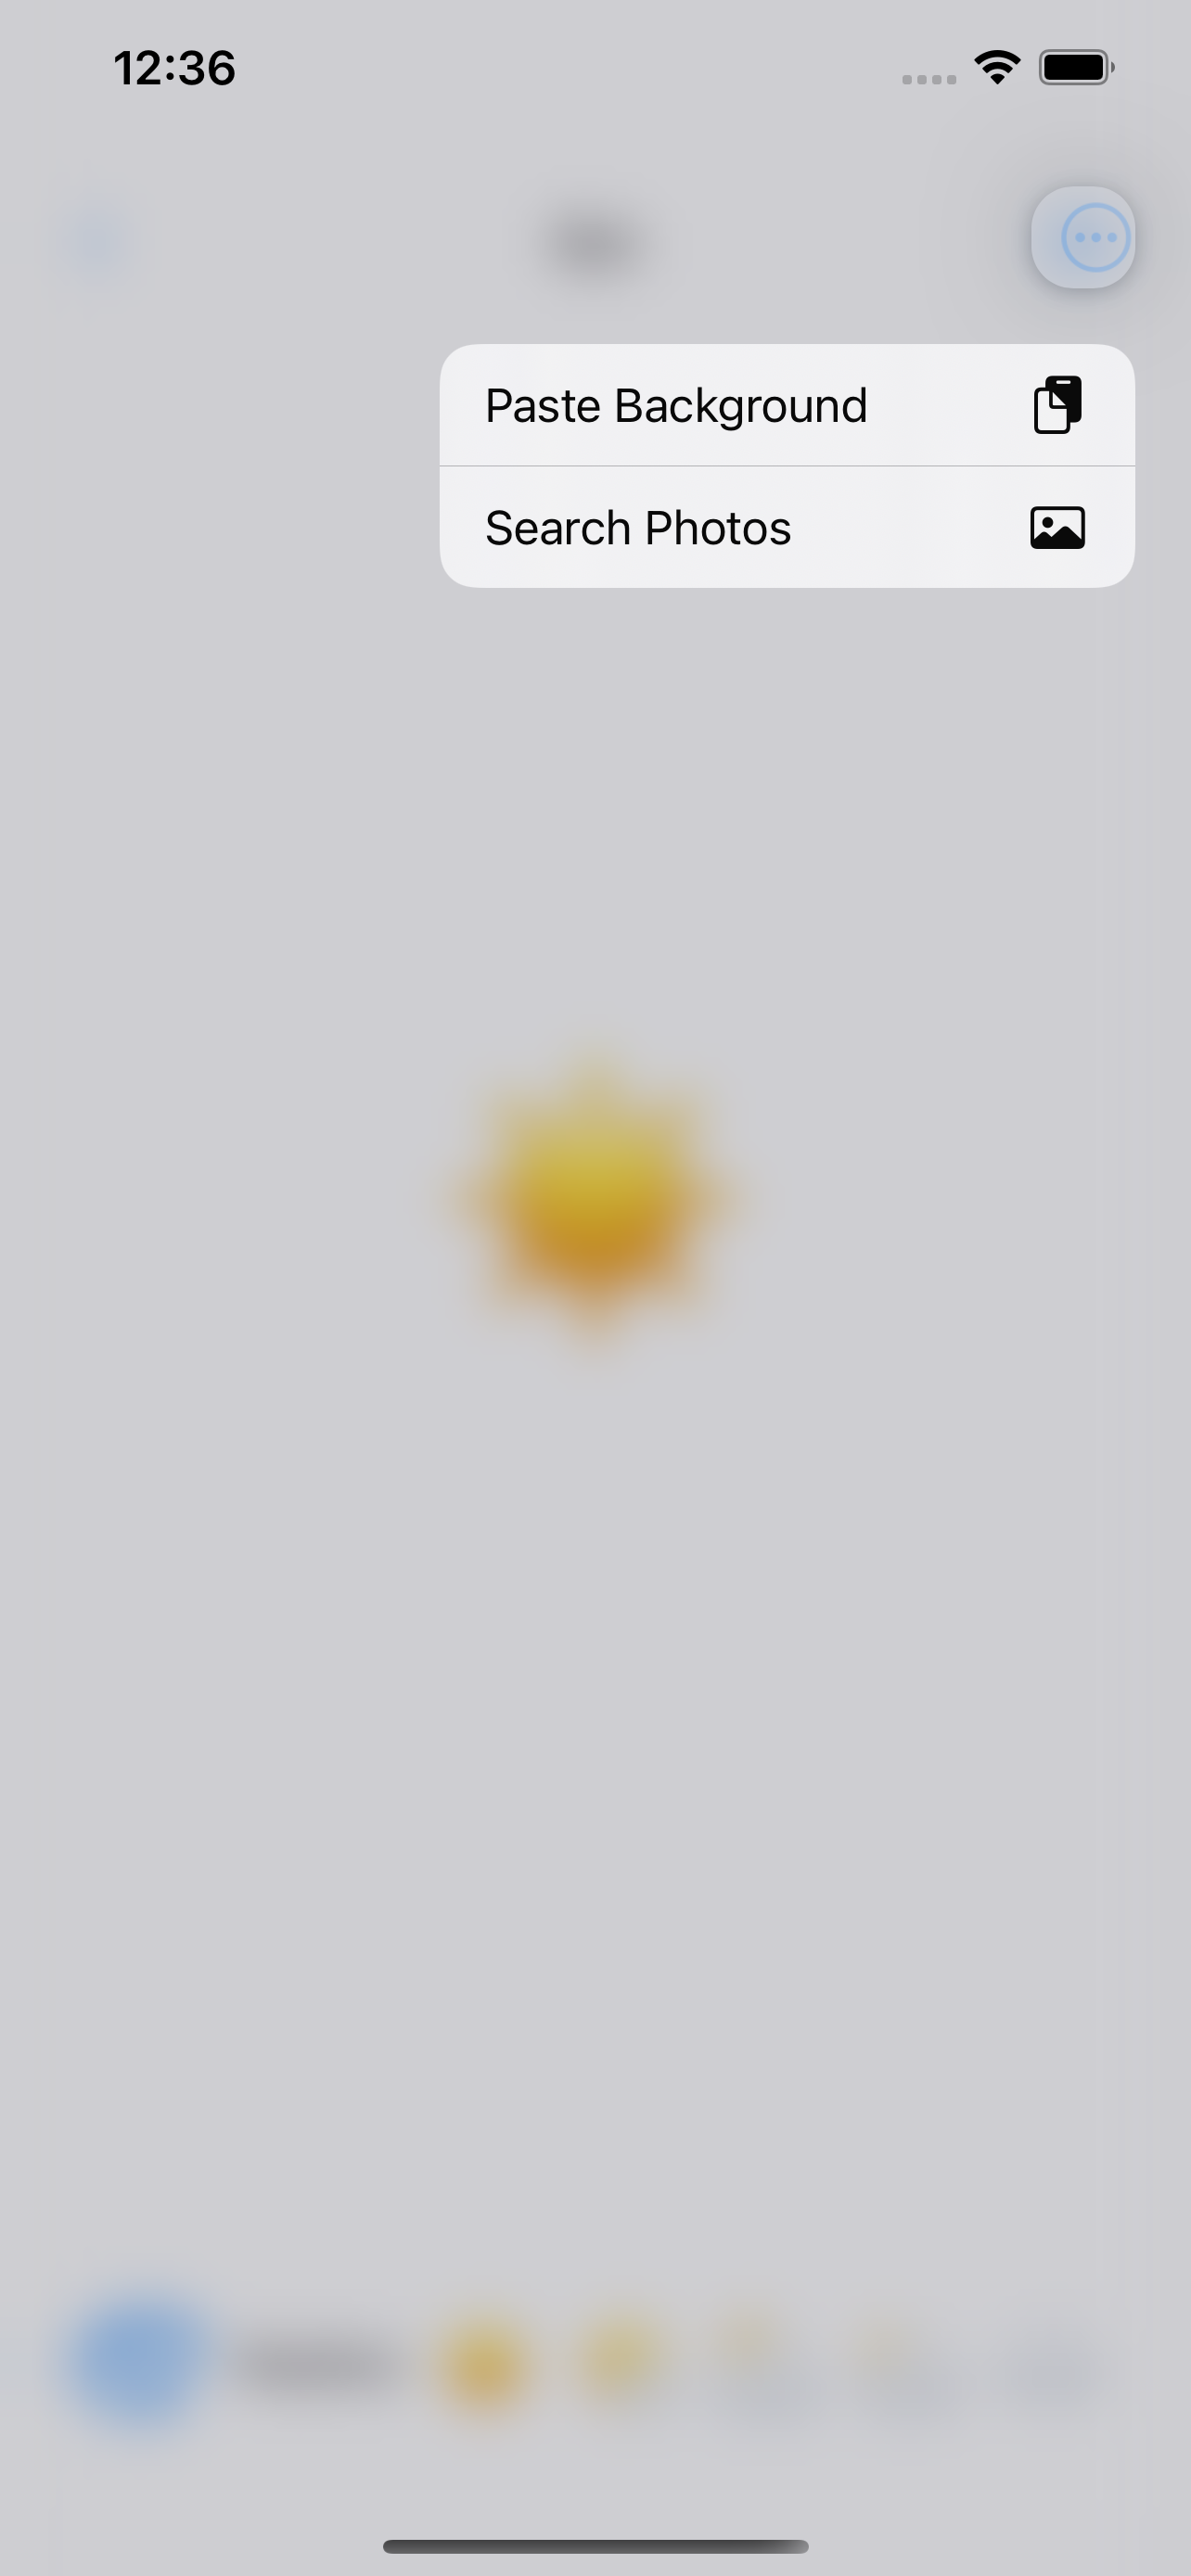
세로모드는 위처럼, 가로모드에는 아래처럼 뜨게 해줄 예정!

- 먼저
View의extension으로compactableToolbar(_:)를 선언해줄건데,ViewBuilder를 인자로 받아서 너비에 따라서toolbar에contextMenu혹은 버튼 전체가 나열된View를 반환해 줄 친구다 따라서 인자로View들을 받아야 하는데,View는 인자 타입을 선언하는 데 쓸 수 없으므로 제네릭Content를 선언한 다음,View프로토콜에 순응하게 한다.
extension View {
    func compactableToolbar<Content>(@ViewBuilder _ content: () -> Content) -> some View where Content: View {
        self
            .toolbar {
                content()
                    .modifier(CompactableIntoContextMenu())
            }
    }
}
CompactableIntoContextMenu ViewModifier는 현재 환경의 너비에 따라content가 담긴contextMenu혹은content그 자체를 반환한다. 여기서 현재 환경의 너비가 충분한지는horizontalSizeClass환경 프로퍼티를 이용하는데.compact또는.regular인지 알 수 있다.
struct CompactableIntoContextMenu: ViewModifier {

    @Environment(\.horizontalSizeClass) var horizontalSizeClass

    private var compact: Bool { horizontalSizeClass == .compact }

    func body(content: Content) -> some View {
        if compact {
            Button {

            } label: {
                Image(systemName: "ellipsis.circle")
            }
            .contextMenu { content }
        } else {
            content
        }
    }
}- 그리고 마지막으로
EmojiArtDocument에 가서 적절한 위치에compactableToolbar를 달아주고 넣고 싶은View들을 클로저로 보내주면 끝~
struct EmojiArtDocumentView: View {
    var background: some View {
        GeometryReader { geometry in
            ZStack {
                // some code..
            }
            .compactableToolbar {
                AnimatedActionButton(title: "Paste Background", systemImage: "doc.on.clipboard", action: pasteBackground)
                if Camera.isAvailable {
                    AnimatedActionButton(title: "Take Photo", systemImage: "camera") {
                        backgroundPicker = .camera
                    }
                }
                if PhotoLibrary.isAvailable {
                    AnimatedActionButton(title: "Search Photos", systemImage: "photo") {
                        backgroundPicker = .library
                    }
                }
                if let undoManager = undoManager {
                    if undoManager.canUndo {
                        AnimatedActionButton(title: undoManager.undoActionName, systemImage: "arrow.uturn.backward") {
                            undoManager.undo()
                        }
                    }
                    if undoManager.canRedo {
                        AnimatedActionButton(title: undoManager.undoActionName, systemImage: "arrow.uturn.forward") {
                            undoManager.redo()
                        }
                    }
                }
            }
        }
    }
}
# You've Got Copy~
- 이전에 만들어뒀던
AnimatedActionButton(title:systemImage:action)를 다시 사용할거기 때문에 클립보드에서 복사한 사진을 배경 이미지로 설정해주는 함수를 만들어서action인자에 넣어주기만 하면 된다.
- 앱 내/외부 간 데이터 공유를 도와주는
UIPasteboard인스턴스를 사용할건데, 그냥 단순히 다른 곳에서 복사한 이미지를 붙여넣을 것이므로 시스템 전체에서 공유하는general타입을 사용한다. 클립보드의 첫번째 아이템이image혹은imageURL이라면setBackground()메서드를 사용해 배경 이미지를 지정해주고, 클립보드에 아무것도 없는 경우 알림창을 띄우게 하면 끝!
struct EmojiArtDocumentView {
    private func pasteBackground() {
        autoZoom = true
        if let imageData = UIPasteboard.general.image?.jpegData(compressionQuality: 1.0) {
            document.setBackground(.imageData(imageData), undoManager: undoManager)
        } else if let url = UIPasteboard.general.url?.imageURL {
            document.setBackground(.url(url), undoManager: undoManager)
        } else {
            alertToShow = IdentifiableAlert(
                title: "Paste Background",
                message: "There is no image currently on the pasteboard"
            )
        }
    }
}

- 사파리에서 임의의 이미지를 복사한 다음,
EmojiArt앱에서 붙여넣기 버튼을 누르면 복사했던 이미지가 왼쪽 아래부터 슥 올라오는데, 이는 우리가OptionalImage를Color.white에overlay했기 때문! 따라서 제거해준다.
struct EmojiArtDocumentView: View {
    var background: some View {
        GeometryReader { geometry in
            ZStack {
                Color.white  // overlay 제거
                OptionalImage(uiImage: document.backgroundImage)
                    .scaleEffect(zoomScale)
                    .position(convertFromEmojiCoordinates((0, 0), in: geometry))
                    .gesture(doubleTapToZoom(in: geometry.size))
            }
        }
    }
}
Welcome To UIKit
# 컨트롤러 월드에 오신 걸 환영합니다~🎶
-
UIKit에서는ViewModel과 완전히 다른controller가 존재한다.controller들은UI즉View들의 덩어리라고 생각할 수 있으며, 원래 자기가 할 일의 일부를delegate에게 넘긴다. -
SwiftUI와UIKit을 통합하기 위해서는UIViewRepresentable이나UIViewControllerRepresentable을 사용해서UIKit의view나controller를SwiftUI View로 바꿔줘야 한다. -
UIViewRepresentable과UIViewControllerRepresentable은 아래의 5가지 주요 컴포넌트를 갖는다.UIKit의view/controller를 생성하는 함수func makeUIViewController(context: Context) -> controllerfunc makeUIView(context: Context) -> view
UIKit요소를 업데이트하는 함수- `func updateUIViewController(controller, context: Context)
SwiftUI의 핵심이View를 무효화하고 다시 그리는 것이므로 매우 중요
delegate을 의미하는Coordinator객체func makeCoordinator() -> Coordinater- 유저가 특정 행동을 하면
delegate가 알림 메세지를 받는다
Coordinator,SwiftUI environment,animation transaction등을 담고 있는contextSwiftUI의 다른View들과 상호작용하는 데 필수적
view/controller를 완전히 제거하는 함수func dismantleUIViewController(controller, coordinator: Coordinator)
# 내가 찍은 사진으로 배경 이미지 설정하기!
-
SwiftUI는 카메라 API가 없으므로UIKit의 API를 빌려와야 한다. 따라서Camera구조체를 선언한 다음,UIViewControllerRepresetable프로토콜을 따르게 해서UIKit세계와 연결해준다. -
Camera구조체는 카메라 기능과 버튼을 제공하는some View다
1. UIViewControllerType 선언하기
- 먼저 우리는 디바이스의 카메라를 사용해서 사진을 찍고 싶으므로,
UIViewControllerType을 사진 찍는 데 필요한 시스템 인터페이스를 관리하는UIImagePickerController로 선언해준다. 이러면 이제 우리의makeUIViewController(context:)함수의 리턴값이UIImagePickerController가 된다!
2. UIController 만들고, 업데이트 하기
UIViewController를 만들기 위해서는makeUIViewController(context:)함수에서UIImagePickerController의 인스턴스를 선언한 다음, 유저가 사진을 찍으면서 줌인/아웃 할 수 있도록allowsEditing프로퍼티를true로 설정하고,delegate프로퍼티에 우리가 선언한Coordinator클래스의 인스턴스를 할당해주면 된다.
- 유저가 버튼을 눌렀을 때 디바이스의 카메라를 시트로 띄워줄 것이므로
SwiftUI를 업데이트할 필요가 없어서updateUIViewController(_:context:)는 빈 함수로 둔다
struct Camera: UIViewControllerRepresentable {
    func makeUIViewController(context: Context) -> UIImagePickerController {
        let picker = UIImagePickerController()
        picker.sourceType = .camera
        picker.allowsEditing = true
        picker.delegate = context.coordinator
        return picker
    }

    func updateUIViewController(_ uiViewController: UIImagePickerController, context: Context) {
        // leave empty
    }
}
3. Coordinator 만들기
makeCoordinator함수는Coordinator를 리턴하는데 이 친구가 바로makeUIViewController(context:)의delegate프로퍼티에 할당해 준 친구다,Coordinator는 일종의 제네릭으로 우리가 구현해줘야 한다. 우리의Coordinate는 유저가 사진이나 영상을pick하거나 작업을 취소하는 경우delegate에게 알림을 보내고,picker를 닫는 작업을 하는UIImagePickerControllerDelegate프로토콜을 따른다. 그 외에도UIKit세계의 친구들은 통상적으로NSObject클래스를 상속하며UIImagePickerController가UINavigationControllerDelegate프로토콜을 따르기 때문에 여기에도 순응한다.
struct Camera: UIViewControllerRepresentable {
    var handlePickedImage: (UIImage?) -> Void

    func makeCoordinator() -> Coordinator {
        Coordinator(handlePickedImage: handlePickedImage)
    }

    class Coordinator: NSObject, UIImagePickerControllerDelegate, UINavigationControllerDelegate {

        var handlePickedImage: (UIImage?) -> Void

        init(handlePickedImage: @escaping (UIImage?) -> Void) {
            self.handlePickedImage = handlePickedImage
        }

        func imagePickerControllerDidCancel(_ picker: UIImagePickerController) {
            handlePickedImage(nil)
        }

        func imagePickerController(_ picker: UIImagePickerController, didFinishPickingMediaWithInfo info: [UIImagePickerController.InfoKey : Any]) {
            handlePickedImage((info[.editedImage] ?? info[.originalImage]) as? UIImage)
        }

}Coordinator클래스에서 유저가 각각 작업을 취소했을 때와 무언가를pick했을 때 특정 액션을 수행하도록 선언해야 하는데, 이를 위해서 우리는SwiftUI View에서 어떻게 처리할 지handlePickedImage: (UIImage?) -> Void 클로저로 받아온 다음, 이를 사용해서imagePickerControllerDidCancel(_:)함수와imagePickerController(_:info:)에서 사용한다.
-
handlePickedImage 클로저는SwiftUI View->Camera->Coordinator의 과정으로 전달된다 -
유의할 점은
Picker는 작업이 끝났다고 해서 자동으로 닫히지 않아 우리가 닫아줘야 하므로handlePickedBackgroundImage(_:)메서드에서 작업을 완료한 후backgroundPicker = nil로 설정해서 창을 닫아줘야 한다.
struct EmojiArtDocumentView: View {
private func handlePickedBackgroundImage(_ image: UIImage?) {
autozoom = true
if let imageData = image?.imageData {
document.setBackground(.imageData(imageData), undoManager: undoManager)
}
backgroundPicker = nil
}
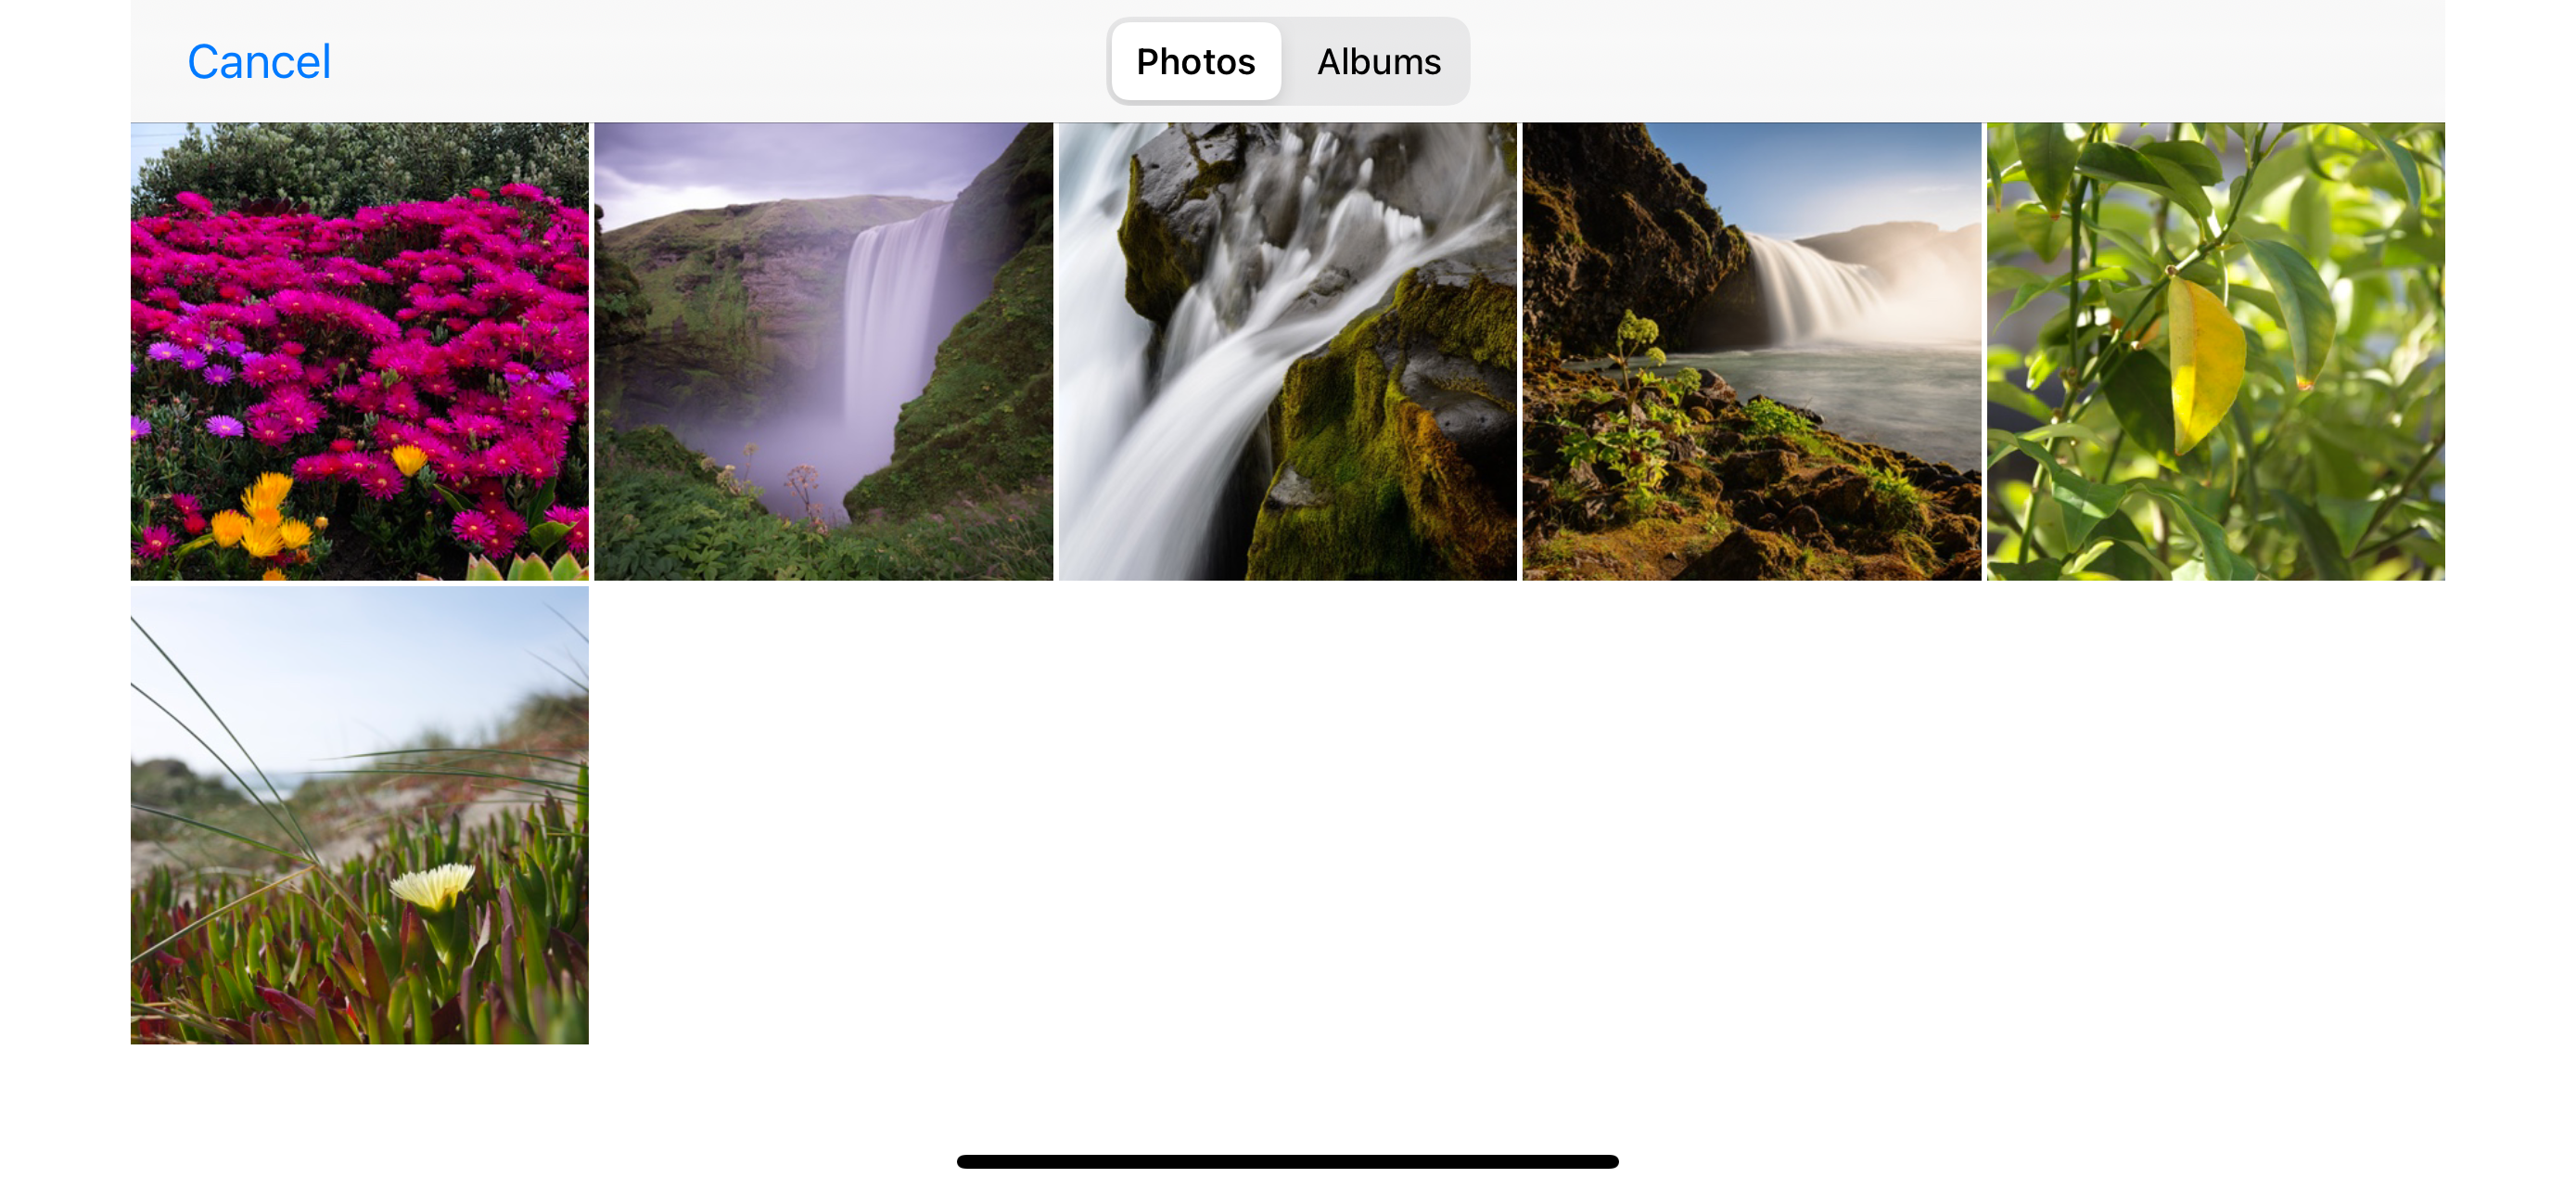
}# 갤러리에서 배경화면에 쓸 이미지 불러오기
-
PhotosUI프레임워크를 불러와서 사용한다.PhotoLibrary구조체를 선언해서 쓸건데, 전체적인 과정은Camera구조체를 만드는 것과 유사해서 세부사항만 살짝 정리하고 넘어갈거다!Picker타입은 갤러리에서 사진/영상 등을 선택할 수 있는 인터페이스를 제공하는PHPickerViewController를 사용한다.UIImagePickerController의 상위호환으로, 안정성과 신뢰성이 더 높고, 특정 유형의 자료만 디스플레이하는 등의 유용한 기능을 제공한다. -
우리의 경우 유저가 사진만을 배경으로 설정할 수 있도록 하고 싶으므로
makeUIViewController(contex:)함수에서PHPPickerViewController설정에 관한 정보를 담고 있는PHPPickerConfiguration선언한 다음,filter프로퍼티를 사용해서 사진만 나타내도록 설정한다. -
Coordinator 클래스에서picker(_:didFinishPicking)함수를 선언할 때, 유저가 선택한 항목을NSItemprovider가 전달하므로, 이를loadObjects(ofType:)함수를 선언해서UIImage로 변환한다.
import SwiftUI
import PhotosUI

struct PhotoLibrary: UIViewControllerRepresentable {
    var handlePickedImage: (UIImage?) -> Void

    static var isAvailable = true

    func makeCoordinator() -> Coordinator {
        Coordinator(handlePickedImage: handlePickedImage)
    }

    func makeUIViewController(context: Context) -> PHPickerViewController {
        var configuration = PHPickerConfiguration()
        configuration.filter = .images
        let picker = PHPickerViewController(configuration: configuration)
        picker.delegate = context.coordinator
        return picker
    }

    func updateUIViewController(_ uiViewController: PHPickerViewController, context: Context) {
        // leave empty
    }

    class Coordinator: NSObject, PHPickerViewControllerDelegate {
        var handlePickedImage: (UIImage?) -> Void

        init(handlePickedImage: @escaping (UIImage?) -> Void) {
            self.handlePickedImage = handlePickedImage
        }

        func picker(_ picker: PHPickerViewController, didFinishPicking results: [PHPickerResult]) {
            let found = results.map { $0.itemProvider }.loadObjects(ofType: UIImage.self) { [weak self] image in
                self?.handlePickedImage(image)
            }
            if !found {
                handlePickedImage(nil)
            }
        }
    }
}
# 카메라/갤러리 버튼 달고, 권한 허용하기
toolbar에 그냥AnimatedActionButton을 선언하면 시뮬레이터의 경우 카메라가 없으므로 앱이 터진다. 따라서Camera에isAvaible프로퍼티를 선언해서 현재 사용중인 디바이스에 카메라가 있는지 확인하고 있는 경우에만 카메라를 토글하도록 한다.
struct Camera: UIViewControllerRepresentable {

    static var isAvailable: Bool {
        UIImagePickerController.isSourceTypeAvailable(.camera)
    }
}- 카메라와 갤러리 토글에는
.sheet(item:content)메서드를 사용할건데, 이 과정에서BackgroundPickerType enum을 선언하고Identifiable하게 만들어줘야 한다. 여기서의 팁은var id: BackgroundPickerType { self }와 같이 선언하면 자기 자신을id로 쓸 수 있다.rawValue를id로 쓰기도 하지만, 해당 방법은associated value가 있는 경우 쓸 수 없으므로 앞에서 얘기한 방법이 더 좋다고 한다.
  enum BackgroundPickerType: Identifiable {
        case camera
        case library
        var id: BackgroundPickerType { self }
}- 아 맞다 권한허용!
Info.plist-Privacy-Camera Usage Description-The camera can be used to set the background of an emojiart document

☀️ 느낀점
-
@ViewBuilder는 분기 등을 허용해서 다양한child View를 담을 수 있도록 해준다는 점을 다시 한 번 짚고 넘어갈 수 있었고,weak에 대해서 다시 공부했는데 아직도 사실 좀 헷갈린다ㅠㅠㅠ 기본적으로retain cycle을 피하기 위해 쓴다는 건 알겠는데, 어떤 때에는retain cycle이 있는 것 같은데weak을 안 써도 해결되는 것 같고 헷갈린다...여기 다시 한번 해보기 언제쯤 확신을 갖고 이해할 수 있을까... -
완강이 코앞이라 기뻐했는데 날짜를 보니 12월이라 바로
UIKit공부를 시작해야될 것 같다는 생각이 들어서 슬펐다...대체 왜 벌써 12월이지? 아직도 할 게 산더미인데 나는 왜 이렇게 의지가 부족할까
Delegation
- In UIKit when sth like the camera takes a picture and it wants to communicate that back to you, it does it via delegation
- delegation : ur gonna hava a var that implements a certain protocol, and in this protocol, like for the camera, would say "I just took a picture and here it is" or "the user hit cancel with this camera ViewController" and those messages are gonna be sent to the delegate
- controllers delegate some functionality to some other objects, like delegating what to do when a photo is chosen from the camera
Representables
- func makeCoordinator lets u make an object that can be a delegate b/c so many things in UIKit have a delegate, they're delegating their functionality to sth else...coordinator == delegate
-
close button for paletteEditor
- when ur in a navigation View and there's enough horizontal space, then it will actually put two Views in ur Navigaiton View
-
set background in iPhone
- enum SizeClass : compact(ur kinda challenged for space in that direction(horizontal/vertical) and regular(ur not challenged)
-
creating toolbar for undo and paste
-
creating camera button
-
controllers are kinda bundles of UI
-
e.g. a UI that takes a picture from the camera all bundeld into one nice little space
-
Views are used but not as impt...controllers put the View together into one thing
-
Info.plist - Privacy-Camera Usage Description - "The camera can be used to set the background of an emojiart document"