# 아이템이 없을 때는 No item 셀 디스플레이 하기
-
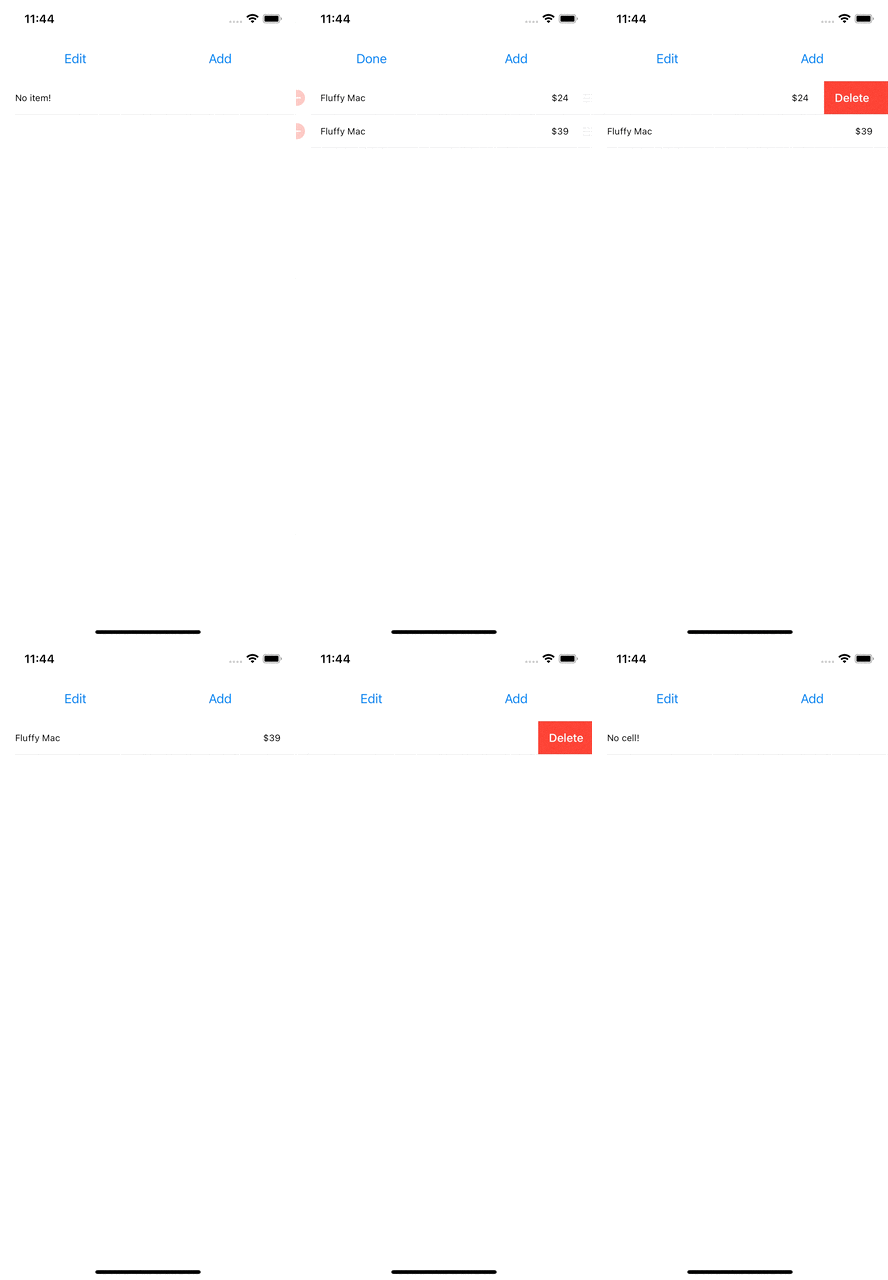
아이템이 1개도 없을 때에는
No item!이라고 쓰인 셀을 나타내야 한다. 대신 아이템이 하나라도 추가되면 이 셀은 사라진다 -
그리고
No item!셀은 삭제나 이동이 불가능해야 한다
# tableView.cellForRow(at: indexPath)
- 쉬울 줄 알았는데...안 쉬웠다...처음에는 itemStore.allItems 가 비어있으면 테이블에 No item 셀을 추가하고 첫 번째 아이템이 추가되는 순간 No item 셀을 삭제하고 첫 번째 아이템 셀을 추가하는 방식으로 생각했다.
- 문제는 No item 셀 추가를 위해 numberOfRowsInSection 을 항상 1 이상이도록 설정했는데, No item 셀이 삭제되는 순간 테이블 상 셀이 0개가 되어 numberOfRowsInSection 과 일치하지 않아 컴파일이 안됐다...
- 결국 추가로 인해 생기는 row 개수의 불일치 가 문제라고 생각해서 1) 아이템이 없다가 최초로 추가되는 경우 와 2) 아이템이 있다가 다 삭제되는 경우 에는 이미 디스플레이되어 있는 cell 의 내용을 교체 하는 방식으로 접근했다.
- 처음에는 교체도 tableView(_:cellForRowAt:) 내부에서 구현하려고 했는데 해당 메서드는 insertRows(at:with:) 메서드가 호출된 다음에(만 호출되는 줄 알았는데 후술하겠지만 reloadRows(at:with)이라는 친구가 있었다...) 호출되는 관계로 행을 하나 추가해서 행 개수 불일치 문제를 피할 수 없없다....
- 그래서 addNewItem(_:) 메서드에서 현재 아이템이 1개인 경우(즉, 아이템이 없다가 최초로 추가된 경우) 에는 insertRows(at:with:) 메서드를 호출하지 않고 replaceNoItemCellWithItemCell(at: indexPath) 메서드를 별도로 만들어서 해당 위치의 셀을 직접 찾아서 내용만 교체해주는 방식으로 접근했다.

class ItemsViewController: UITableViewController {

    var itemStore: ItemStore!

    @IBAction func addNewItem(_ sender: UIButton) {
        let newItem = itemStore.createItem()

        if let index = itemStore.allItems.firstIndex(of: newItem) {
            let indexPath = IndexPath(row: index, section: 0)

            if itemStore.allItems.count == 1 {
                replaceNoItemCellWithItemCell(at: indexPath)
            } else {
                tableView.insertRows(at: [indexPath], with: .automatic)
            }
        }
    }

    func replaceNoItemCellWithItemCell(at: indexPath) {
        let cell = tableView.cellForRow(at: indexPath)
        let item = itemStore.allItems[indexPath.row]
        cell.textLabel?.text = item.name
        cell.detailTextLabel?.text = "$\(item.valueInDollars)"
    }

    override func tableView(_ tableView: UITableView, numberOfRowsInSection section: Int) -> Int {
        itemStore.allItems.isEmpty ? 1 : itemStore.allItems.count
    }

    override func tableView(_ tableView: UITableView, cellForRowAt indexPath: IndexPath) -> UITableViewCell {

        let cell = tableView.dequeueReusableCell(withIdentifier: "UITableViewCell", for: indexPath)

        if !itemStore.allItems.isEmpty {
            let item = itemStore.allItems[indexPath.row]
            cell.textLabel?.text = item.name
            cell.detailTextLabel?.text = "$\(item.valueInDollars)"
        } else {
            cell.textLabel?.text = "No item!"
            cell.detailTextLabel?.text = nil
        }

        return cell
    }
# reloadRows(at:with:)
-
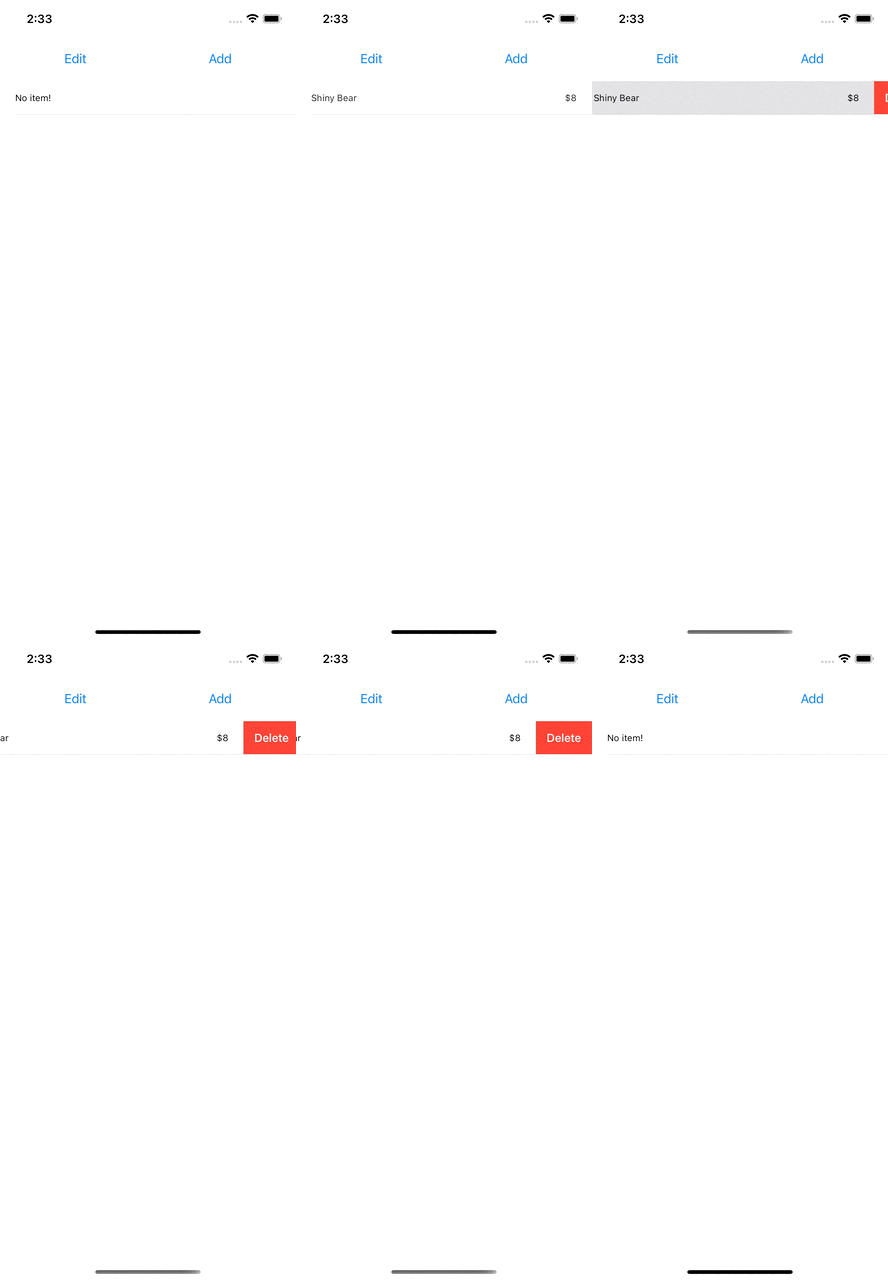
위에서처럼 하니까 작동은 잘 하는데 개인적으로 no item cell -> item cell 로 바뀔 때 애니메이션 효과가 없는 게 아쉬웠다...그래서 공식문서를 뒤지다가 특정 위치의 cell 을 애니메이션 효과를 곁들여서 다시 로드해준다는 reloadRows(at:with:) 메서드를 발견했다.
-
작동 방식이 어떻게 되는 지 몰라서 삽질을 좀 하다가 insertRows(at:with:) 메서드와 마찬가지로 tableView 에서 해당 메서드를 호출하면 델리게이트의 tableView(_:cellForRowAt:) 메서드가 호출되는데, 이제 얘는 해당 위치에 새로 추가가 아니라 새로운 셀로 바꿔주는 것임을 깨달았다! 그래서 아이템 개수가 하나인 경우 교체 작업을 수행하도록 reloadRows(at:with:) 를 호출했더니 애니메이션 효과까지 잘 적용되면서 대체됐다!
-
원래는 replaceNoItemCellWithItemCell(at: indexPath) 에다가 아이템 개수가 여러개였다가 다 삭제되어서 다시 no item cell 이 되는 경우를 위한 replaceItemCellWithNoItemCell(at: indexPath) 까지 두 개의 커스텀 메서드가 있었는데 reloadRows(at:with:) 을 사용하면서 둘 다 삭제할 수 있었다.

    @IBAction func addNewItem(_ sender: UIButton) {
        let newItem = itemStore.createItem()

        if let index = itemStore.allItems.firstIndex(of: newItem) {
            let indexPath = IndexPath(row: index, section: 0)

            if itemStore.allItems.count == 1 {
                tableView.reloadRows(at: [indexPath], with: .automatic)  // 여기요 여기
            } else {
                tableView.insertRows(at: [indexPath], with: .automatic)
            }
        }
    }
# reconfigureRows(at:)
- reloadRows(at:with:)는 기본적으로 새로운 셀로 기존 셀을 대체하는 방식인데 기존 셀을 그대로 유지하면서 내용만 바꾸고 싶은 경우 reconfigureRows(at:) 을 사용하면 된다. 마찬가지로 tableView(_:cellForRowAt:) 가 이어서 호출되는데, print 문으로 찍어보면 dequeueReusableCell(withIdentifier:for: indexPath) 메서드가 기존 셀, 즉 현재 디스플레이되고 있는 셀을 반환함을 알 수 있다. 대신 얘도 애니메이션 효과가 없는데 아마 수동으로 구현했던 replaceNoItemCellWithItemCell(at:) 과 유사한 방식으로 구현된 게 아닐까 싶다. iOS 15 부터 사용가능한 베타 버전 메서드여서 테스트만 해보고 지웠다.
# row 의 삭제와 이동 방지
- tableView(_:commit:forRowAt:) 와 tableView(_:moveRowAt:to:) 메서드 내부에서 조건을 추가해서 삭제와 이동을 방지할 수도 있지만 itemStore.allStores.isEmpty 를 굳이 계속 no item cell 의 조건으로 사용한 것은 델리게이트의 tableView(_:canEditRowAt indexPath:) 메서드와 tableView(_:canMoveRowAt indexPath:) 메서드를 사용하고 싶었기 때문! 앞의 tableView 어쩌고 메서드들을 호출하기 전에 이 각각 이 두 메서드를 통해 편집/이동이 가능한 지 확인한다. 따라서 아이템이 한 개도 없는 경우 편집/이동이 불가하다고 설정해주면 끝!
class ItemsViewController: UITableViewController {
    override func tableView(_ tableView: UITableView, canEditRowAt indexPath: IndexPath) -> Bool {
        itemStore.allItems.isEmpty ? false : true
    }

    override func tableView(_ tableView: UITableView, canMoveRowAt indexPath: IndexPath) -> Bool {
        itemStore.allItems.isEmpty ? false : true
    }
}