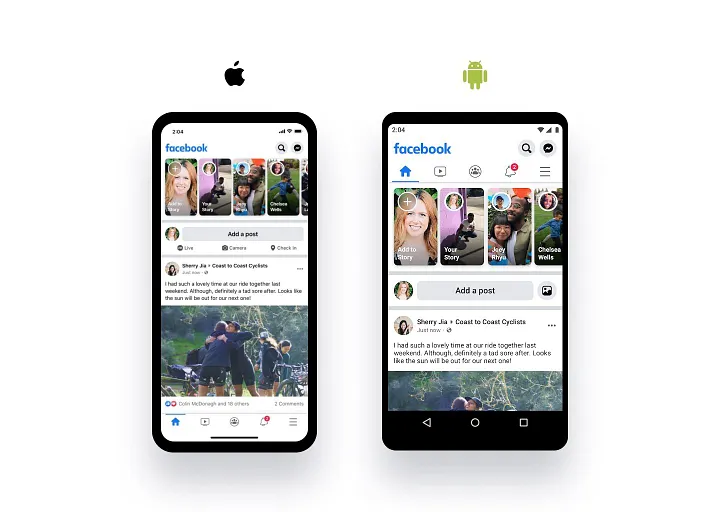
중요한 이유
React Native로 빌드하면 앱은 완전히 다른 두 시스템에서 실행됩니다. 서로 다른 가전제품을 사용하는 두 개의 주방에서 동일한 레시피를 만들려고 하면 같은 결과를 얻으려면 약간의 조정이 필요합니다. 이러한 차이를 무시하면 앱이 고장 나거나 한 플랫폼에서 충돌할 수도 있습니다.
사용 중인 플랫폼 감지
import { Platform } from 'react-native';


// Simple if check
if (Platform.OS === 'ios') {
  // iOS-specific code
} else {
  // Android-specific code
}


// One-liner with Platform.select
const buttonHeight = Platform.select({
  ios: 50,  // iPhones like slightly taller buttons
  android: 48,  // Android material design standard
});
이 코드는 첫 번째 도구입니다. Platform.OS는 단순히 현재 사용 중인 시스템을 알려줍니다. Platform.select 함수는 앱이 실행 중인 위치에 따라 올바른 값을 선택하는 스마트 스위치와 같습니다. 모든 곳에 if/else 문을 사용하는 것보다 코드를 더 깔끔하게 만들 수 있습니다.
스타일링 차이
1. Shadow 문제
iOS와 Android는 그림자를 완전히 다르게 처리합니다. 이로 인해 끝없는 골칫거리가 생깁니다.
// This works on iOS but does nothing on Android
const iosShadowStyle = {
  shadowColor: '#000',
  shadowOffset: { width: 0, height: 2 },
  shadowOpacity: 0.3,
  shadowRadius: 4,
};


// This works on Android but does nothing on iOS
const androidShadowStyle = {
  elevation: 5,
};


// Solution: Combine them into one style
const crossPlatformShadow = {
  ...iosShadowStyle,
  ...androidShadowStyle,
};
iOS는 실제 shadow 속성을 사용하는 반면, Android는 "elevation이라는 단일 숫자를 사용합니다. 스타일에는 두 가지가 모두 필요합니다. 좋은 소식은 서로 간섭하지 않으므로 모든 속성을 포함할 수 있다는 것입니다.
2. Font 문제
// This fails on Android
const badFontStyle = {
  fontWeight: '600', // Works on iOS, breaks on Android
};


// This works everywhere
const goodFontStyle = {
  fontWeight: Platform.select({
    ios: '600',
    android: 'bold', // Android only accepts numeric or named weights
  }),
};
Android는 글꼴 가중치로 'normal'과 'bold'만 인식하지만 iOS는 전체 범위(100-900 또는 명명된 가중치)를 허용합니다. 항상 여기에서 Platform.select를 사용하지 않으면 Android에서 텍스트가 잘못 보입니다.
레이아웃 차이
1. SafeArea 문제
iPhone에는 콘텐츠를 차단할 수 있는 노치 및 홈 인디케이터가 있습니다. Android 기기에도 다양한 컷아웃이 있습니다.
import { SafeAreaView } from 'react-native';


// Wrapping your content protects from notches and system UI
function MyScreen() {
  return (
    <SafeAreaView style={{ flex: 1 }}>
      {/* Your content stays visible */}
      <Text>This won't be under the notch!</Text>
    </SafeAreaView>
  );
}
SafeAreaView는 자동으로 패딩을 추가하여 콘텐츠가 잘 보이도록 합니다. 이 기능이 없으면 콘텐츠가 iPhone 노치 또는 Android 스테이터스 바 아래에 숨겨질 수 있습니다.
2. 스테이터스 바 높이 차이
import { StatusBar } from 'react-native';


// Get proper height for both platforms
const STATUSBAR_HEIGHT = Platform.OS === 'ios'
  ? 20
  : StatusBar.currentHeight;
function MyHeader() {
  return (
    <View style={{ paddingTop: STATUSBAR_HEIGHT }}>
      <Text>My Header</Text>
    </View>
  );
}
스테이터스 바는 디바이스마다 높이가 다릅니다. iOS에서는 일반적으로 고정되어 있지만 Android에서는 다릅니다. 위의 코드는 레이아웃이 깨지지 않도록 적절한 높이를 가져옵니다.
사용자 행동 차이
1. 키보드 문제
키보드는 각 플랫폼에서 콘텐츠를 다르게 밀어 올립니다.
import { KeyboardAvoidingView } from 'react-native';


function LoginScreen() {
  return (
    <KeyboardAvoidingView
      behavior={Platform.OS === 'ios' ? 'padding' : 'height'}
      style={{ flex: 1 }}
    >
      <TextInput placeholder="Email" />
      <TextInput placeholder="Password" />
      <Button title="Login" />
    </KeyboardAvoidingView>
  );
}
iOS는 'padding' 동작(하단에 공간 추가)이 가장 잘 작동하는 반면, Android는 'height'(보기 크기 조정)가 더 잘 작동합니다. 이렇게 하면 입력할 때 입력 내용이 잘 보입니다.
2. TouchableOpacity vs TouchableNativeFeedback
import {
  TouchableOpacity,
  TouchableNativeFeedback,
  Platform
} from 'react-native';


// A button that feels right on both platforms
function MyButton({ onPress, title }) {
  // Use Material ripple effect on Android, opacity on iOS
  const Touchable = Platform.OS === 'android'
    ? TouchableNativeFeedback
    : TouchableOpacity;

  return (
    <Touchable onPress={onPress}>
      <View style={styles.button}>
        <Text>{title}</Text>
      </View>
    </Touchable>
  );
}
Android 사용자는 버튼을 탭할 때 ripple 효과(동그라미 애니메이션)를 기대합니다. iOS 사용자는 약간의 페이드 효과를 기대합니다. 이 코드는 각 플랫폼에서 사용자에게 자연스러운 느낌을 줍니다.
합리적인 파일 구성
src/
  components/
    Button/
      index.js       <- Main component code
      Button.ios.js  <- iOS-specific code
      Button.android.js  <- Android-specific code
React Native는 플랫폼에 따라 적합한 파일을 자동으로 로드합니다. 큰 차이가 있는 컴포넌트가 있는 경우 코드를 if/else 문으로 채우는 대신 플랫폼별 파일로 분리하세요.
실제 테스트 전략
-
두 플랫폼 모두에서 조기 테스트 - 끝까지 기다리지 마세요
-
개발하는 동안 각 플랫폼의 기기(또는 에뮬레이터)를 열어 두세요
-
이상한 점이 있으면 다른 플랫폼에서 즉시 확인하세요
-
실제 기기에서 빠르게 테스트하려면 Expo와 같은 도구를 사용하세요
빠른 시작 단계
-
먼저 앱의 어떤 기능이 다르게 동작하는지 파악하세요(입력, 애니메이션, 레이아웃)
-
작은 차이는 Platform.OS를 사용하여 확인하세요
-
플랫폼에 따라 다른 값은 Platform.select()를 사용하세요
-
큰 차이는 .ios.js와 .android.js 파일로 분리하세요
-
작은 변화에도 두 플랫폼에서 지속적으로 테스트하세요
최종 조언
저는 이러한 기술을 사용했다면 피할 수 있었던 플랫폼 차이를 디버깅하는 데 수많은 시간을 보냈습니다. 프로젝트 첫날부터 '크로스 플랫폼'을 나중에 고려하는 것이 아니라 처음부터 고려하세요.
이 팁은 이론적인 팁이 아니라 수천 명의 사용자가 사용하는 실제 앱에서 검증된 솔루션입니다. 플랫폼 차이를 적절히 처리하기 위한 작은 노력으로 나중에 큰 골칫거리를 줄일 수 있습니다.
지금 어떤 특정 React Native 플랫폼 문제로 어려움을 겪고 계신가요? 댓글로 알려주세요!