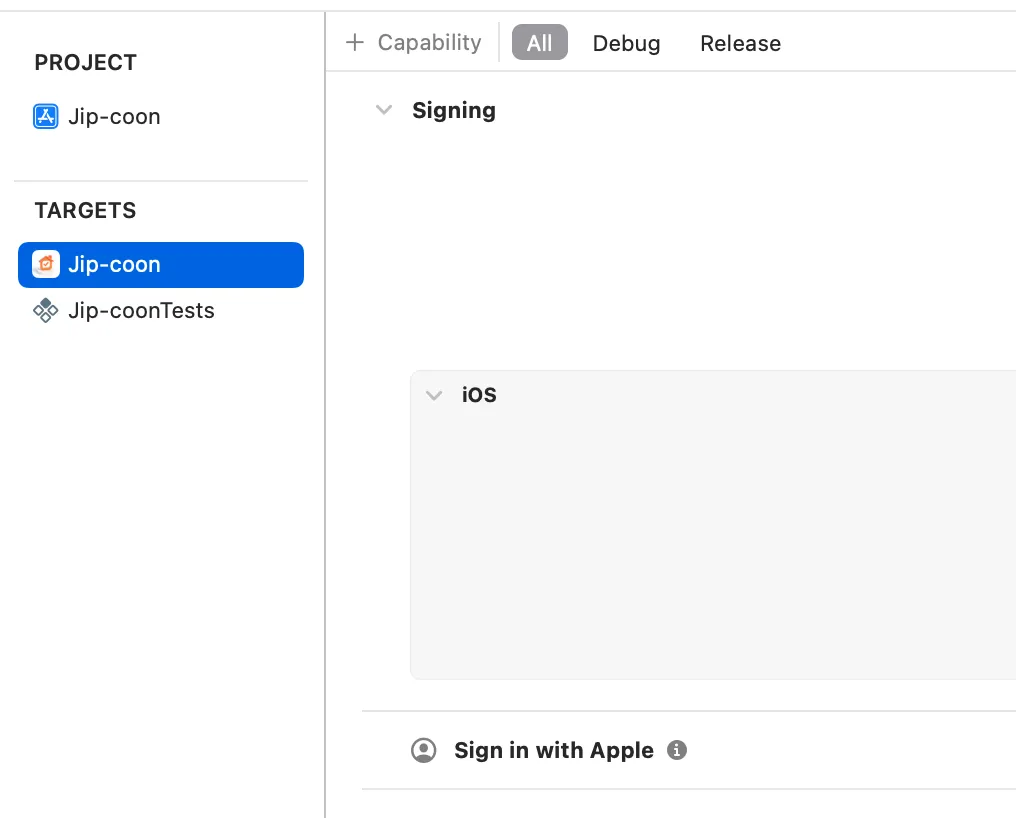
1. Capability 추가
targets → Signing & Capabilities → + Capability
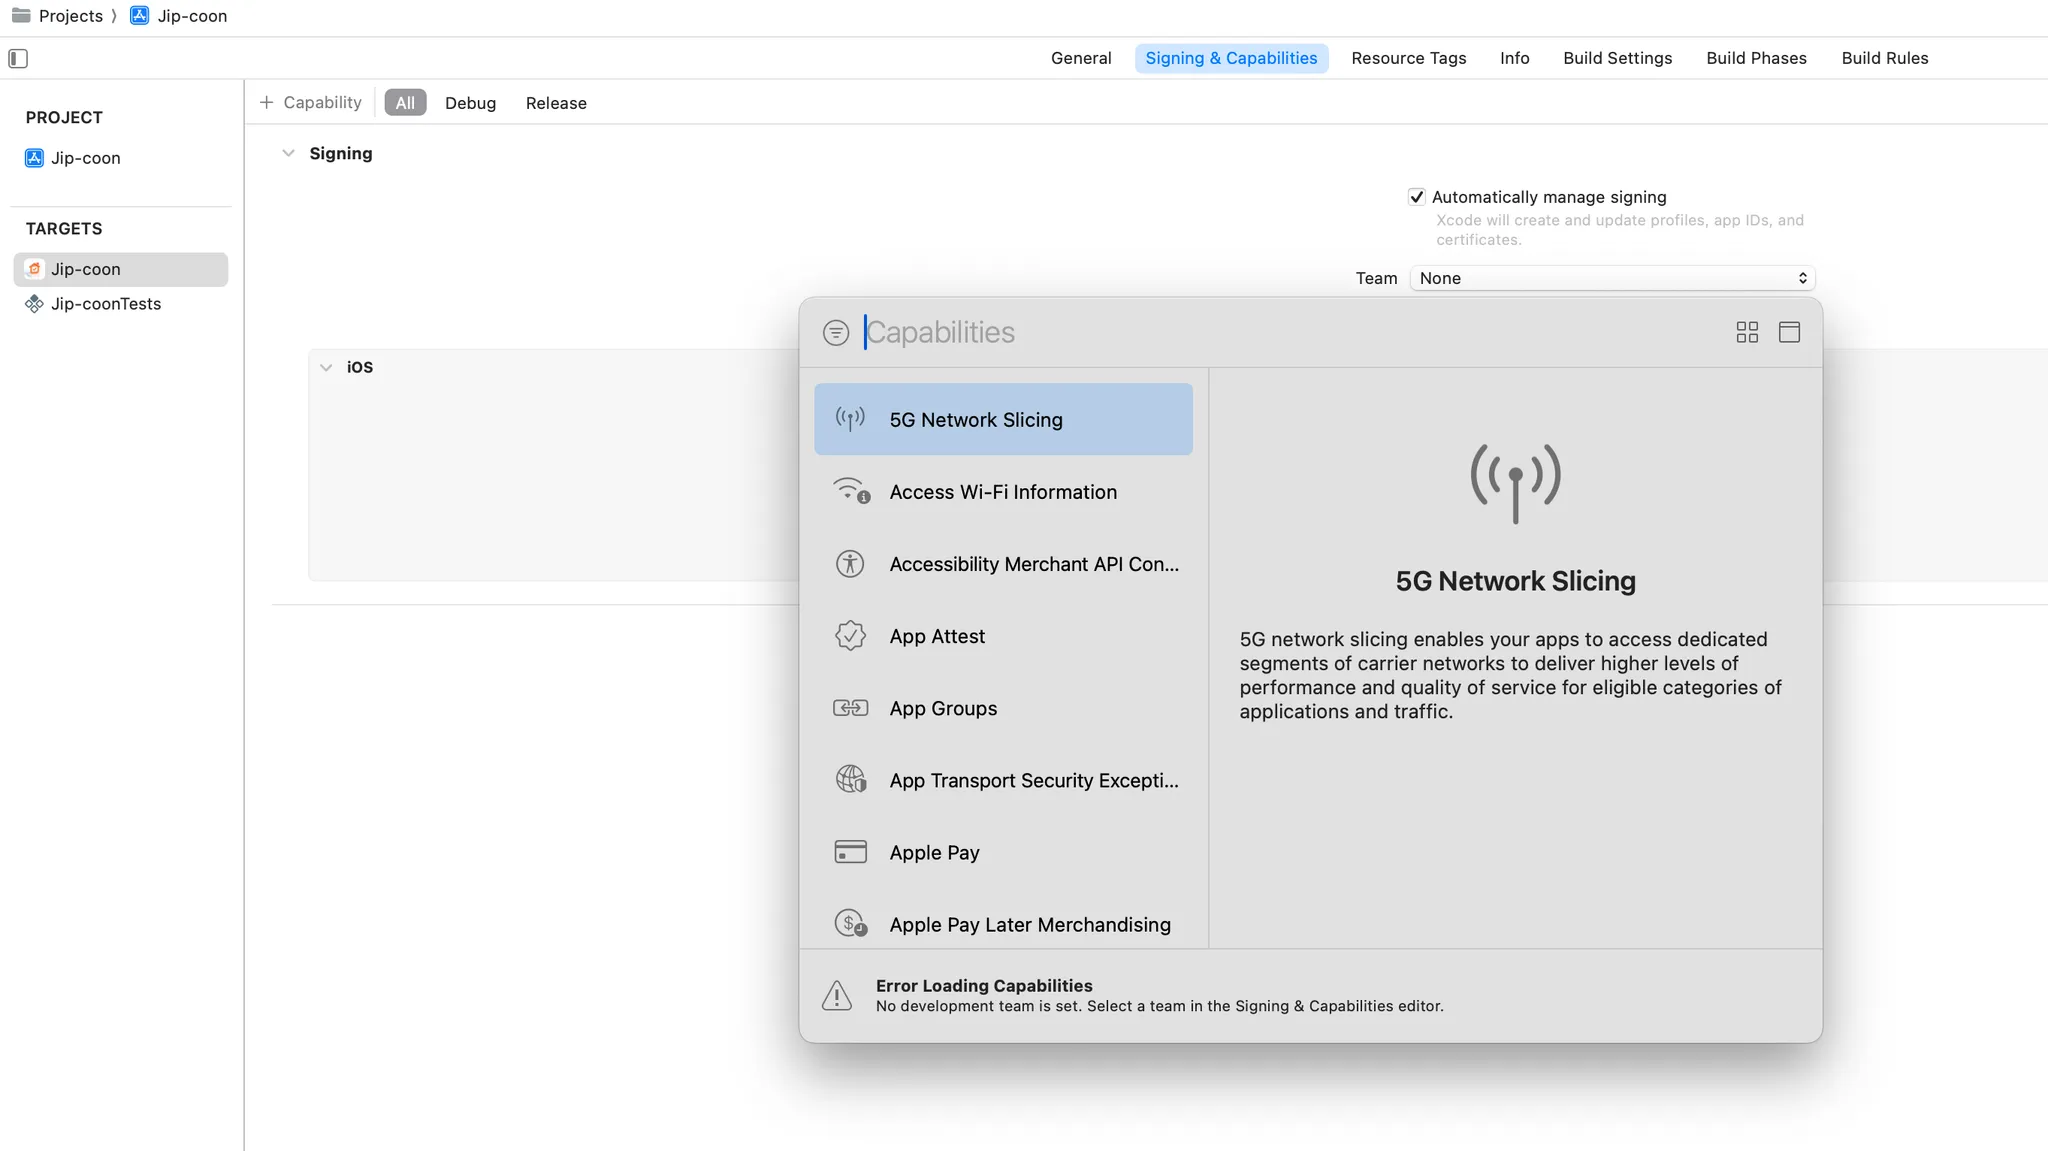
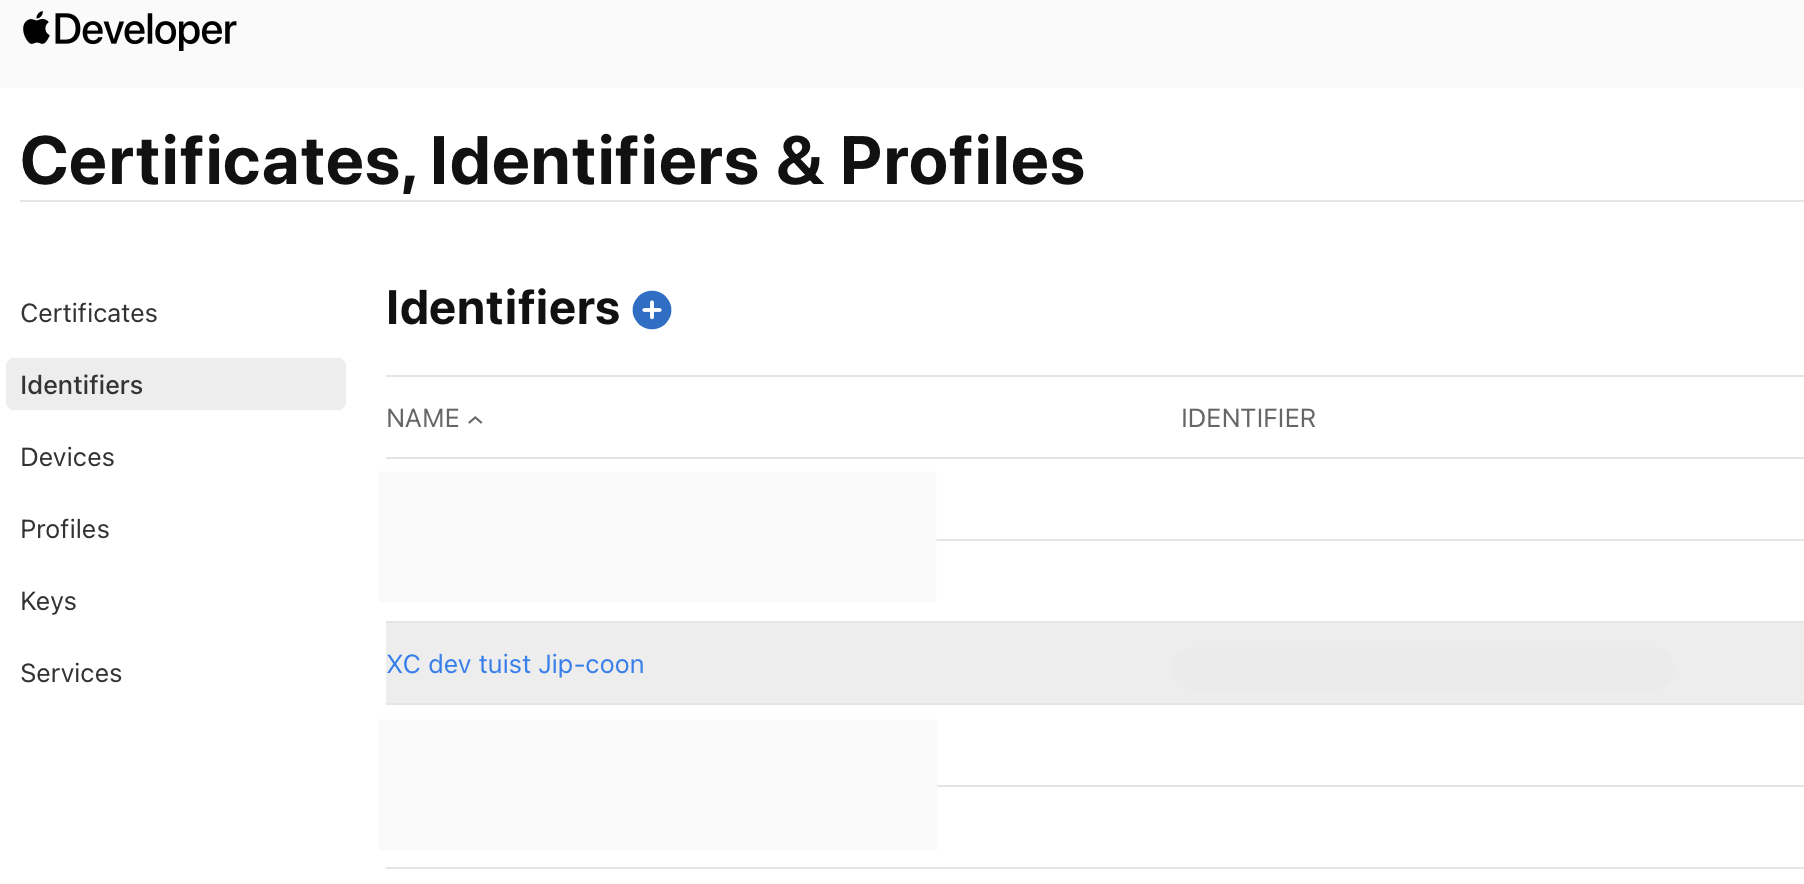
Xcode에서 Team을 None으로 두면 안 되고 개발자 계정으로 선택해주면 Apple Developer 웹의 Identifiers에서 정상적으로 등록된 것을 볼 수 있다.
2. Firebase 연결
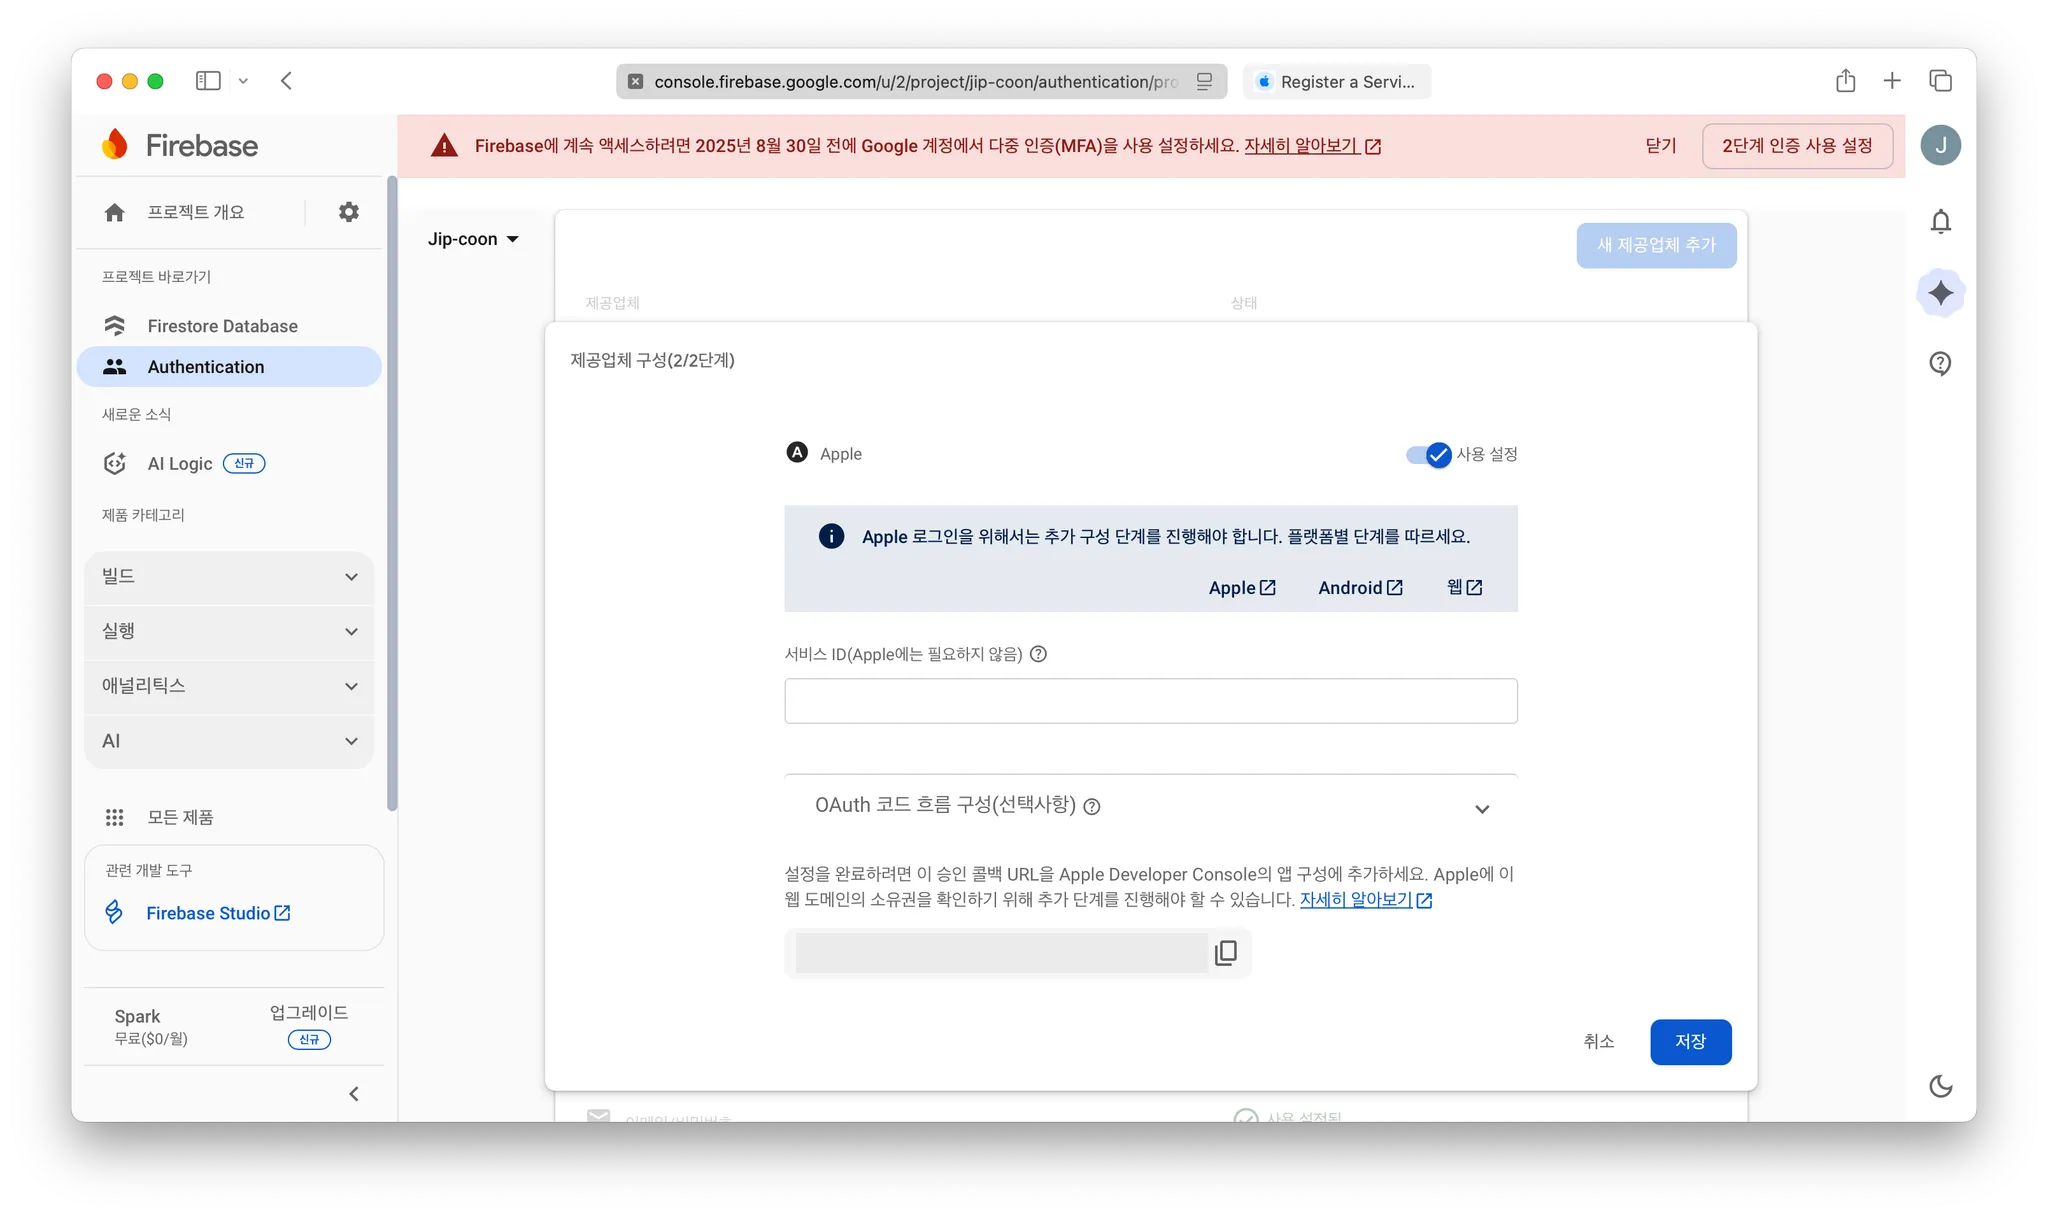
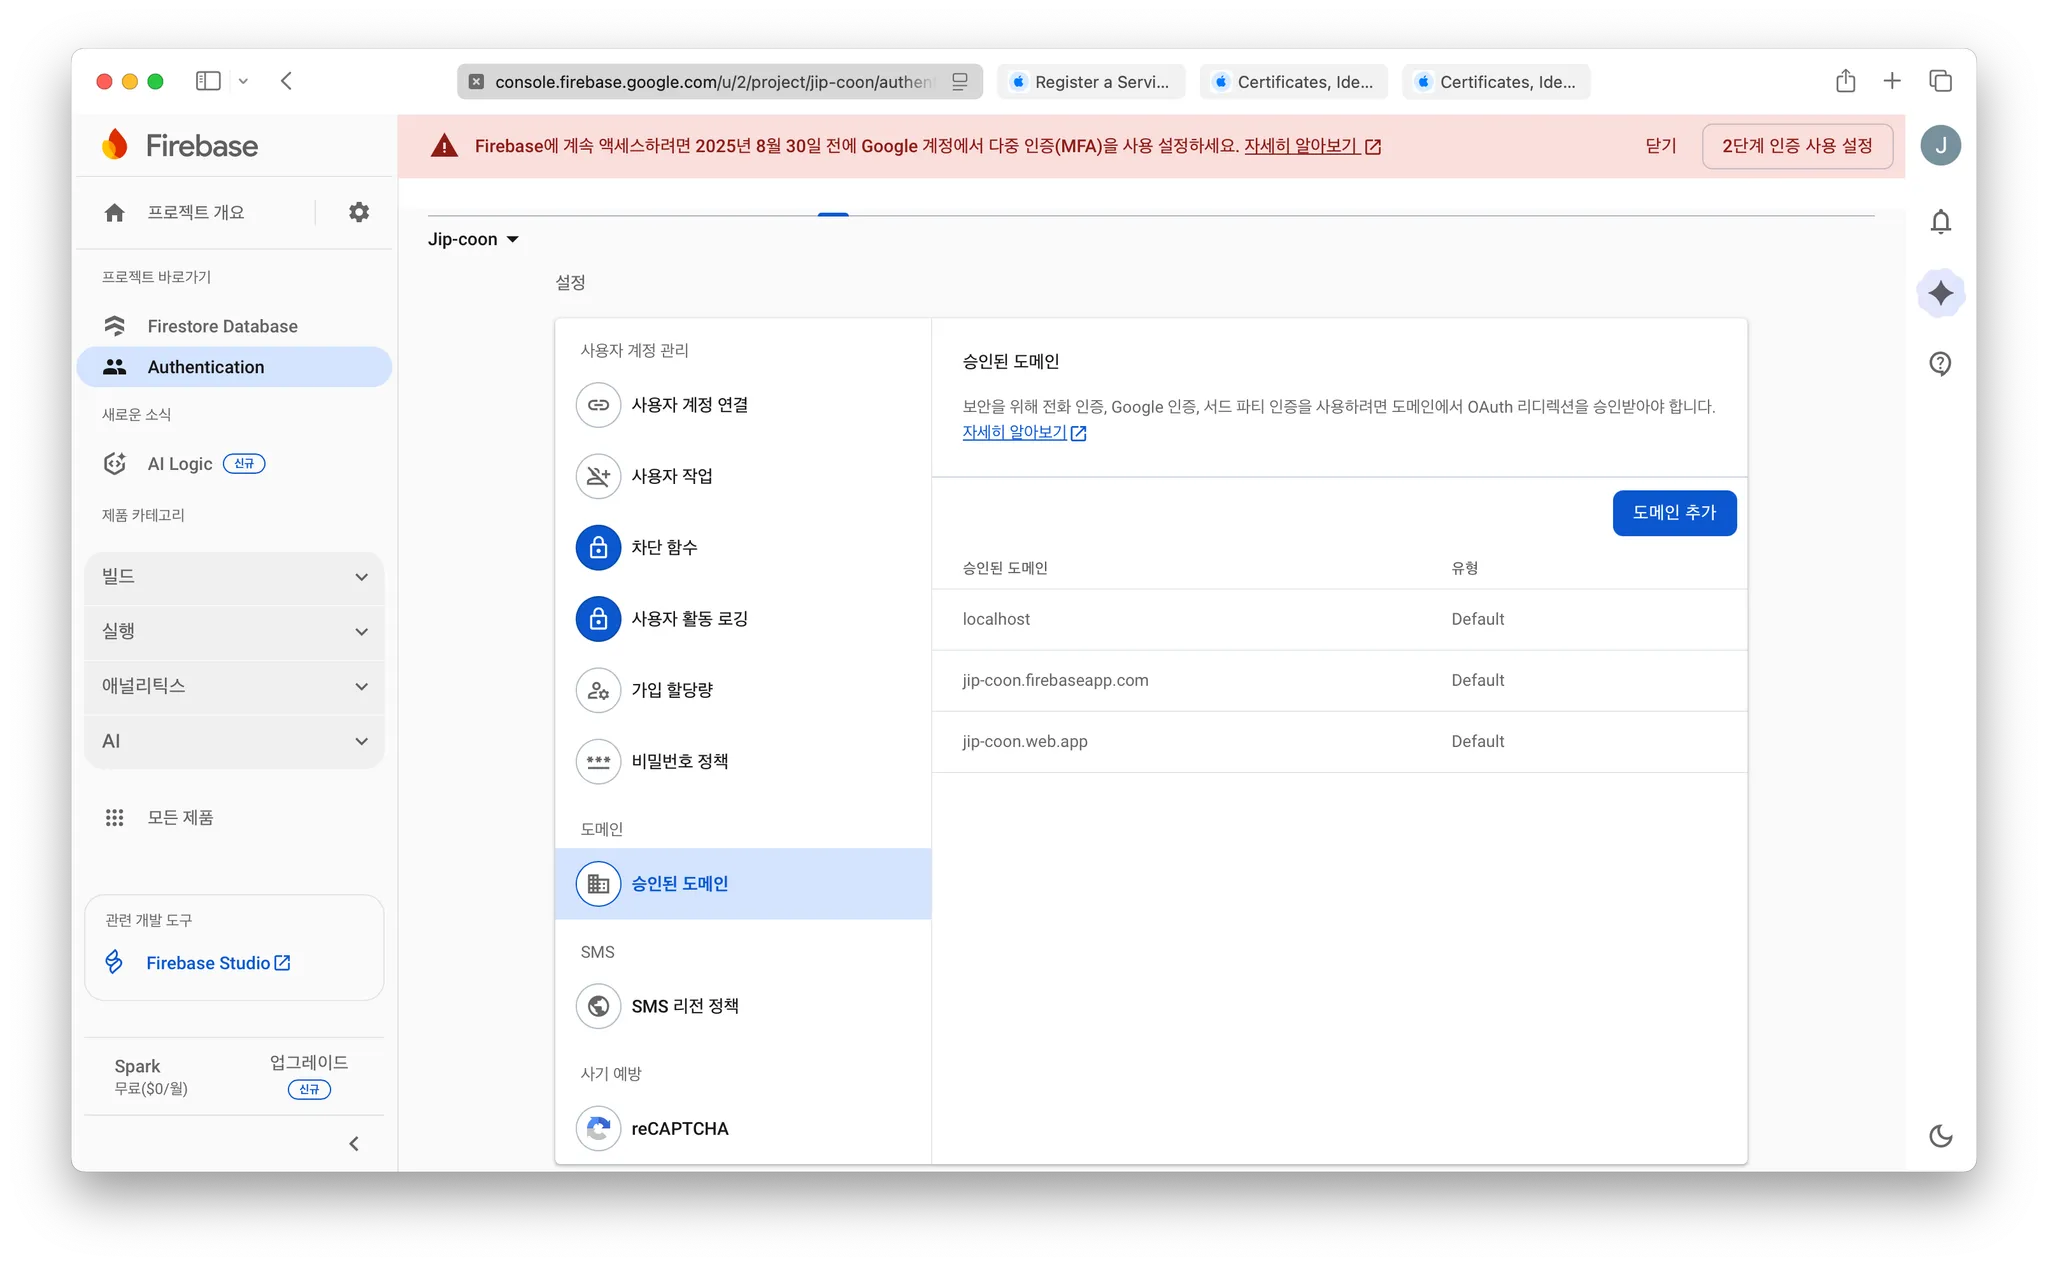
1. Firebase console에서 새 제공업체 추가

2. Apple 추가
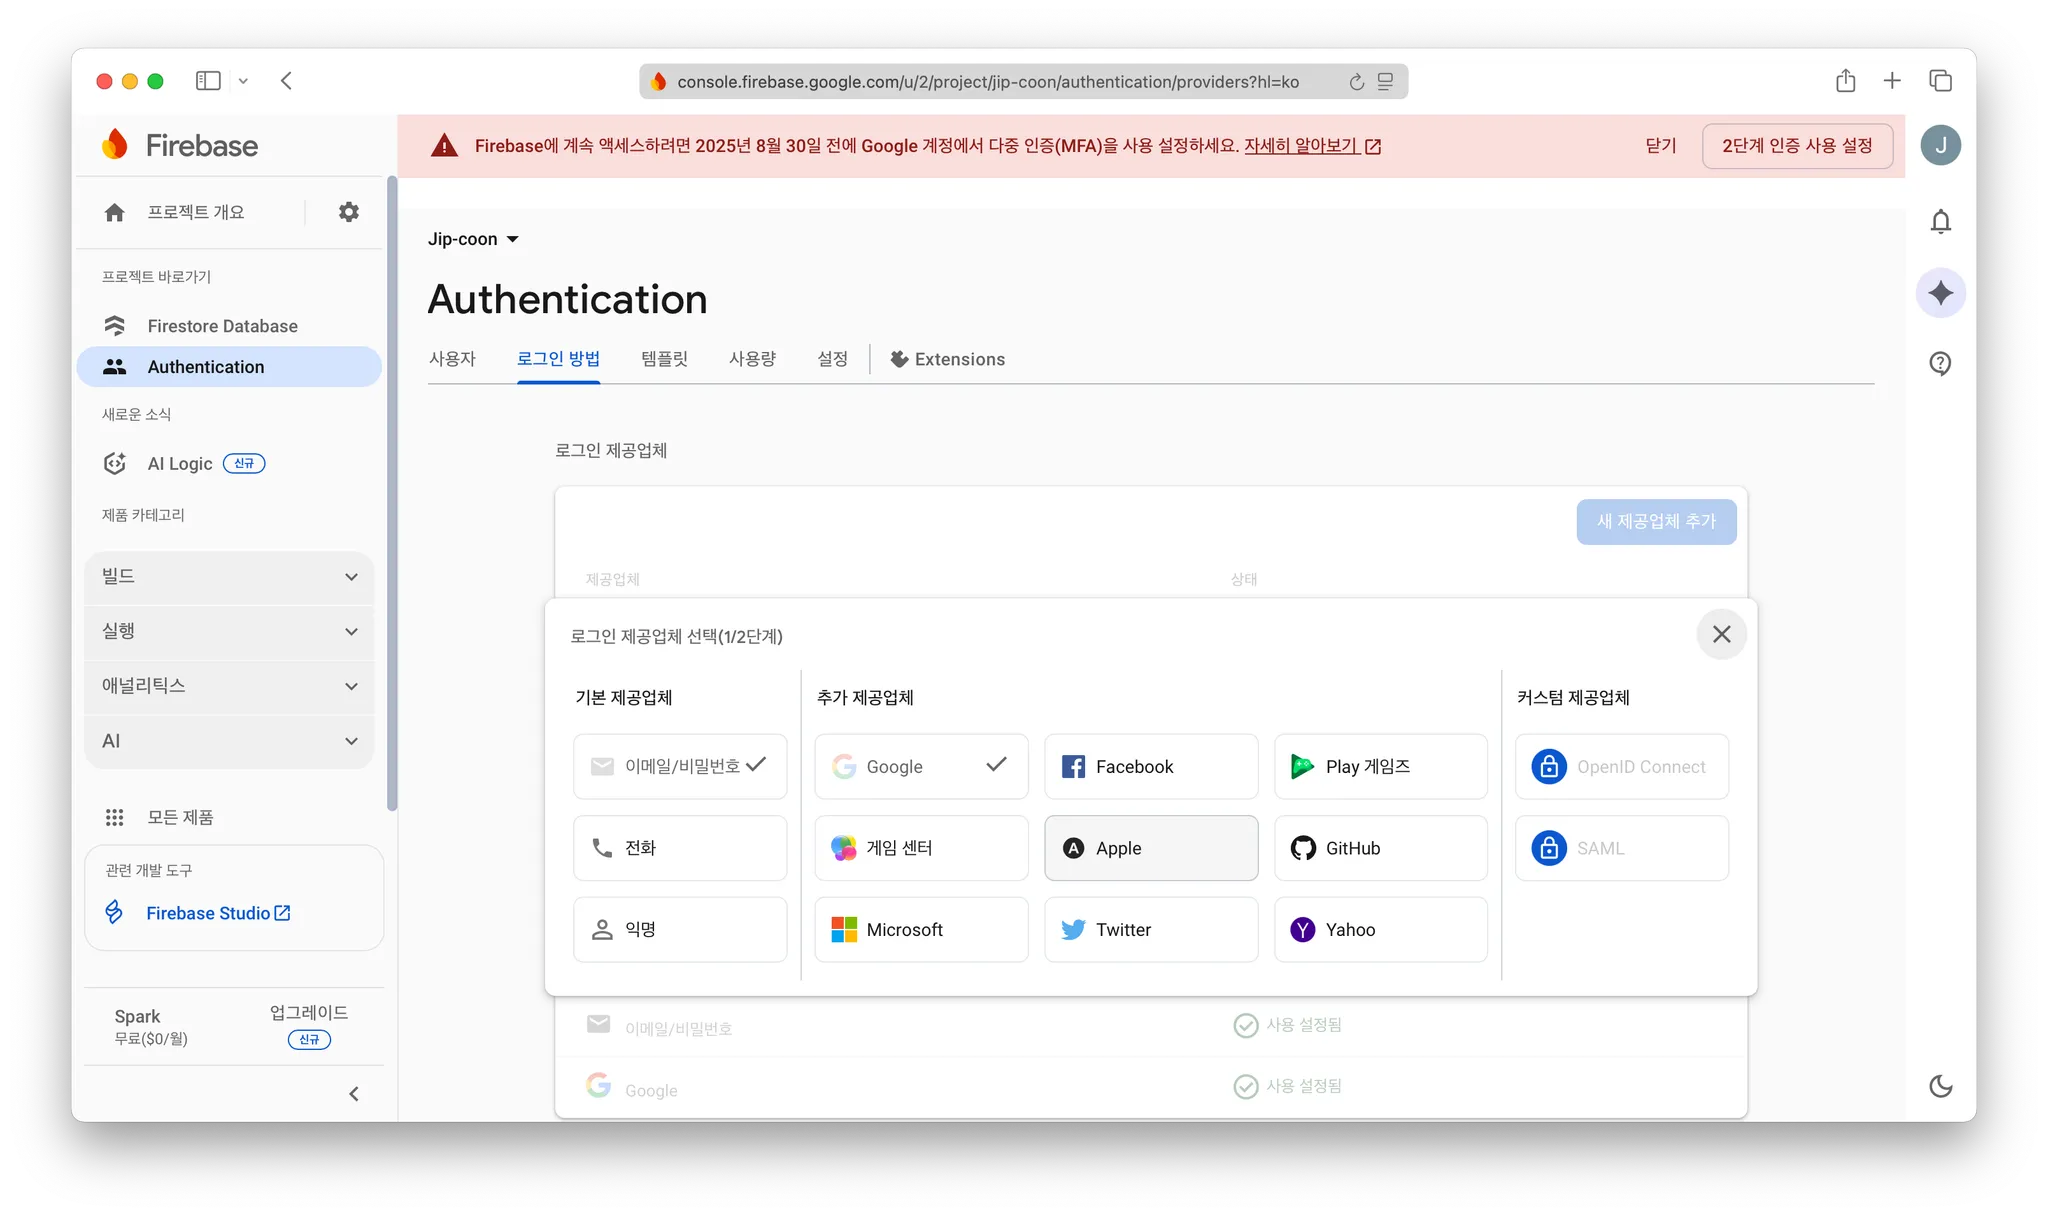
사용 설정을 켜줍니다! 그리고 회색 박스 부분 주소 기억하기 (2번)
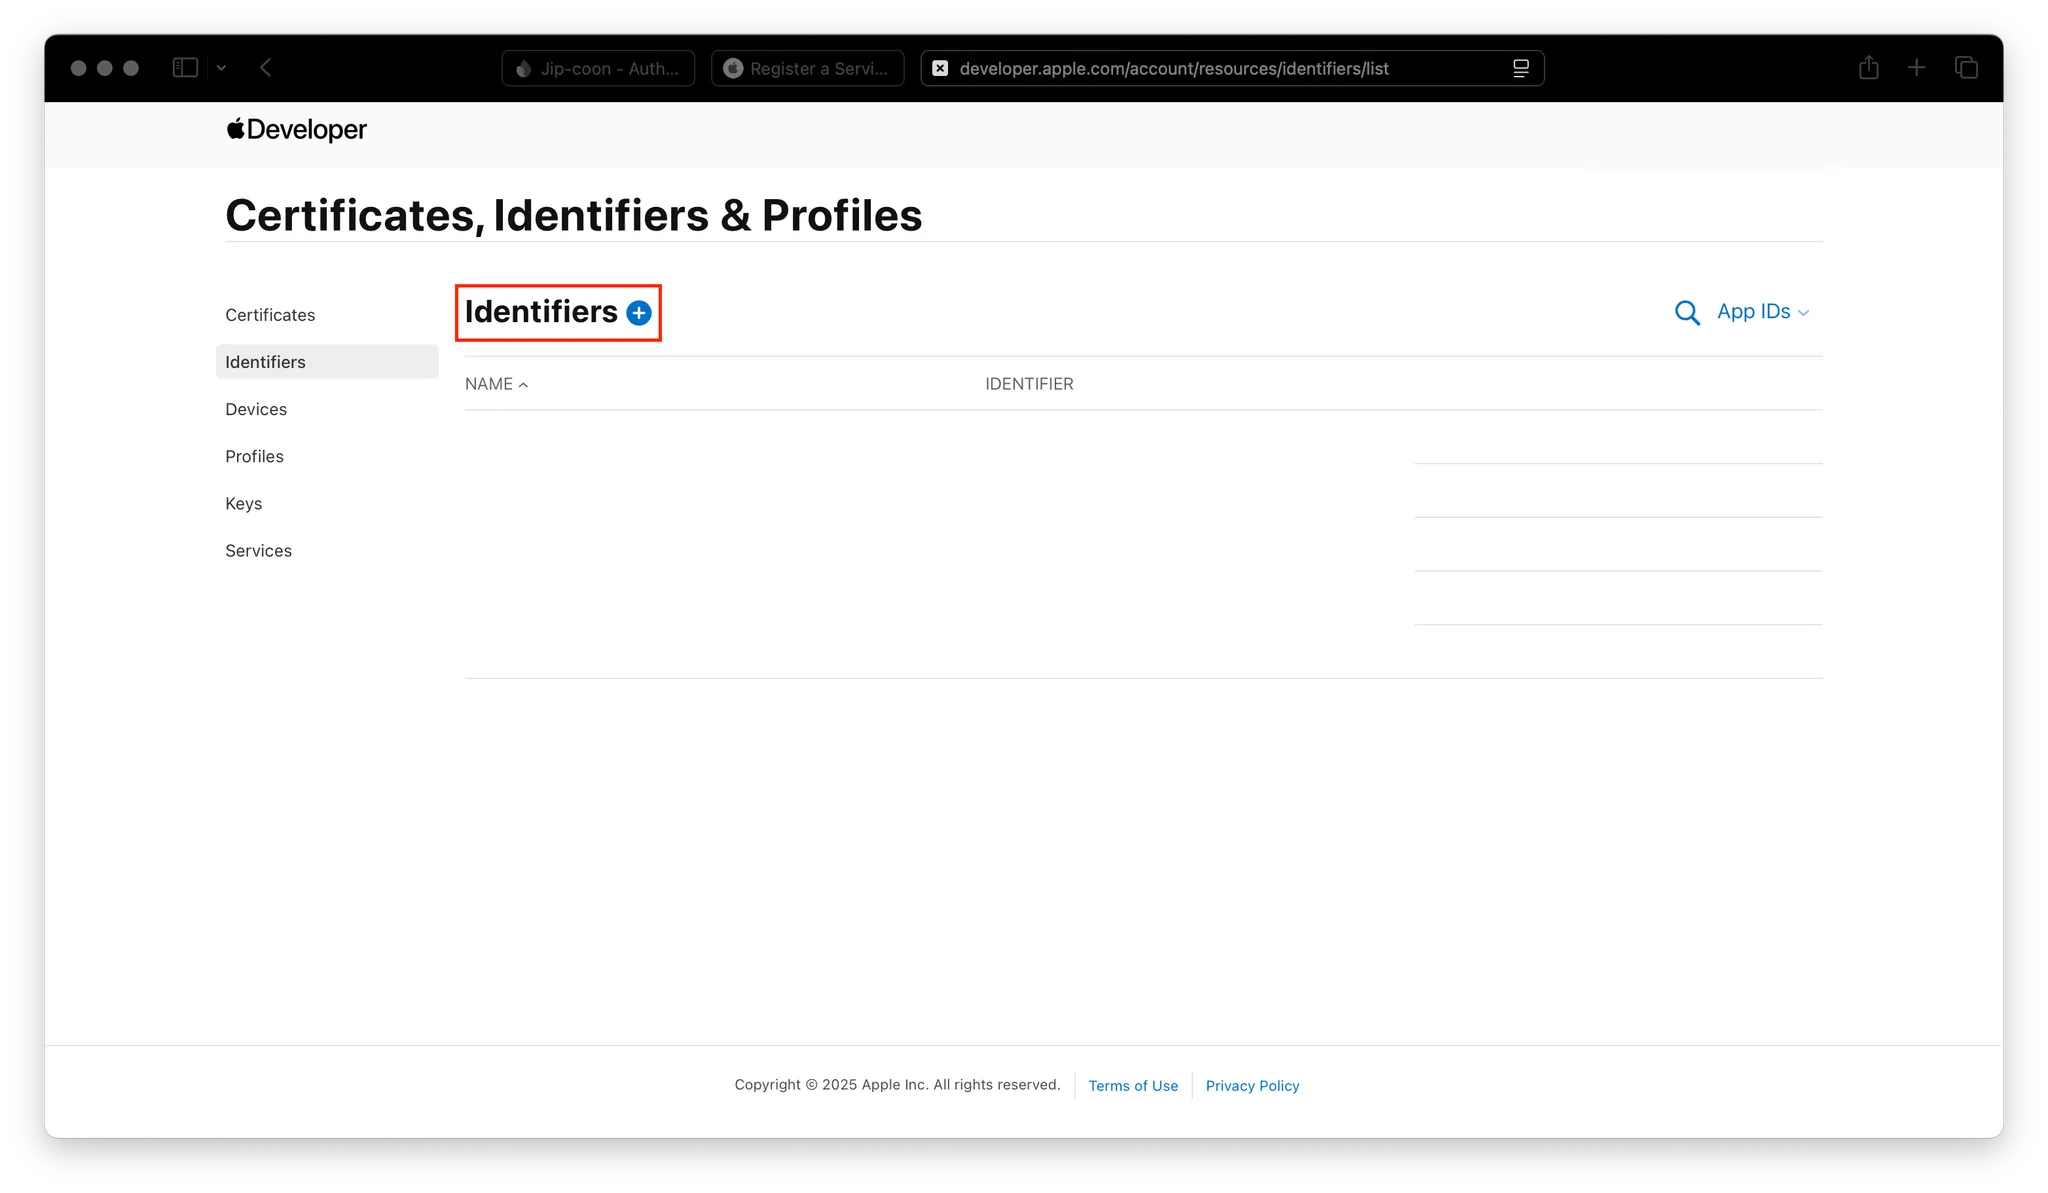
3. Apple Developer 에서 설정하기
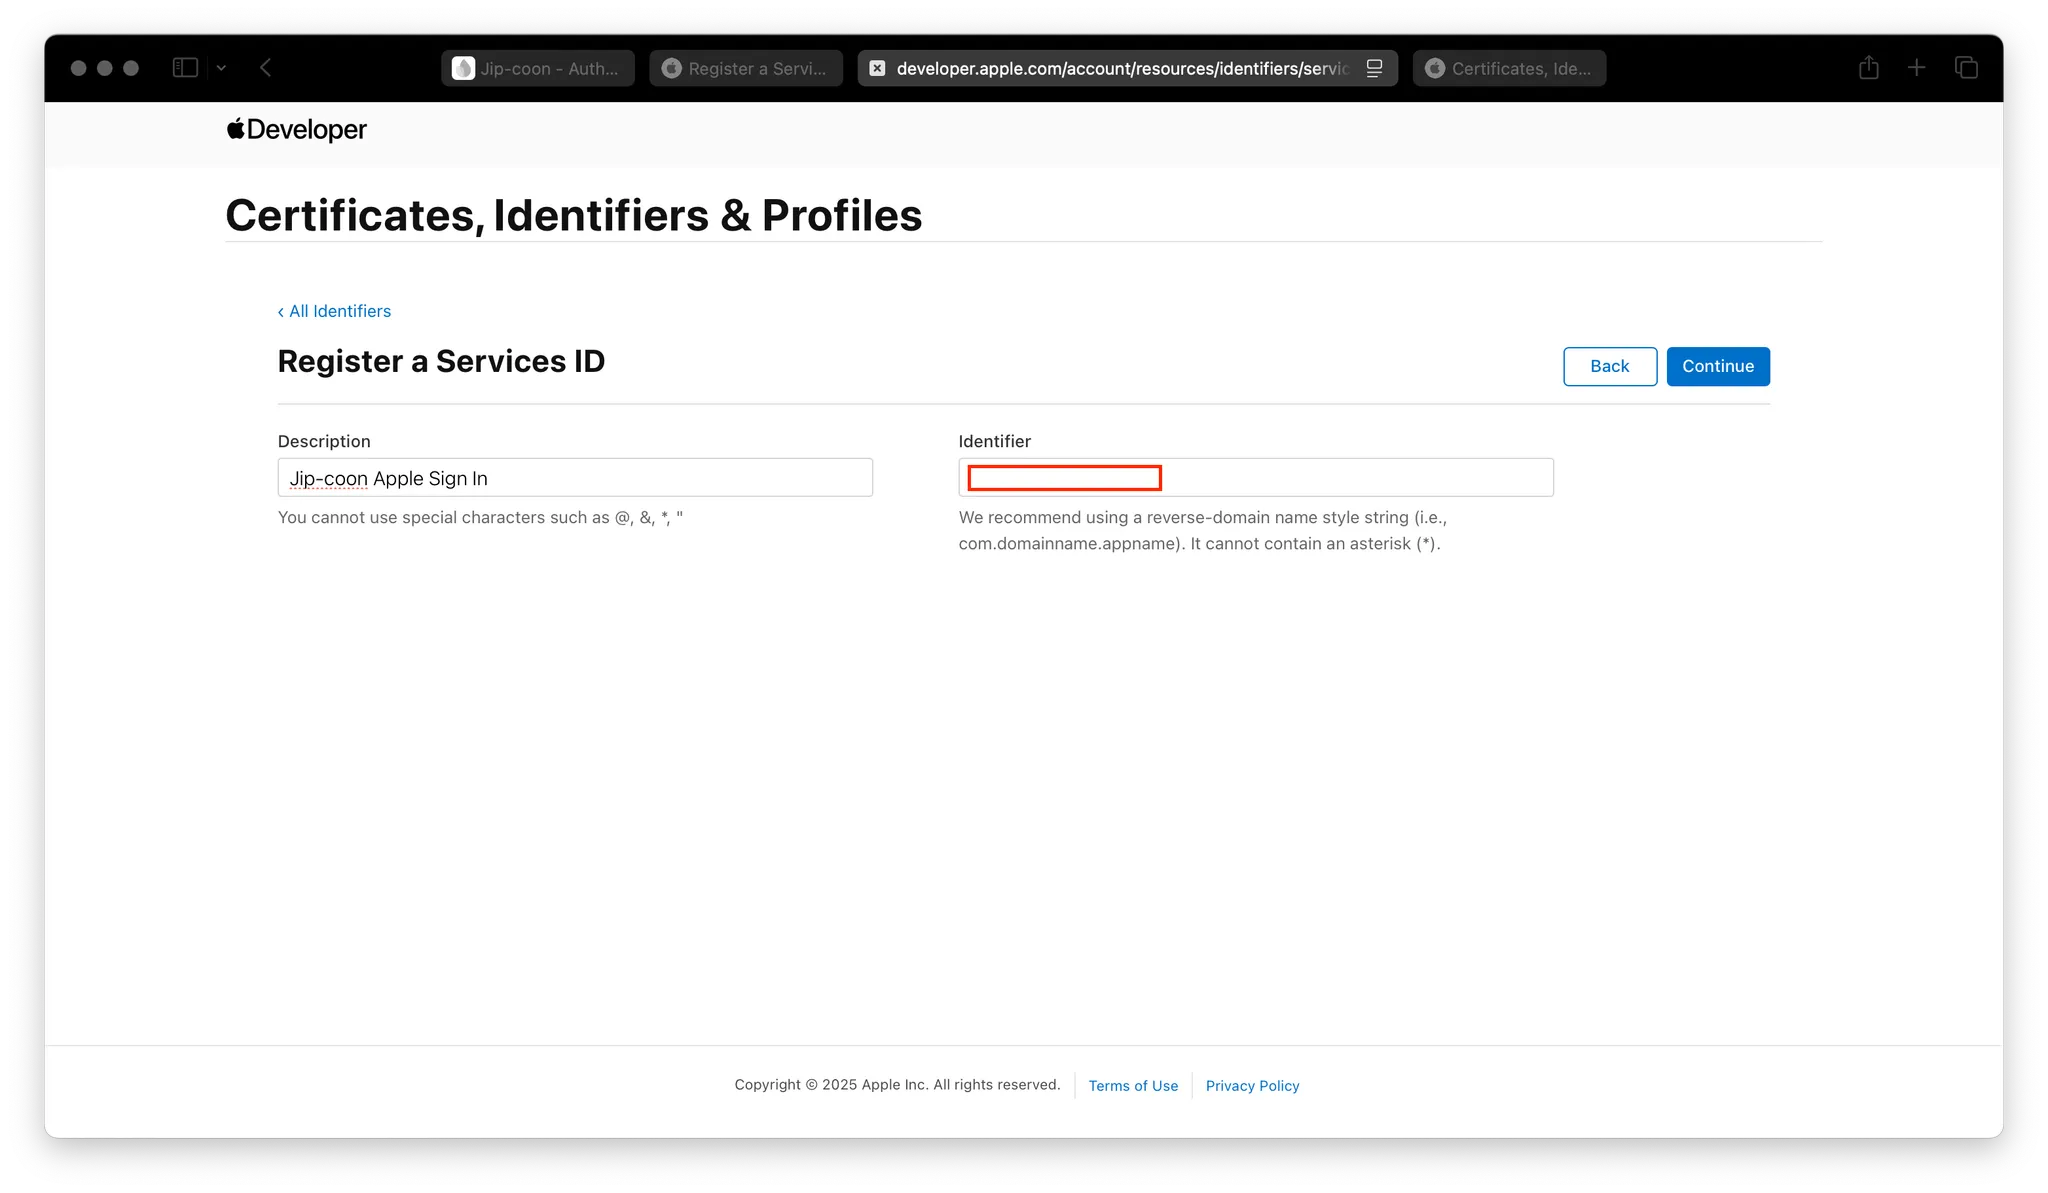
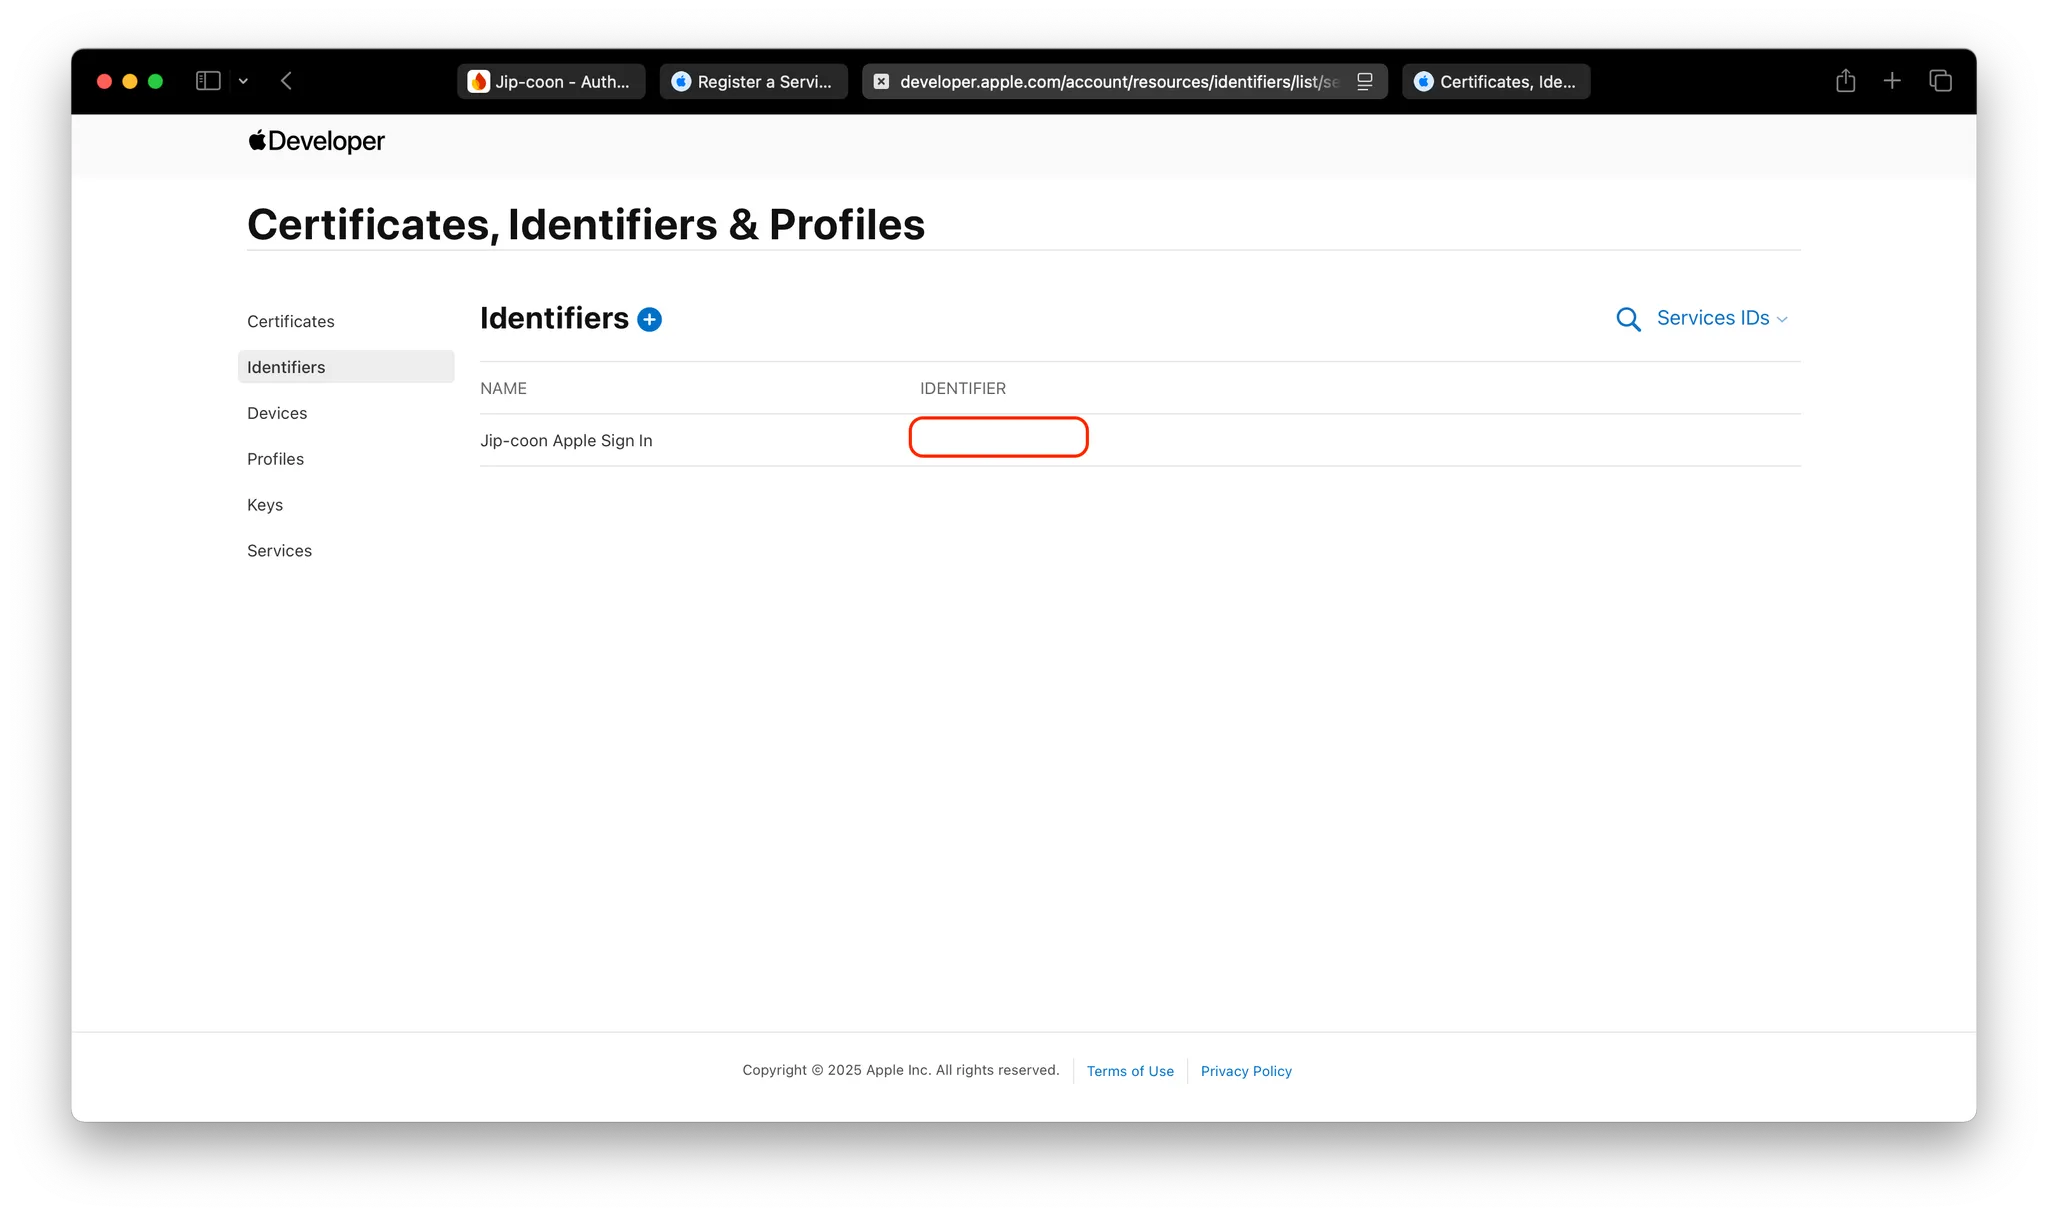
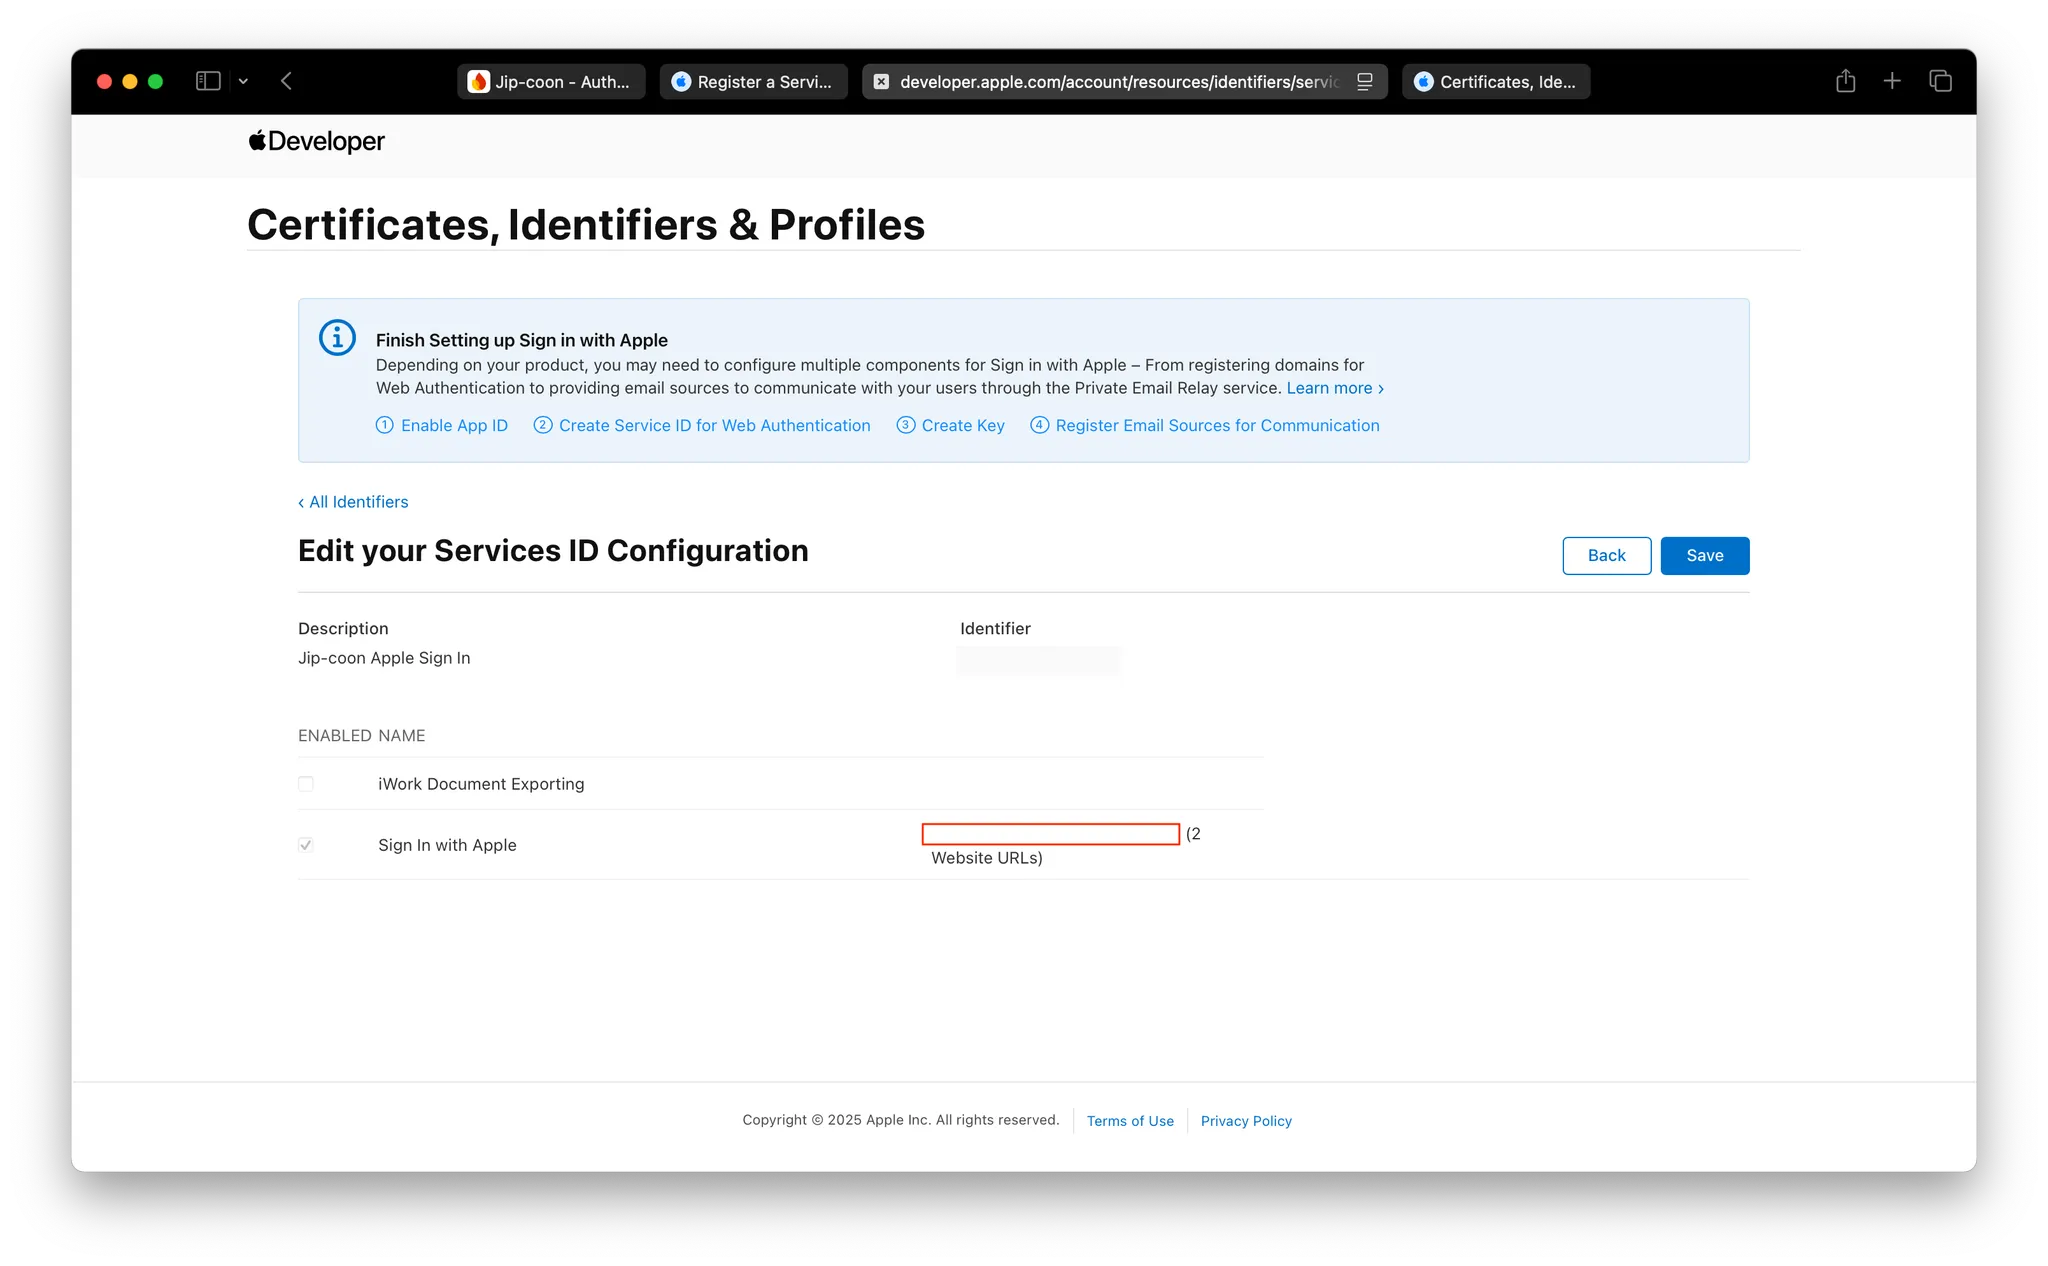
서비스 ID 추가 방법 - Associate your website to your app 를 따라하면 됩니다.

Sign In with Apple 클릭 - Configure
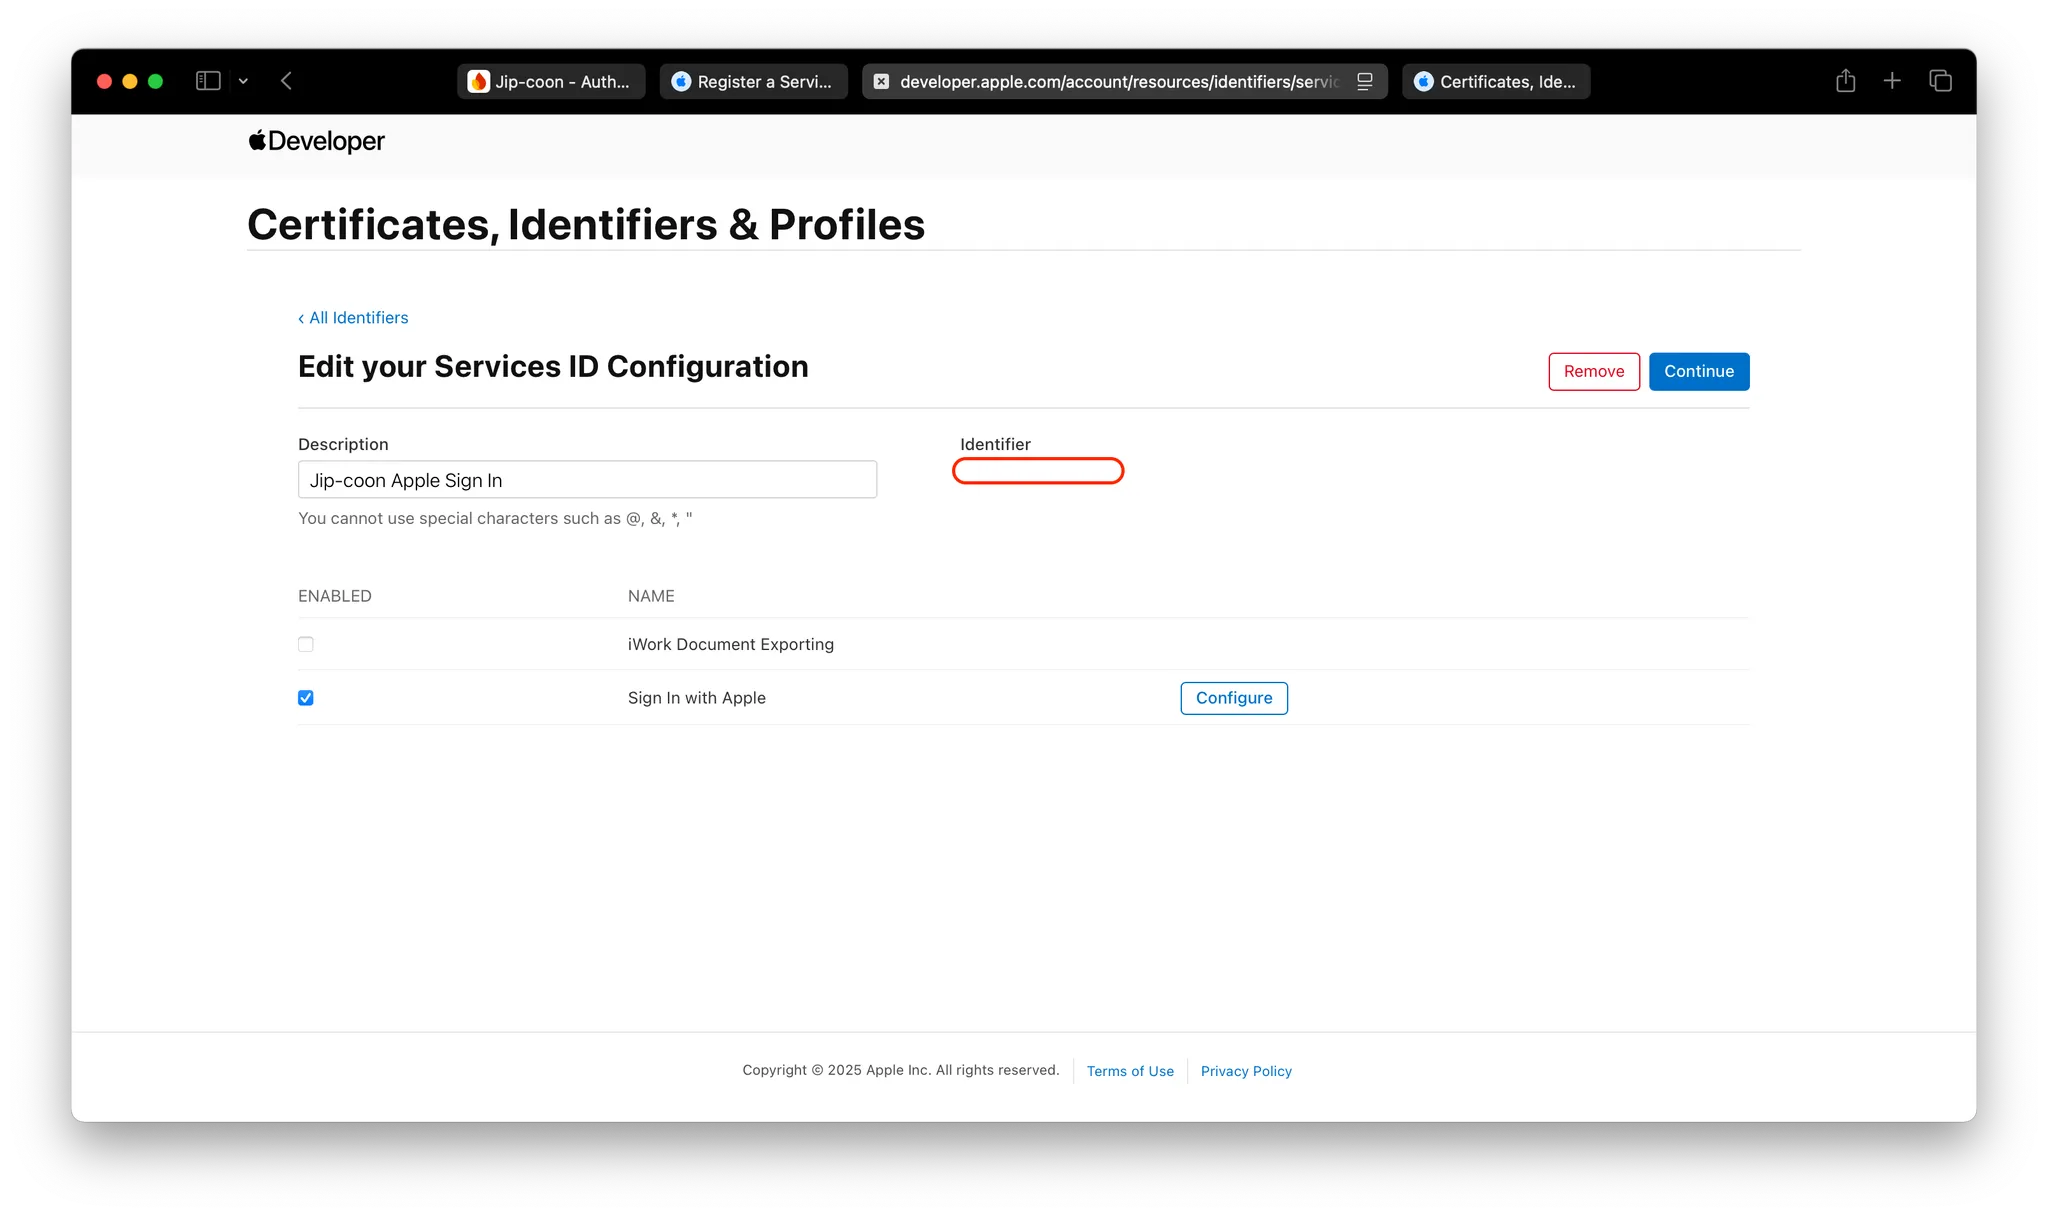
firebaseapp.com 으로 끝나는 도메인 복사 (1번)
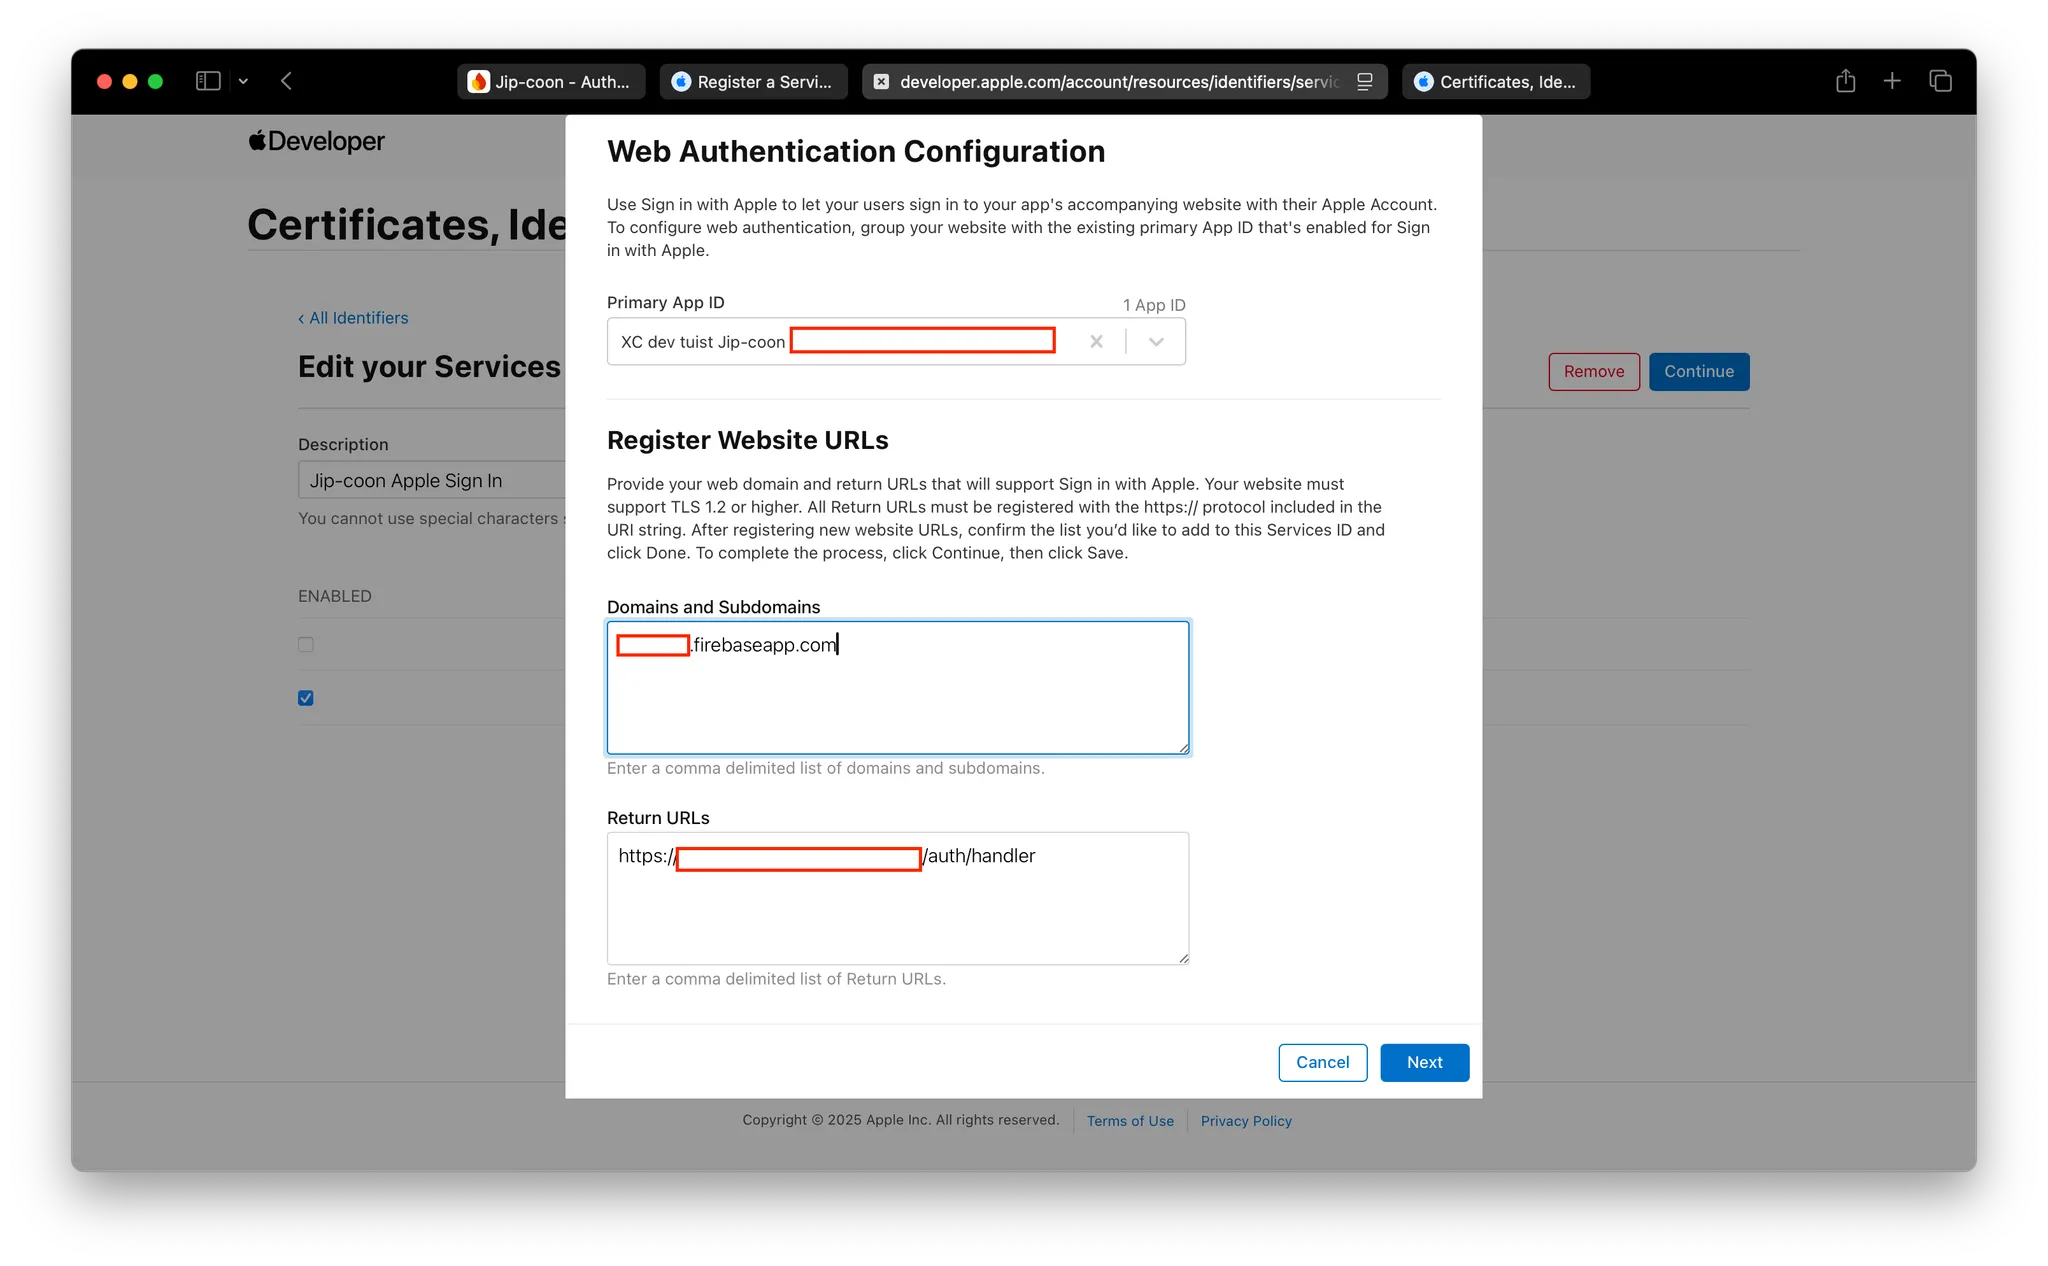
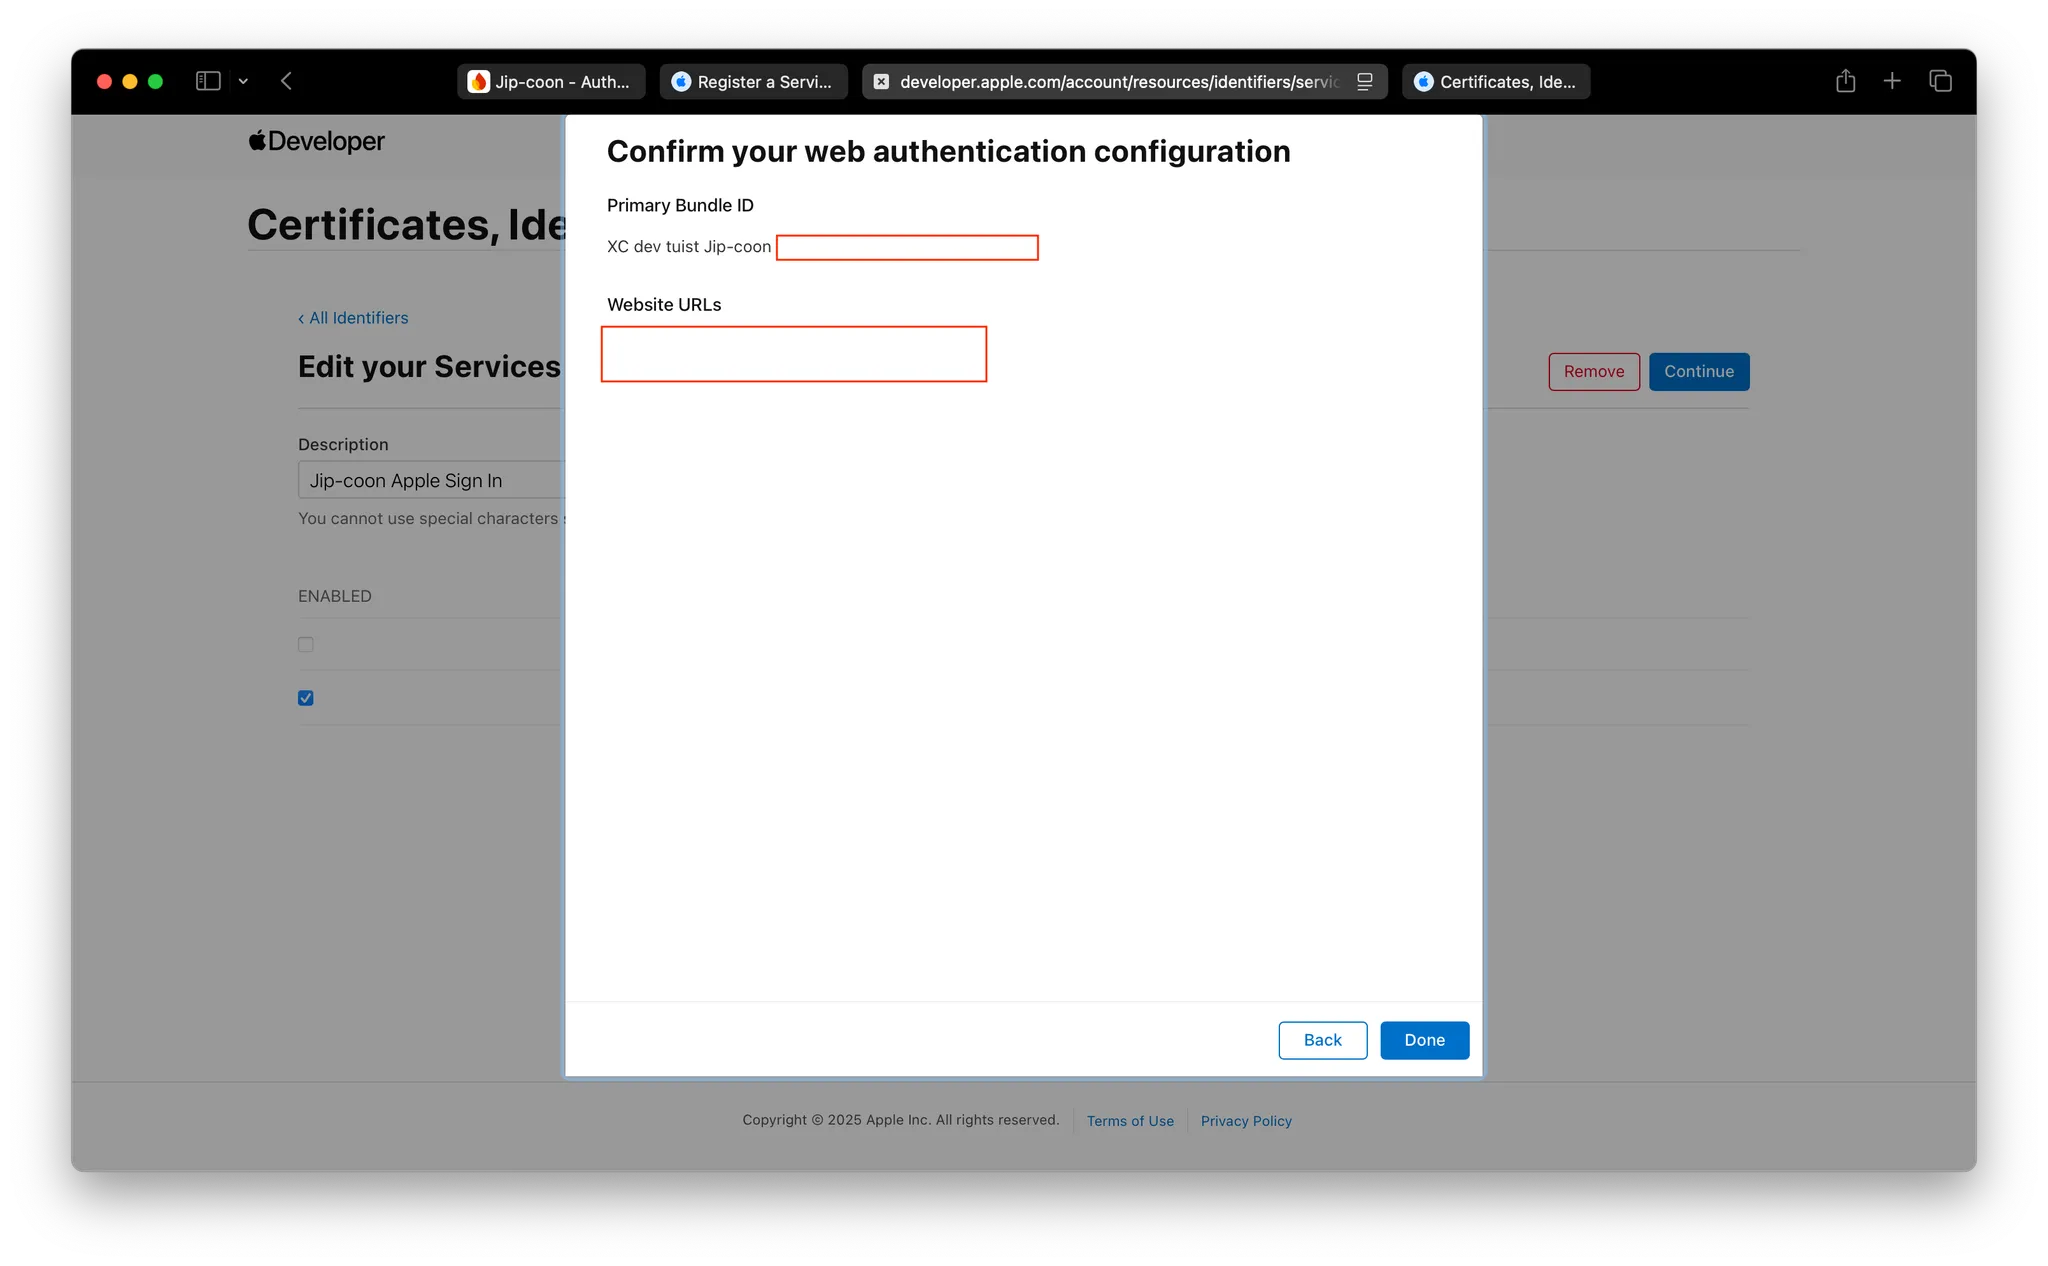
사진과 같이 아까 복사해둔 주소들을 넣어주면 됩니다.
Domain and Subdomains - 1번
Return URLs - 2번
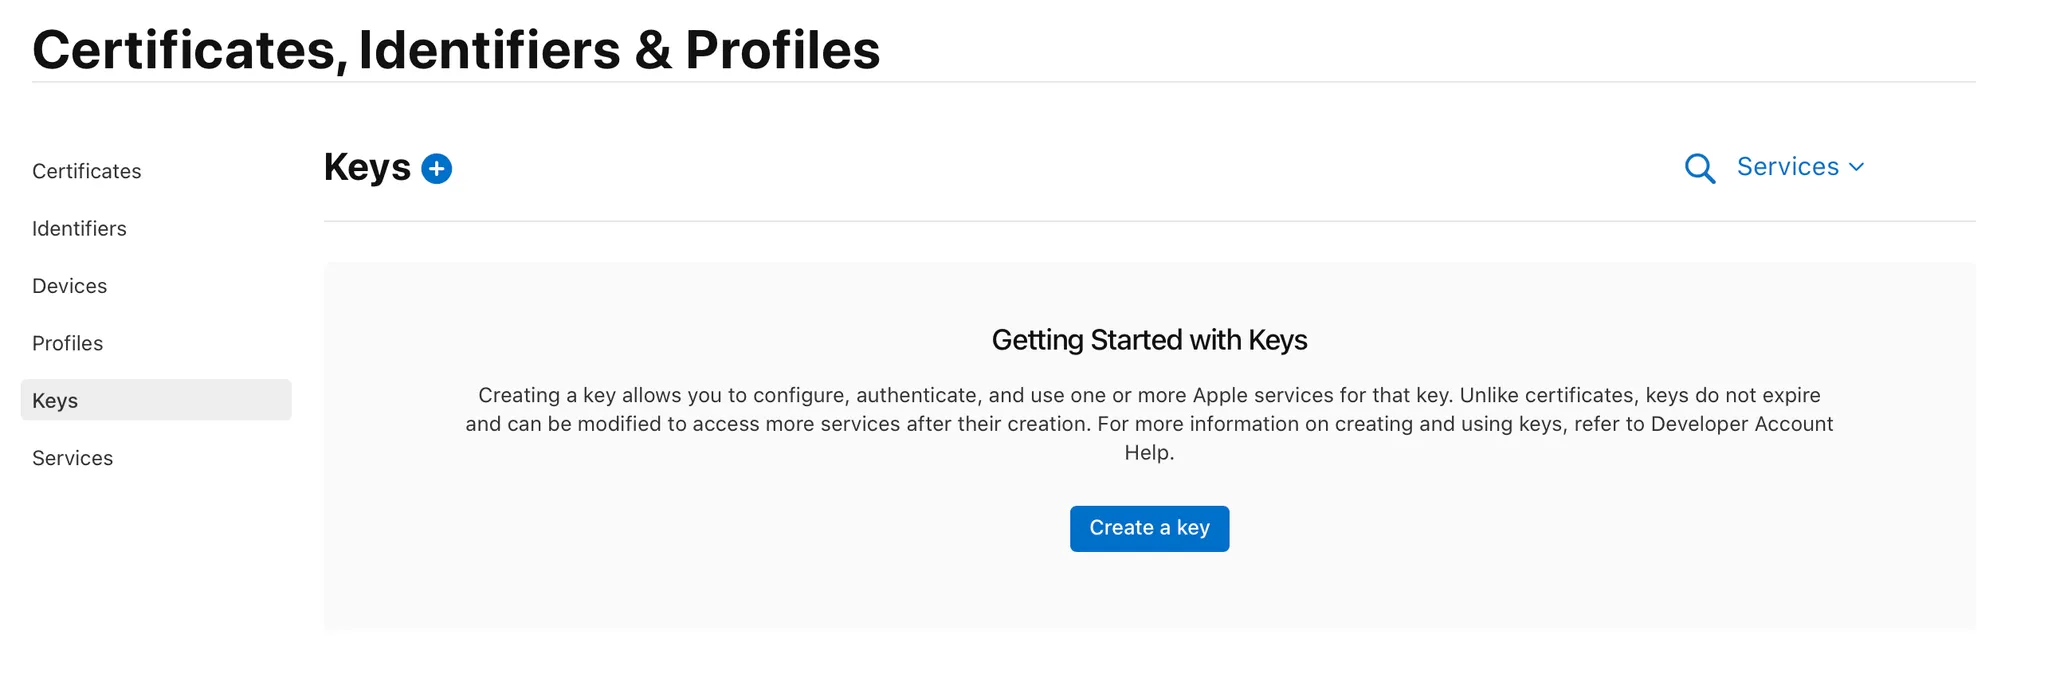
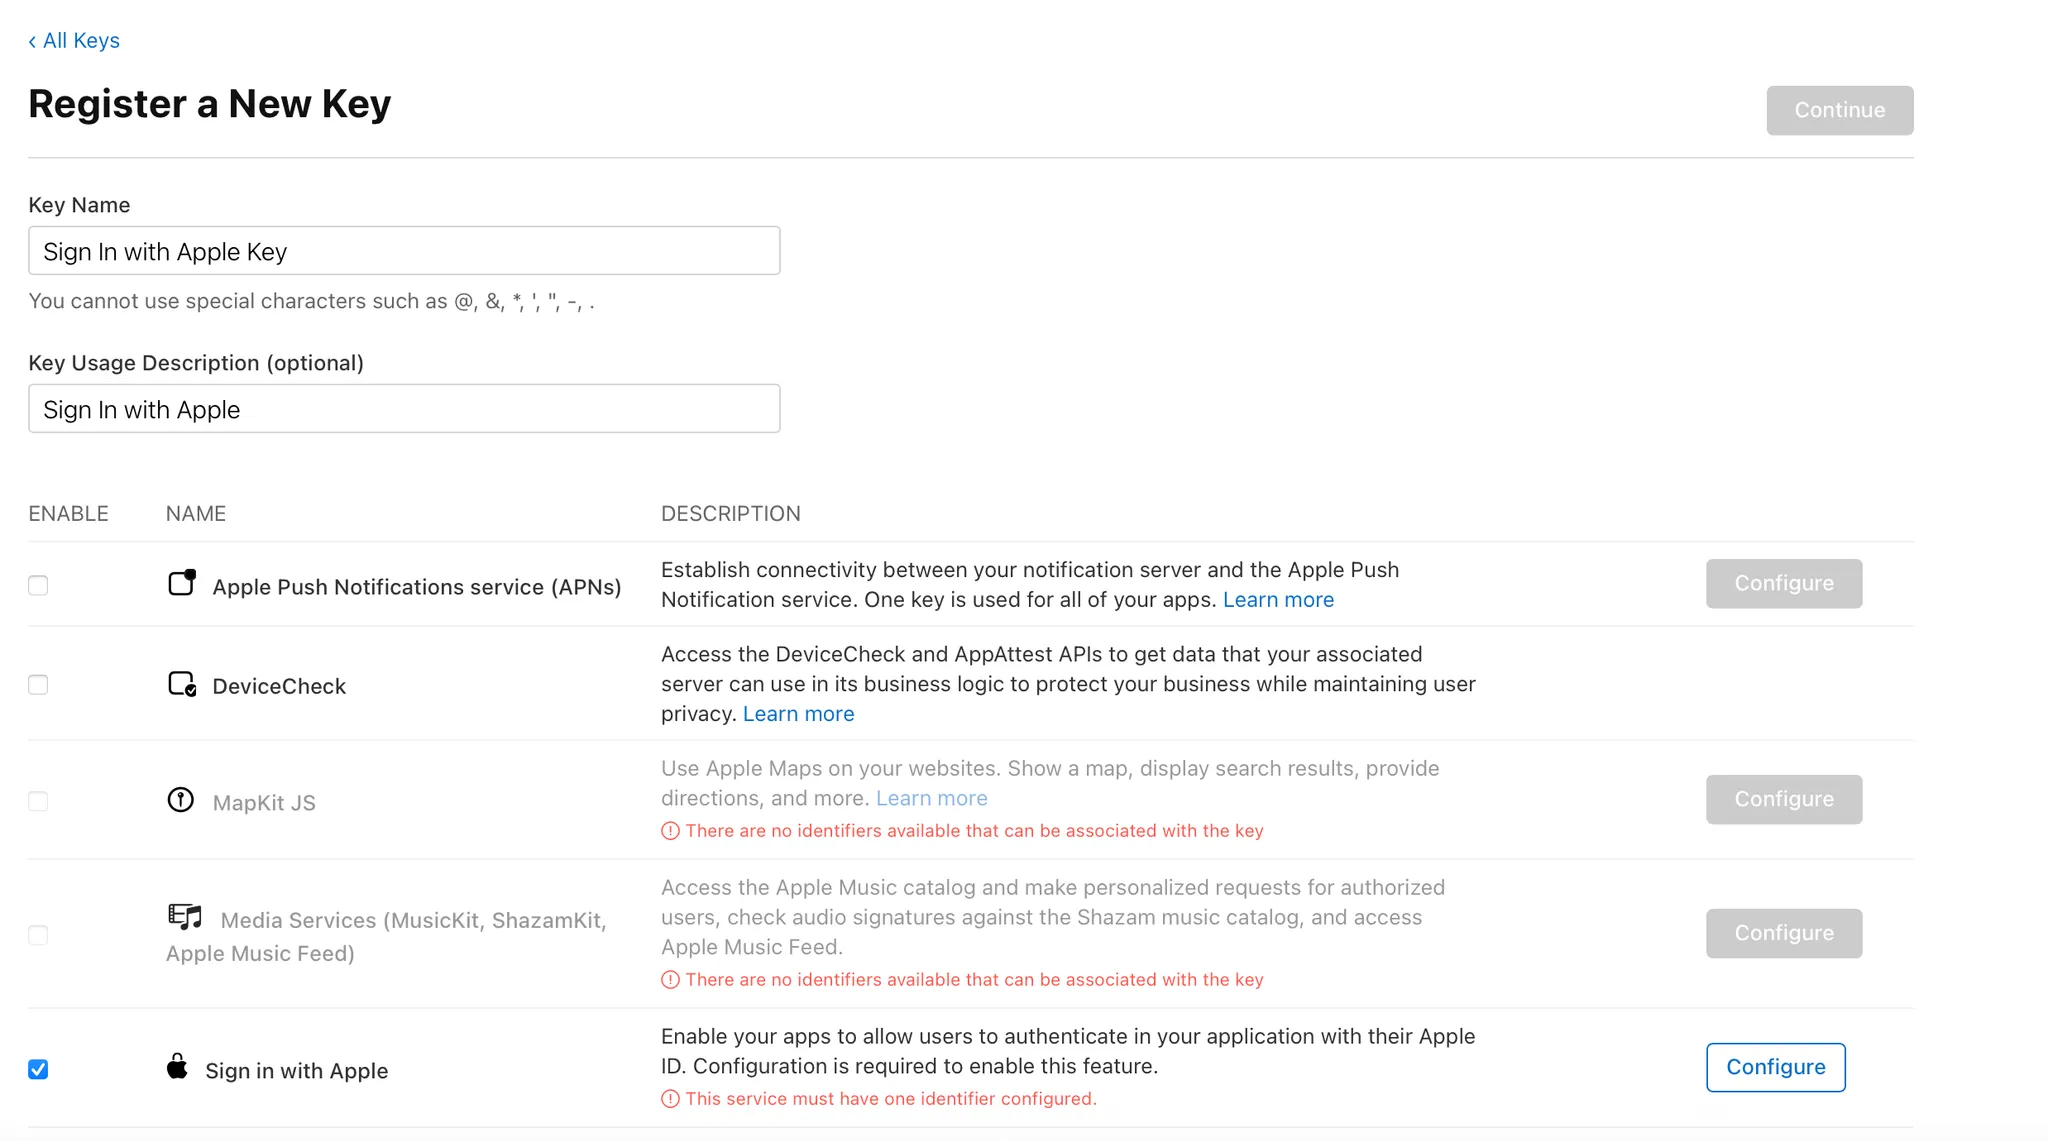
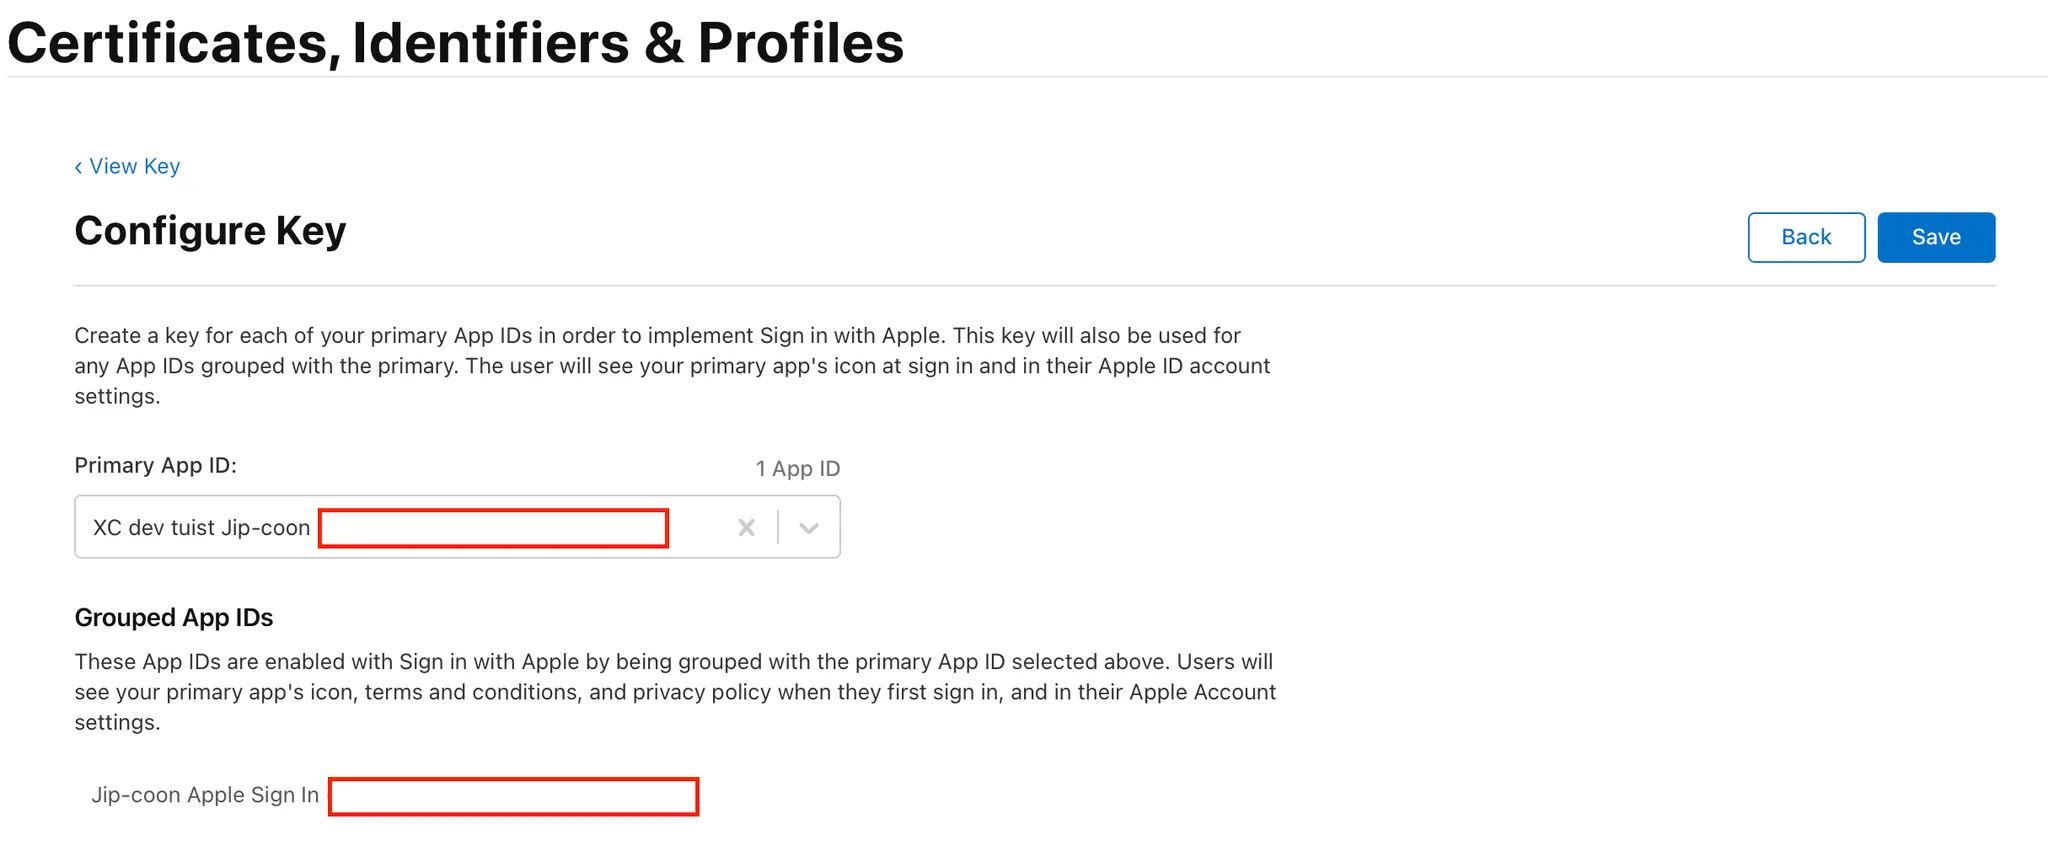
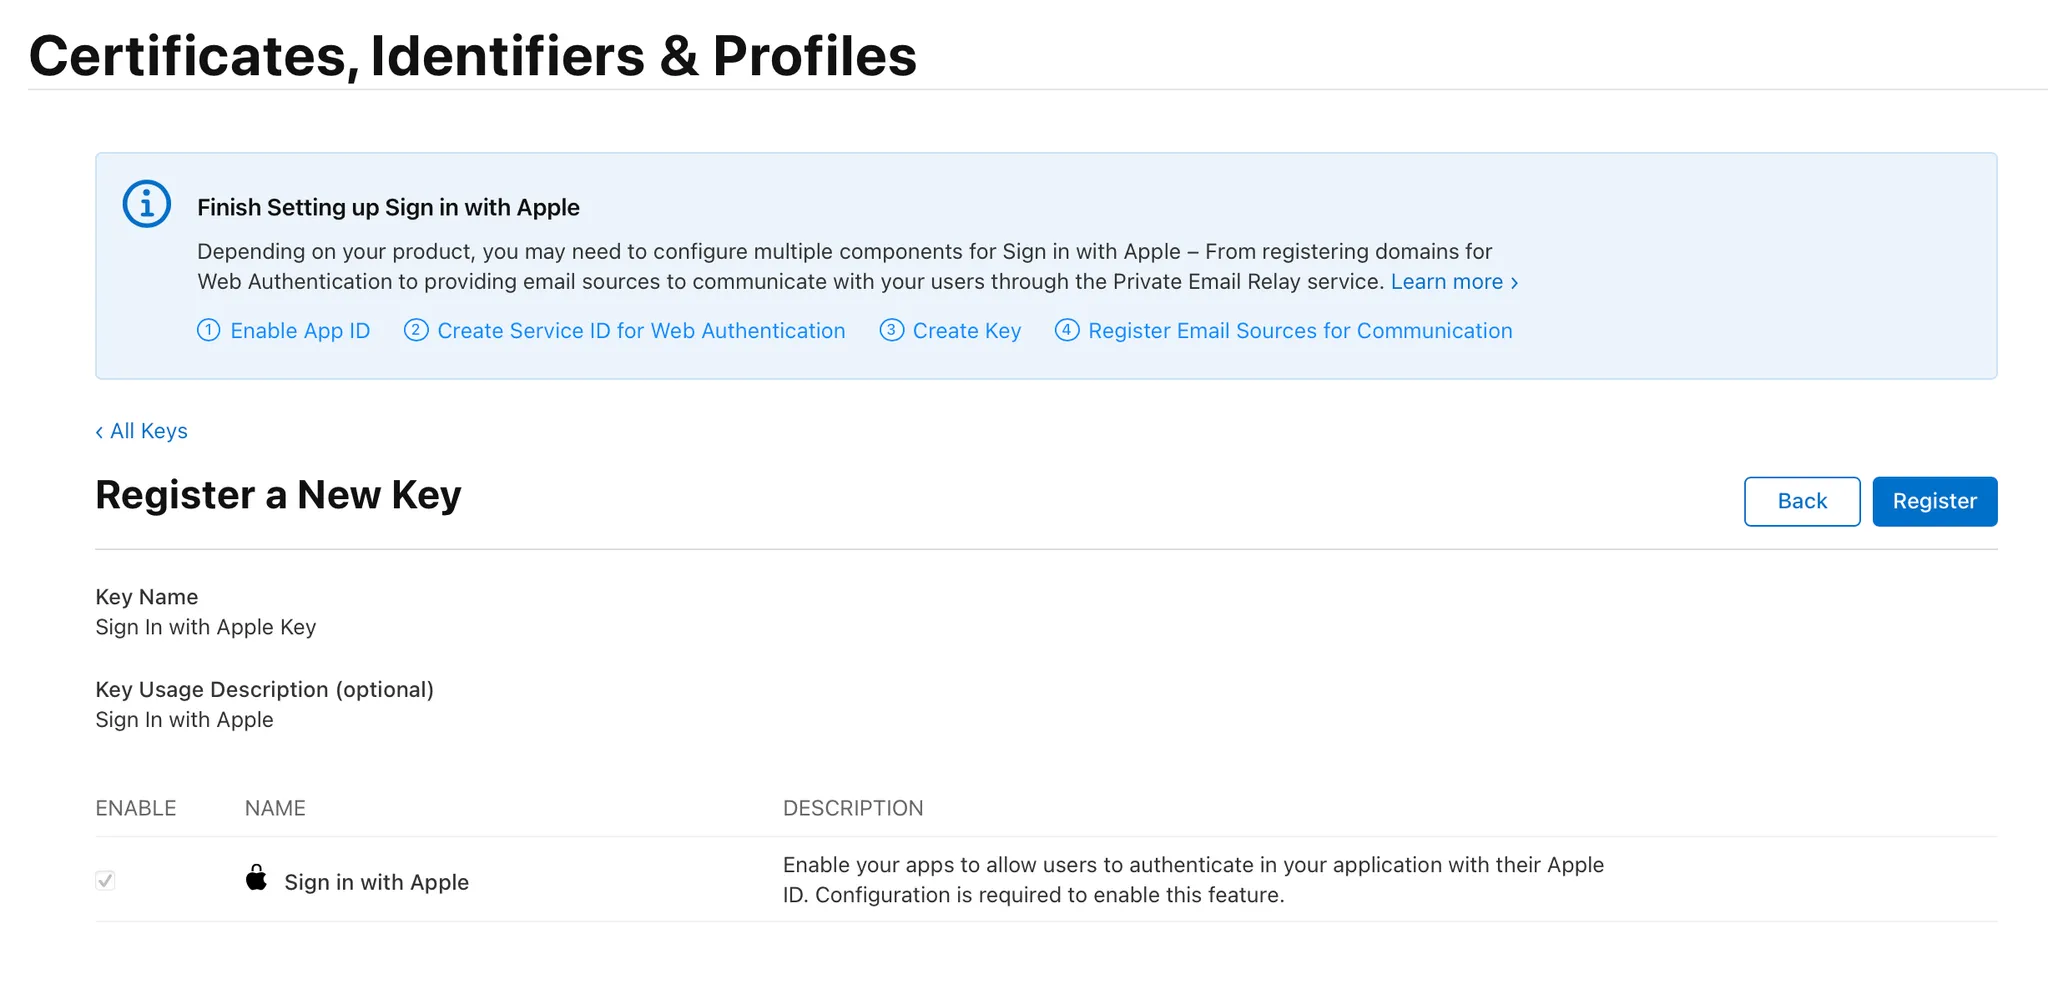
3. 비공개 키 설정
Create a Sign in with Apple private key
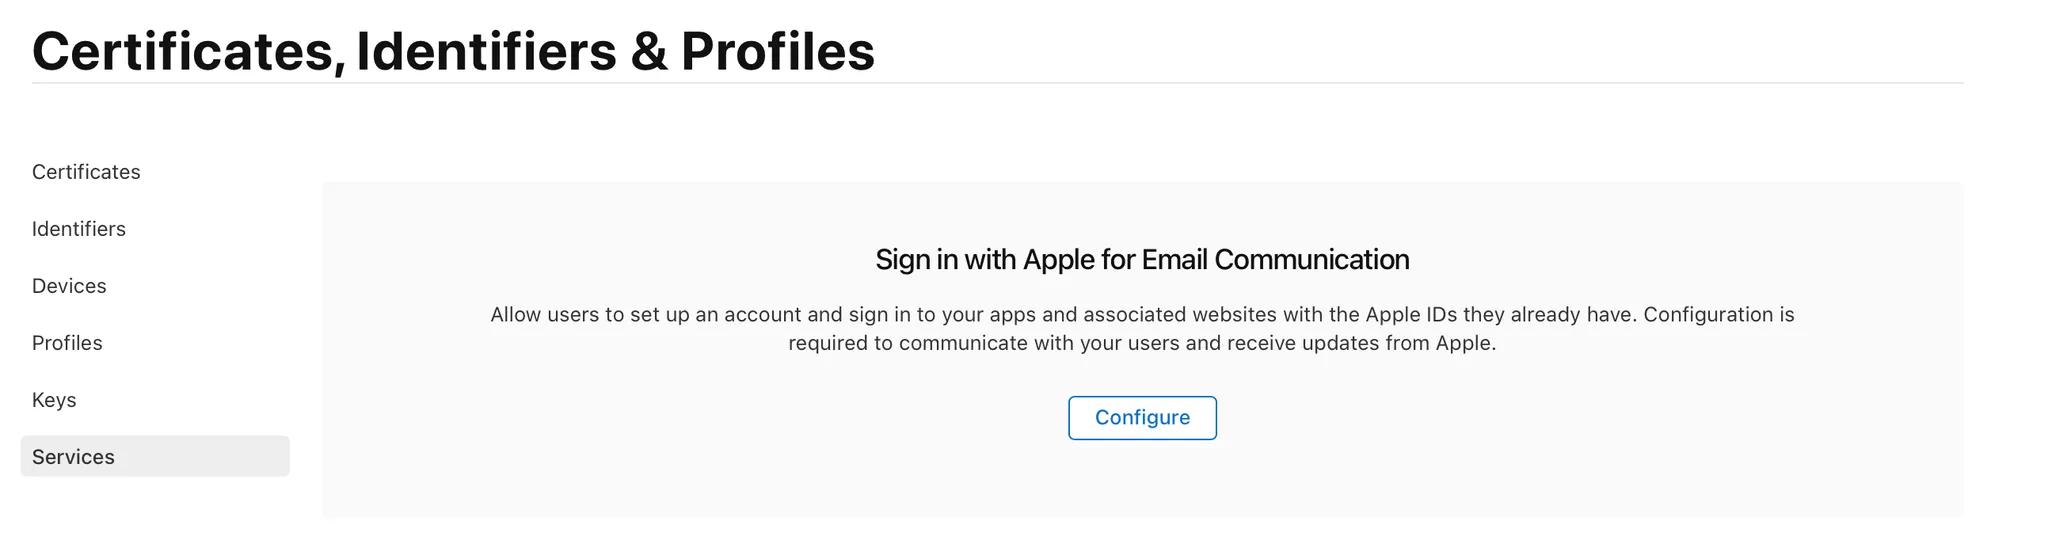
4. Apple 비공개 이메일 릴레이 서비스를 구성
Service - Configure 클릭
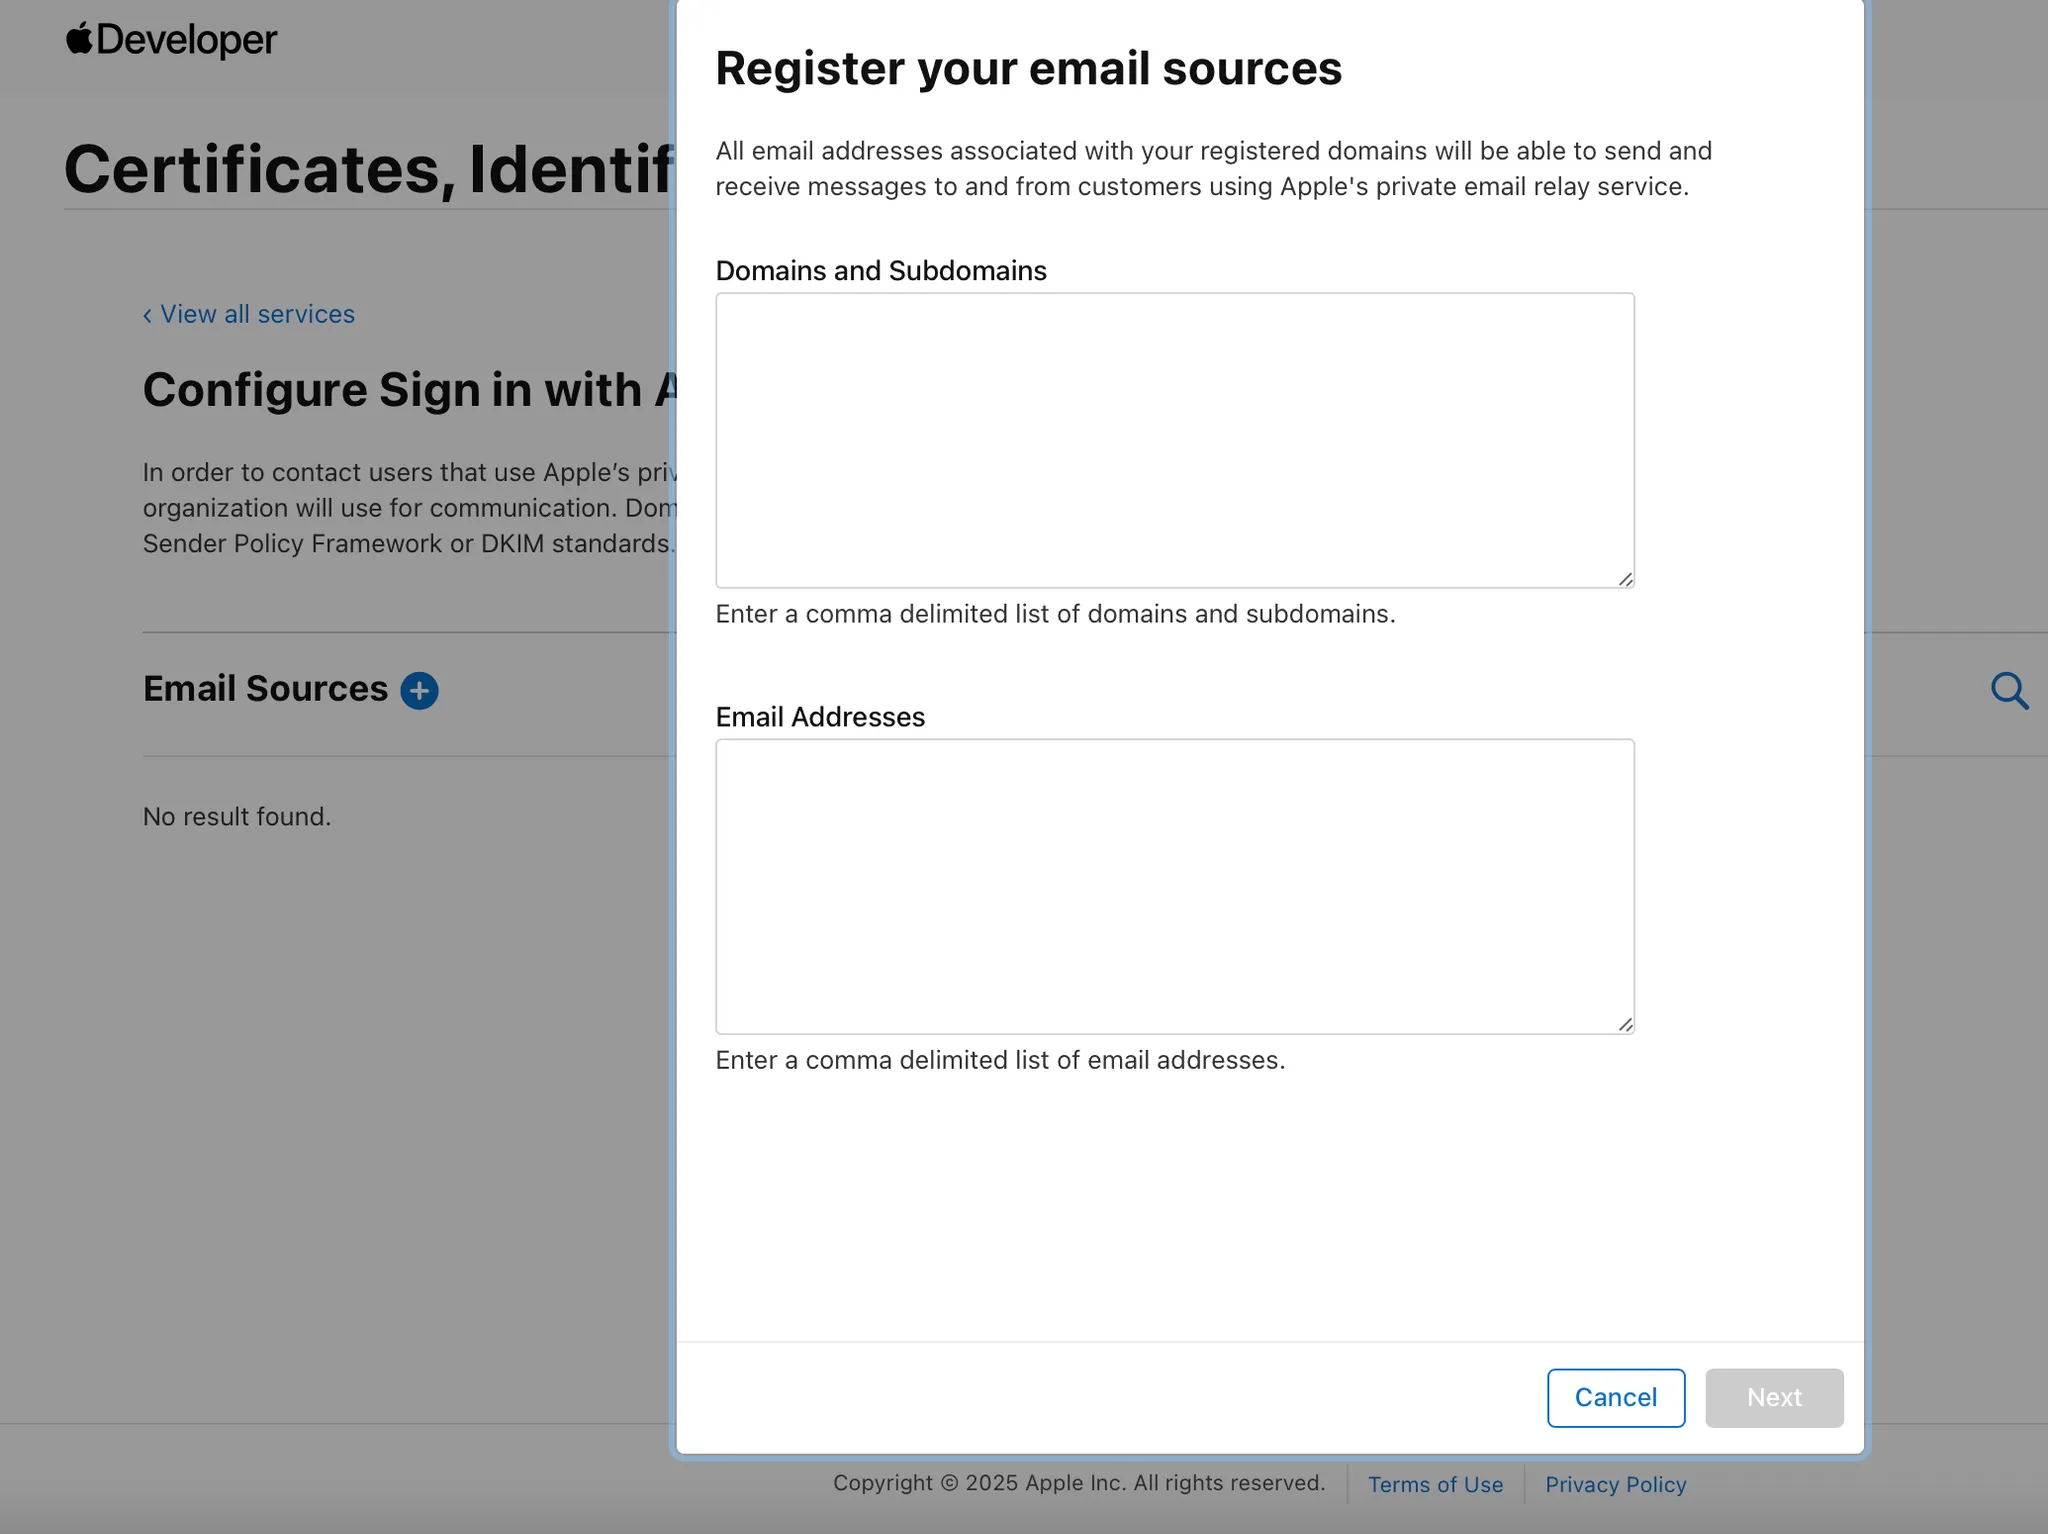
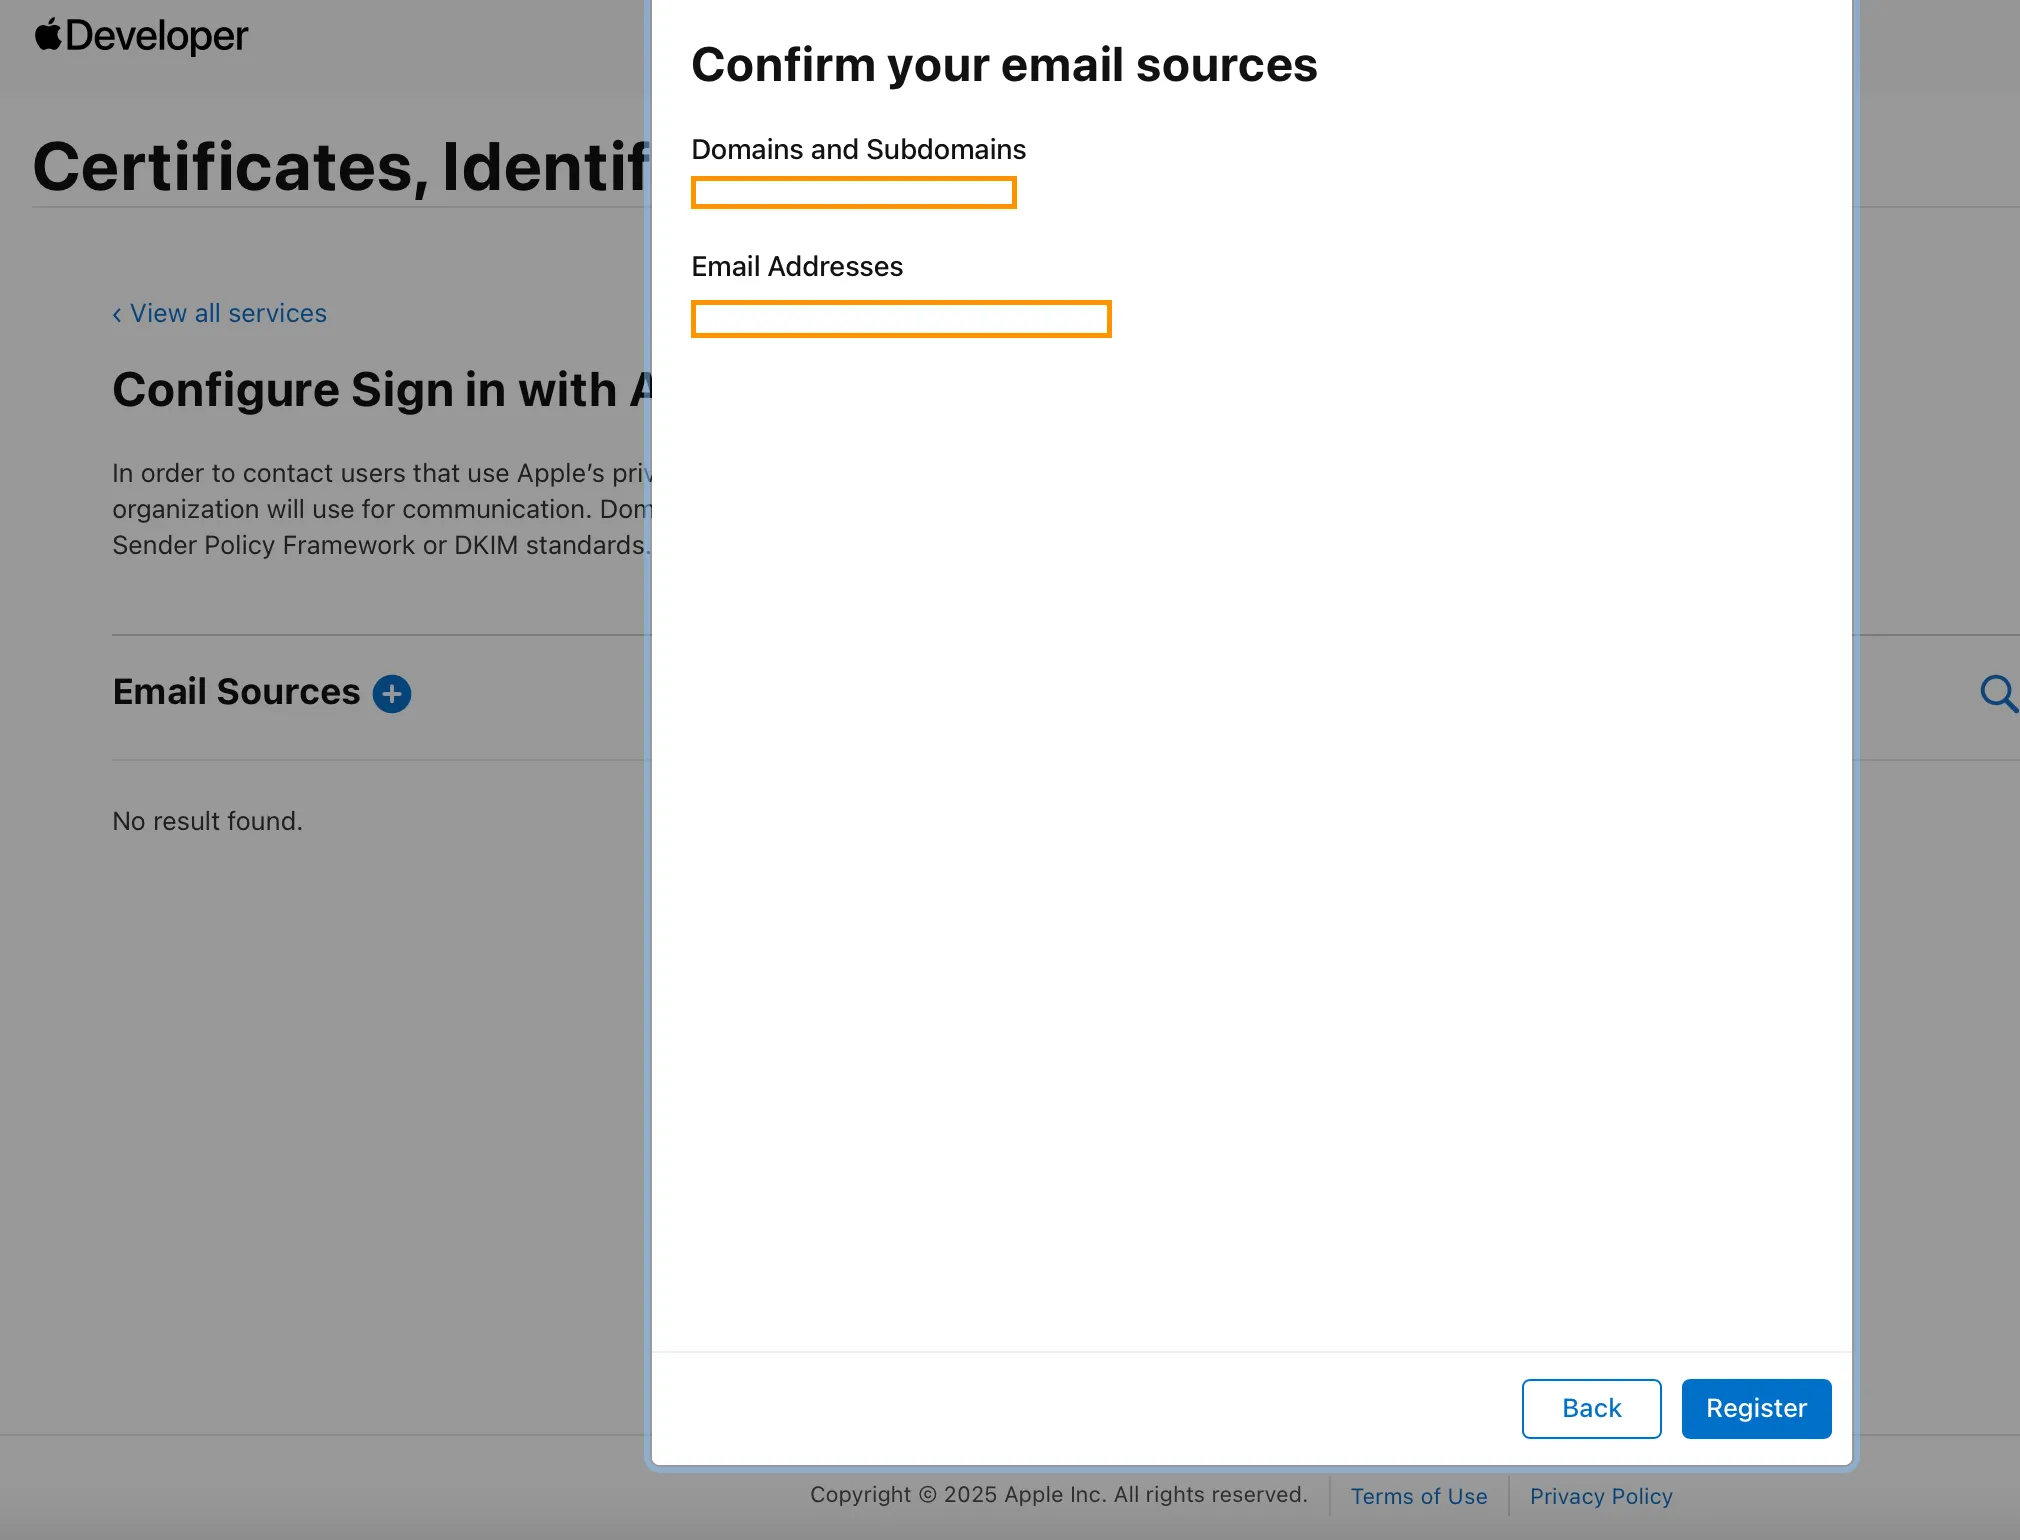
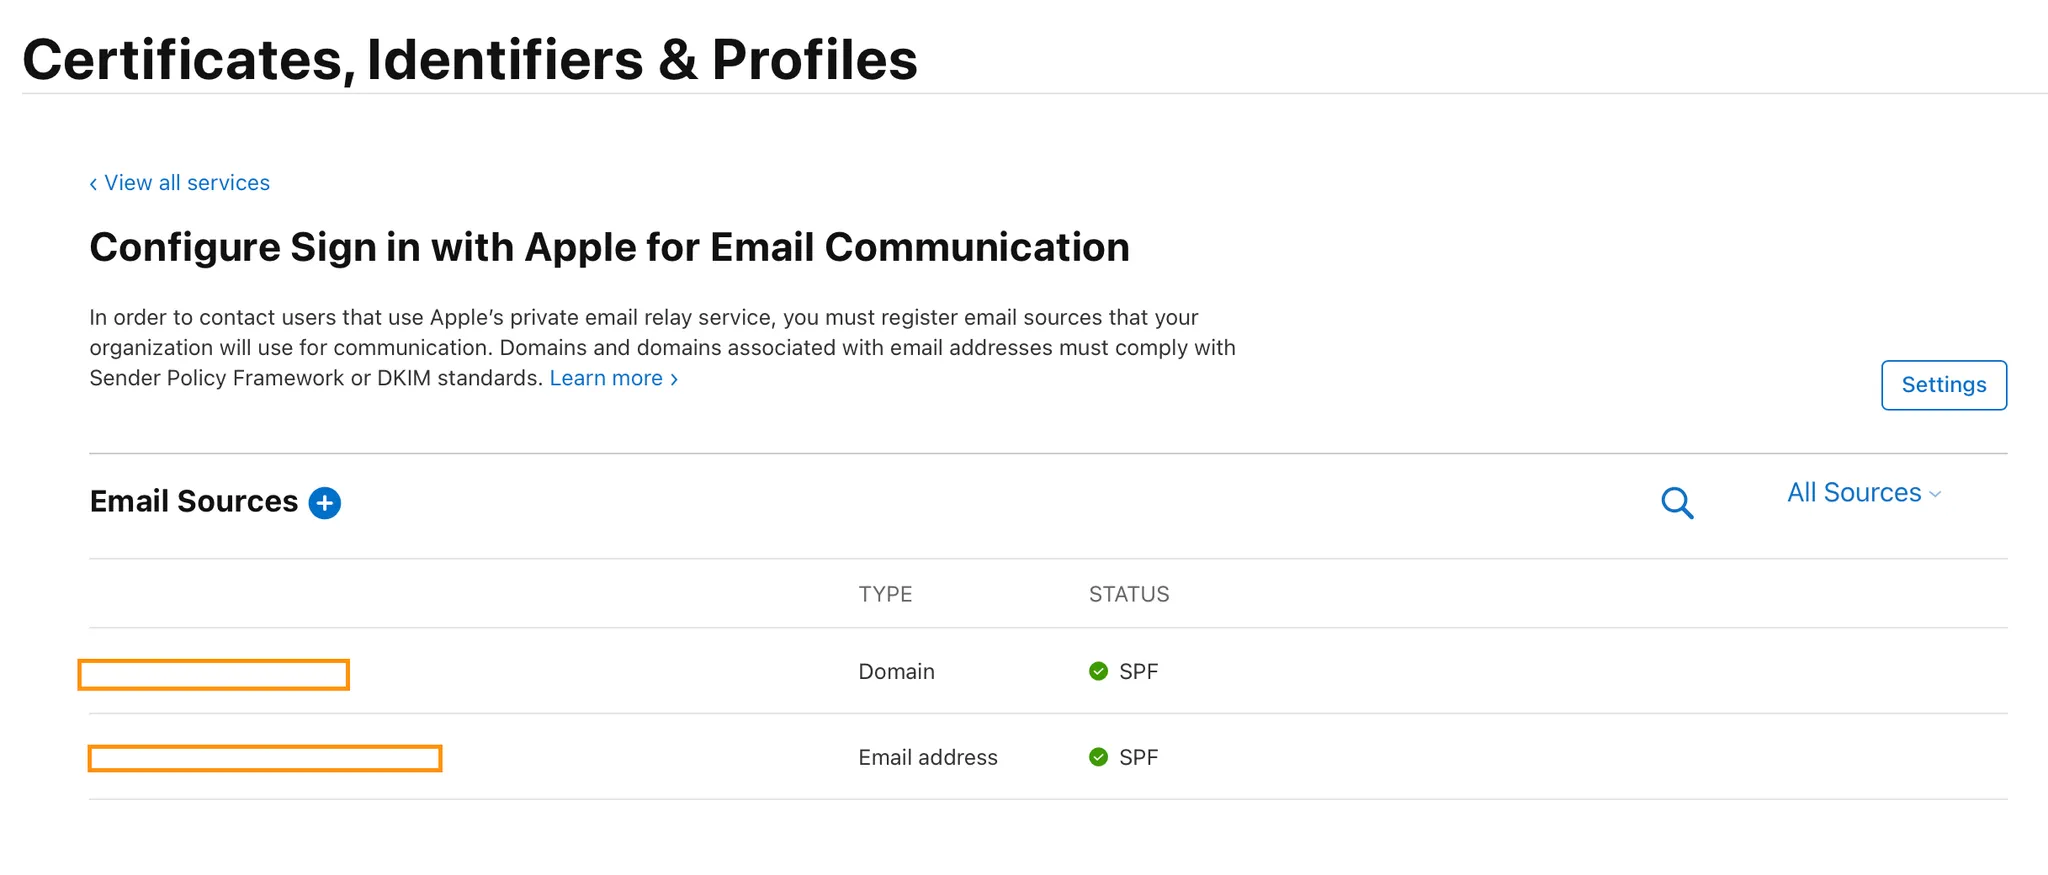
Email Sources +
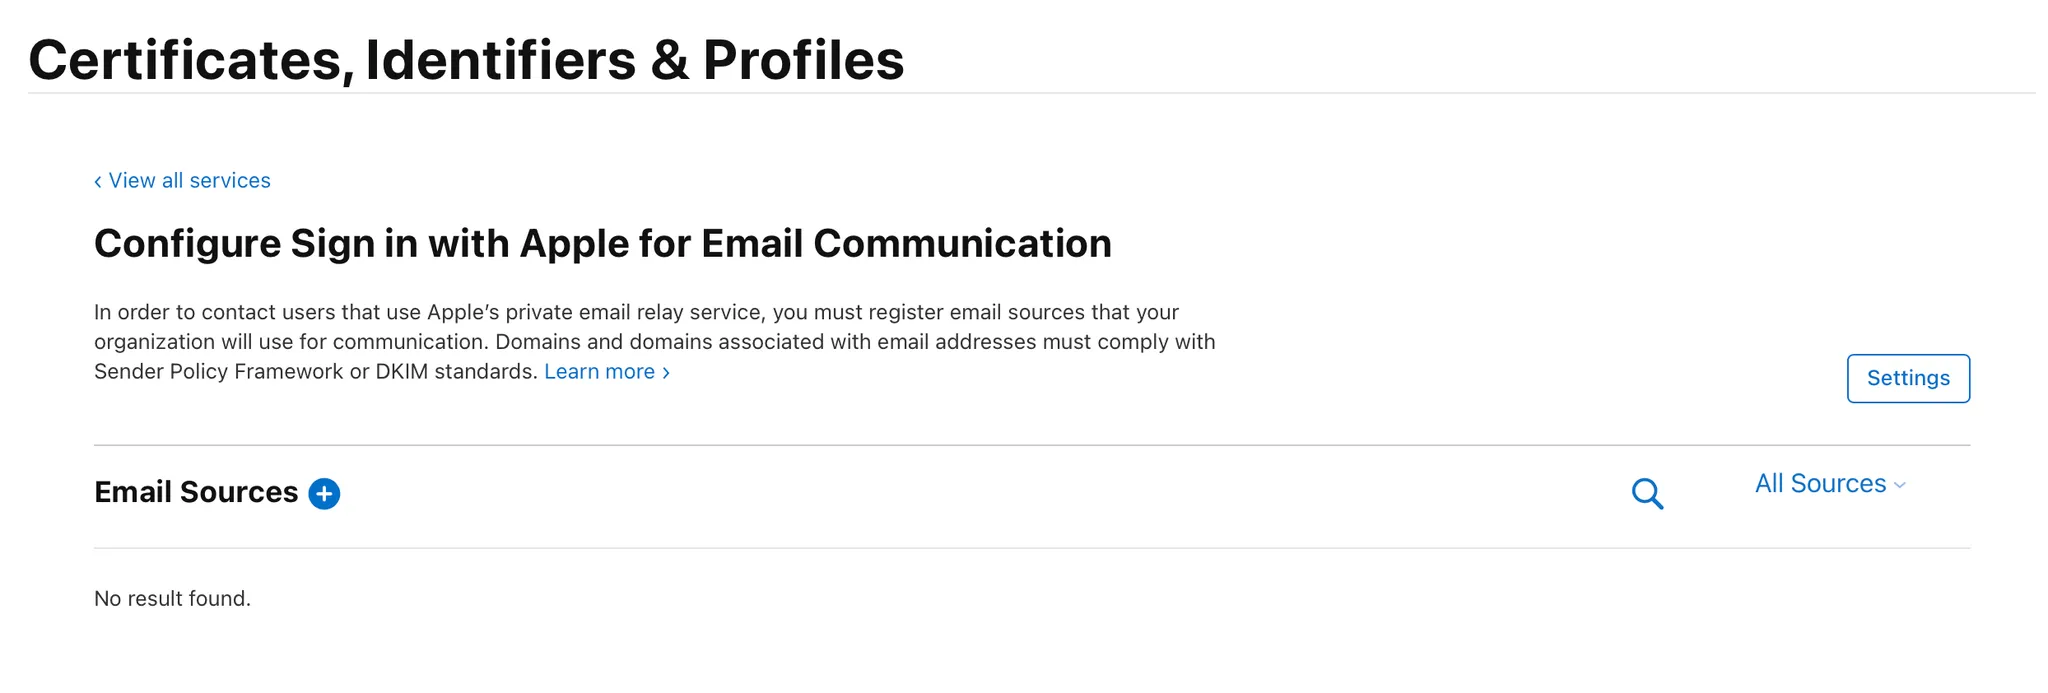
Domains and Subdomains → 아까 설정한 도메인 주소 입력
Firebase console - Authentication - 설정 - 승인된 도메인에서 확인 가능 (~~~.firebaseapp.com)
Email Addresses → noreply@YOUR_FIREBASE_PROJECT_ID.firebaseapp.com
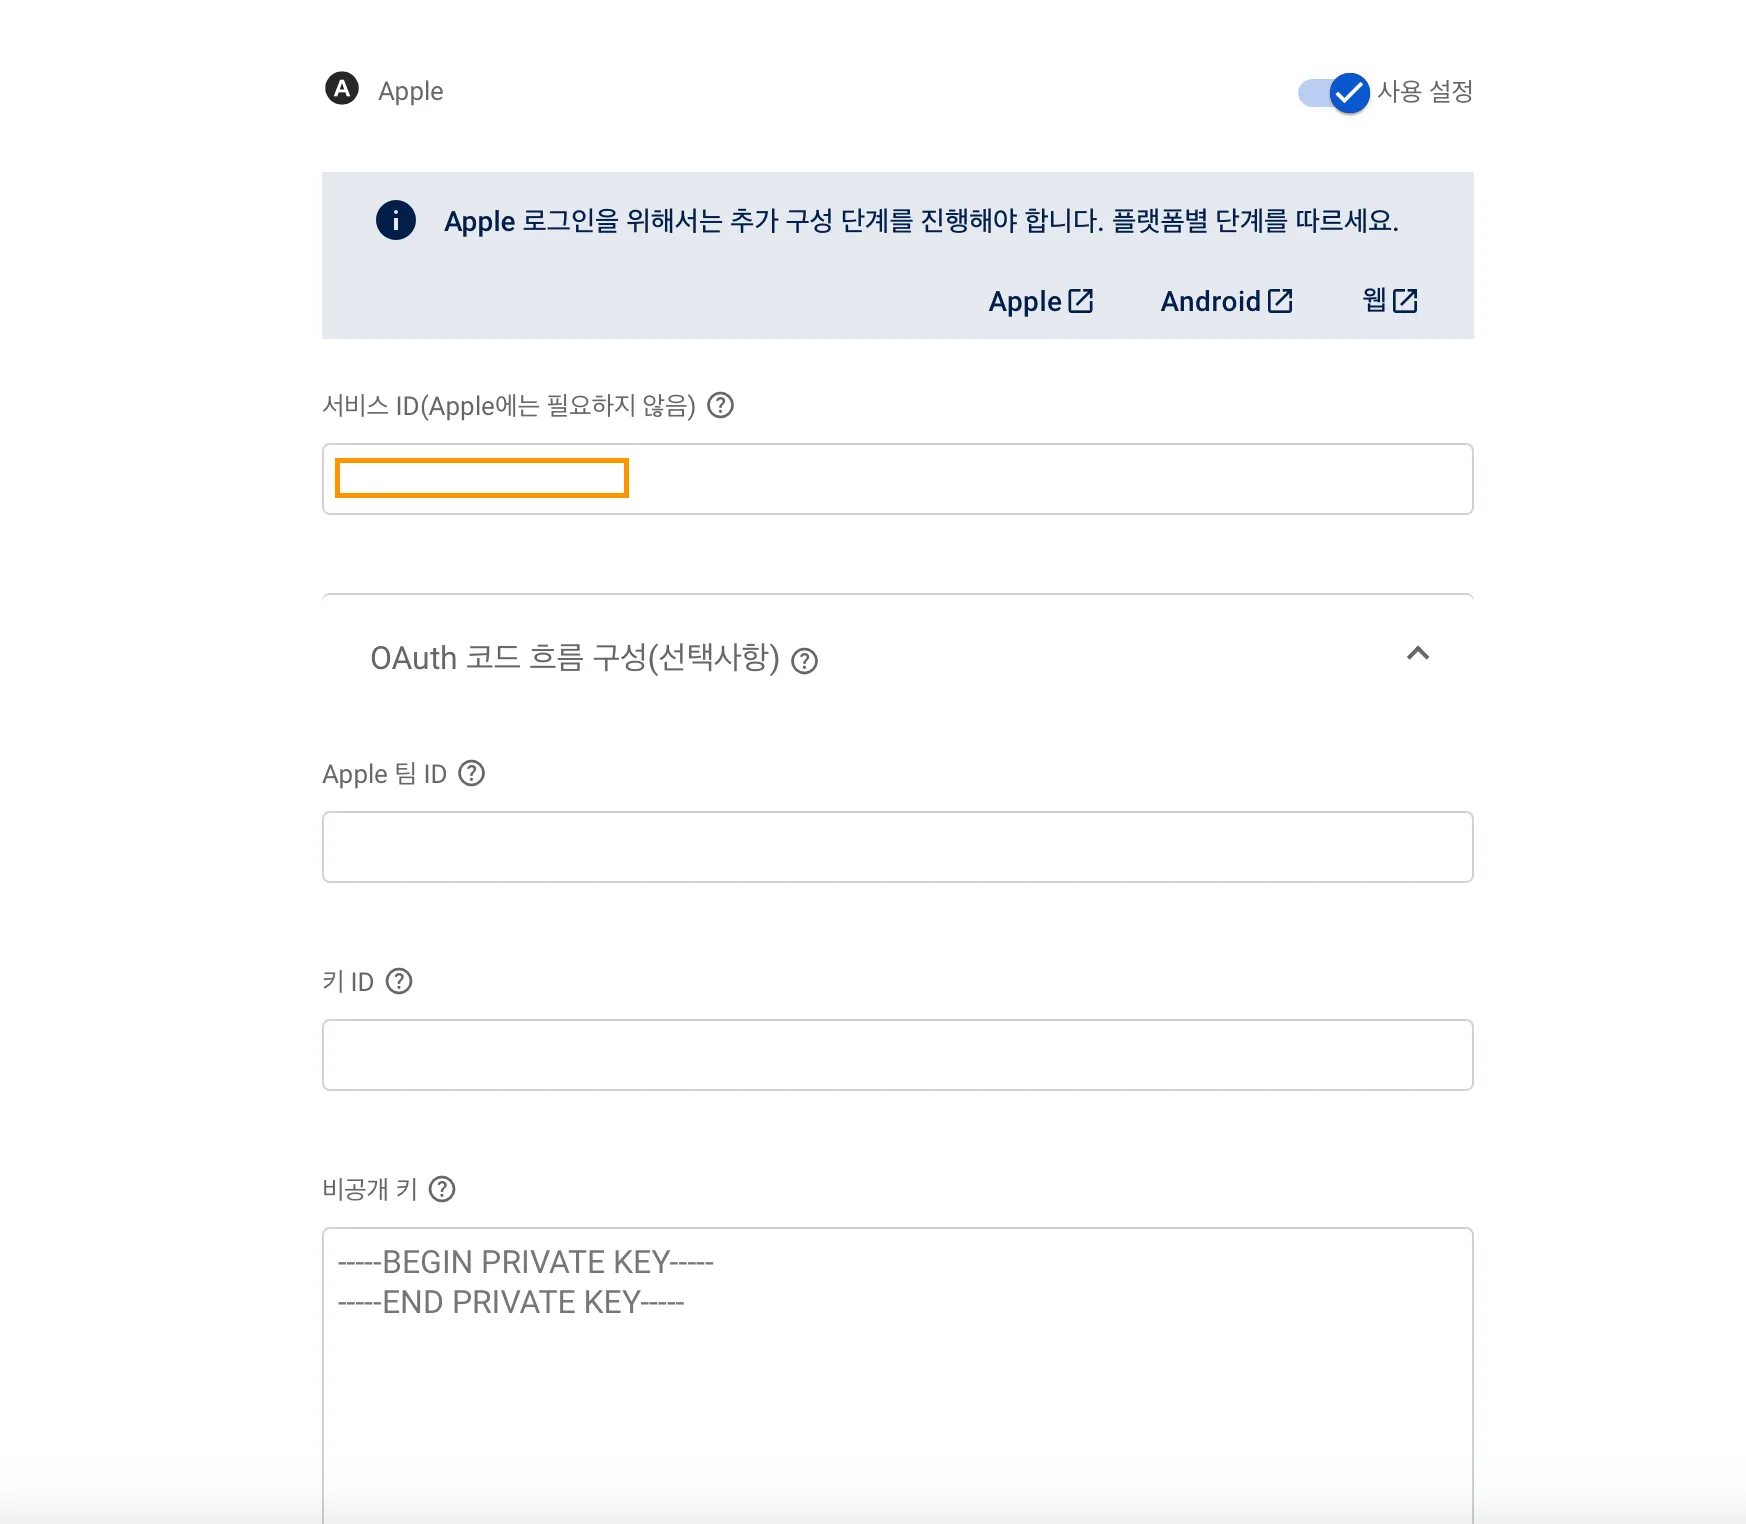
5. Apple을 로그인 제공업체로 사용 설정
Firebase console - Authentication - 로그인 방법 - Apple 수정 - OAuth 코드 흐름 구성
-
Apple 팀 ID → Apple Developer 로그인 하면 바로 보인다. 이름 아래에 적혀있음!
다른 방법으로도 확인 가능 하다. Identifier에서 아까 만든 식별자를 보면 팀 ID가 적혀있다.
-
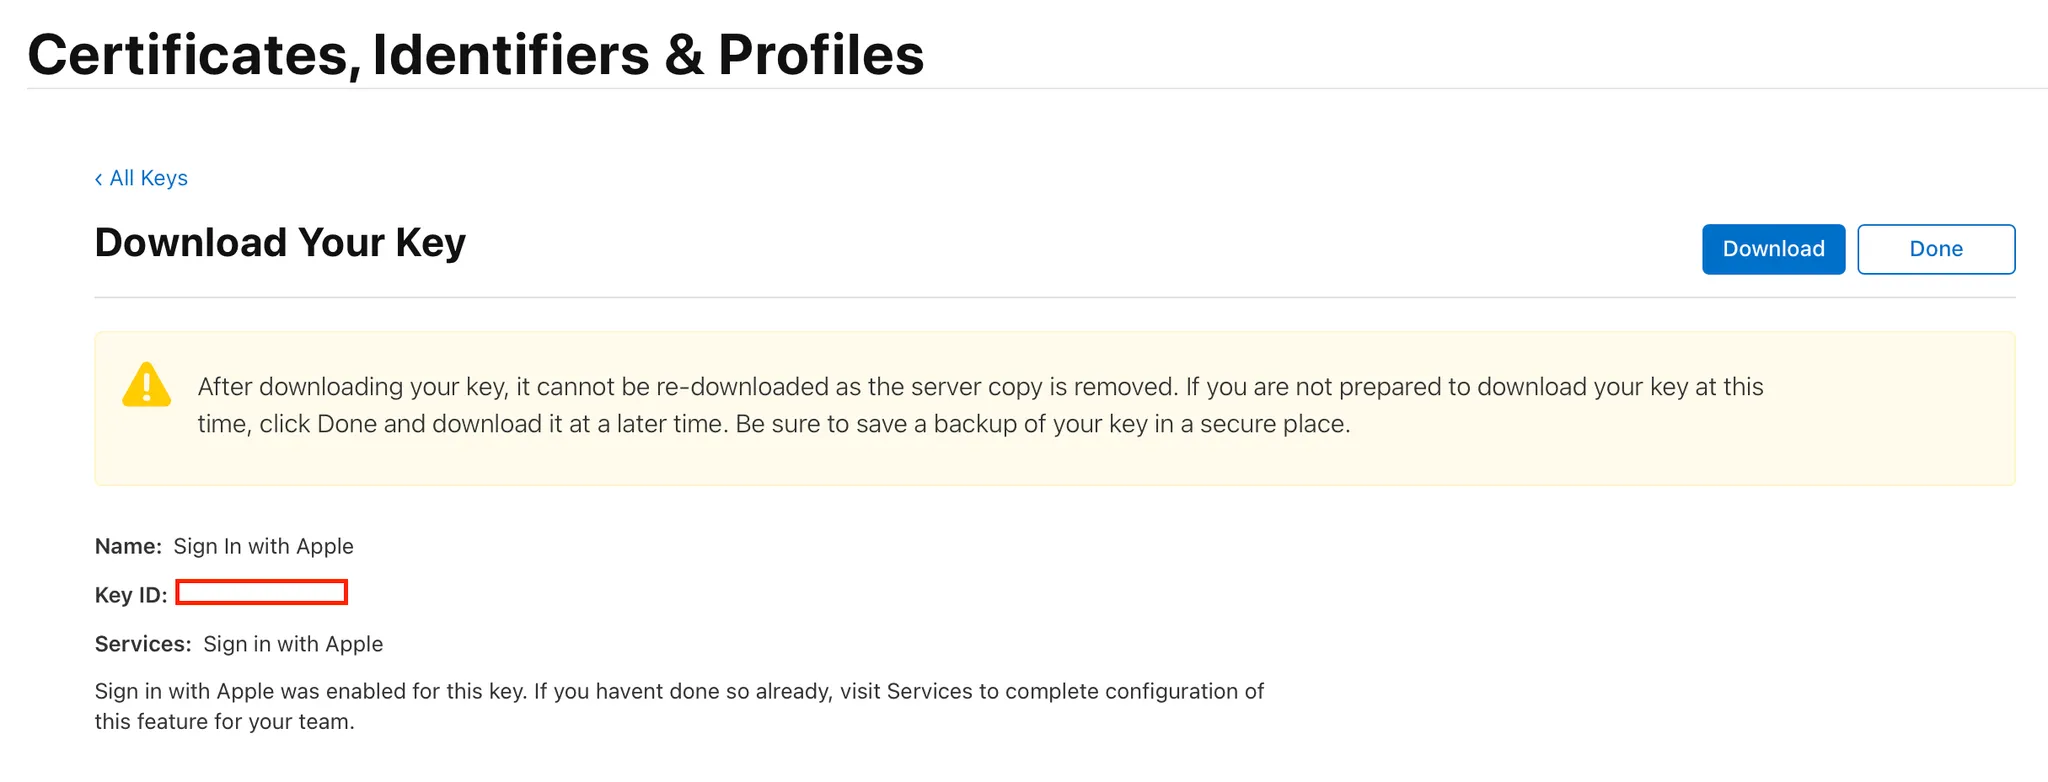
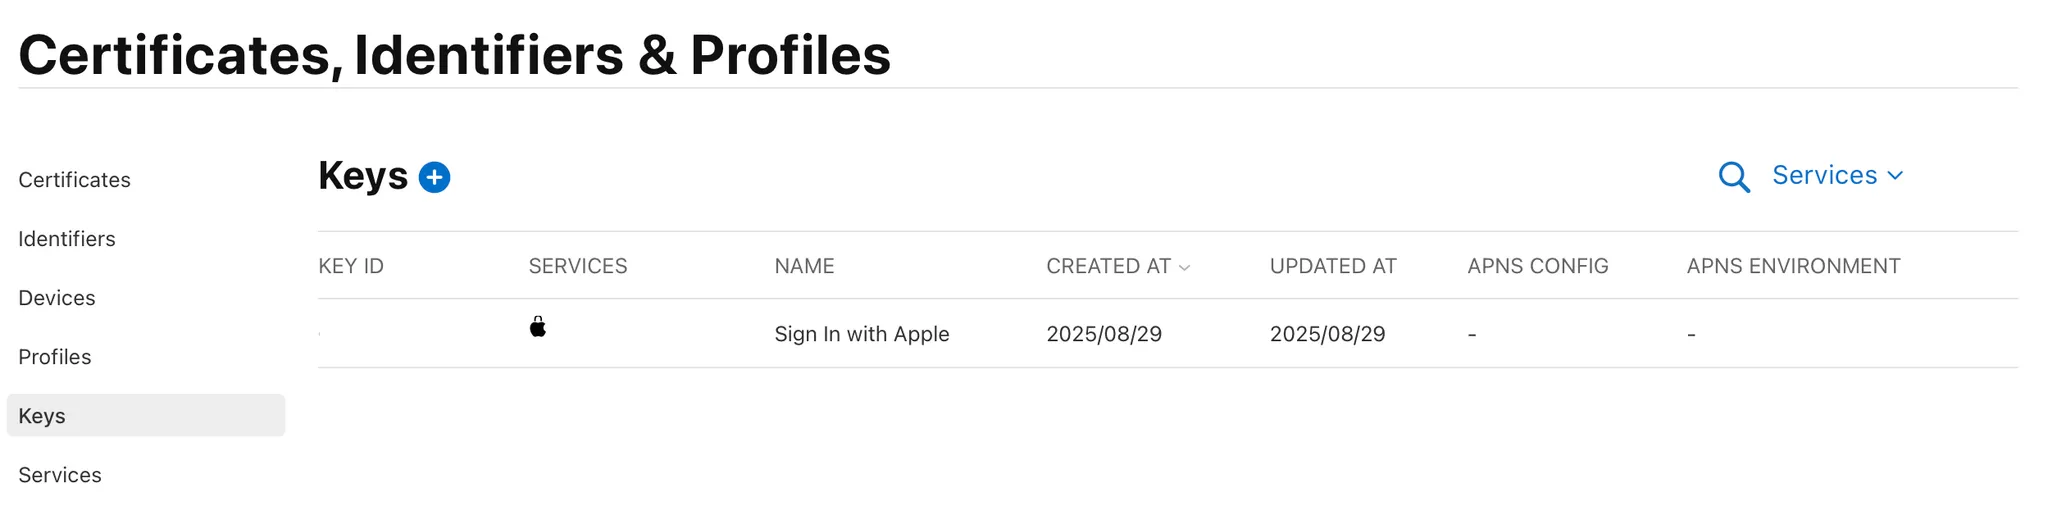
키 ID → 아까 만든 Key ID. Apple Developer에서 Key에서 확인 가능하다.
-
비공개 키 → 다운 받아 둔 파일(.p8)을 열고 내용을 복사 붙여넣기 한다.
6. 이제 코드 작업 시작!
AppleLoginViewModel.swift
// AppleLoginViewModel.swift

import AuthenticationServices
import Combine
import CryptoKit
import Foundation
import FirebaseAuth

final class AppleLoginViewModel: NSObject {
    // Unhashed nonce.
    fileprivate var currentNonce: String?
    public let loginSuccess = PassthroughSubject<Void, Never>()

    @available(iOS 13, *)
    func startSignInWithAppleFlow() {
        let nonce = randomNonceString()
        currentNonce = nonce
        let appleIDProvider = ASAuthorizationAppleIDProvider()  // Apple ID 제공자를 생성
        let request = appleIDProvider.createRequest()   // 인증 요청을 생성
        request.requestedScopes = [.fullName, .email]   // 사용자로부터 전체 이름과 이메일을 요청
        request.nonce = sha256(nonce)

        // 인증 요청을 처리할 컨트롤러를 생성
        let authorizationController = ASAuthorizationController(authorizationRequests: [request])
        authorizationController.delegate = self // 이 뷰 모델을 인증 컨트롤러의 delegate로 설정
        authorizationController.presentationContextProvider = self  // 이 뷰 모델을 인증 컨트롤러의 프레젠테이션 컨텍스트 제공자로 설정
        authorizationController.performRequests()   // 인증 요청을 수행
    }

    private func randomNonceString(length: Int = 32) -> String {
        precondition(length > 0)
        var randomBytes = [UInt8](repeating: 0, count: length)
        let errorCode = SecRandomCopyBytes(kSecRandomDefault, randomBytes.count, &randomBytes)
        if errorCode != errSecSuccess {
            fatalError(
                "Unable to generate nonce. SecRandomCopyBytes failed with OSStatus \(errorCode)"
            )
        }

        let charset: [Character] =
        Array("0123456789ABCDEFGHIJKLMNOPQRSTUVXYZabcdefghijklmnopqrstuvwxyz-._")

        let nonce = randomBytes.map { byte in
            // Pick a random character from the set, wrapping around if needed.
            charset[Int(byte) % charset.count]
        }

        return String(nonce)
    }

    @available(iOS 13, *)
    private func sha256(_ input: String) -> String {
        let inputData = Data(input.utf8)
        let hashedData = SHA256.hash(data: inputData)
        let hashString = hashedData.compactMap {
            String(format: "%02x", $0)
        }.joined()

        return hashString
    }
}

extension AppleLoginViewModel: ASAuthorizationControllerDelegate {
    // 로그인 성공
    func authorizationController(controller: ASAuthorizationController, didCompleteWithAuthorization authorization: ASAuthorization) {
        if let appleIDCredential = authorization.credential as? ASAuthorizationAppleIDCredential {
            guard let nonce = currentNonce else {
                fatalError("Invalid state: A login callback was received, but no login request was sent.")
            }
            guard let appleIDToken = appleIDCredential.identityToken else {
                print("Unable to fetch identity token")
                return
            }
            guard let idTokenString = String(data: appleIDToken, encoding: .utf8) else {
                print("Unable to serialize token string from data: \(appleIDToken.debugDescription)")
                return
            }
            // Initialize a Firebase credential, including the user's full name.
            let credential = OAuthProvider.appleCredential(withIDToken: idTokenString,
                                                           rawNonce: nonce,
                                                           fullName: appleIDCredential.fullName)
            // Sign in with Firebase.
            Auth.auth().signIn(with: credential) { (authResult, error) in
                if (error != nil) {
                    // Error. If error.code == .MissingOrInvalidNonce, make sure
                    // you're sending the SHA256-hashed nonce as a hex string with
                    // your request to Apple.
                    print(error?.localizedDescription ?? "")
                    return
                }
                // 로그인에 성공했을 시 실행할 메서드 추가
                self.loginSuccess.send()
            }
        }
    }

    // 로그인 실패
    func authorizationController(controller: ASAuthorizationController, didCompleteWithError error: any Error) {
        print("로그인 실패", error.localizedDescription)
    }
}

extension AppleLoginViewModel: ASAuthorizationControllerPresentationContextProviding {
    func presentationAnchor(for controller: ASAuthorizationController) -> ASPresentationAnchor {
        // 현재 애플리케이션에서 활성화된 첫 번째 윈도우
        guard let window = UIApplication.shared.connectedScenes
            .compactMap({ $0 as? UIWindowScene })
            .flatMap({ $0.windows })
            .first(where: { $0.isKeyWindow }) else {
            fatalError("No key window found")
        }
        return window
    }
}
LoginViewController.swift
// LoginViewController.swift

public class LoginViewController: UIViewController {
    private let appleLoginViewModel = AppleLoginViewModel()

    public override func viewDidLoad() {
        super.viewDidLoad()
        setUpButtonAction()
        bindViewModel()
    }

    private func setUpButtonAction() {
        loginView.appleLoginButton.addTarget(self, action: #selector(appleLoginTapped), for: .touchUpInside)
    }

    @objc private func appleLoginTapped() {
        print("apple login button tapped")
        appleLoginViewModel.startSignInWithAppleFlow()
    }

    private func bindViewModel() {
        appleLoginViewModel.loginSuccess
            .receive(on: DispatchQueue.main)
            .sink { [weak self] in
                self?.navigateToMainScreen()
            }
            .store(in: &cancellables)
    }

    private func navigateToMainScreen() {
        // 로그인 성공 알림 전송
        NotificationCenter.default.post(name: NSNotification.Name("LoginSuccess"), object: nil)
    }
SceneDelegate.swift
// SceneDelegate.swift

class SceneDelegate: UIResponder, UIWindowSceneDelegate {

    var window: UIWindow?

    func scene(_ scene: UIScene,
               willConnectTo session: UISceneSession,
               options connectionOptions: UIScene.ConnectionOptions) {
        guard let ws = scene as? UIWindowScene else { return }
        let window = UIWindow(windowScene: ws)
        let loginViewController = LoginViewController()
        let navigationController = UINavigationController(rootViewController: loginViewController)

        // 로그인 상태 확인
        let authService = AuthService()
        if authService.isLoggedIn {
            window.rootViewController = MainTabBarController()
        } else {
            window.rootViewController = navigationController
        }

        window.makeKeyAndVisible()
        self.window = window

        // 로그인 성공 알림 구독
        NotificationCenter.default.addObserver(
            self,
            selector: #selector(handleLoginSuccess),
            name: NSNotification.Name("LoginSuccess"),
            object: nil
        )

        // 로그아웃 성공 알림 구독
        NotificationCenter.default.addObserver(
            self,
            selector: #selector(handleLogoutSuccess),
            name: NSNotification.Name("LogoutSuccess"),
            object: nil
        )
    }
7. Tuist entitlements 설정
Sign In with Apple Capability를 설정해 놓은 것이 Xcode를 껐다 켜면 초기화 된다.
이유는 ? Tuist 때문..
그럼 어떻게 하냐! Tuist Manifest에서 entitlements 파일을 설정해주면 된다.
Q. entitlements 파일을 어디에 만드는데요?
A. 최상위 루트에 만들어주면 된다. 예를 들어 나의 파일 구조는 아래와 같다.
나는 Projects 그룹에서 New file을 해서 만들었다. 그러니까 App 그룹 바로 위..(다른 폴더들과 같은 계층)
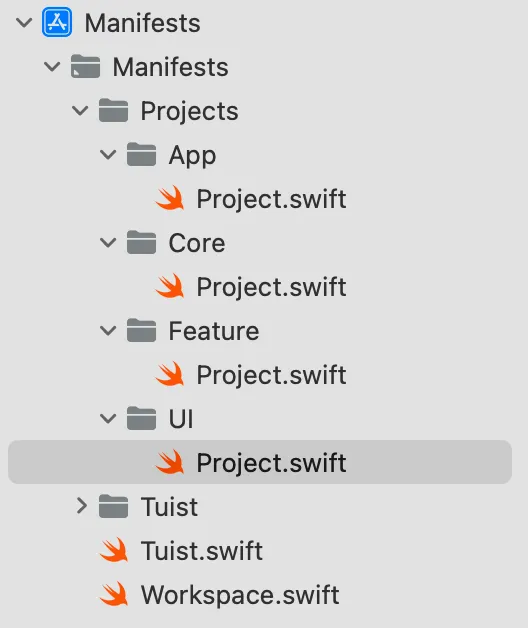
파일 이름은 앱이름.entitlements 로 해주면 된다. 확장자를 .entitlements로 설정하면 알아서 저런 화면으로 나옴. 이후 아래와 같이 Sign in with Apple 을 추가해주면 된다.
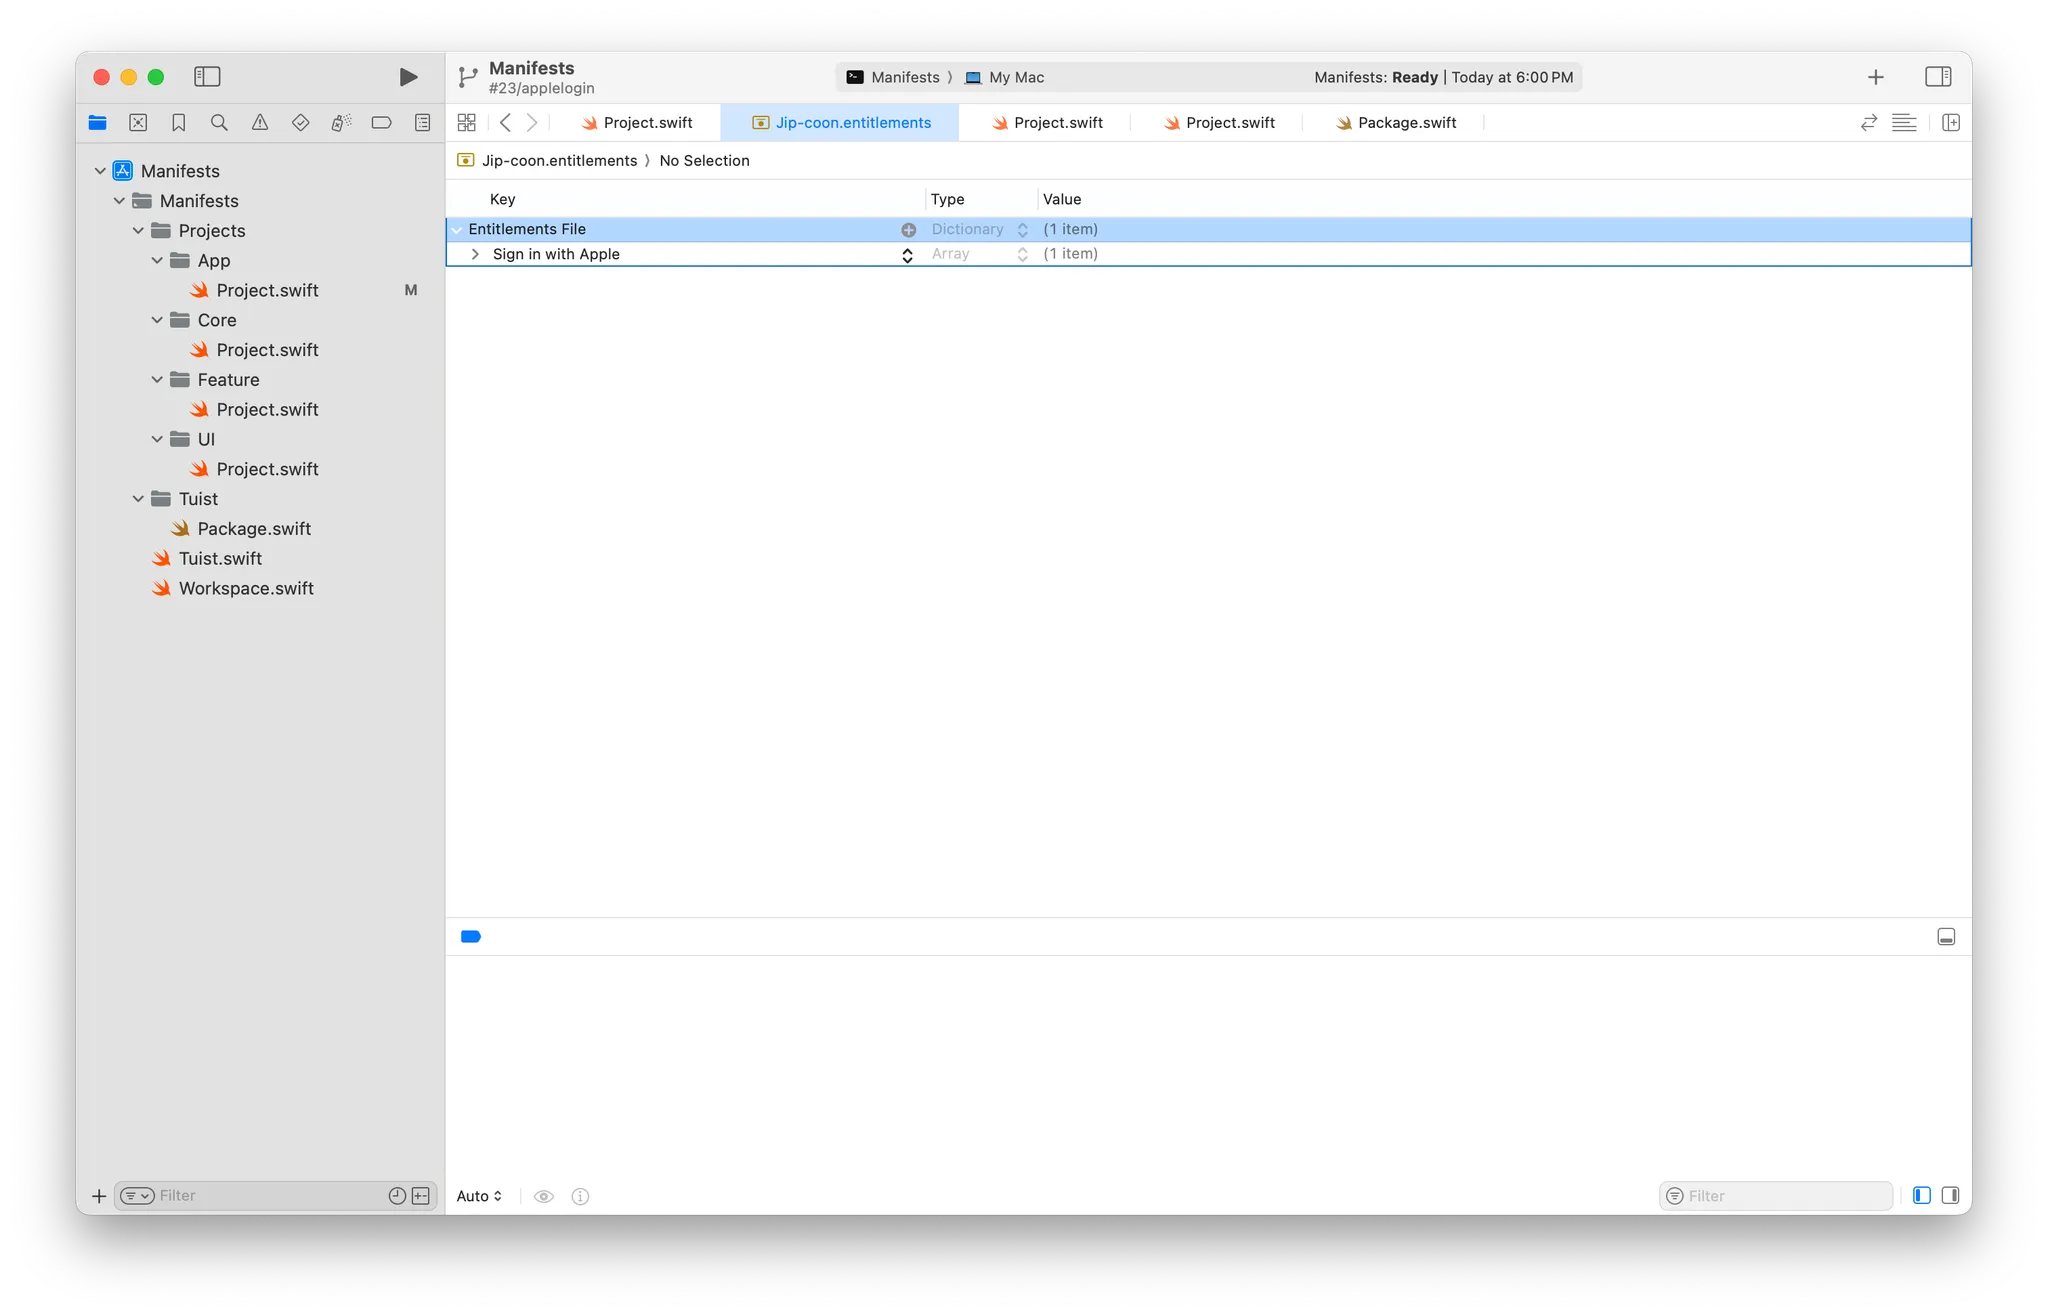
코드로는 다음과 같이 보일 것이다.
<?xml version="1.0" encoding="UTF-8"?>
<!DOCTYPE plist PUBLIC "-//Apple//DTD PLIST 1.0//EN" "http://www.apple.com/DTDs/PropertyList-1.0.dtd">
<plist version="1.0">
<dict>
	<key>com.apple.developer.applesignin</key>
	<array>
		<string>Default</string>
	</array>
</dict>
</plist>
이후 최상위 모듈의 Project.swift 파일에 코드를 추가한다. entitlements: "파일명.entitlements",
// App.swift

//
//  Project.swift
//  Config
//
//  Created by 예슬 on 8/18/25.
//

import ProjectDescription

let project = Project(
    name: "Jip-coon",
    targets: [
        .target(
            name: "Jip-coon",
            destinations: .iOS,
            product: .app,
            bundleId: "dev.tuist.Jip-coon",
            infoPlist: .extendingDefault(
                with: [
                    "UILaunchStoryboardName": "Launch Screen.storyboard",
                    "UIApplicationSceneManifest": [
                        "UIApplicationSupportsMultipleScenes": false,
                        "UISceneConfigurations": [
                            "UIWindowSceneSessionRoleApplication": [
                                [
                                    "UISceneConfigurationName": "Default Configuration",
                                    "UISceneDelegateClassName": "$(PRODUCT_MODULE_NAME).SceneDelegate"
                                ],
                            ]
                        ]
                    ],
                ]
            ),
            sources: ["Sources/**"],
            resources: ["Resources/**"],
            entitlements: "Jip-coon.entitlements",    // 이 부분 추가
            dependencies: [
                .project(target: "Feature", path: .relativeToRoot("Projects/Feature")),
                .external(name: "FirebaseCore")
            ],
            settings: .settings(
                base: [
                    "OTHER_LDFLAGS": "$(inherited) -ObjC",
                    "ENABLE_USER_SCRIPT_SANDBOXING": "NO"
                ]
            )
        ),
        .target(
            name: "Jip-coonTests",
            destinations: .iOS,
            product: .unitTests,
            bundleId: "dev.tuist.Jip-coonTests",
            infoPlist: .default,
            sources: ["Tests/**"],
            resources: [],
            dependencies: [.target(name: "Jip-coon")]
        ),
    ]
)
설정을 마치면 다시 tuist generate를 해도 sign in with apple capability가 잘 남아있습니다.
참고자료
https://firebase.google.com/docs/auth/ios/apple?hl=ko#reauthentication_and_account_linking
https://velog.io/@oasis444/Apple-%EB%A1%9C%EA%B7%B8%EC%9D%B8-with-Firebase