텔넷 서버
오랫동안 사용되었던 원격 접속 방법이지만 가장 기본적은 원격 접속 방법이므로 설정해 보았다.
- 텔넷 서버 설치 확인 및 설치
[root@localhost ~]# rpm -qa telnet-server
[root@localhost ~]# dnf -y install telnet-server- 텔넷 서버 가동 및 사용자 추가
[root@localhost ~]# systemctl start telnet.socket
[root@localhost ~]# systemctl status telnet.socket
● telnet.socket - Telnet Server Activation Socket
   Loaded: loaded (/usr/lib/systemd/system/telnet.socket; disabled; vendor pres>
   Active: active (listening) since Thu 2022-07-21 14:07:00 KST; 9s ago
     Docs: man:telnetd(8)
   Listen: [::]:23 (Stream)
[root@localhost ~]# adduser teluser
[root@localhost ~]# passwd teluser
teluser 사용자의 비밀 번호 변경 중
새  암호:
새  암호 재입력:
passwd: 모든 인증 토큰이 성공적으로 업데이트 되었습니다.- 방화벽 해제
[root@localhost ~]# firewall-cmd --permanent --add-service=23/tcp
[root@localhost ~]# firewall-cmd --reload
[root@localhost ~]# systemctl enable telnet.socket- 텔넷 접속 시도
- 자신의 컴퓨터에서 시도
[root@localhost ~]# telnet [ip 주소] [teluser@localhost ~]# whoami teluser [teluser@localhost ~]# exit logout [root@localhost ~]#- 호스트 컴퓨터에서 시도
telnet [ip 주소]
localhost login: teluser
Password:
[teluser@localhost ~]# whoami
teluser
ssh 서버
ssh는 텔넷의 단점인 보안적인 요소를 강화한 원격 접속 방법이다. 방식은 넬텟과 거의 동일하지만 데이터 전송 시 암호화 한다는 차이점을 확인할 수 있다.
- ssh 설치 확인 및 동작 확인
[root@localhost ~]# rpm -qa openssh-server
openssh-server-7.8p1-4.el8.x86_64
[root@localhost ~]# systemctl status sshd
● sshd.service - OpenSSH server daemon
   Loaded: loaded (/usr/lib/systemd/system/sshd.service; enabled; vendor preset>
Active: active (running) since Thu 2022-07-21 14:05:38 KST; 11min ago- client 에서 접속 시도
[centos@localhost ~]# ssh teluser@[ip 주소]
The authenticity of host 'ip 주소(ip 주소)' can't be established.
ECDSA key fingerprint is SHA256:ad7yaM9TPtJFGM+VYYC2ONE9GN3mpuryKTQCEkCcr3E.
Are you sure you want to continue connecting (yes/no/[fingerprint])? yes
[teluser@localhost ~]# whoami
teluser
[centos@localhost ~]# ifconfig ens160
ens160: flags=4163<UP,BROADCAST,RUNNING,MULTICAST>  mtu 1500
inet [ip 주소] netmask [서브넷마스크] broadcast [브로드캐스트 주소]- 호스트 컴퓨터에서 접속 시도
호스트 컴퓨터에서 만약 ssh가 지원이 안된다면 putty를 설치하여 접속할 수 있다. 그렇지만 여기서는 ssh 접속이 가능하여 접속시도를 하고 성공했다.
PS C:\Users\admin> ssh teluser@ip 주소
The authenticity of host 'ip 주소 (ip 주소)' can't be established.
ECDSA key fingerprint is SHA256:ad7yaM9TPtJFGM+VYYC2ONE9GN3mpuryKTQCEkCcr3E.
Are you sure you want to continue connecting (yes/no/[fingerprint])? yes
Warning: Permanently added 'ip 주소' (ECDSA) to the list of known hosts.
teluser@ip 주소's password:
Activate the web console with: systemctl enable --now cockpit.socket
[teluser@localhost ~]$ whoami
telnet
[teluser@localhost ~]$ exit
logout
Connection to 192.168.111.100 closed.
PS C:\Users\admin>
xrdp 서버
원격 접속 후 CLI 모드에서 접속하고 작업하는 것이 아닌 GUI모드에서 원격 접속하여 작업할 수 있는 환경이다.
- xrdp 설치 및 가동
[root@localhost ~]# dnf -y install epel-release
[root@localhost ~]# dnf -y install xrdp
[root@localhost ~]# systemctl start xrdp
[root@localhost ~]# systemctl enable xrdp- 방화벽 설정
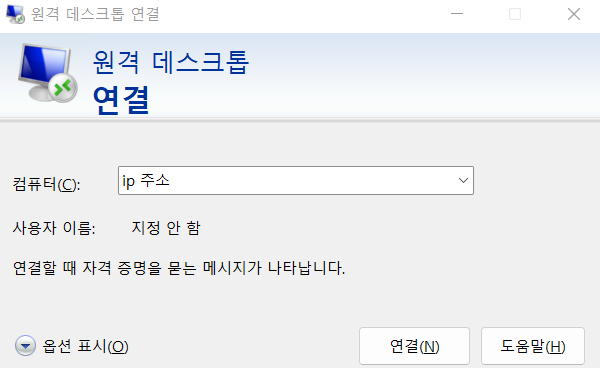
xrdp는 3389번 포트를 사용하므로 방화벽에서 3389/tcp를 오픈해준다. - 호스트 컴퓨터에서 접속
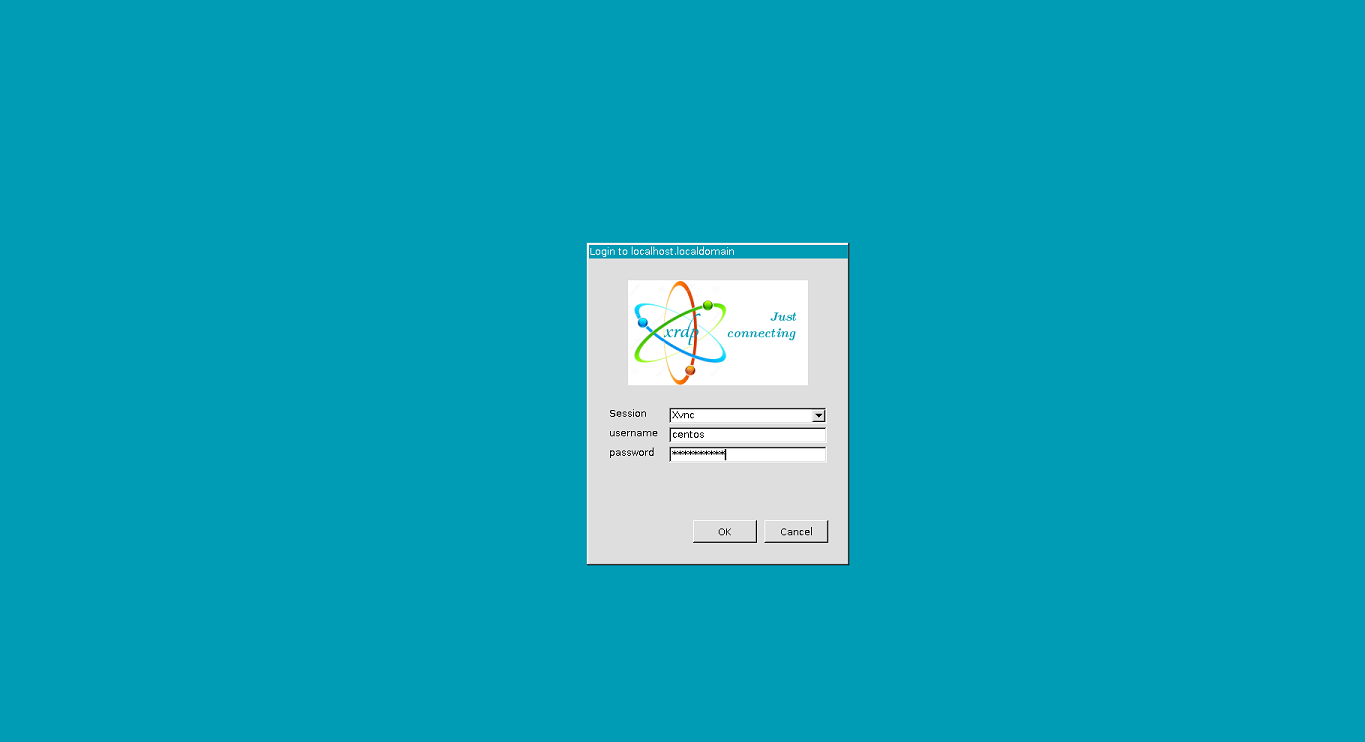
위 사진 처럼 로그인 화면이 나타나고 접속이 가능해진다.

아침엔 운동하고 밤엔 잠을 잔다.