RN 이미지 가져오기
 <Image
      // 꼭 style로 width와 height를 넣어줘야함
        style={{ width: 100, height: 100 }}
        source={{
          // 이미지 주소 복사
          uri: "https://reactjs.org/logo-og.png",
        }}
      />
onChangeText 사용하기
여기서는 event 객체를 사용하지 않는다.
export default function App() {
  const [text, setText] = useState("");

  const onChangeText = (text) => {
    setText(text);
  };

  return (
    <View style={styles.container}>
      <Text>Hello</Text>
      <TextInput
        onChangeText={onChangeText}
        value={text}
        style={{ width: "100%", backgroundColor: "grey" }}
      />
      <StatusBar style="auto" />
    </View>
  );
}
ScrollView 사용하기
    {/* 스크롤 사용시 ScrollView를 사용해야함 */}
      <ScrollView contentContainerStyle={{ backgroundColor: "red" }}>
        <Text style={{ fontSize: 32 }}>Hello</Text>
        <Text style={{ fontSize: 32 }}>Hello</Text>
        <Text style={{ fontSize: 32 }}>Hello</Text>
        <Text style={{ fontSize: 32 }}>Hello</Text>
        <Text style={{ fontSize: 32 }}>Hello</Text>
        <Text style={{ fontSize: 32 }}>Hello</Text>
        <Text style={{ fontSize: 32 }}>Hello</Text>
        <Text style={{ fontSize: 32 }}>Hello</Text>
        <Text style={{ fontSize: 32 }}>Hello</Text>
        <Text style={{ fontSize: 32 }}>Hello</Text>
        <Text style={{ fontSize: 32 }}>Hello</Text>
        <Text style={{ fontSize: 32 }}>Hello</Text>
        <Text style={{ fontSize: 32 }}>Hello</Text>
        <Text style={{ fontSize: 32 }}>Hello</Text>
        <Text style={{ fontSize: 32 }}>Hello</Text>
        <Text style={{ fontSize: 32 }}>Hello</Text>
        <Text style={{ fontSize: 32 }}>Hello</Text>
      </ScrollView>
SafeAreaView
최 상단 위에서 사용을 한다.
 <SafeAreaView>
        <ScrollView>
          <Text>하이</Text>
          <Text>하이</Text>
          <Text>하이</Text>
          <Text>하이</Text>
          <Text>하이</Text>
          <Text>하이</Text>
        </ScrollView>
      </SafeAreaView>
emotion 만들기
npm install @emotion/react @emotion/native
yarn add @emotion/react @emotion/native
import styled from "@emotion/native"; ----- 가장 먼저 Import 해온다.

const StyledText = styled.Text`   ----- 리액트에서처럼 똑같이 사용하면 됨
  color: red;
  font-size: 32px;
  background-color: grey;
  height: 300px;
  text-align: center;
`;
export default function App() {
  const [text, setText] = useState("");

  const onChangeText = (text) => {
    setText(text);
  };

  return (
    <View>
      <SafeAreaView>
        <ScrollView>
          <StyledText>하이</StyledText>  ----- 여기에 똑같이 StyedText를 넣어주면됨
        </ScrollView>
      </SafeAreaView>

      <StatusBar style="auto" />
    </View>
  );
}
CSS 꾸미기(borderTopWidth, paddingVertical)
borderTopWidth는 위에 선긋기
paddingVertical은 paddingTop and paddingBottom 둘다 주는 효과임
paddingHorizontal은 paddingLeft와 paddingRight를 주는 효과임

  inputWrapper: {
    borderTopWidth: 1,
    borderBottomWidth: 1,
    paddingVertical: 15,
    marginTop: 15,
    marginBottom: 15,
  },
CSS 꾸미기
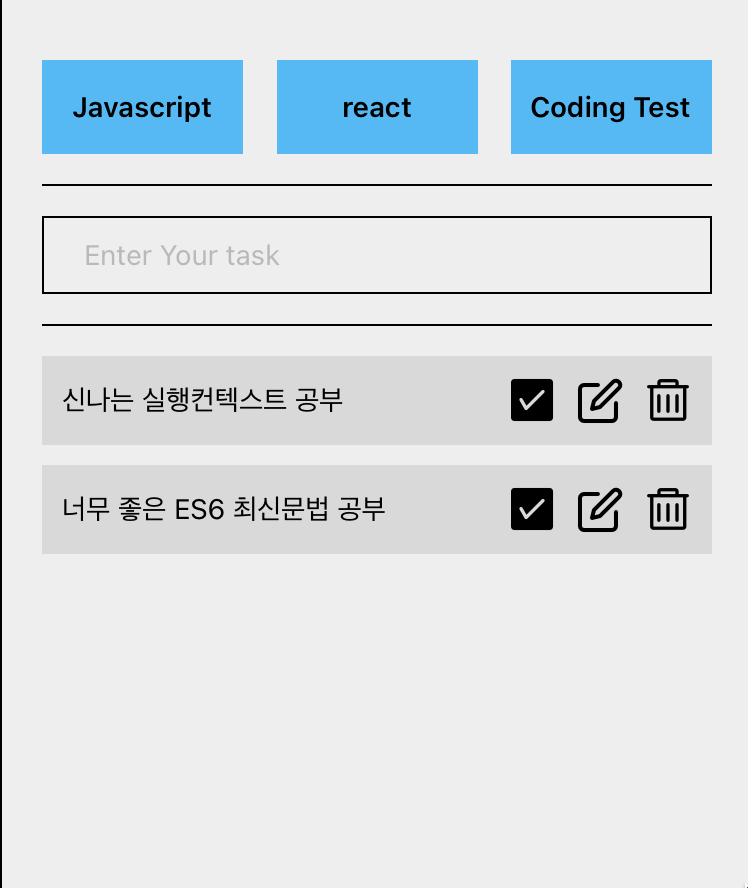
  task: {
    flexDirection: "row",   --- 나란히 배열을 해줌
    paddingVertical: 10, -- 패딩 위아래 효과를줌
    paddingHorizontal: 10, -- 패딩 양 옆으로 효과를줌
    justifyContent: "space-between", -- 각각 왼쪽 오른쪽으로 배분을 해줌(가로축을 기준으로 정렬)
    backgroundColor: "#D9D9D9",
    alignItems: "center", -- 세로축을 기준으로 가운데 정렬
    marginBottom: 10,
Statusbar
<StatusBar style="auto" />
여기 위에 시간을 나타냄