이제 본격적인 수업 진도에 맞춰서 TODOLIST를 만들어보자
우선 가장 먼저 해야할 일은
1. useState를 설정해줘야 한다.
const [todos, setTodos] = useState('') --- 투두리스트 그 자체라고 보면 된다.
const [category, setCategory] = useState('') --- 카테고리를 나눌 때 사용
const [text, setText] = useState('') --- Input 입력창에 사용
2. 다음 변수newTodo와 함수 addTodo를 만들어보자
const newTodo = {
id : Date.now(),
text,
isDone:false,
isEdit:false,
category
}
const addTodo = () => { --- Input 버튼에 있는 추가 버튼을 누르면 newTodo가 생성되는 함수이다.
setTodos((prev) => {
return [...prev, newTodo]; --- prev는 기존의 Todo들을 뜻한다. 여기에 newTodo를 더하는 것
});
};3. Input Text에 함수 넣어주기
<TextInput
value={text}
onChangeText={setText}
onSubmitEditting={addTodo}
>
4. 컴포넌트에 map 함수를 돌려서 Todo들을 렌더링해보자
      <ScrollView>
          {todos.map((todo) => {
            return (
              <View key={todo.id} style={styles.task}>
                <Text>{todo.text}</Text>
                <View style={{ flexDirection: "row" }}>
                  <AntDesign name="checksquare" size={24} color="black" />
                  <Feather
                    style={{ marginLeft: 10 }}
                    name="edit"
                    size={24}
                    color="black"
                  />
                  <AntDesign
                    style={{ marginLeft: 10 }}
                    name="delete"
                    size={24}
                    color="black"
                  />
                </View>
              </View>
            );
          })}
        </ScrollView>
5. 이제 style에 3항 연산자를 줘보자
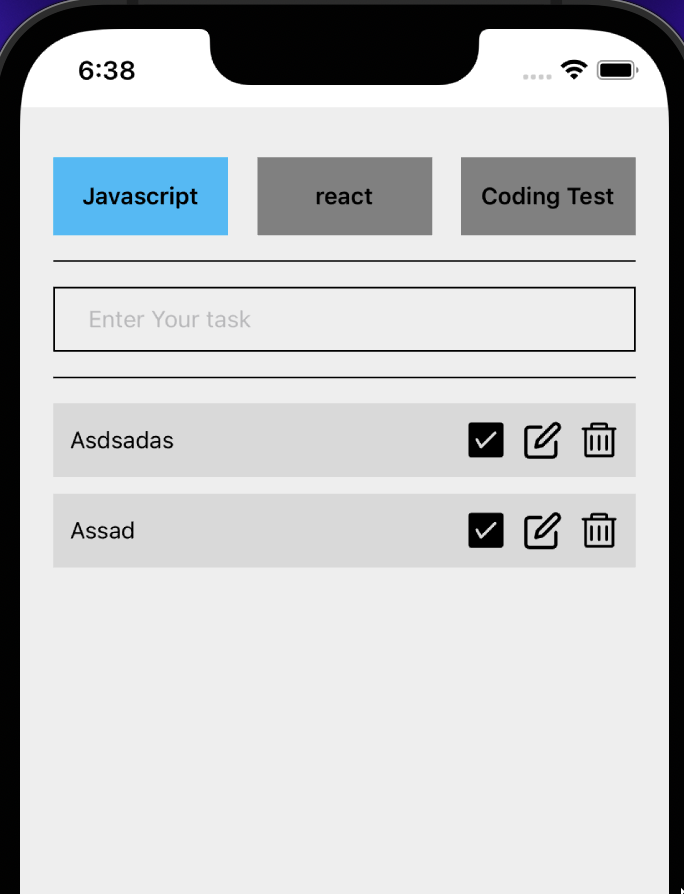
위의 3개버튼 중 1개의 버튼을 누를 때 색상이 나오게끔 변경을 해야한다.
<TouchableOpacity
            onPress={() => {
              setCategory("js");
            }}
            style={{
              ...styles.tab,
                   // 기존의 tab 스타일을 적용해줘

              backgroundColor: category === "js" ? "#0FBCF9" : "grey",
                   // 카테고리가 js 라면 파란색으로, 그게 아니면 grey로 해줘
            }}
          >
6. 다음 아까 맵을 돌렸던 것을 if 문으로 다시 설정을 해주자
map 위에 if(category === todo.category){
  return map으로 돌린 것들 }
7. 이제 setDone을 할 차례

체크를 하면 line-through가 되는 기능을 만들어보자
const setDone =(id)=>{
 const newTodos=[...todos];
 const idx = newTodos.findIndex((todo)=> todo.id ===id);
  // 위 (id)에 해당하는 index를 찾는 과정임
  newTodos[idx].isDone = !newTodos[idx].isDone;

  setTodos(newTodos)
}


-> onPress={()=>{
setDone(todo.id)
}}<Text
style={{textDecorationLine: todo.isDone ? "line-through" : "none",}}>
// 해당 Text에 css 효과를 주면된다.
// textDecorationLine : todo.isDone이 true이면 line-through를 주고
// false면 아무것도 안하면 된다.
{todo.text}
</Text>
8. 이제 Delete를 할 차례
  const deleteTodo = (id) => {
    // 1.id 값을 받아서 해당배열 요소를 제외한 나머지를 새로운 배열로 받는다. - filter
    // 2. setTodos
    // 3. filter는 immutable이라 filter에 영향을 끼치지 못한다. 따라서 바로 todos를 쓰는 것이다.

   const newTodos = todos.filter((todo) => todo.id !== id);
    setTodos(newTodos);
  };
9. alert을 동반한 삭제
 Alert.alert("Todo삭제", "정말 삭제하시겠습니까?", [
      {
        text: "취소",
        style: "cancel",
        onPress: () => console.log("취소 클릭"),
      },
      {
        text: "삭제",
        style: "cancel",
        onPress: () => {
          const newTodos = todos.filter((todo) => todo.id !== id);
          setTodos(newTodos);
        },
      },
    ]);
  };
10. 수정기능
const setEdit = (id) => {
    const newTodos = [...todos];

    const idx = newTodos.findIndex((todo) => todo.id == id);

    newTodos[idx].isEdit = !newTodos[idx].isEdit;

    setTodos(newTodos);
  };
  const editTodo = (id) => {
    // 1. id값 받아서 해당 배열의 요소를 찾는다. idx 찾기
    // 2. todos[idx].text값을 editText로 할당

    const newTodos = [...todos];
    const idx = newTodos.findIndex((todo) => todo.id == id);
    newTodos[idx].text = eidtText;
    newTodos[idx].isEdit = false;
    setTodos(newTodos);
};{todo.isEdit ? (
<TextInput
onSubmitEditing={() => {
editTodo(todo.id);
}}
onChangeText={setEditText}
value={eidtText}
style={{ backgroundColor: "white", flex: 1 }}
/>)
:
(<Text style={{textDecorationLine: todo.isDone? "line-through": "none",}}>
{todo.text}
</Text>
)}