목적
해당 글의 목적은 React, Vue, Angular등 SPA를 프론트앤드로 사용할 때 Java, PHP, Golang 등 웹서버를 만들 수 있는 프로그래밍 언어에서 서버 사이드 랜더링을 구현할 때 쉽게 참고할 수 있도록 하는 것입니다.
물론 재미로 봐도 좋습니다 :)
해당 예제를 실행해 보고 싶으면 여기를 참고해 주세요!
사용하는 기술
프론트앤드
- Javascript
- React
- Parcel (쉬운 빌드를 위해)
다음 강의에서 React Router와 React Imported Component를 이용한 라우팅, code splitting까지 구현해 볼 예정입니다.
백앤드
만들게 된 계기
Server Side Rendering(줄여서 SSR)은 주로 Next.js(Nuxt.js)와 같은 SSR을 위해 만들어진 프레임워크나 Node.js에서 동작하는 Express를 사용합니다.
하지만 얼마 전에, 팀 프로젝트로 Laravel Mix와 Laravel SSR를 이용하여 php와 Vue를 사용하여 개발한 적이 있었습니다. 이때 'C언어를 백앤드로 사용했을 때 SSR이 될까?' 라는 의문점이 생겼었고. 그래서 학교 과제를 백앤드를 C로, 프론트를 React로 결정하여 시작하게 되었습니다.
구글링을 아무리 해도 C언어와 React를 이용한 예제는 찾아보기 힘들었고, 결국 하나씩 공부해나가며 구현하였습니다.
어느정도 구현이 된 뒤에 알게된 점과 어려웠던 점들을 정리하기 위해 글을 쓰게 되었습니다.
먼저 Laravel SSR 라이브러리를 사용할 때 알게된 구조에 대해 설명하겠습니다.
Laravel SSR의 구조
Laravel SSR 라이브러리의 구조를 단순하게 설명하자면
-
클라이언트에서 요청이 들어옴
-
프로세스에서 다음 커맨드 실행
node app.server.[hash].js위 파일은 Laravel Mix의 webpack으로 빌드된 결과입니다.
원본 파일 내용은 여기에서 참고 -
결과를 받으면 html 파일의
<div id="app"></div>사이에 집어넣음
이렇게 SSR을 실행하거나 V8엔진을 사용하는 방법을 사용합니다.
프로세스에서 node를 실행할 시 클라이언트에서 요청이 올 때 마다 코드를 해석하고 실행하기 때문에 시간이 걸리게 됩니다. 그래서 C언어에서는 코드를 미리 읽기 위해 전용 Javascript 해석기(duktape)를 사용하여 SSR을 구현하겠습니다.
전체 폴더 구조
├── CMakeLists.txt
├── backend
│   ├── ssr.h
│   └── main.c
├── web
│   ├── app.jsx
│   ├── client.jsx
│   ├── index.html
│   ├── server.jsx
│   └── ...additional File
├── package.json
└── yarn.lock (또는 package-lock.json)
React프로젝트 준비
쉽게 빌드하기 위해서 Parcel를 사용할 것입니다.
-
프로젝트 초기화
mkdir c-react-ssr && cd c-react-ssr npm init -y npm install --save-dev parcel-bundler # 또는 npm install -g parcel-bundler npm install --save react react-dom -
파일 생성
web/index.html # Parcel entry 파일
web/app.jsx # 브라우저와 서버가 공통으로 실행할 자바스크립트
web/client.jsx # 브라우저에서 실행될 자바스크립트
web/server.jsx # 서버에서 실행될 자바스크립트
프론트앤드 코드 작성
1. index.html 작성
<!-- web/index.html -->
<!DOCTYPE html>
<html>
  <head>
    <title>C with SSR</title>
  </head>
  <body>
    <div id="root"></div>
    <!-- 원래 html에서 jsx는 못불러오지만 parcel에서 자동으로 빌드해 줍니다 -->
    <script src="./client.jsx"></script>
  </body>
</html>
2. app.jsx 작성
// web/app.jsx
import React from "react";

export default class App extends React.Component {
  render() {
    return <div>hello world!</div>
  }
}
3. client.jsx 작성
// web/client.jsx
import React from "react";
import ReactDOM from "react-dom";
import App from "./app";

ReactDOM.hydrate(<App />, document.getElementById("root"));ReactDOM.hydrate는 server side에서 렌더링된 컴포넌트에 이벤트를 추가시킵니다.
또한 div가 미리 랜더링 되어있지 않거나 client에서 실행된 tree와 다르면 경고를 발생시킵니다.
SSR 코드 작성
먼저, 렌더링이 잘 되는지 테스트하기위해 console.log로 출력해봅니다.
1. server.jsx 작성
// web/server.jsx
import React from "react";
import ReactDOMServer from "react-dom/server";
import App from "./app";

console.log(ReactDOMServer.renderToString(<App />));
2. 빌드
parcel build --no-source-maps web/server.jsx # 소스 파일 경로3. 실행
node dist/server.js # 빌드된 파일 경로
# 출력: <div data-reactroot="">Hello World!</div>
잘 출력이 되는 것을 확인하였으니 server.jsx를 c언어에서 실행하기 위해 약간 수정합니다.
// src/server.jsx
import React from "react";
import ReactDOMServer from "react-dom/server";
import App from "./app";

global.make = () => {
  return `<div id="root">${ReactDOMServer.renderToString(<App />)}</div>`;
}global.make는 c언어에서 호출이 됩니다.
function make() 가 아니라 global.make를 사용하는 이유
parcel은 빌드가 될 때 자동으로
parcelRequire라는 스코프 내로 보내집니다.
그래서 외부에서 make는undefined가 되어 global변수에 등록을 하여서 사용해야 정상적으로 C언어에서 불려지게 됩니다.
C언어 코드 작성
C언어에서 duktape과 civetweb을 사용하기 위해 cmake와 vcpkg를 설치합니다.
cmake 설치는 생략하겠습니다. 참고
1. vcpkg 설치
git clone https://github.com/Microsoft/vcpkg.git
cd vcpkg
.\bootstrap-vcpkg.bat # 윈도우
./bootstrap-vcpkg.sh # Linux, Mac
2. 라이브러리 설치 (vcpkg 폴더)
./vcpkg install duktape civetweb3. vcpkg integrate install 실행 (vcpkg 폴더)
./vcpkg integrate install그러면 터미널에 아래와 같이 나올 것입니다.
Applied user-wide integration for this vcpkg root.
CMake projects should use: [문자열]
해당 문자열을 복사해 놓습니다. ("-DCMAKE.../vcpkg.cmake" 이런 형식입니다.)
4. packages.json scripts 작성 (프로젝트 폴더)
react빌드와 c언어 빌드 스크립트를 작성합니다.
// packages.json
...
"scripts": {
  "build": "npm run build:client && npm run build:server",
  "build:client": "parcel build ./web/index.html",
  "build:server": "parcel build --no-source-maps --no-minify ./web/server.jsx",
  "cmake": "cmake CmakeLists.txt -Bbuild [복사한 문자열]", // 여기에 복사한 문자열을 넣습니다.
  "cmake:build": "cmake --build build/",
  "start:server": "npm run cmake:build && ./build/c-react-ssr-example"
},
...
5. 코드 생성
CMake가 잘 작동하는지 확인해기 위해 기본적인 코드를 작성합니다.
// server/main.c
#include <stdio.h>
#include "duktape.h"
#include "civetweb.h"

int main(void) {
  printf("hello world!");
}
6. CMakeList 작성
CmakeList에 사용하는 라이브러리를 명시해줘야 합니다.
# CMakeList.txt
cmake_minimum_required(VERSION 3.0.0)
project(c-react-ssr-example VERSION 0.1.0)

find_package(duktape CONFIG REQUIRED)

include_directories(${CMAKE_CURRENT_SOURCE_DIR} ${DUKTAPE_INCLUDE_DIRS})

find_package(civetweb CONFIG REQUIRED)

add_executable(c-react-ssr-example backend/main.c)
target_link_libraries(c-react-ssr-example ${DUKTAPE_LIBRARY} civetweb::civetweb )
set(CPACK_PROJECT_NAME ${PROJECT_NAME})
set(CPACK_PROJECT_VERSION ${PROJECT_VERSION})
include(CPack)
7. 빌드 및 실행.
npm run cmake && npm run cmake:build
./build/c-react-ssr-example
# 결과: hello world!
8. http서버 코드 작성
간단한 http 서버를 작성해봅시다.
// server/main.c
#define _CRT_SECURE_NO_WARNINGS
#include <stdio.h>
#include "duktape.h"
#include "civetweb.h"
#define PORT "3030"

int exitNow = 0;

static int mainHandler(struct mg_connection *conn, void *cbdata)
{
  // HTTP Header를 보냅니다.
  mg_printf(conn, "HTTP/1.1 200 OK\r\nContent-Type: text/html\r\n\r\n");
  // 테스트용 html를 보냅니다.
  mg_printf(conn, "<html><head></head><body>body</body></html>");
  return 1;
}

int main(int argc, char **argv)
{
  const char *options[] = {
    // document root 설정 express의 static설정과 같습니다.
    // 브라우저에서 <script src="clicnt.**.js"></script>를 요청할 때 호출할 폴더입니다.
    "document_root",
    "dist",
    // 웹 서버를 열 포트
    "listening_ports",
    PORT,
    // timeout 시간
    "request_timeout_ms",
    "10000"
      // 설정에 마지막엔 0을 붙여줍니다.
      0};
  struct mg_callbacks callbacks;
  struct mg_context *mg;
  memset(&callbacks, 0, sizeof(callbacks));
  mg = mg_start(&callbacks, 0, options);
  // 메인 url에 접근했을 때만 보내지게 합니다 ($는 exact 입니다.)
  mg_set_request_handler(mg, "/$", mainHandler, 0);
  printf("Server Start in port %s\n", PORT);

  while (!exitNow)
  {
    sleep(1);
  }

  mg_stop(mg);

  return 0;
}
9. 웹서버 실행.
npm run start:serverPostman 으로 localhost:3030에 접속하고 아래와 같이 html이 나온다면 성공입니다.
<html>
  <head></head>
  <body>body</body>
</html>
Duktape (javascript 해석기) 사용
이제 웹에서 빌드된 server.js를 c언어에서 불러와 해석할 것입니다.
단계
- main함수에서 js코드 로딩
- 요청이 올 때,
global.make()함수 호출 - 리턴값을 받아 서버에 전송
그럼 코드를 작성해 봅시다.
아래 코드들 중에 정의되지 않은 함수는 ssr.h에 정의되어 있습니다. 코드를 줄이기 위해 생략하겠습니다.
// server/main.c
// html은 글로벌로 선언합니다.
char *html = 0;

int main(int argc, char **argv)
{
  const char *options[] = {
      "document_root",
      "dist",
      "listening_ports",
      PORT,
      "request_timeout_ms",
      "10000",
      0};
  duk_context *ctx;
  struct mg_callbacks callbacks;
  struct mg_context *mg;

  // html을 불러옵니다. read_file 정의는 ssr.h에 정의되어 있습니다.
  html = read_file("dist/index.html");

  // duktape을 생성합니다. 1) my_fatal은 아래를 참고해 주세요
  ctx = duk_create_heap(NULL, NULL, NULL, NULL, my_fatal);
  if (!ctx)
  {
    exit(1);
  }
  // server.js 파일을 불러옵니다. duk_push_file도 ssr.h에 정의되어 있습니다.
  duk_push_file(ctx, "dist/server.js");
  duk_eval(ctx);
  printf("js load success\n");
  memset(&callbacks, 0, sizeof(callbacks));
  mg = mg_start(&callbacks, 0, options);
  // 4번째 인자값으로 duktape context를 넘깁니다. 2) mainHandler는 아래를 참고해 주세요
  mg_set_request_handler(mg, "/$", mainHandler, ctx);
  printf("Server Start in port %s\n", PORT);

  while (1)
  {
    sleep(1);
  }

  mg_stop(mg);

  return 0;
}
1) my_fatal
duktape은 parser중 에러가 발생했을 때 그냥 프로그램이 종료됩니다. 그래서 에러가 나타날 때 에러를 볼 수 있게 함수를 추가해줘야 합니다.
// server/main.c
static void my_fatal(void *udata, const char *msg)
{
  fprintf(stderr, "*** FATAL ERROR: %s\n", (msg ? msg : "no message"));
  fflush(stderr);
  exit(1);
}
2) mainHandler
클라이언트에셔 요청이 왔을 때 ReactDOMServer.renderToString를 실행하여 렌더링합니다.
// server/main.c
// 2번째 인자값 ctx은 duktape context로 넘어옵니다
static int mainHandler(struct mg_connection *conn, void *ctx)
{
  // request 정보를 얻습니다. express의 (req) 와 비슷한 역할입니다.
  const struct mg_request_info *info = mg_get_request_info(conn);

  // 실행할 함수의 이름을 make로 설정합니다.
  duk_get_global_string(ctx, "make");

  // 나중에 사용할 react-router를 위해 request_url을 인자값으로 넘깁니다.
  duk_push_string(ctx, info->request_uri);

  // 함수를 호출합니다. 1은 인자값의 개수입니다.
  duk_call(ctx, 1);

  // 함수 return 값을 받습니다.
  const char *build = duk_get_string(ctx, -1);

  // replaceString은 ssr.h에 정의되어 있습니다.
  char *page = replaceString(html, "<div id=\"root\"></div>", build);

  mg_printf(conn, "HTTP/1.1 200 OK\r\nContent-Type: text/html\r\n\r\n");
  mg_printf(conn, page);
  free(page);
  return 1;
}
SSR 서버 실행
npm run start:server를 실행해서 c언어 서버를 실행한 뒤 localhost:3030에 접속해 봅니다.
Postman 결과
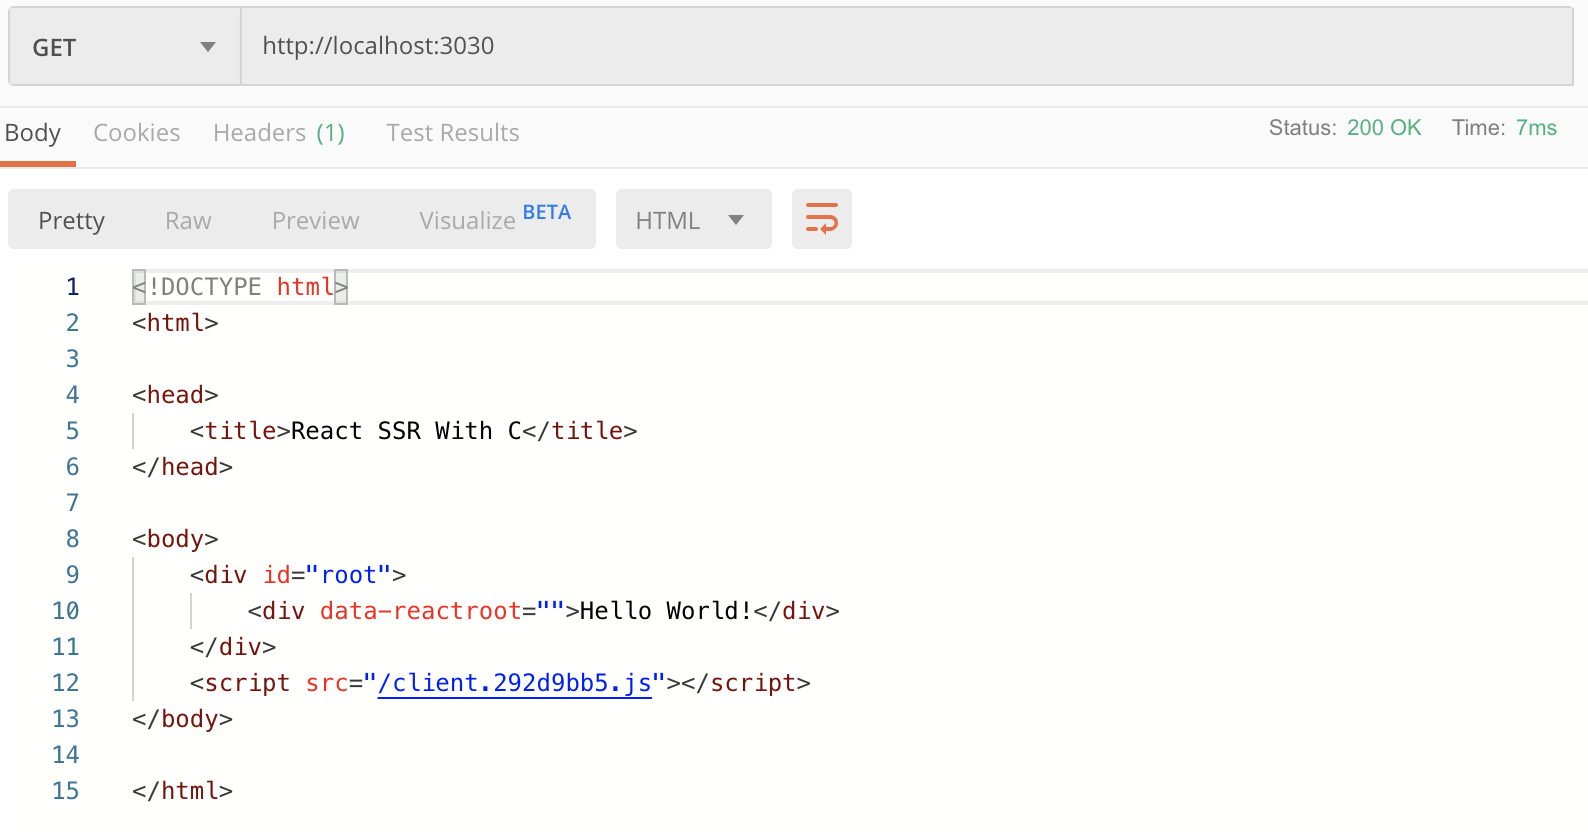
성공!
app.jsx 에 componentDidMount를 추가해 봅시다.
// web/app.jsx
import React from 'react';

export default class App extends React.Component {
  componentDidMount() {
    console.log("mounted!");
  }
  render() {
    return (
      <div>Hello World!</div>
    )
  }
}
웹을 빌드한 뒤 서버를 실행해 봅니다.
npm run build && npm run strat:server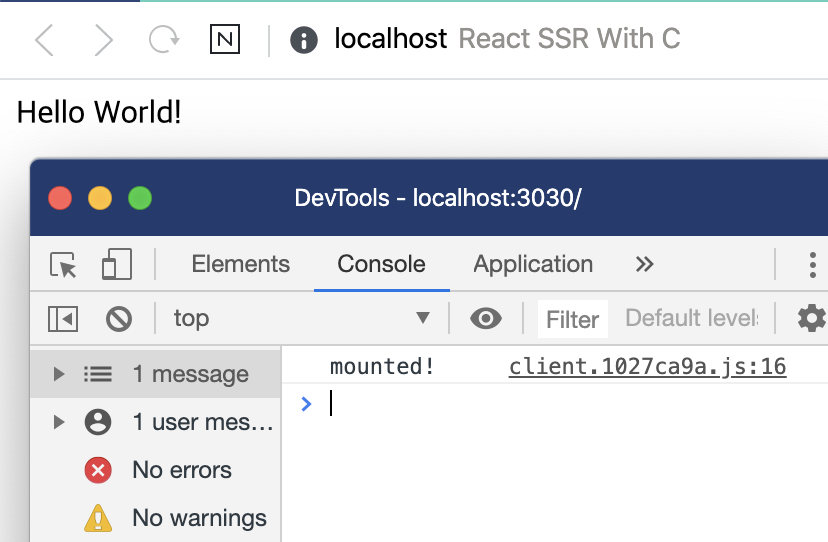
후기
처음에는 호기심 반 재미 반으로 시작해 본 프로젝트지만 막혀서 헤매던 중 하나씩 정복하여 끝까지 완성하니 기분은 좋았습니다.
대부분의 시간은 civetweb이랑 duktape 사용법을 공부하는데 소모한 것 같았지만 소모한 시간에 비례해 속도도 빠르게 나와서 (2~10ms) 만족스러웠습니다.
물론 프로덕션 환경에서는 많은 리소스가 필요하여 사용은 힘들지만 호기심을 풀었다는 것에 의의를 두고 싶습니다.
다음 강의에는 react-router와 react-imported-component(code splitting)을 사용할 때 생기는 문제점들을 해결해 나가면서 구현하겠습니다.