How to Configure Tenda Router as Access Point Using Web Interface?
An efficient way to increase Wi-Fi coverage or enhance network performance is to set up your Tenda router as access point. With this configuration, the router may function as a secondary device, spreading the internet connection from your primary network across a larger region without generating a different network name or causing interference. Here's a detailed tutorial to assist you finish configuring your Tenda router using the web interface.
1. Establish a Router Connection
First, use an Ethernet wire to connect your laptop or PC to the Tenda router. Although a connected connection offers more reliability during setup, you can still connect wirelessly if necessary.
2. Go to the Web Interface
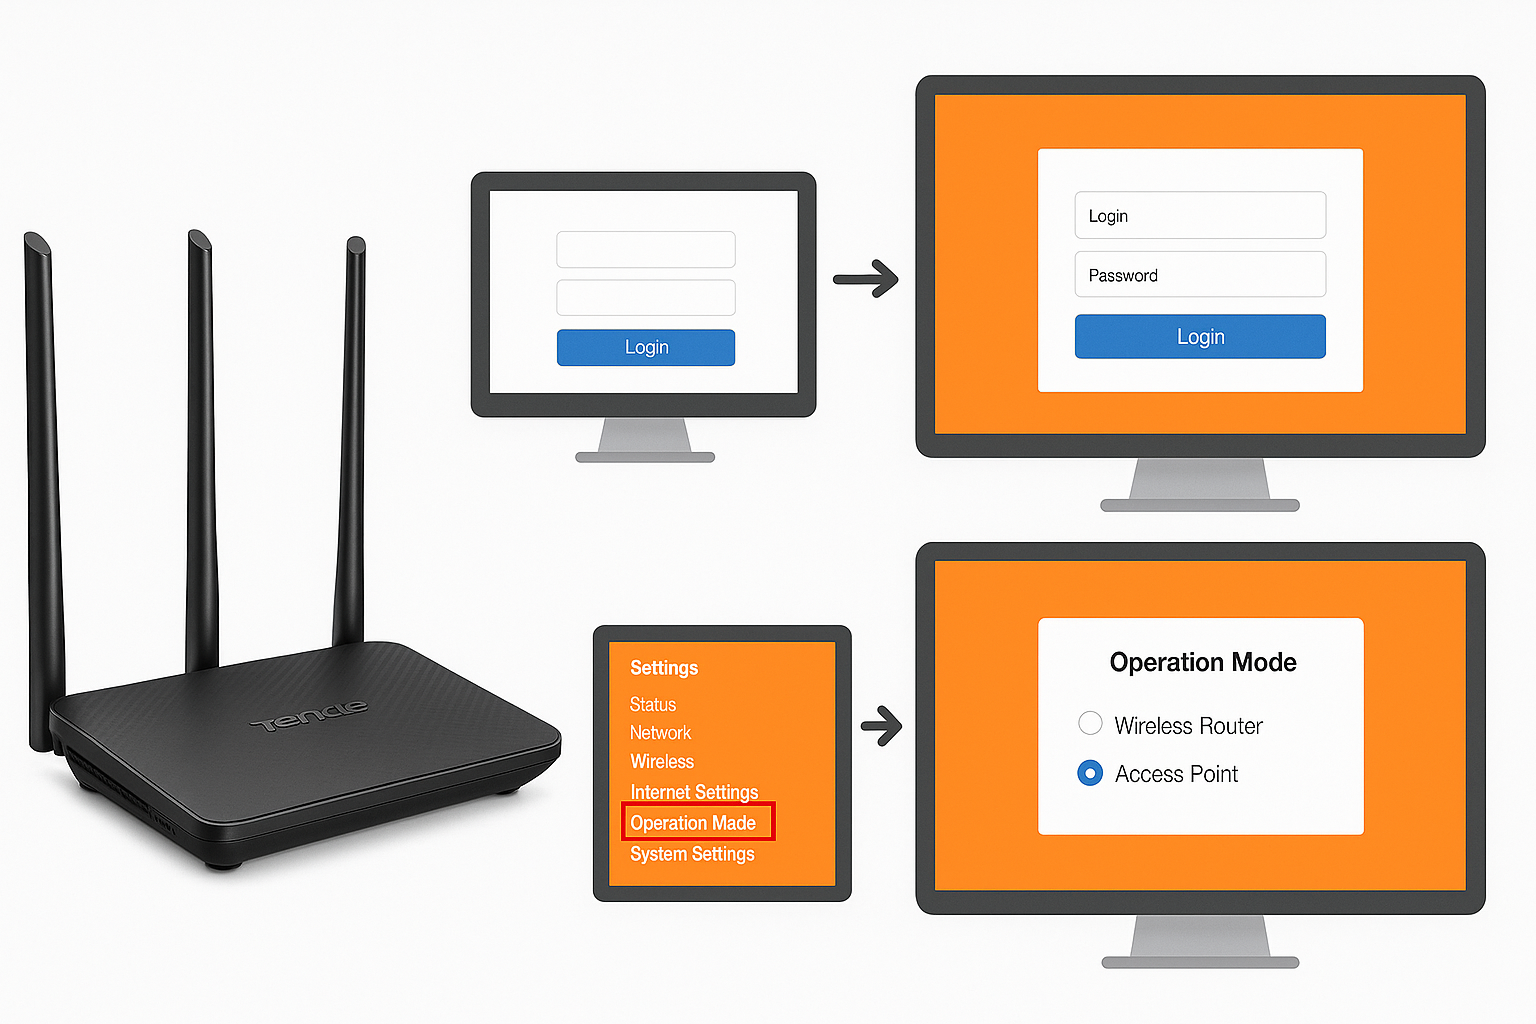
Enter tendawifi.com or 192.168.0.1 in the address bar of any web browser and hit Enter. This will direct you to the login page for the Tenda router. To access the dashboard, enter your admin password.
3. Modify the Mode of Operation
Go to Advanced Settings > Internet Settings > WAN Mode or Operation Mode after logging in; the menu name may change based on the router type. Choose AP Mode (Access Point Mode). By doing this, your Tenda router will be set up as an access point rather than a conventional router.
4. Set Up IP Configuration
Your Tenda router should have a static IP address that is outside of its DHCP range but within the same subnet as your primary router.
For instance, you may set the Tenda router's IP address to 192.168.0.2 if your primary router's is 192.168.0.1.
5. Attach to the primary router
Connect your Tenda router's LAN port to a LAN port on your primary router using an Ethernet wire. Do not use the WAN port. This guarantees that every device remains connected to the same network.
6. Reboot and save
To implement the changes, click Save and let the router reset. Your Tenda router setup is finished when it resumes. Your house or workplace may now have seamless Wi-Fi coverage. Visit our website to know more.