개요
이전 시리즈에서 Supabase에서 간략하게 알아봤으니 이제 직접적으로 사용을 해보자.
환경설정
Remix에서 Supabase를 사용하기 전에 환경설정을 해줘야 한다.
Supabase 로그인
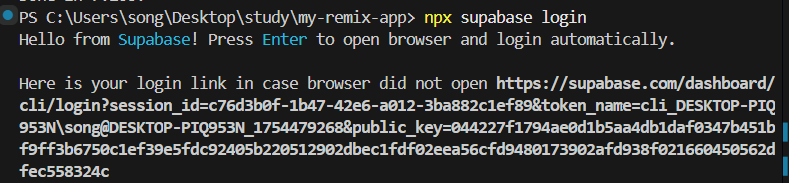
supabase를 사용할 프로젝트 폴더로 이동해 터미널을 열고 아래 명령어를 입력한다.
npx supabase login그러면 사진과같이 터미널이 표시가 되는데 자동으로 브라우저가 열린다
-
터미널
-
브라우저

터미널에 브라우저에 표시된 유효 코드를 입력한다.

로그인 성공했다. 이전에는 토큰을 생성해서 토큰을 입력하고 하는 구시대적인 방식으로 로그인을 진행했었지만 바뀌었다.
supabase-js 설치
Supabase의 여러 솔루션들을 js로 쉽게 사용할 수 있도록 도와주는 라이브러리를 설치한다.
yarn add @supabase/supabase-js데이터 타입 생성
Supabase의 데이터 타입을 직접 만들지 않고 CLI를 입력해 쉽게 데이터 타입을 만드는 방법이 있다.
먼저 프로젝트의 app/models 폴더를 만들고 웹 supabase 콘솔에 로그인하여 Settings - General 메뉴로 이동해 Project ID를 복사한다.
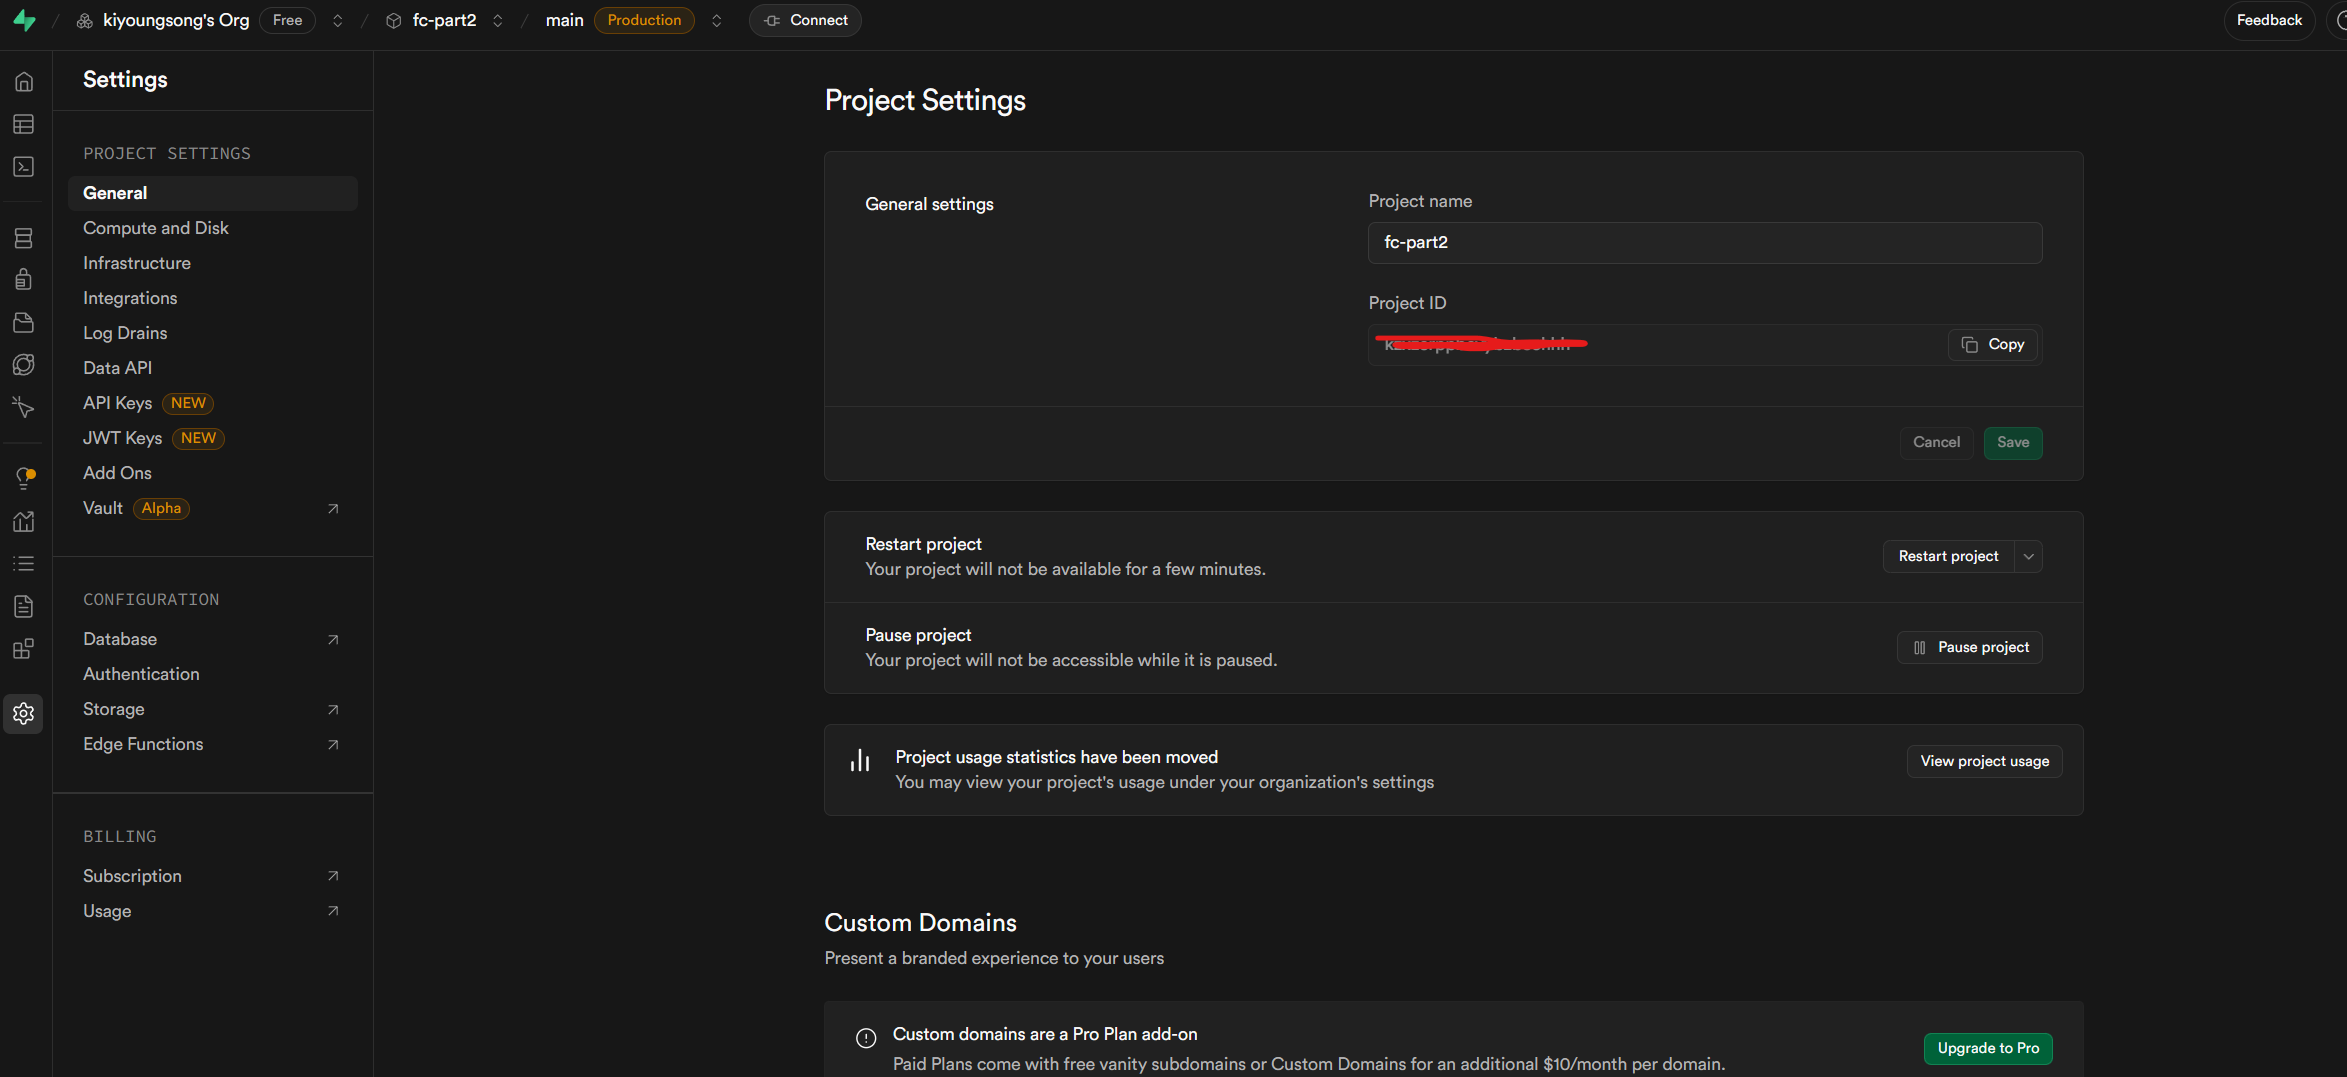
그리고 프로젝트에서 터미널을 열어 복사한 Proejct ID를 아래 명령어의 {project-id}에 입력한다.
npx supabase gen types typescript --project-id {project-id} > app/models/database.types.ts그러면 database.types.ts 이름의 파일이 생성된다.
// app/models/database.types.ts
export type Json =
  | string
  | number
  | boolean
  | null
  | { [key: string]: Json | undefined }
  | Json[]

export type Database = {
  // Allows to automatically instanciate createClient with right options
  // instead of createClient<Database, { PostgrestVersion: 'XX' }>(URL, KEY)
  __InternalSupabase: {
    PostgrestVersion: "13.0.4"
  }
  public: {
    Tables: {
      board: {
        Row: {
          created_at: string
          id: number
          name: string | null
        }
        Insert: {
          created_at?: string
          id?: number
          name?: string | null
        }
        Update: {
          created_at?: string
          id?: number
          name?: string | null
        }
        Relationships: []
      }
      post: {
        Row: {
          board_id: number
          content: string | null
          created_at: string
          id: number
          title: string | null
        }
        Insert: {
          board_id: number
          content?: string | null
          created_at?: string
          id?: number
          title?: string | null
        }
        Update: {
          board_id?: number
          content?: string | null
          created_at?: string
          id?: number
          title?: string | null
        }
        Relationships: [
          {
            foreignKeyName: "post_board_id_fkey"
            columns: ["board_id"]
            isOneToOne: false
            referencedRelation: "board"
            referencedColumns: ["id"]
          },
        ]
      }
    }
    // 생략
  }
}

// 생략
환경변수
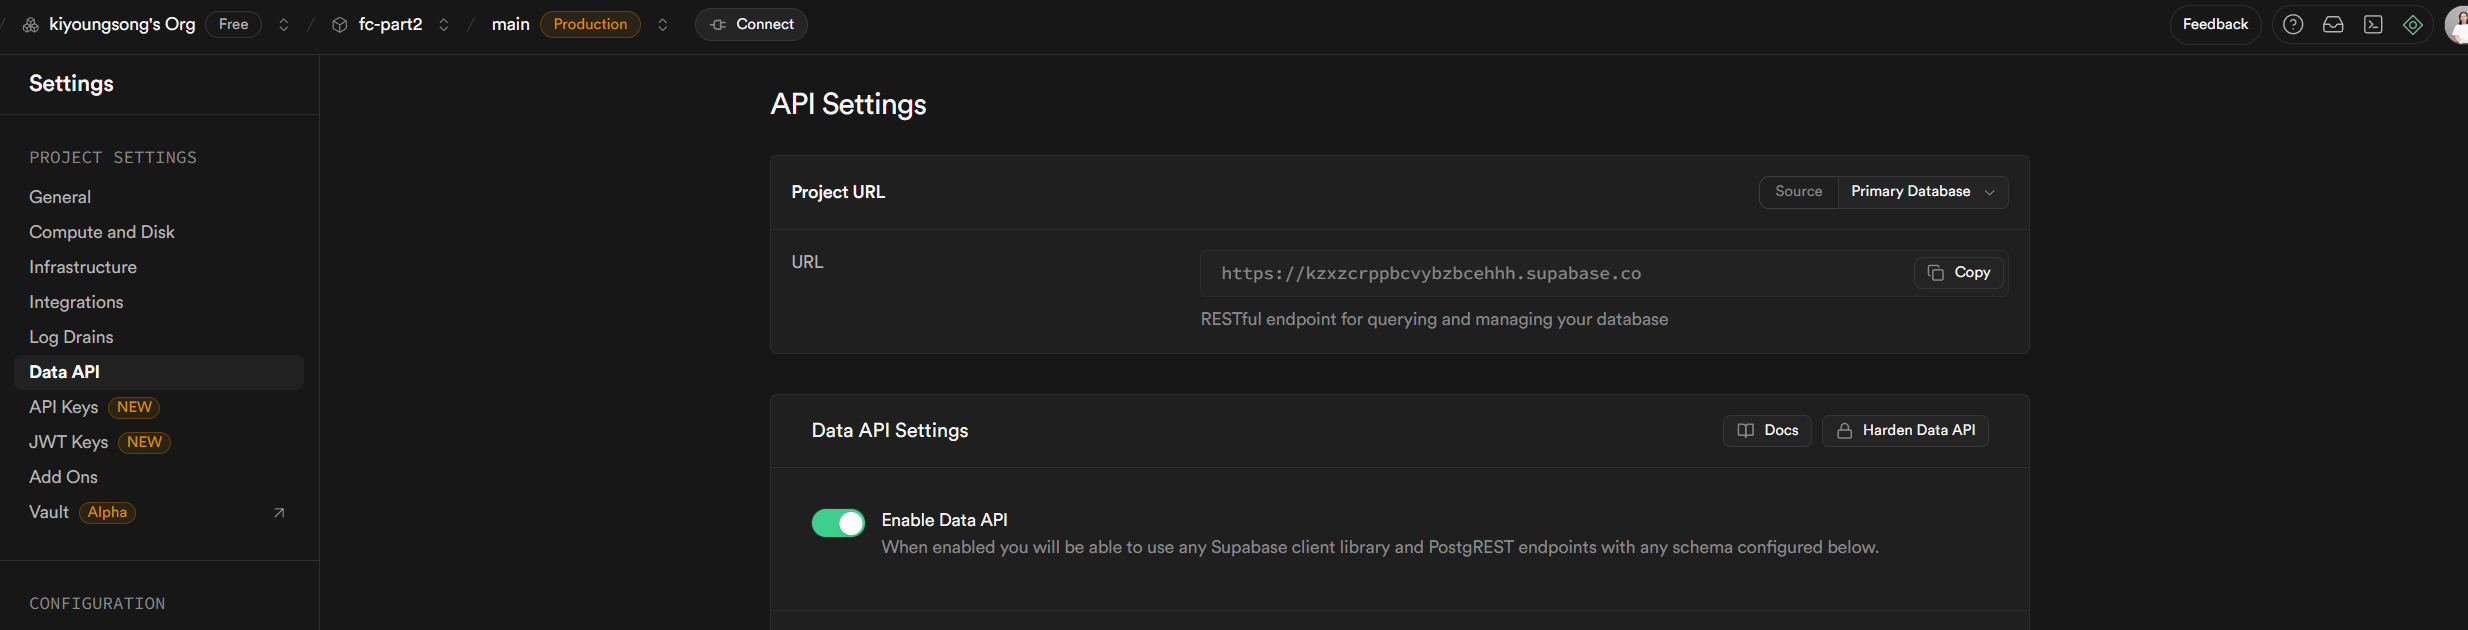
프로젝트 루트 폴더에 .env 파일을 생성 후 아래와 같이 내용을 넣어준다.
SUPABASE_URL=https://kzxzcrppbcvybzbcehhh.supabase.co
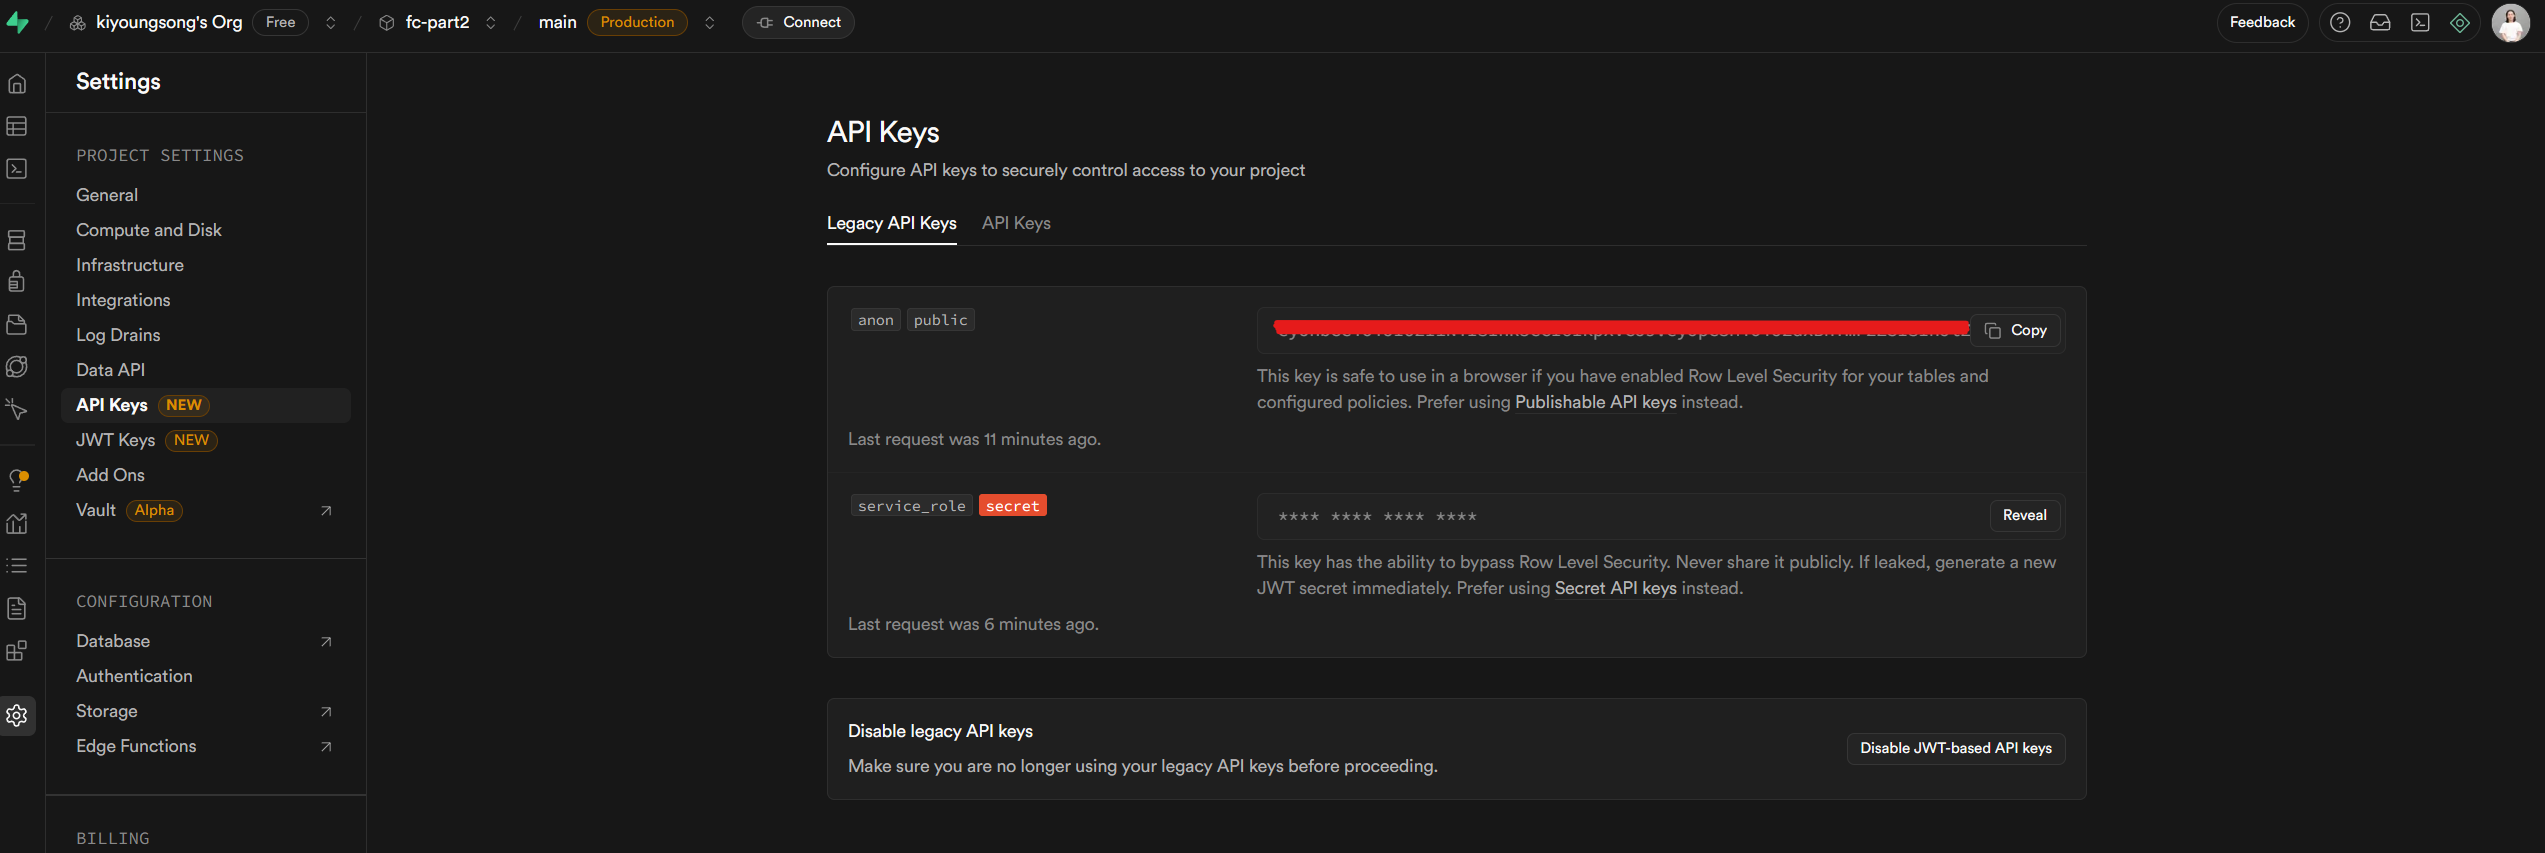
SUPBASE_ANON_KEY=eyJhbGciOiJIUzI1NiIsInR5cCI6IkpXVCJ9.env 파일의 URL과 ANON_KEY는 본인 프로젝트의 키를 넣어주면 된다. 웹 supabase 콘솔의 Settings - Data API와 API Keys 메뉴에서 Data API와 API Keys를 복사하여 넣는다.
- Data API
- API Keys
Client 설정
프로젝트에 app/models/supabase.ts 경로에 파일을 생성 후 아래와 같이 넣어준다
// app/models/supabase.ts

import { createClient } from "@supabase/supabase-js";
import { Database } from "./database.types";

export default createClient<Database>(
  process.env.SUPABASE_URL as string,
  process.env.SUPBASE_ANON_KEY as string
);
Service 파일 설정
supabse를 이용하기 위해서 service단위로 파일을 나눠준다. service는 CRUD를 위한 곳이라고 생각하면 된다.
Board
// app/models/board.service.ts

import supabase from "./supabase";

export type TBoard = {
  id: number;
  name: string | null;
};

// 모든 게시글 가져오기
export async function getBoards() {
  return await supabase.from("board").select(`id, name`);
}

// 하나의 게시글 가져오기
export async function getBoard(id: number) {
  return await supabase.from("board").select(`id, name`).eq("id", id);
}

// 게시글 생성
export async function createBoard(name: string) {
  return await supabase.from("board").insert({ name });
}

// 게시글 업데이트
export async function updateBoard(id: number, name: string) {
  return await supabase.from("board").update({ name }).eq("id", id);
}

// 게시글 삭제
export async function deleteBoard(id: number) {
  return await supabase.from("board").delete().eq("id", id);
}
Post
// app/models/post.service.ts

import supabase from "./supabase";

export type TPostTitleOnly = {
  id: number;
  title: string | null;
};

export type TPost = {
  id: number;
  title: string | null;
  content: string | null;
  board_id: number;
};

// 특정 게시글의 Post의 타이틀 가져오기
export async function getPostsTitleByBoardId(board_id: number) {
  return await supabase
    .from("post")
    .select(`id, title`)
    .eq("board_id", board_id);
}

// 특정 게시글의 post들 가져오기
export async function getPostsByBoardId(board_id: number) {
  return await supabase
    .from("post")
    .select(`id, title, content, board_id`)
    .eq("board_id", board_id);
}

// 하나의 post 가져오기
export async function getPost(id: number) {
  return await supabase
    .from("post")
    .select(`id, title, content, board_id`)
    .eq("id", id)
    .limit(1)
    .single();
}

// post 생성
export async function createPost(
  title: string,
  content: string,
  board_id: number
) {
  return await supabase.from("post").insert({ title, content, board_id });
}

// post 업데이트
export async function updatePost(
  id: number,
  title: string,
  content: string,
  board_id: number
) {
  return await supabase
    .from("post")
    .update({ title, content, board_id })
    .eq("id", id);
}

// post 삭제
export async function deletePost(id: number) {
  return await supabase.from("post").delete().eq("id", id);
}
여기까지 실제로 데이터를 호출하기 전에 필요한 과정이 끝났다. 실습을 진행해보면서 데이터를 호출해보자.
실습
서버에서 데이터 가져오기
실제로 loader 함수를 이용해서 게시글 데이터를 가져와보자
export const loader: LoaderFunction = async ({ request, params }) => {
  const result = await getBoards();
  console.log(result);
  return {
    result,
  };
};- 결과
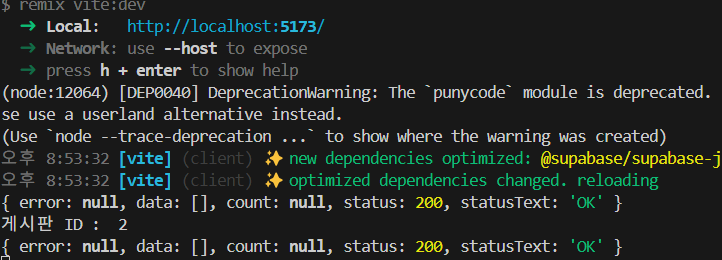
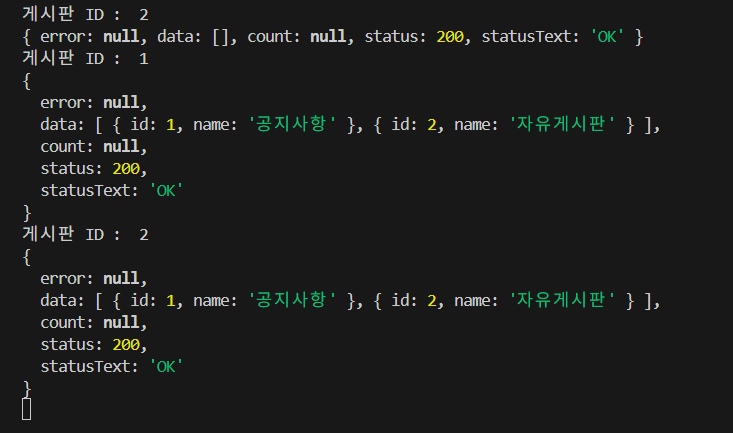
결과를 확인해보면 실제로 데이터가 존재하는데 빈배열로 오는데 이는 웹 supabase 콘솔에서 테이블들의 RLS를 Disable 처리해주어야 한다. 데이터가 중요한 실제 배포에서는 이렇게 하면 안된다. 추후 실제 배포시에 RLS를 적용하는 법에 대해서도 작성 예정이다.
- RLS Disabled

- RLS Disbaled 후 결과
RLS는 Row Level Security(행 수준 보안)의 줄임말입니다. PostgreSQL과 Supabase에서 사용하는 보안 기능으로, 테이블의 각 행(row)에 대해 누가 접근할 수 있는지를 세밀하게 제어할 수 있게 해줍니다.
자세한 내용은 공홈을 확인하자.
서버에 액션 보내기
제목과 글을 입력해서 데이터베이스에 등록을 하는 내용을 실습해보려고 한다.
- 컴포넌트
export default function Depth1() {
  const { id } = useParams();
  const loaderData = useLoaderData<ILoaderData>();
  const [posts, setPosts] = useState(loaderData.posts);
  const actionData = useActionData<ActionData>();
  const [message, setMessage] = useState(actionData?.message);

  useEffect(() => {
    setPosts(loaderData.posts);
  }, [loaderData.posts]);

  useEffect(() => {
    if (actionData) {
      setMessage(actionData.message);
    }
  }, [actionData]);

  return (
    <div style={{ border: "3px solid green" }}>
      <h1>게시판 ID : {id}</h1>
      {message && <div>{message}</div>}
      <Form method="post">
        <input type="text" name="title" placeholder="제목" />
        <br />
        <textarea name="content" />
        <br />
        <button type="submit">등록</button>
      </Form>
      <div className="space-x-5">
        {posts.map((post) => (
          <Link
            to={`/dynamic/${id}/${post.id}`}
            key={post.id}
            prefetch="intent"
          >
            {post.title}
          </Link>
        ))}
      </div>
      <Outlet />
    </div>
  );
}- action 함수
간략하게 설명하면Form태그 안에button을 누르게되면input,textarea의 값들을 가져와 service로 만들어 놓은 함수를 실행하는 함수이다.
export const action: ActionFunction = async ({
  request,
  params,
}): Promise<ActionData> => {
  const boardId = params.id ?? "NO ID";
  const body = await request.formData();
  const title = body.get("title");
  const content = body.get("content");

  console.log(title, content);

  if (title && content && boardId !== "NO ID") {
    const post = await createPost(
      title.toString(),
      content.toString(),
      parseInt(boardId)
    );
    console.log(post);
    return { message: "글이 등록되었습니다." };
  }

  return { message: "" };
};- 결과
결과를 보면 데이터가 자동으로 업데이트 되고있는데 action와 loader가 같이 있으면 action를 처리하고 자동으로 loader를 호출하여 동기화를 해준다고 한다.
하나의 액션 여러개 폼 사용
이번에는 수정과 삭제가 있는 두개의 폼이 하나의 액션을 사용할때 처리해주는 방법을 실습한다.
- 컴포넌트
아래 코드를 보면 삭제 Form과 수정 Form이 두개가 존재하는데 이 둘은 하나의 action 함수에서 처리된다. 어떤 Form에서 왔는지는button의 값에 따라서 action에서 구분한다.
여기에서 hidden의 input태그를 넣어준 이유는 수정, 삭제는 id값이 있어야 하기 때문에 넣어줬다고 생각하면 된다.
export default function Depth1() {
  const { id, code } = useParams();
  const loaderData = useLoaderData<ILoaderData>();
  const [post, setPost] = useState<TPost | null>(loaderData.post);
  const [mode, setMode] = useState<"view" | "edit">("view");

  useEffect(() => {
    setPost(loaderData.post);
  }, [loaderData.post]);

  return (
    <div style={{ border: "3px solid green" }}>
      <h1>게시판 ID : {id}</h1>
      <h1>게시글 ID : {code}</h1>
      <Form method="post">
        <button type="submit" name="action" value={InputType.DELETE_POST}>
          삭제
        </button>
        <input type="hidden" name="id" value={post?.id} />
      </Form>
      <button
        onClick={() => {
          if (mode === "view") {
            setMode("edit");
          } else {
            setMode("view");
          }
        }}
      >
        {mode === "view" ? "수정" : "취소"}
      </button>

      {mode === "edit" ? (
        <Form
          method="post"
          onSubmit={() => {
            setMode("view");
          }}
        >
          <input type="hidden" name="id" value={post?.id} />
          <input
            type="text"
            name="title"
            placeholder="제목"
            defaultValue={post?.title?.toString()}
          />
          <br />
          <textarea name="content" defaultValue={post?.content?.toString()} />
          <br />
          <button type="submit" name="action" value={InputType.UPDATE_POST}>
            저장
          </button>
        </Form>
      ) : (
        <>
          <h1>{post?.title}</h1>
          <h5>{post?.content}</h5>
        </>
      )}
    </div>
  );
}- action
이번 action에서는 qs모듈을 사용했는데 body.get()으로 가져오는 모듈을 아래처럼 간단하게 객체형태로 가져올 수 있게 된다.
await request.text() // id=21&title=ttt&content=ddd
qs.parse(await request.text()) // {id: '21', title:'ttt', content: 'ddd'}
간략하게 설명하면 qs의 parse함수를 이용해서 데이터를 가져와서 data.action 값에 따라 분기처리하여 처리하는 것을 확인할 수 있다.
export const action: ActionFunction = async ({
  request,
  params,
}): Promise<ActionData> => {
  const boardId = params.id ?? "NO ID";
  const data = qs.parse(await request.text()) as unknown as InputData;

  switch (data.action) {
    case InputType.UPDATE_POST: {
      if (data.id && data.title && data.content) {
        const post = await updatePost(
          data.id,
          data.title,
          data.content,
          parseInt(boardId)
        );
        console.log(post);
        return {
          message: "글이 수정되었습니다.",
        };
      }
      break;
    }
    case InputType.DELETE_POST: {
      if (data.id) {
        const post = await deletePost(data.id);
        console.log(post);
        return redirect(`/dynamic/${boardId}`);
      }
      break;
    }
  }

  return { message: "" };
};- 결과
에러처리
loader와 action에서 발생하는 에러는 ErrorBoundary와 useRouteError를 사용한다.
- 임의 에러 발생 코드
export const loader: LoaderFunction = async ({
  params,
}): Promise<ILoaderData> => {
  const boardId = params.id ?? "NO ID";
  const postId = params.code ?? "NO CODE";

  if (postId === "2") {
    throw new Response("postID ERROR", { status: 400 });
  }
  const post = await getPost(parseInt(postId));
  return {
    post: post.data || null,
  };
};- 에러처리
export function ErrorBoundary() {
  const error: any = useRouteError();
  console.log(error);

  return <div>{error.status === 400 && <h1>400 에러가 발생했습니다.</h1>}</div>;
}- 결과

이번 포스트에서는 코드가 너무 길어서 간략하게만 작성했는데 전체 코드는 아래 링크에서 확인하시기 바랍니다.