레이아웃 편집기에서 레이아웃 구성하기
- ConstraintLayout은 뷰를 상대 위치로 배치하는 RelativeLayout과 비슷하지만 더 다양한 속성을 제공한다. 그만큼 복잡하기 때문에 레이아웃 편집기에서 사용하는 것이 편리하다.

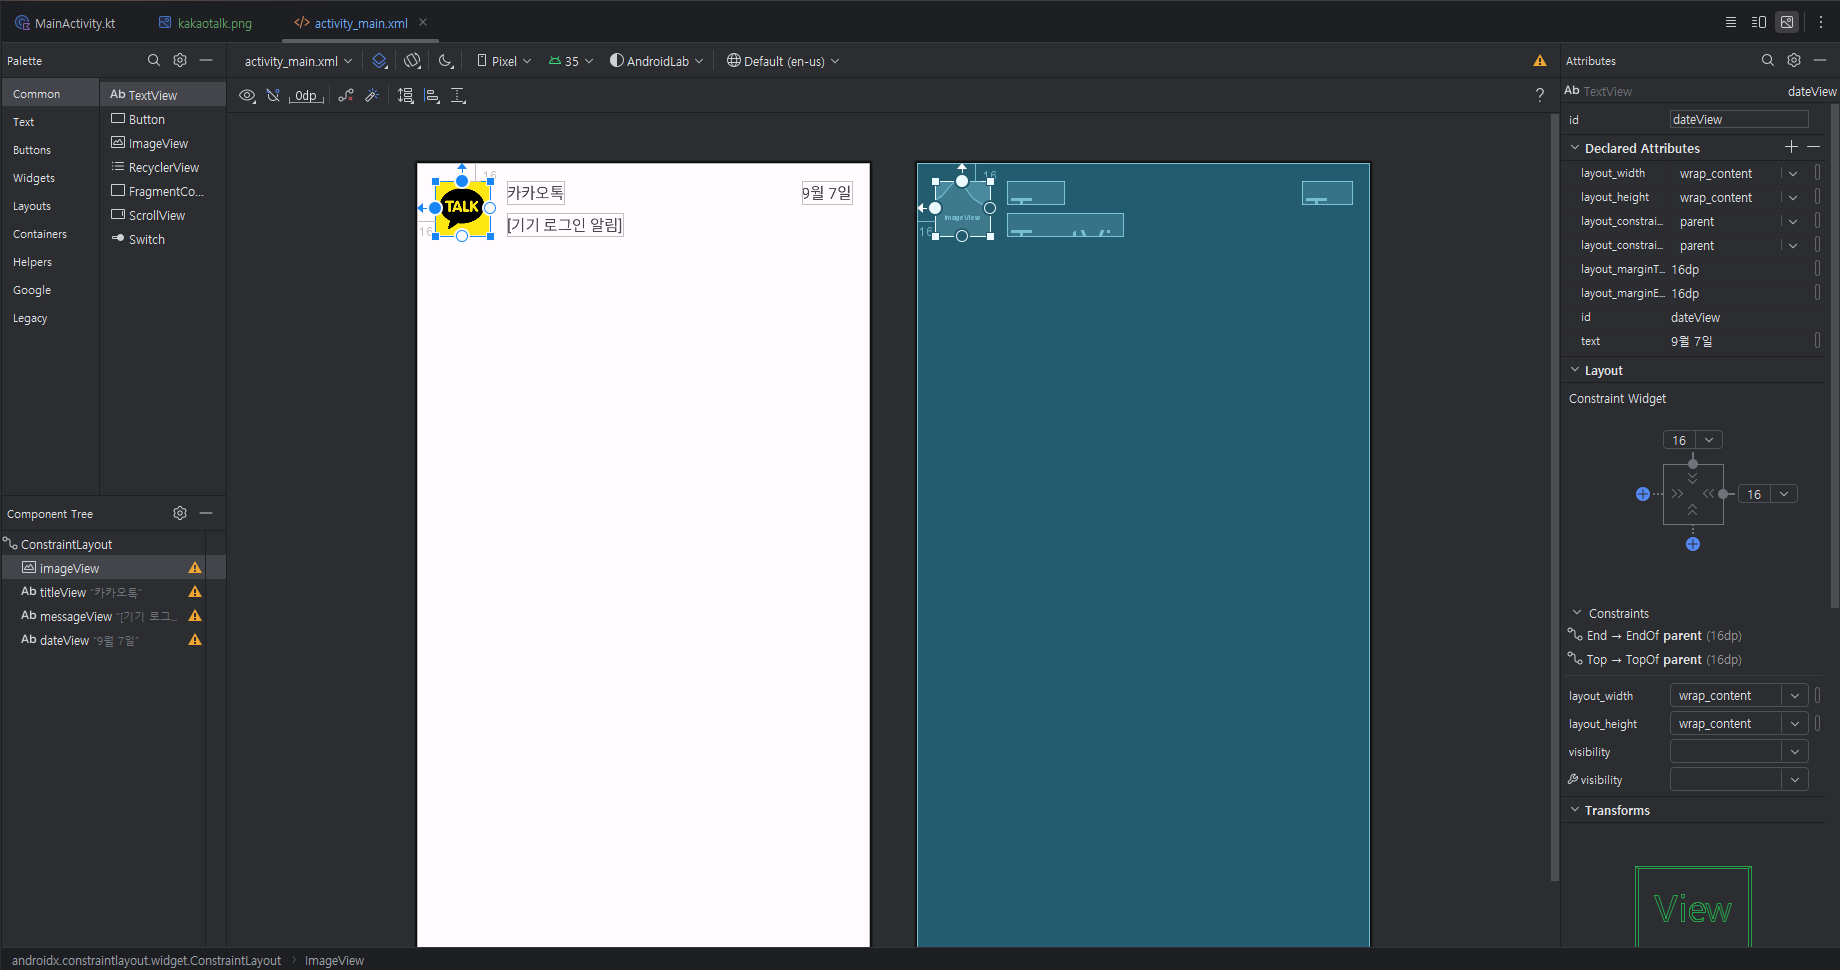
- 카카오톡 사진을 이미지뷰로 가져왔다. Constraint Widget을 사용하면 부모 창을 기준으로 한 margin을 추가할 수 있다.
- Declared Attributes에선 사진의 크기를 조정할 수 있다.
제목 추가

마우스로 텍스트 뷰의 왼쪽 동그라미 버튼을 끌어서 이미지 뷰에 놓으면 이미지 뷰의 어느쪽에 제약을 지정할 것인지 선택하는 메뉴가 나온다. 여기선 이미지 뷰 오른쪽(end)에 여백을 두고 텍스트 뷰를 지정하고 싶으므로 Start to imageView end를 선택하면 된다.

실제로 날짜 텍스트 뷰에는 아무런 제약조건을 설정하지 않고, layout_width,height를 설정하지 않고 wrap_content를 설정했기 때문에 화면에 완전히 붙어있다.
만약 마우스로 위치를 옮기거나 constraint widget에서 여백을 설정하면 당연히 바뀌긴 할 것이다.
XML
<?xml version="1.0" encoding="utf-8"?>
<androidx.constraintlayout.widget.ConstraintLayout xmlns:android="http://schemas.android.com/apk/res/android"
    xmlns:app="http://schemas.android.com/apk/res-auto"
    xmlns:tools="http://schemas.android.com/tools"
    android:layout_width="match_parent"
    android:layout_height="match_parent">

    <!-- 여기에 뷰 추가 -->

    <ImageView
        android:id="@+id/imageView"
        android:layout_width="50dp"
        android:layout_height="50dp"
        android:layout_marginStart="16dp"
        android:layout_marginTop="16dp"
        app:layout_constraintStart_toStartOf="parent"
        app:layout_constraintTop_toTopOf="parent"
        app:srcCompat="@drawable/kakaotalk" />

    <TextView
        android:id="@+id/titleView"
        android:layout_width="wrap_content"
        android:layout_height="wrap_content"
        android:layout_marginStart="16dp"
        android:layout_marginBottom="29dp"
        android:text="카카오톡"
        app:layout_constraintBottom_toBottomOf="@+id/imageView"
        app:layout_constraintStart_toEndOf="@+id/imageView" />

    <TextView
        android:id="@+id/messageView"
        android:layout_width="wrap_content"
        android:layout_height="wrap_content"
        android:layout_marginStart="16dp"
        android:text="[기기 로그인 알림]"
        app:layout_constraintBottom_toBottomOf="@+id/imageView"
        app:layout_constraintStart_toEndOf="@+id/imageView" />

    <TextView
        android:id="@+id/dateView"
        android:layout_width="wrap_content"
        android:layout_height="wrap_content"
        android:layout_marginTop="16dp"
        android:layout_marginEnd="16dp"
        android:text="9월 7일"
        app:layout_constraintEnd_toEndOf="parent"
        app:layout_constraintTop_toTopOf="parent" />
</androidx.constraintlayout.widget.ConstraintLayout>
GUI로 설정했는데 자동으로 코드가 완성되었다 hurray~
질문1: 동그라미 버튼(constraint 핸들)의 용도와 설정하지 않고 배치하는 경우의 차이?
용도:
- 이 동그라미 버튼(constraint 핸들)은 뷰 사이의 제약 조건(constraints)을 설정하는 데 사용된다.
- 이를 통해 뷰의 위치를 다른 뷰나 부모 레이아웃을 기준으로 정의할 수 있다.
- 이 제약 조건들은 다양한 화면 크기에서 레이아웃이 적절하게 조정되도록 돕는다.
설정하지 않고 배치하는 경우와의 차이:
- 제약 조건을 설정하지 않으면, 뷰는 레이아웃의 왼쪽 상단 모서리에 위치하게 된다.
- 제약 조건 없이는 뷰의 크기와 위치가 고정되어, 다양한 화면 크기에 대응하기 어렵다.
- 반면, 제약 조건을 설정하면 뷰의 위치와 크기가 상대적으로 정의되어 유연한 레이아웃을 만들 수 있다.
질문2: "Start to imageView start"와 "Start to imageView end"의 차이
1. "Start to imageView start":

- 현재 뷰의 시작점(왼쪽 가장자리)을 imageView의 시작점(왼쪽 가장자리)에 맞춘다.
- 두 뷰가 나란히 정렬되며, 현재 뷰가 imageView의 왼쪽에 위치하게 된다.
- 카톡 이미지의 왼쪽 여백은 16dp다.
2. "Start to imageView end":

- 현재 뷰의 시작점(왼쪽 가장자리)을 imageView의 끝점(오른쪽 가장자리)에 맞춘다.
- 현재 뷰가 imageView의 오른쪽에 바로 붙어서 위치하게 된다.
- 카톡 이미지의 왼쪽 여백은 16dp다.
예시:
[ImageView] [CurrentView]  // Start to imageView end
[ImageView CurrentView]    // Start to imageView start
질문3: Start to imageView start/end를 설정하면 무조건 Start to imageView top / bottom을 선택해야 하는가?
start to imageView end로만 설정했더니 "Missing Constraints in ConstraintLayout"에러가 발생했다.
ConstraintLayout에서 뷰를 올바르게 배치하려면 수평(horizontal)과 수직(vertical) 방향 모두에 대해 제약 조건을 설정해야 한다.
- Start to imageView start/end만 설정하는 것은 충분하지 않다.
- 수직 방향의 제약 조건도 반드시 필요하다.
"Missing Constraints in ConstraintLayout" 오류가 발생한 이유:
- 수평 방향으로만 제약 조건을 설정하고 수직 방향의 제약 조건이 없어서 발생했다.
- "Not vertically Constrained" 오류 메시지가 이를 명확히 나타내고 있다.
일반적으로 뷰의 완전한 배치를 위해서는 다음과 같은 제약 조건 조합이 필요하다.
- 수평 방향: start/end 또는 left/right 중 하나
- 수직 방향: top/bottom
정리
-
ConstraintLayout 개요
- 뷰 간의 상대적 위치를 지정하는 레이아웃으로, 다양한 제약 조건을 설정하여 유연한 배치를 가능하게 함.
- GUI 편집기를 사용해 직관적으로 배치 가능.
-
Constraint 핸들(동그라미 버튼)의 용도
- 뷰 간의 제약 조건을 설정하는 데 사용.
- 제약 조건이 없으면 뷰는 화면의 왼쪽 상단에 위치.
- 제약 조건 설정 시 다양한 화면 크기에 유연하게 대응 가능.
-
Start to imageView start와 end의 차이
- Start to imageView start: 현재 뷰의 왼쪽을 imageView의 왼쪽에 맞춤.
- Start to imageView end: 현재 뷰의 왼쪽을 imageView의 오른쪽에 맞춤.
-
제약 조건 설정 시 가로와 세로 모두 설정 필요
- 수평(start/end) 또는 수직(top/bottom) 방향 중 하나만 설정하면 오류 발생.
- 뷰의 올바른 배치를 위해 가로와 세로 제약 조건 모두 설정해야 함.

화려한 외면이 아닌 단단한 내면