Swagger은 작성하기 어렵고 심지어 테스트까지 통과해야 문서가 만들어지는 Spring REST Docs와는 다르게 빠르고 쉬우면서 색깔까지 알록달록한 문서를 만들 수 있게 도와준다.
설명하기 전에 Swagger가 무엇인지 아는가?
개발자가 REST 웹 서비스를 설계, 빌드, 문서화, 소비하는 일을 도와주는 대형 도구 생태계의 지원을 받는 오픈 소스 소프트웨어 프레임워크 - 위키백과
위키백과 항상 감사하다.
왜 사용할까?
Swagger를 사용하는 이유는 다음과 같다.
- 적용하기 쉽다.
- 위에서도 말했지만 테스트 코드를 작성하고 테스트를 성공시켜야 만들어지는
Spring REST Docs와 달리Swagger는 코드 몇 줄만 추가하면 만들 수 있다.
- 위에서도 말했지만 테스트 코드를 작성하고 테스트를 성공시켜야 만들어지는
- 테스트할 수 있는 UI를 제공한다.
Spring REST Docs는 테스트를 돌리면서 성공하는 지 실패하는 지 확인했지만 Swagger는 문서 화면에서 API를 바로바로 테스트할 수 있다.
어떻게 사용할까?
사용하는 방법도 간단하다. 일단 build.gradle에 2줄을 추가해준다.
implementation 'io.springfox:springfox-swagger2:2.9.2'
implementation 'io.springfox:springfox-swagger-ui:2.9.2'
왜 3.0.0이 최신버전(2020.08기준)인데 2.9.2를 사용하는가? 3.0.0과 2.9.2의 설정하는 방법이 달라서 3.0.0은 2.9.2 설명이 끝난 후에 설명하겠다.
그리고 Swagger를 사용하기 위해 다음과 같이 Controller와 Entity를 작성했다.
@RequestMapping("/posts")
@RestController
public class PostController {

    private final PostService postService;

    public PostController(final PostService postService) {
        this.postService = postService;
    }

    @PostMapping
    public ResponseEntity<PostResponse> create(@RequestBody final PostRequest postRequest) {
        final PostResponse postResponse = postService.create(postRequest);
        return ResponseEntity.created(URI.create("/posts/" + postResponse.getId())).build();
    }

    @GetMapping
    public ResponseEntity<List<PostResponse>> findAll() {
        return ResponseEntity.ok(postService.findAll());
    }

    @GetMapping("/{postId}")
    public ResponseEntity<PostResponse> findById(@PathVariable final Long postId) {
        return ResponseEntity.ok(postService.findById(postId));
    }

    @PutMapping("/{postId}")
    public ResponseEntity<Void> update(@PathVariable final Long postId, @RequestBody PostRequest postRequest) {
        postService.update(postId, postRequest);
        return ResponseEntity.ok().build();
    }

    @DeleteMapping("/{postId}")
    public ResponseEntity<Void> delete(@PathVariable final Long postId) {
        postService.delete(postId);
        return ResponseEntity.noContent().build();
    }
}
@Entity
public class Post {
@Id
@GeneratedValue(strategy = GenerationType.IDENTITY)
private Long id;
@Column(nullable = false)
private String title;
@Column
private String content;
// ...
}이제 Swagger를 설정하는 부분이다. 먼저 SwaggerConfig 클래스를 생성해준다.
@Configuration
@EnableSwagger2
public class SwaggerConfig {

    @Bean
    public Docket apiV1(){
        return new Docket(DocumentationType.SWAGGER_2)
                .groupName("groupName1")
                .select()
                .apis(RequestHandlerSelectors.
                        basePackage("javable.controller"))
                .paths(PathSelectors.ant("/posts/**")).build();
    }

    @Bean
    public Docket apiV2(){
        return new Docket(DocumentationType.SWAGGER_2)
                .useDefaultResponseMessages(false)
                .groupName("groupName2")
                .select()
                .apis(RequestHandlerSelectors.
                        basePackage("javable.controller"))
                .paths(PathSelectors.ant("/posts/**")).build();
    }
}
똑같은 코드를 두번 작성한 것처럼 보이지만 자세히 보면 약간 차이가 있다는 것을 느낄 수 있을 것이다. 끝났다면 서버를 실행시켜 http://localhost:8080/swagger-ui.html 로 들어가보자.
잠깐!
근데 왜 swagger-ui.html일까?
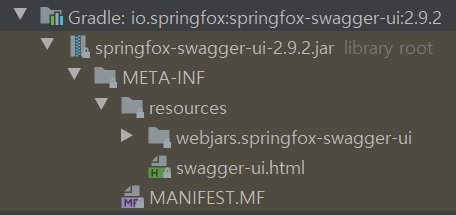
springfox-swagger-ui가 이렇게 만들어주기 때문이다.
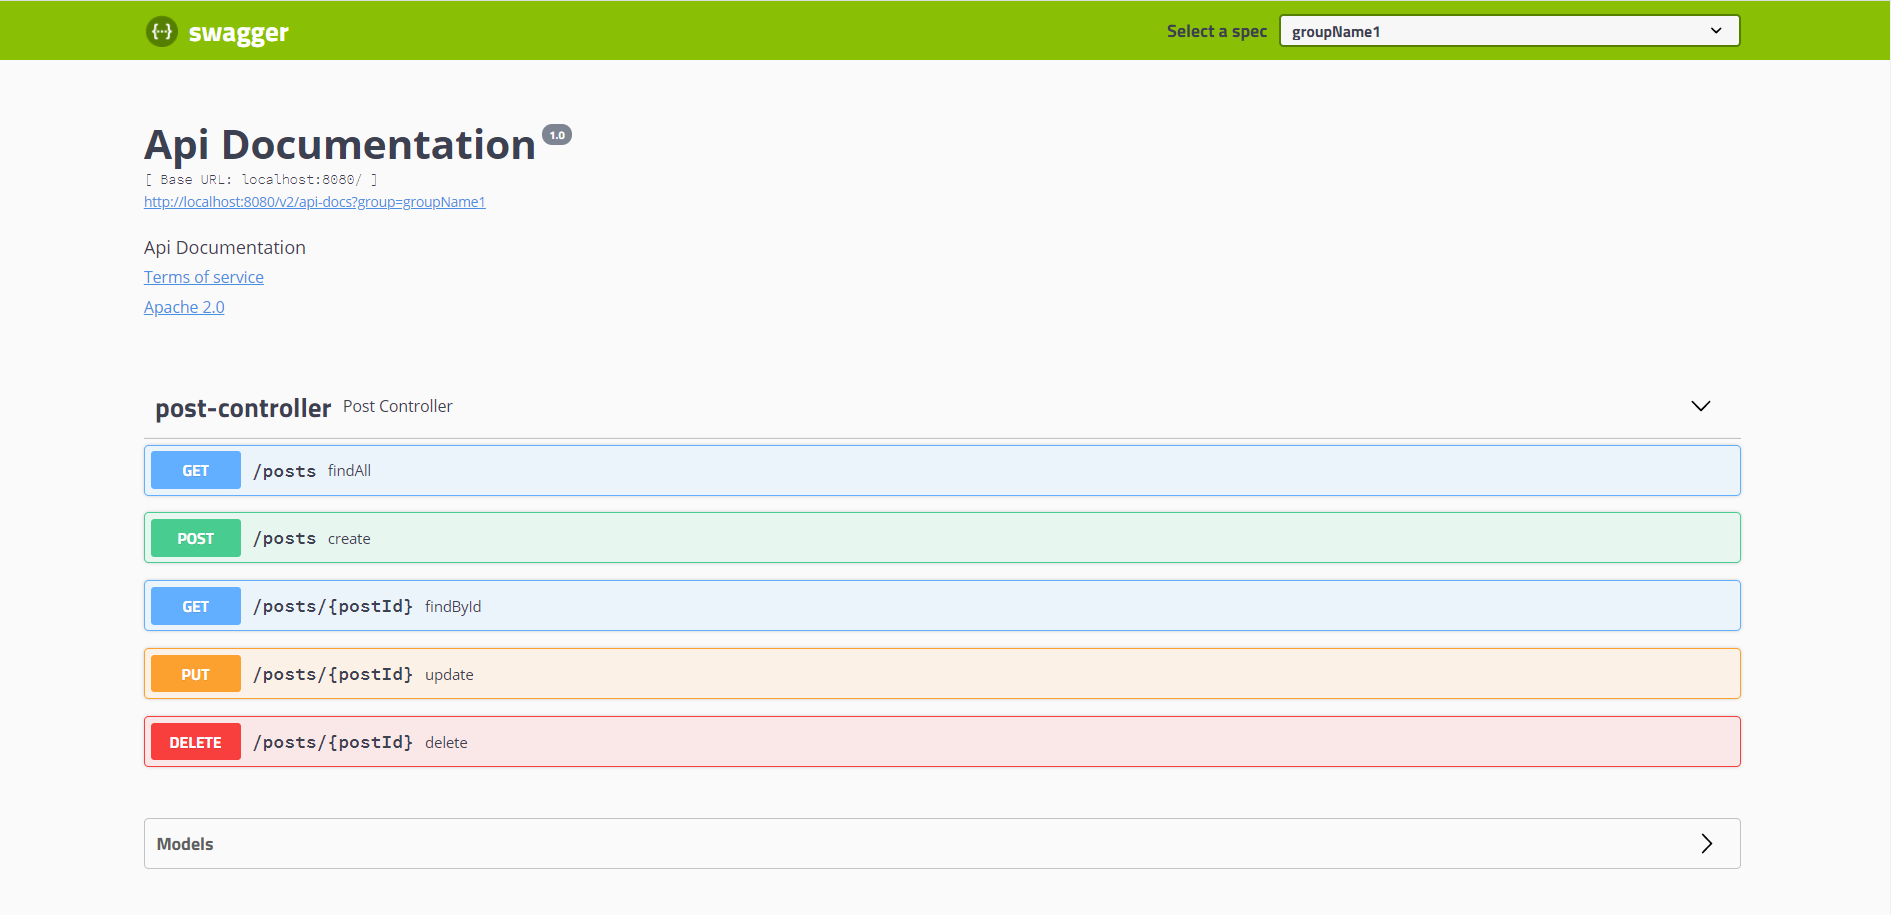
각설하고 http://localhost:8080/swagger-ui.html 로 이동하면 컬러풀하게 만들어진 문서 화면을 볼 수 있을 것이다.
화면도 봤으니 이제 SwaggerConfig에서 사용한 코드에 대해 설명하겠다.
Docket
-
Swagger 설정을 할 수 있게 도와주는 클래스이다.
-
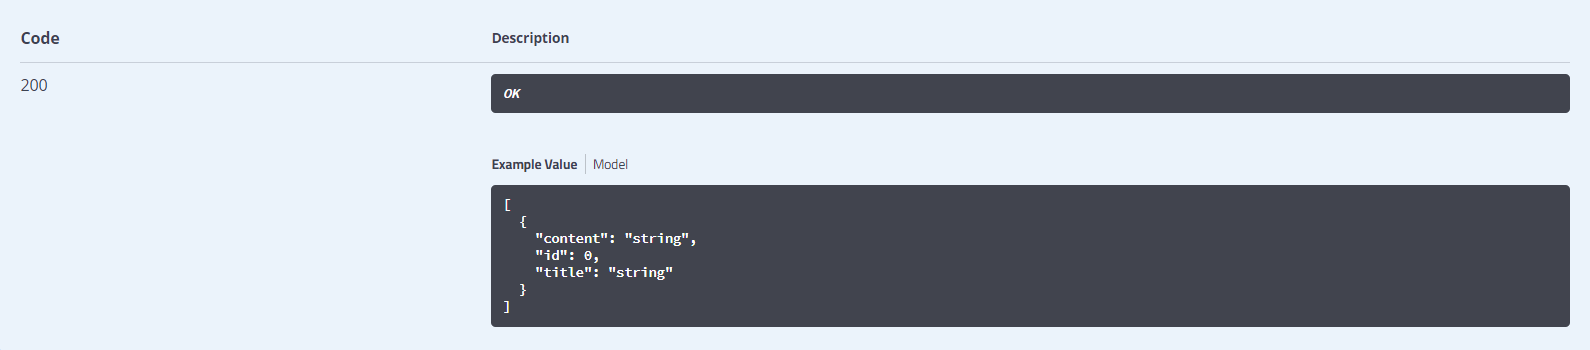
useDefaultResponseMessages()
- false로 설정하면 불필요한 응답코드와 설명을 제거할 수 있다.
- Default 일때

- false 일때
-
groupName()
- 만약 Bean이 하나라면 생략이 가능하지만 위의 코드와 같이 Bean이 여러 개면 명시해줘야한다. Bean이 여러 개면 groupName이 출동하여 오류를 발생하기 때문이다. 그렇게 groupName를 명시하게되면 화면 우측상단에서 아래 이미지와 같은 List를 볼 수 있다.

- 만약 Bean이 하나라면 생략이 가능하지만 위의 코드와 같이 Bean이 여러 개면 명시해줘야한다. Bean이 여러 개면 groupName이 출동하여 오류를 발생하기 때문이다. 그렇게 groupName를 명시하게되면 화면 우측상단에서 아래 이미지와 같은 List를 볼 수 있다.
-
select()
- ApiSelectorBuilder를 생성하여 apis()와 paths()를 사용할 수 있게 해준다.
-
apis()
- api가 작성되있는 패키지를 지정한다.
- javable > controller 안에 api controller가 있기 때문에 basePackage를
javable.controller로 지정했다.
-
paths()
- apis()로 선택된 API중 원하는 path를 지정하여 문서화할 수 있다. 지금은
PathSelectors.ant("/posts/**")이렇게 설정했기때문에/posts에 관한 API를 문서화해서 볼 수 있다. PathSelectors.any()로 설정하면 패키지 안에 모든 API를 한 번에 볼 수 있지만 API가 많아지면 보기 힘들겠지 않겠는가?😂😂
- apis()로 선택된 API중 원하는 path를 지정하여 문서화할 수 있다. 지금은
이 부분은 바꿀 수 없냐? 걱정 하덜덜 마라.
@Configuration
@EnableSwagger2
public class SwaggerConfig {

    @Bean
    public Docket apiV1(){
        return new Docket(DocumentationType.SWAGGER_2)
                .apiInfo(this.apiInfo())
                .groupName("groupName1")
                .select()
                .apis(RequestHandlerSelectors.
                        basePackage("javable.restdocs.controller"))
                .paths(PathSelectors.ant("/posts/**")).build();
    }

    private ApiInfo apiInfo() {
        return new ApiInfo(
                "title",
                "description",
                "version",
                "https://woowacourse.github.io/javable/",
                new Contact("Contact Me", "https://woowacourse.github.io/javable/", "tigger@tigger.com"),
                "tigger Licenses",
                "https://woowacourse.github.io/javable/",
                new ArrayList<>()
        );
    }
}
위의 SwaggerConfig 코드에 ApiInfo를 추가하면 원하는 데로 커스텀할 수 있다.
ApiInfo의 생성자 파라미터는 다음과 같다.
public ApiInfo(
String title,
String description,
String version,
String termsOfServiceUrl,
Contact contact,
String license,
String licenseUrl,
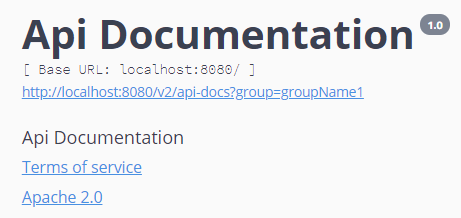
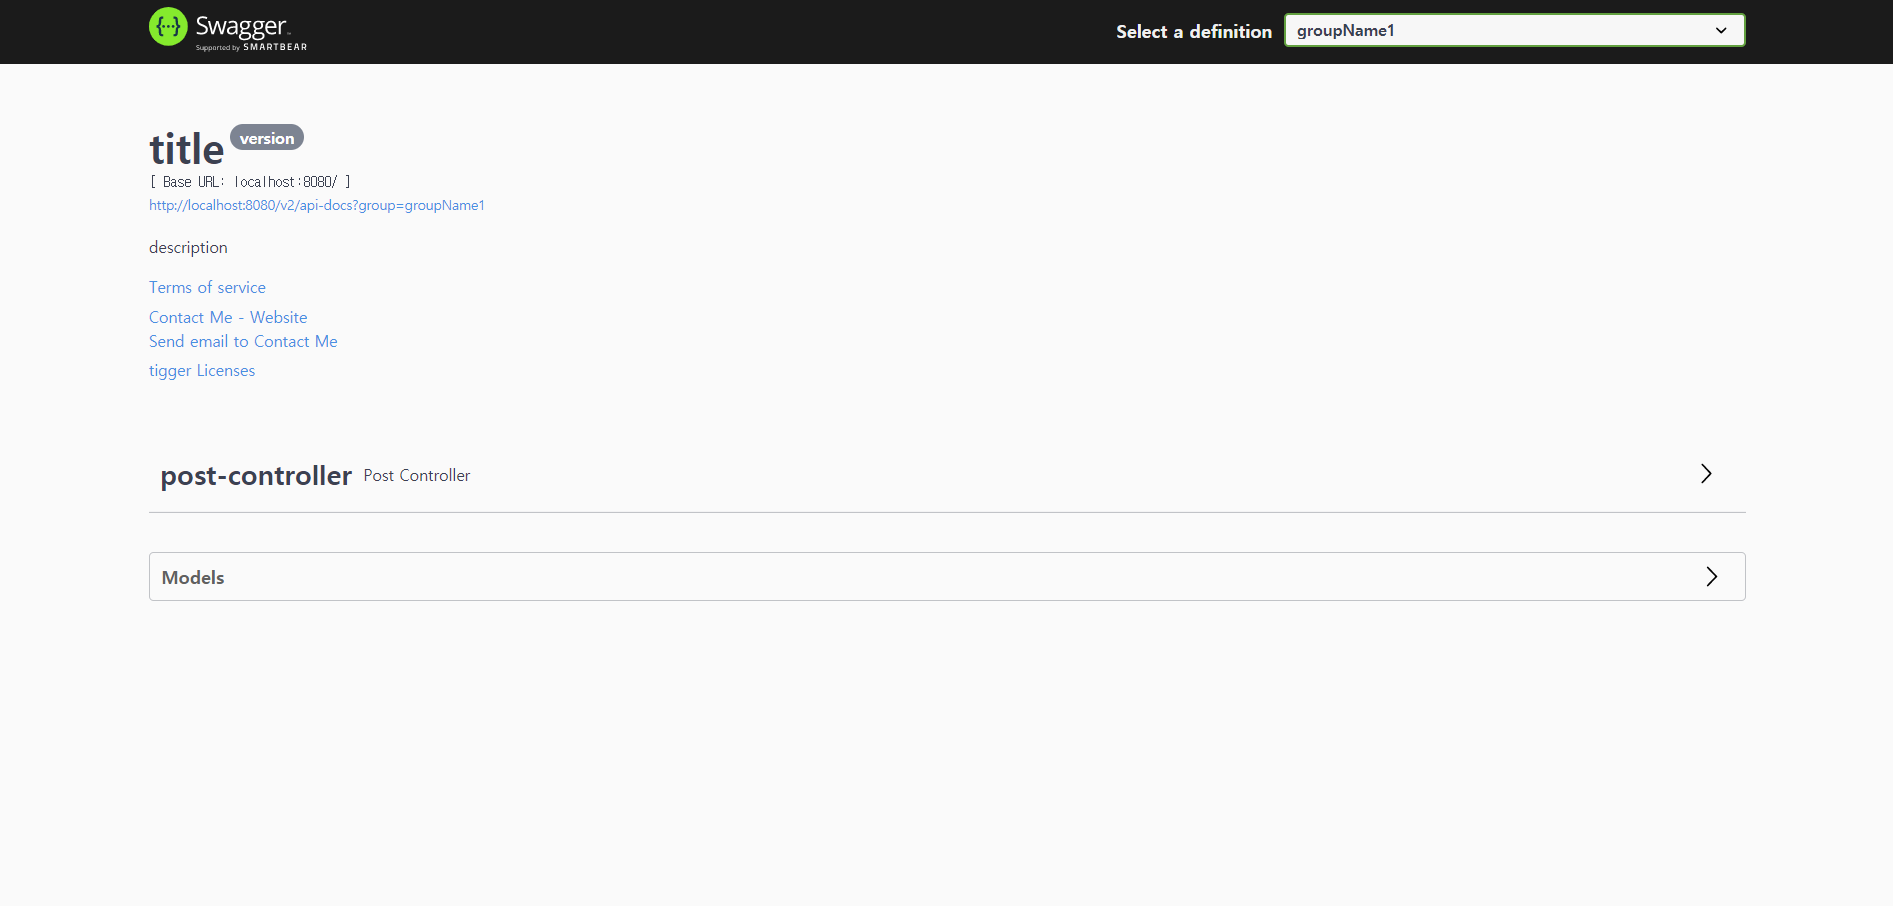
Collection<VendorExtension> vendorExtensions)만약 위의 코드처럼 ApiInfo를 설정하면 어떻게 바뀌어있을까? 야무지게 바뀌어 있다.

숫자는 설명이 편하도록 넣은 것이다.😊😊 그림과 같이 코드를 설명하겠다.
-
ApiInfo의title부분이다. 원하는 문자열을 넣어주시면 된다. -
ApiInfo의version부분이다. 설명은 1번과 같다. -
ApiInfo의description부분이다. 설명은 1번과 같다. -
ApiInfo의termsOfServiceUrl부분이다.Terms of service를 클릭했을 때 보내고 싶은 URL를 적어주면 된다. -
ApiInfo의Contact부분의 첫 번째 파라미터와 두 번째 파라미터 설정이다.Contact첫 번째 파라미터에"Contact Me"를 넣었기 때문에 5번과 6번에Contact Me를 볼 수 있는 것이고, 5번을 클릭하면 두 번째 파라미터에 설정한 URL로 이동할 수 있다. -
ApiInfo의Contact부분의 첫 번째 파라미터와 세 번째 파라미터 설정이다.Contact Me는 5번 설명과 동일하고, 클릭하면 세 번째 파라미터에 설정한 이메일 주소로 메일을 보낼 수 있다. -
ApiInfo의license와licenseUrl부분이다.license로 화면에 명시할 수 있고, 7번을 클릭하면licenseUrl에 설정한 URL로 이동할 수 있다.
화면도 봤고, 코드도 이해했는데 테스트는 어디서 할 수 있냐?
http://localhost:8080/swagger-ui.html 에 들어가서 API를 클릭하면 다음과 같은 화면을 볼 수 있다.
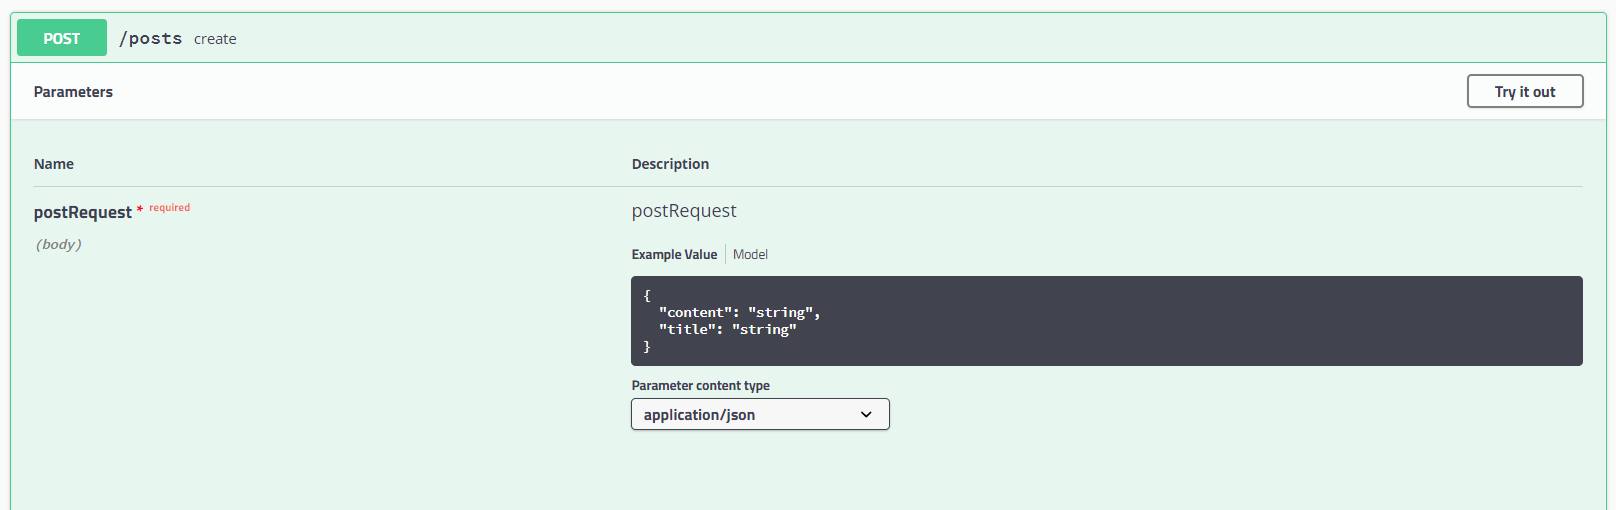
그리고 Try it out을 누르면 화면이 다음과 같이 바뀔 것이다.
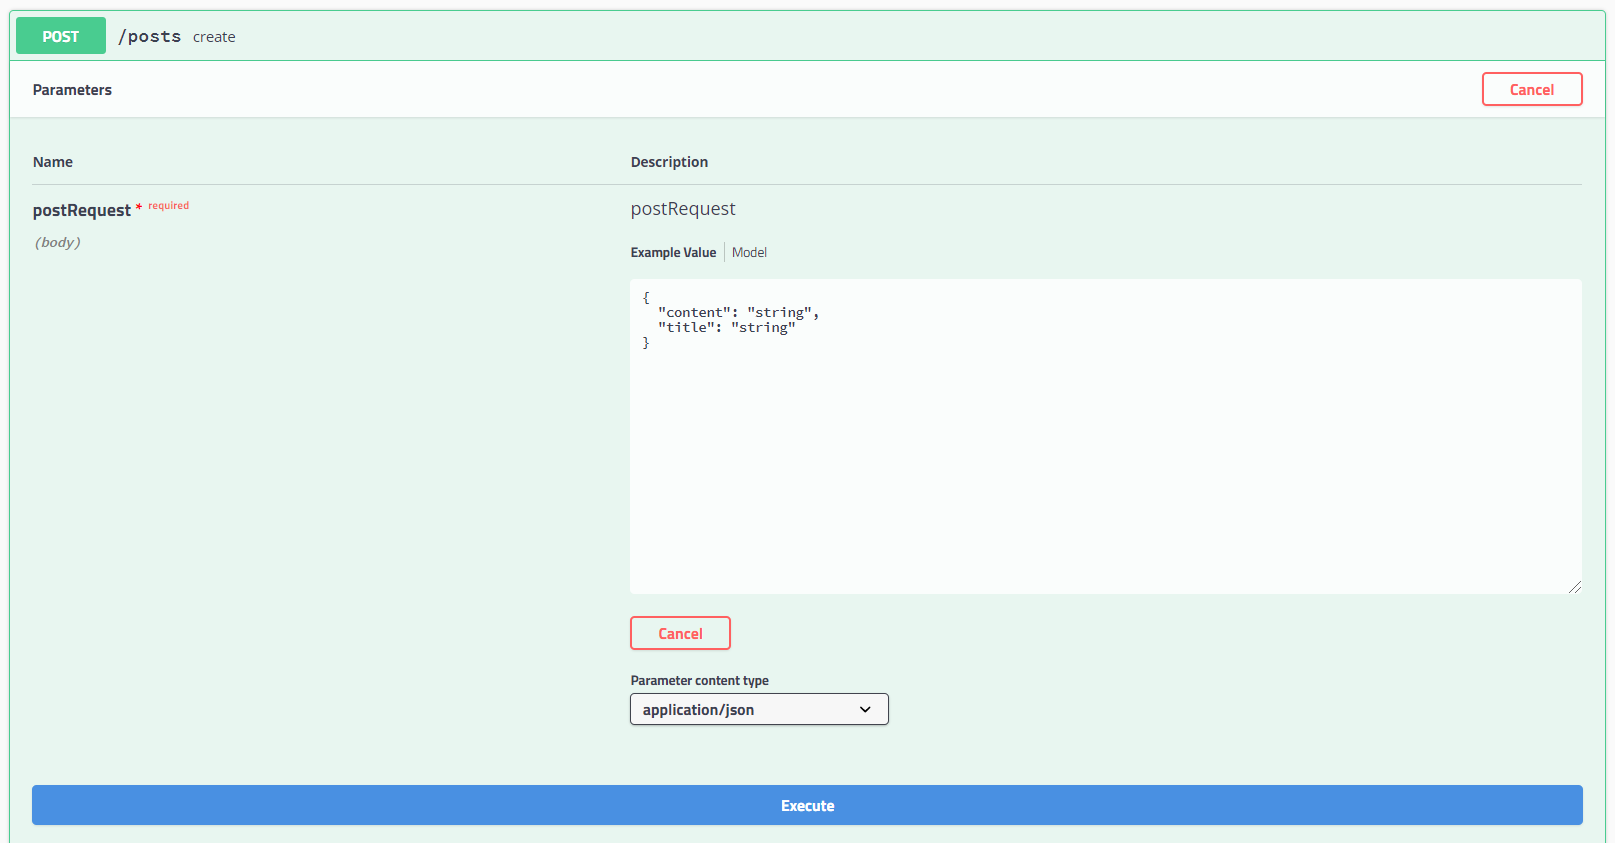
PathVariable를 받는다면 PathVariable를 입력할 수 있는 창이 나오고 RequestBody를 받는다면 RequestBody를 입력할 수 있는 창이 나온다. 주어진 API 형식에 맞게 입력하고 Execute를 누르면 우리가 API를 사용하는 것(유사 Postman)과 똑같이 사용할 수 있다.
주의!!
이렇게 되면 API 문서 URL을 유추하여 아무나 들어와 테스트할 수 있지 않겠는가? 사전에 security 활용하여 접근권한이 있는 사용자만 접근할 수 있게 설정을 해주면 된다. 자세한 것은 Spring Security를 참고하길 바란다.😊😊
그래서 3.0.0은 뭐가 다르냐?
implementation "io.springfox:springfox-boot-starter:3.0.0"
implementation "io.springfox:springfox-swagger-ui:3.0.0"
추가하고
// For WebMvc
public class SwaggerUiWebMvcConfigurer implements WebMvcConfigurer {
  private final String baseUrl;

  public SwaggerUiWebMvcConfigurer(String baseUrl) {
    this.baseUrl = baseUrl;
  }

  @Override
  public void addResourceHandlers(ResourceHandlerRegistry registry) {
    String baseUrl = StringUtils.trimTrailingCharacter(this.baseUrl, '/');
    registry.
        addResourceHandler(baseUrl + "/swagger-ui/**")
        .addResourceLocations("classpath:/META-INF/resources/webjars/springfox-swagger-ui/")
        .resourceChain(false);
  }

  @Override
  public void addViewControllers(ViewControllerRegistry registry) {
    registry.addViewController(baseUrl + "/swagger-ui/")
        .setViewName("forward:" + baseUrl + "/swagger-ui/index.html");
  }
}
// For WebFlux
public class SwaggerUiWebFluxConfigurer implements WebFluxConfigurer {
private final String baseUrl;
public SwaggerUiWebFluxConfigurer(String baseUrl) {
this.baseUrl = baseUrl;
}
@Override
public void addResourceHandlers(ResourceHandlerRegistry registry) {
String baseUrl = StringUtils.trimTrailingCharacter(this.baseUrl, '/');
registry.
addResourceHandler(baseUrl + "/swagger-ui/**")
.addResourceLocations("classpath:/META-INF/resources/webjars/springfox-swagger-ui/")
.resourceChain(false);
}
}둘 중 하나만 만들면 나머지는 2.9.2와 동일하다.
아! 주소는 http://host/context-path/swagger-ui/index.html OR http://host/context-path/swagger-ui/ 로 바뀌었다. 이유는 2.9.2와 동일하다.😊😊
들어가보면 UI도 바뀐 것을 확인할 수 있다.
사용하면 Spring REST Docs보다 빠르고 쉽게 문서를 만드는 것뿐만 아니라 내가 컬러풀하게 디자인한 것처럼 만족감을 얻을 수 있게 하는 문서 자동화 도구 Swagger... 지금 당장 사용하길 바란다.😊😊
참고자료

로컬에서 서버를 돌려야만 확인할수 밖에없나요? 추출해서 다른팀원들한테 공유하고싶어요..