
로그인 폼을 만드는 여러가지 방법 중에
저는 PHP, MySQL을 사용하여 간단한 로그인 및 회원가입 폼 프로젝트를 진행해 보겠습니다.
이번 프로젝트를 진행하며 DB 연결 및 CRUD를 더 이해할 수 있었습니다.
⭐️ php@8.0, httpd, mysql을 사용하여 MacOS에서 진행하였습니다.
1. 서버 연결
- 먼저 mysql 서버와 httpd(Apache) 서버를 실행시켜 줍니다.
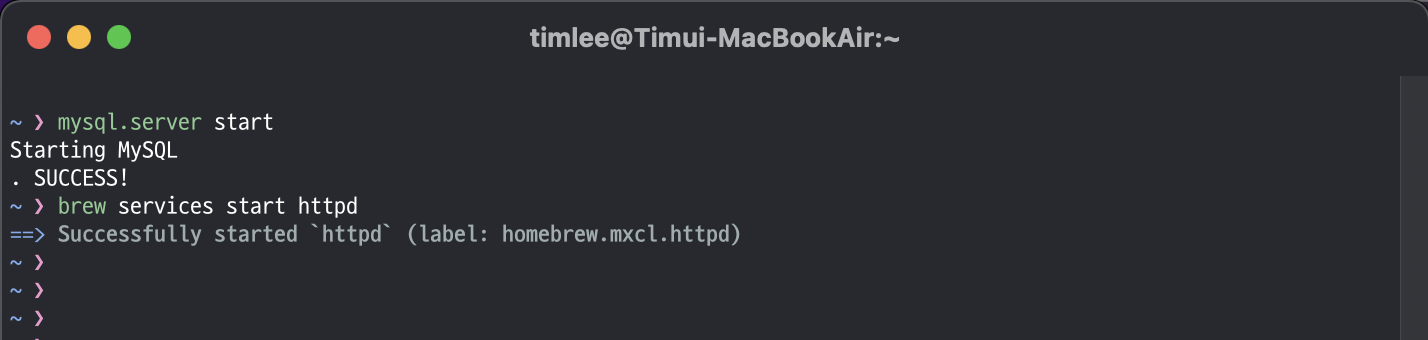
> mysql.server start
Starting MySQL
.SUCCESS!
> brew services start httpd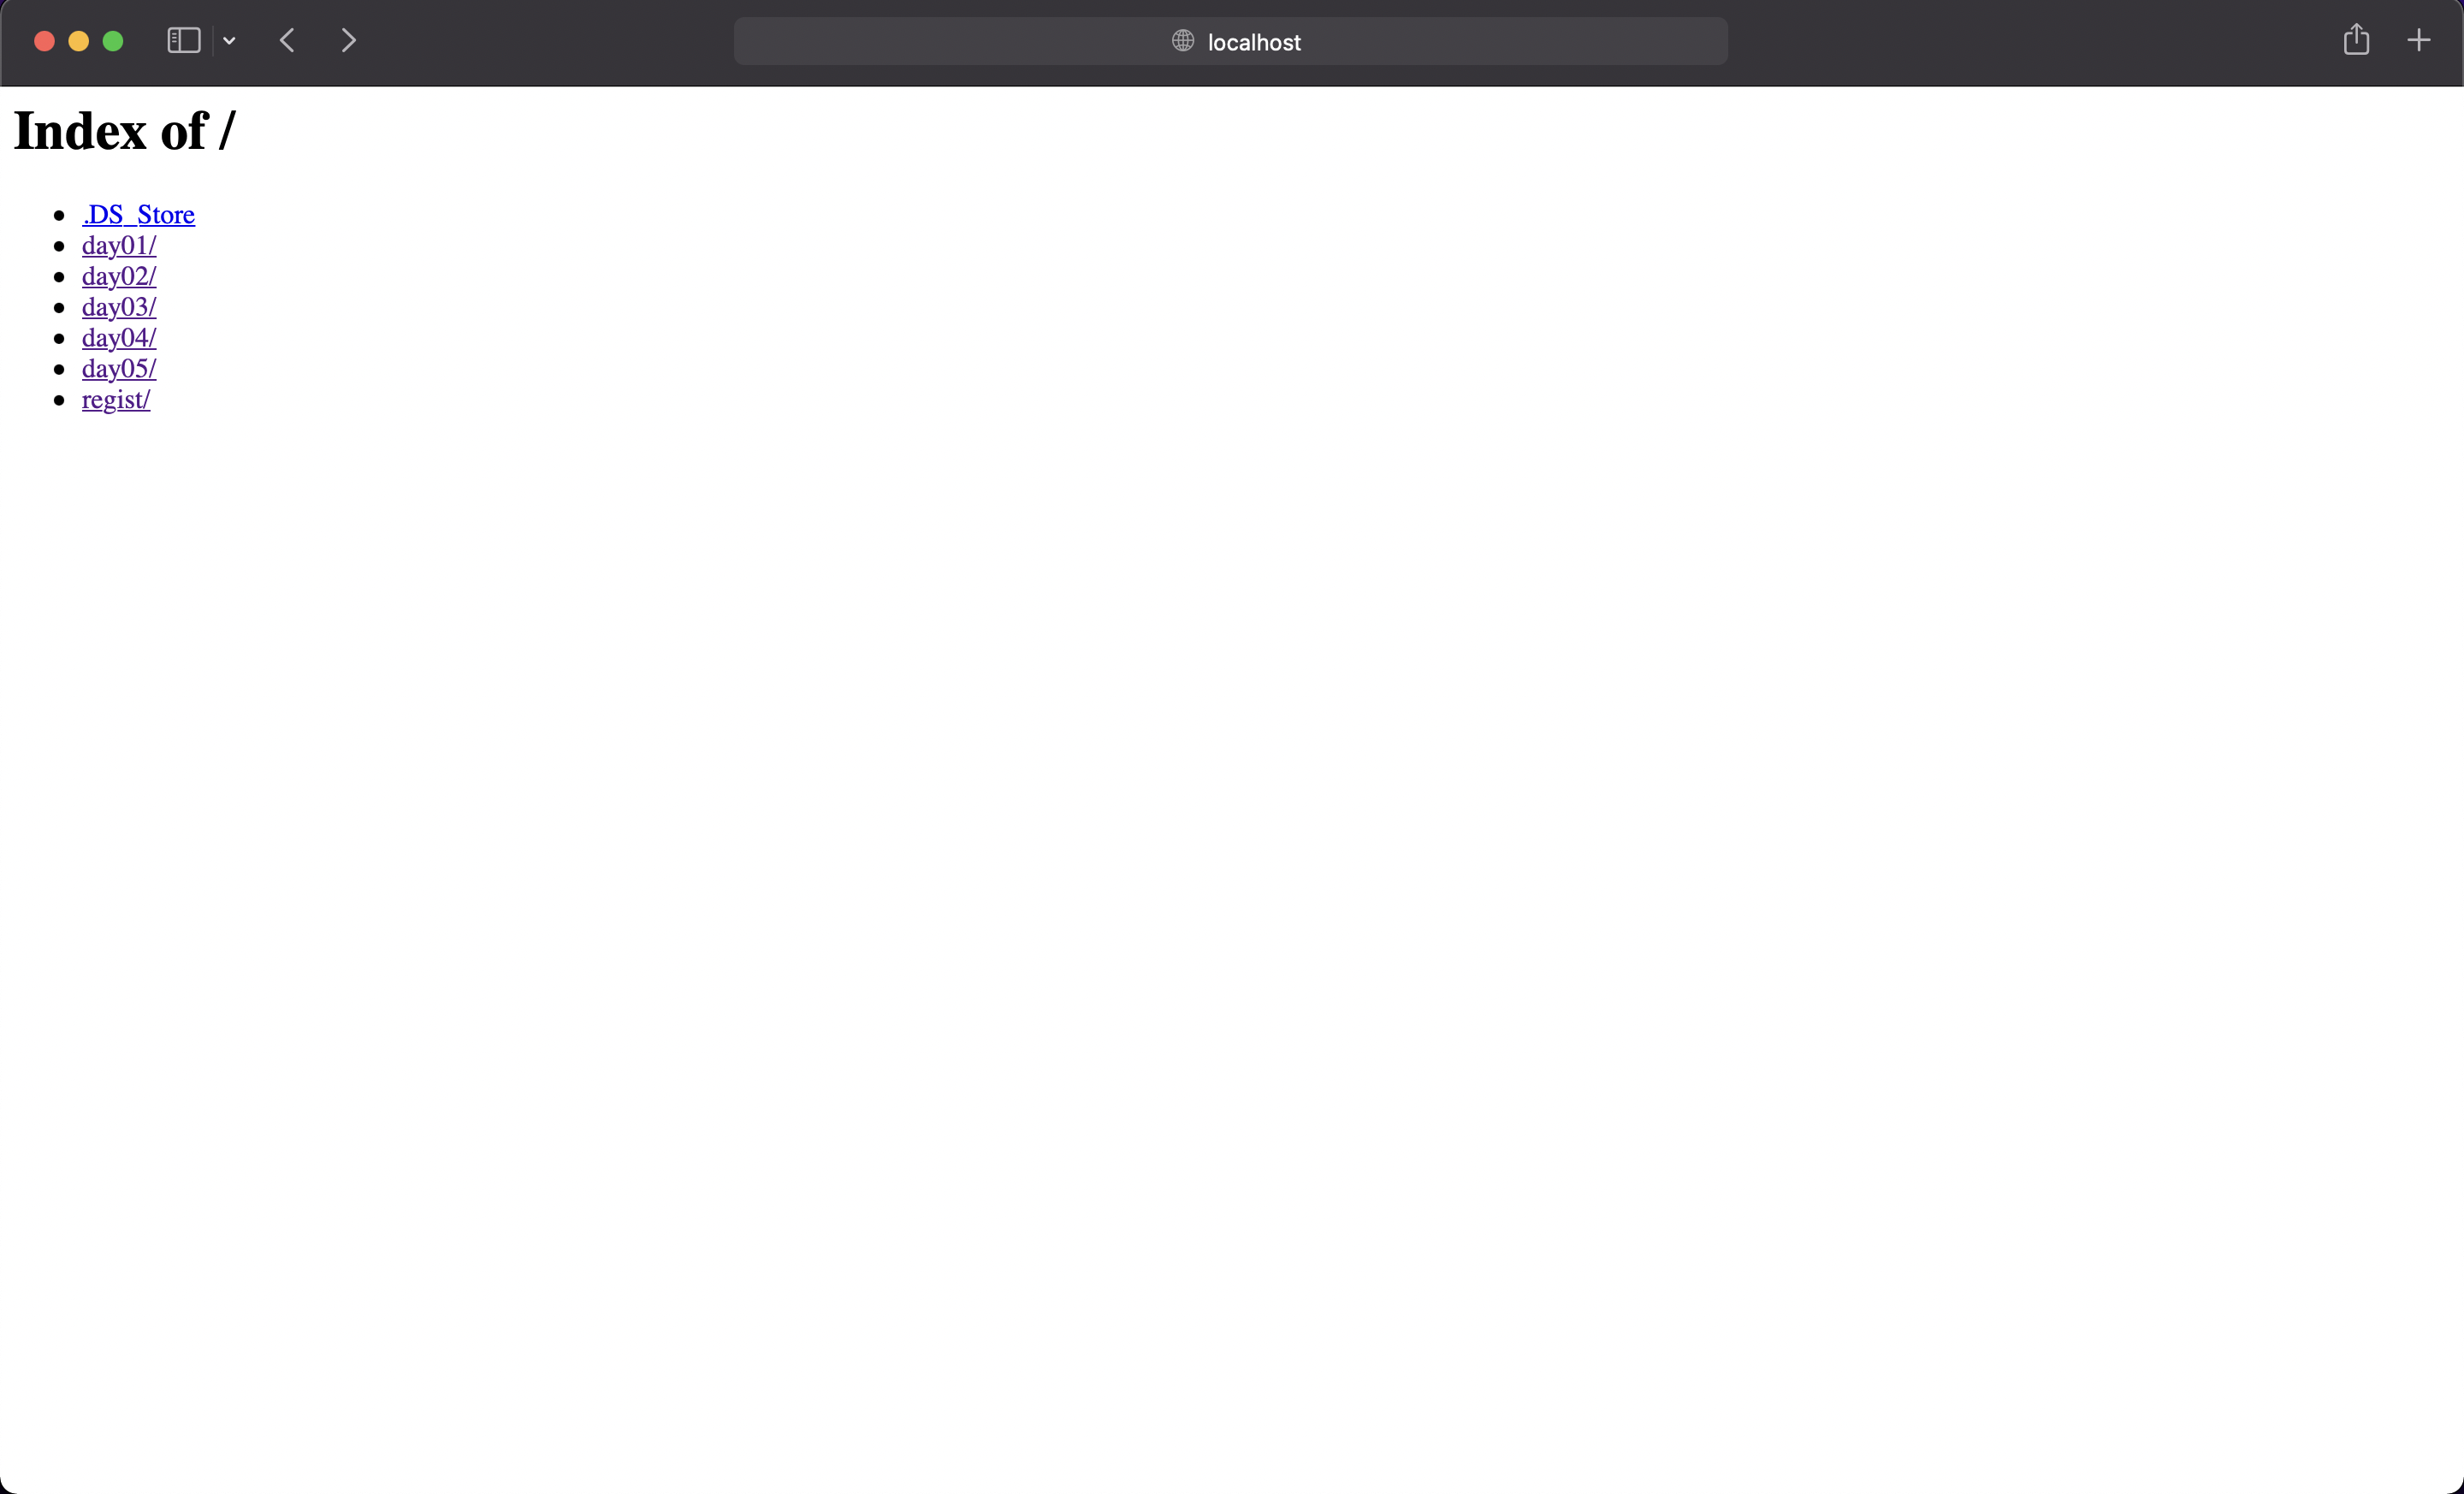
==> Successfully started `httpd` (label: homebrew.mxcl.httpd)- httpd에 성공적으로 접속을 잘 하였다면 아래와 같은 페이지가 나옵니다.(localhost)
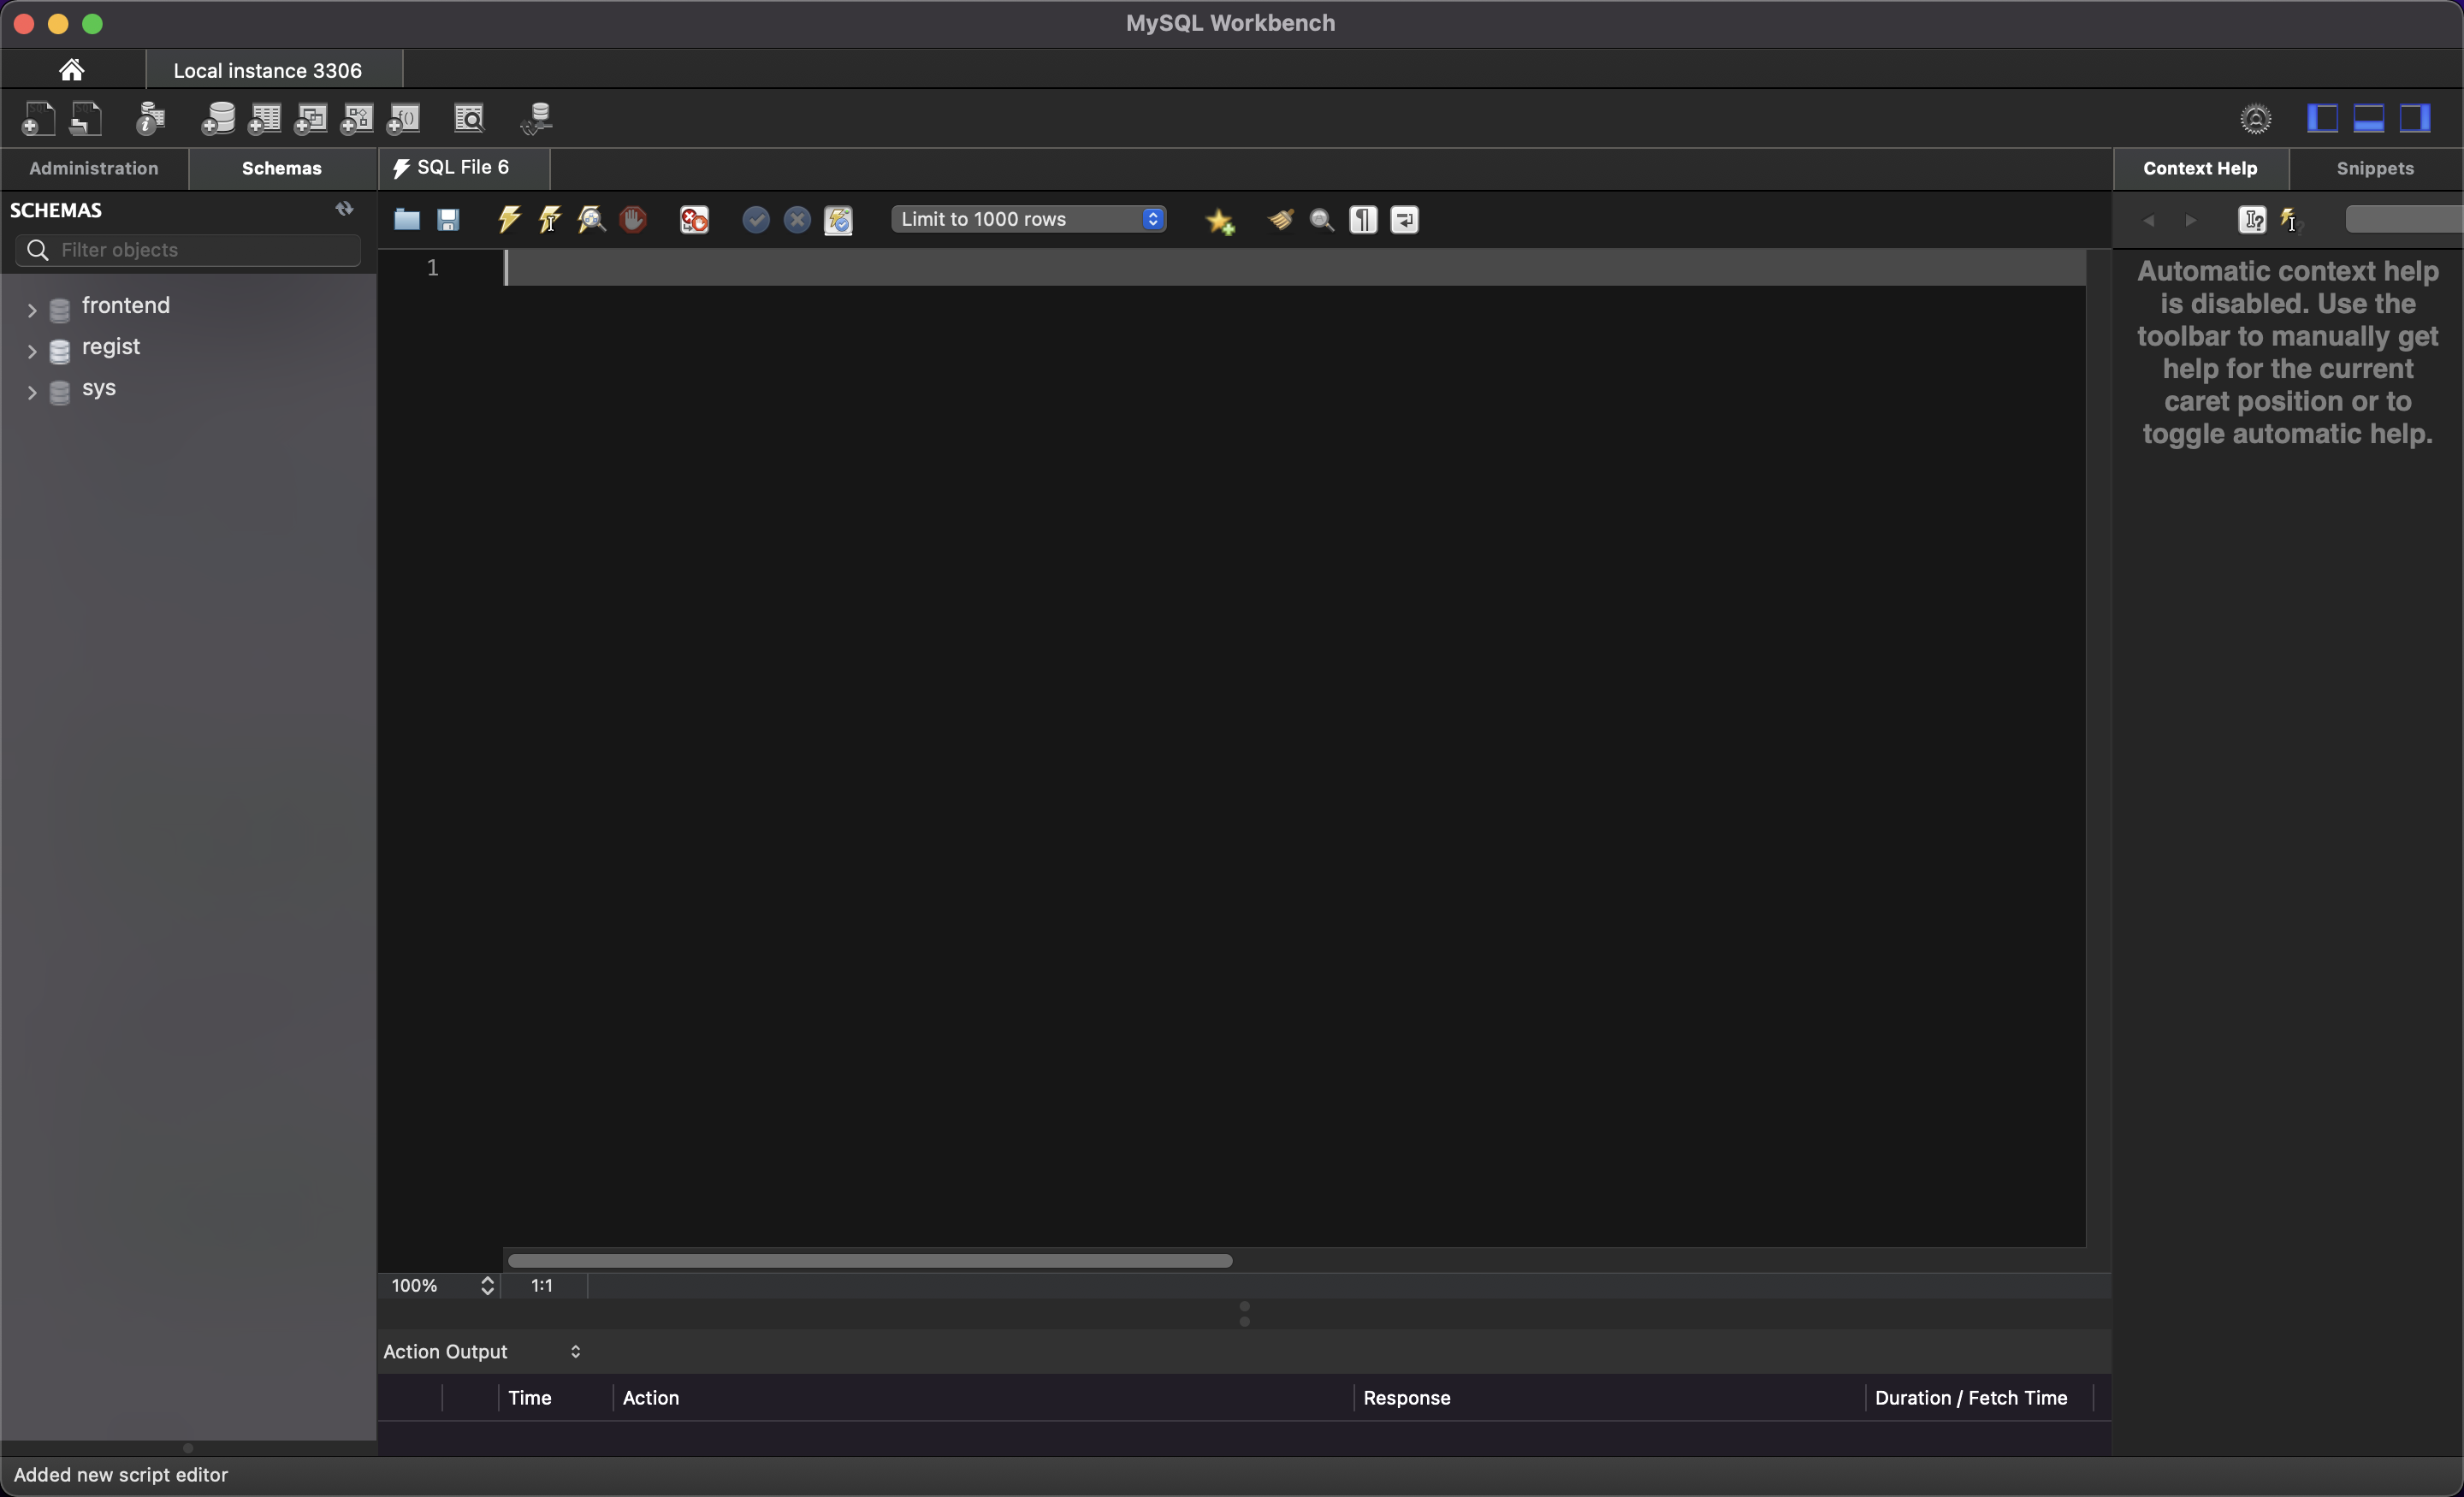
- mysql에 성공적으로 접속을 잘 하였다면 MySQLWorkbench 프로그램을 통해서 잘 접속이 되었는지 편리하게 확인 가능합니다.
- 사용할 database와 table을 만들어줍니다.
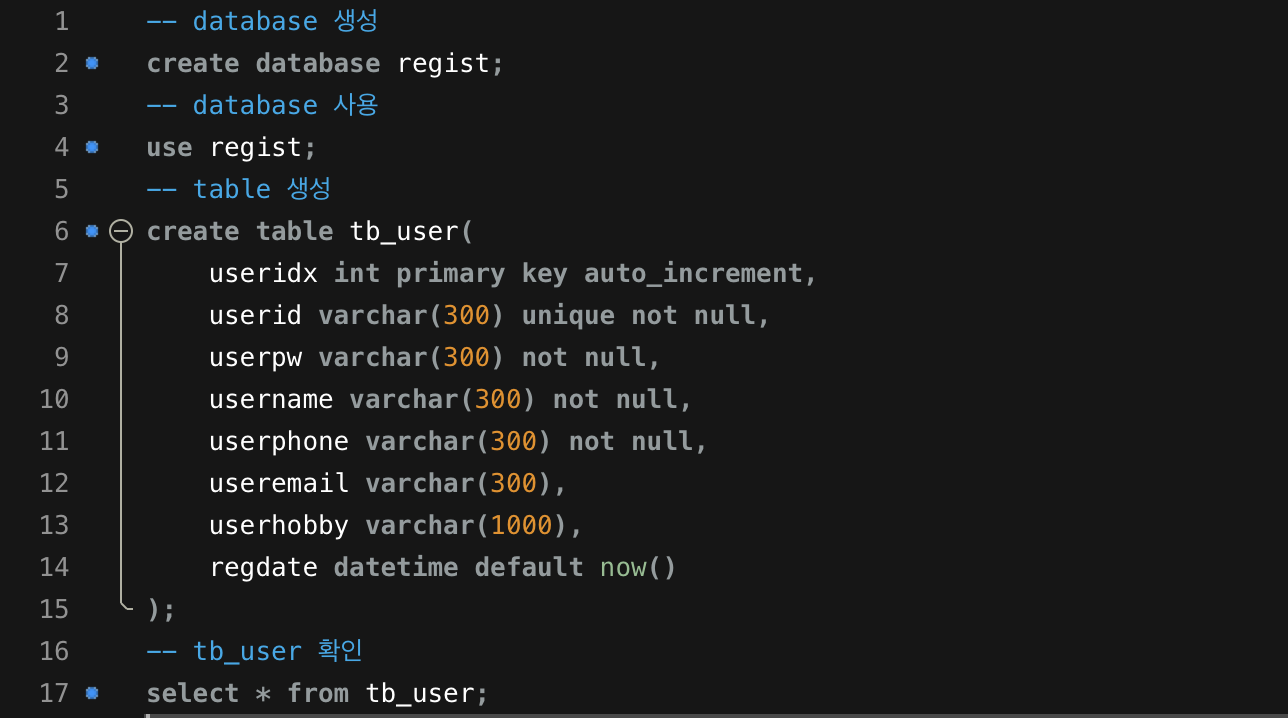
-- database 생성
create database regist;
-- database 사용
use regist;
-- table 생성
create table tb_user(
	useridx int primary key auto_increment,
    userid varchar(300) unique not null,
    userpw varchar(300) not null,
    username varchar(300) not null,
    userphone varchar(300) not null,
    useremail varchar(300),
    userhobby varchar(300),
    regdate datatime default now()
);
-- tb_user 확인
select * from tb_user;- 수고하셨습니다. 서버 연결 및 데이터베이스 생성을 완료하였습니다~
2. 기본 틀(php) 만들기
- httpd의 localhost에 연결된 경로에 프로젝트 폴더를 만들어줍니다.
(전 "regist"로 폴더를 만들어주었습니다.) - 메인 로그인 페이지가 될 "index.php" 파일을 만들어주고 로그인 폼을 작성해줍니다.
// index.php
<head>
<link rel="stylesheet" href="./lib/css/style.css">
</head>
<body>
<div id="login_wrap">
<div>
<h1>Login Form</h1>
<form action="login_ok.php" method="post" id="login_form">
<p><input type="text" name="userid" id="userid" placeholder="ID"></p>
<p><input type="password" name="userpw" id="userpw" placeholder="Password"></p>
<p class="forgetpw"><a href="changepw.php">Forget Password?</a></p>
<p><input type="submit" value="Login" class="login_btn"></p>
</form>
<p class="regist_btn">Not a member? <a href="regist.php">Sign Up</a></p>
</div>
</div>
</body>- 그럼 아래와 같이 아무것도 적용이 안된 DOM이 만들어집니다.
(display flex를 사용하여 정렬을 하기위해 div로 감싸주었습니다.) - 레이아웃 디자인이 너무 안예쁘니 공통으로 들어갈 스타일시트를 작성해주겠습니다.
lib 폴더를 만들고 안에 css 폴더를 만든 뒤 "style.css" 파일을 만들어 아래 코드를 작성해줍니다.( ./lib/css/style.css )
/* style.css */
* { padding: 0; margin: 0; }
a { text-decoration: none; color: #000; }
/* body를 가운데 정렬하기 위해 html에 flex를 주었습니다. */
html { width: 100%; height: 100%; display: flex;
    align-items: center; }
body { width: 100%; margin: 0 auto; text-align: center;
    background: linear-gradient(to left, #f857a6, #ff5858);
    font-family: sans-serif; }
.wrap { width: 500px; height: 650px; margin: 0 auto;
    background-color: #fff; border-radius: 5px; display: flex;
    justify-content: center; align-items: center; }
.wrap > div { width: 100%; margin: 0 100px; }
h1 { margin-bottom: 20px; }
/* submit을 제외한 나머지 input 태그에 적용 */
.wrap .form input:not(input[type='submit'], input[type='checkbox']) {
    border: 1px solid #d9d9d9; width: 400px; height: 50px;
    margin: 5px; padding-left: 10px; border-radius: 5px;
    box-sizing: border-box; font-size: 18px; }
#login_wrap .forgetpw { text-align: left; font-size: 14px;
    margin: 0 0 10px 10px; cursor: pointer; }
.wrap .form_btn { width: 400px; height: 50px;
    margin: 10px; border-radius: 5px; border: 0;
    background: linear-gradient(to left, #f857a6, #ff5858);
    color: #fff; font-weight: bold; font-size: 18px;
    cursor: pointer; }
#login_wrap .forgetpw a, #login_wrap .regist_btn a { color: red; }- 아래와 같이 예쁘게 적용이 되었습니다^^

- 로그인 페이지를 만들었으니 회원가입 페이지를 만들겠습니다.
"regist.php" 파일을 만들어 주고 코드를 작성합니다.
<!-- regist.php -->
<head>
	<link rel="stylesheet" href="./lib/css/style.css">
</head>
<body>
    <div id="regist_wrap" class="wrap">
        <div>
            <h1>Regist Form</h1>
            <form action="regist_ok.php" method="post" name="regiform" id="regist_form" class="form" onsubmit="return sendit()">
                <p><input type="text" name="userid" id="userid" placeholder="ID"></p>
                <p><input type="password" name="userpw" id="userpw" placeholder="Password"></p>
                <p><input type="password" name="userpw_ch" id="userpw_ch" placeholder="Password Check"></p>
                <p><input type="text" name="username" id="username" placeholder="Name"></p>
                <p><input type="text" name="userphone" id="userphone" placeholder="Phone Number 000-0000-0000"></p>
                <p><input type="text" name="useremail" id="useremail" placeholder="E-mail"></p>
                <p class="hobbystr">
                    <label for="drive">Drive <input type="checkbox" name="hobby[]" id="drive" value="Drive"></label>
                    <label for="movie">Movie <input type="checkbox" name="hobby[]" id="movie" value="Movie"></label>
                    <label for="study">Study <input type="checkbox" name="hobby[]" id="study" value="Study"></label>
                    <label for="game">Game <input type="checkbox" name="hobby[]" id="game" value="Game"></label>
                    <label for="health">Health <input type="checkbox" name="hobby[]" id="health" value="Health"></label>
                    <label for="coding">Coding <input type="checkbox" name="hobby[]" id="coding" value="Coding"></label>
                </p>
                <p><input type="submit" value="Sin Up" class="signup_btn"></p>
                <p class="pre_btn">Are you join? <a href="index.php">Login.</a></p>
            </form>
        </div>
    </div>
    <script src="./lib/js/regist.js"></script>
</body>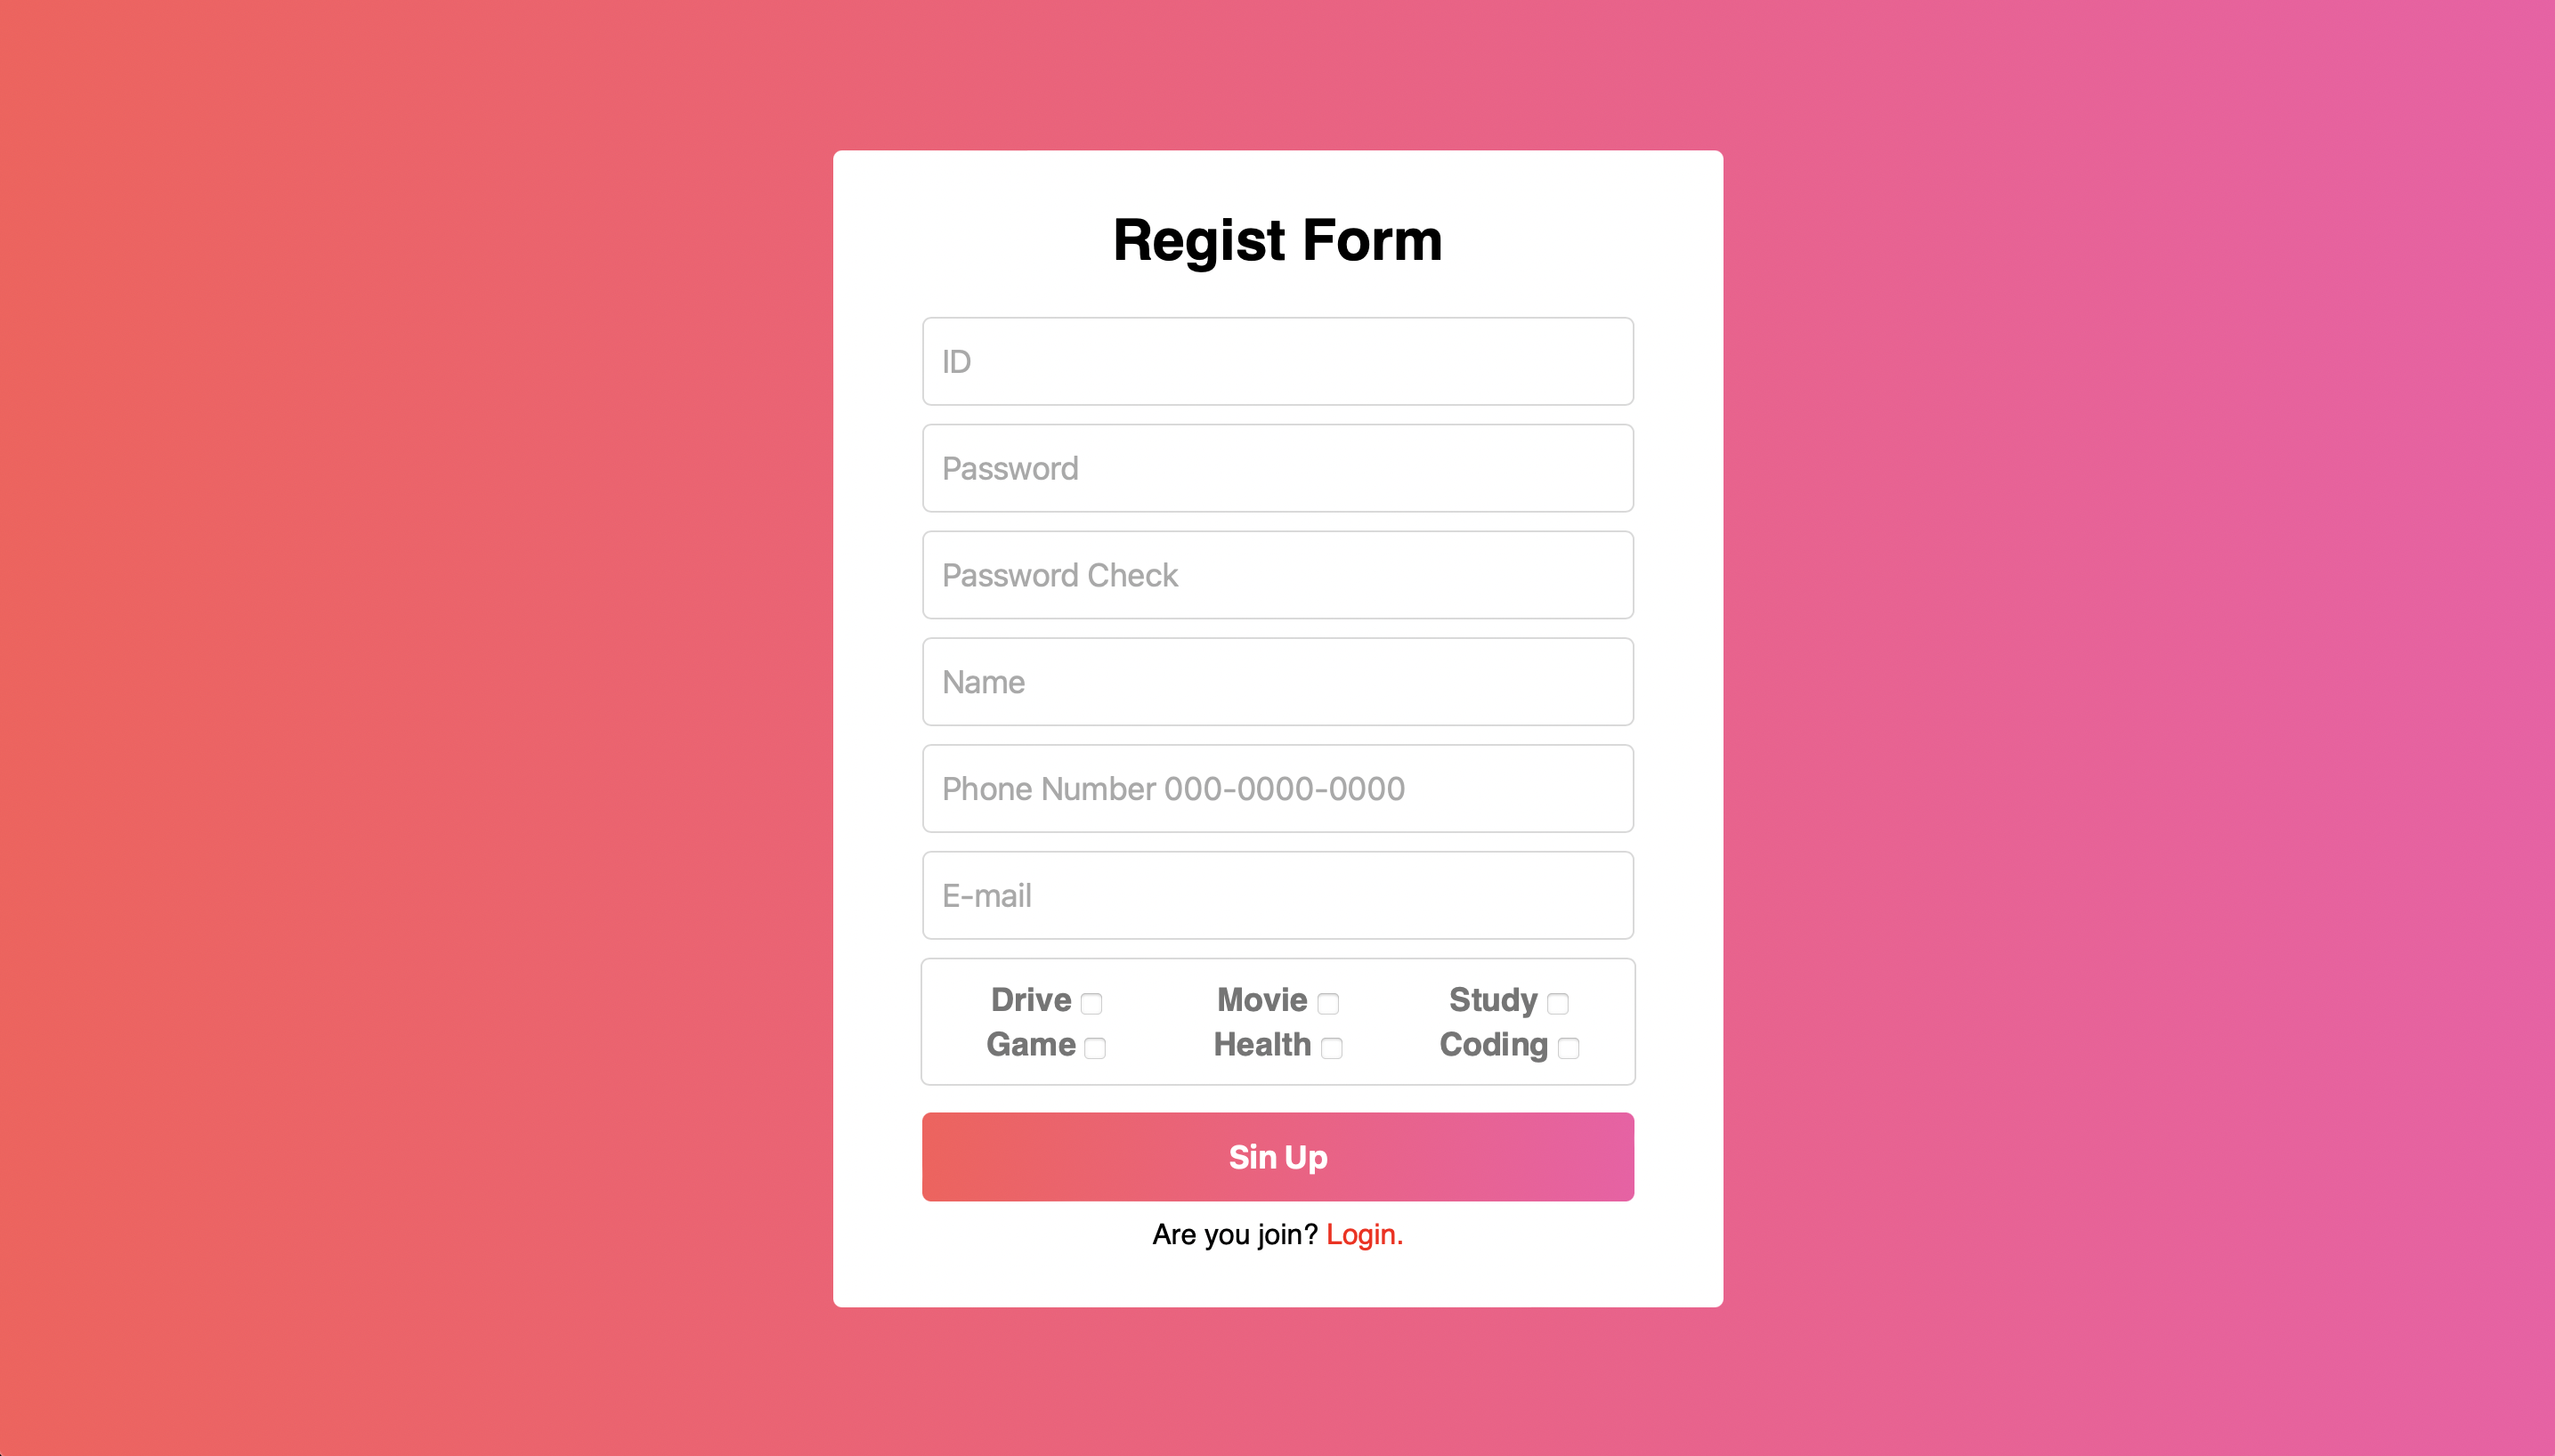
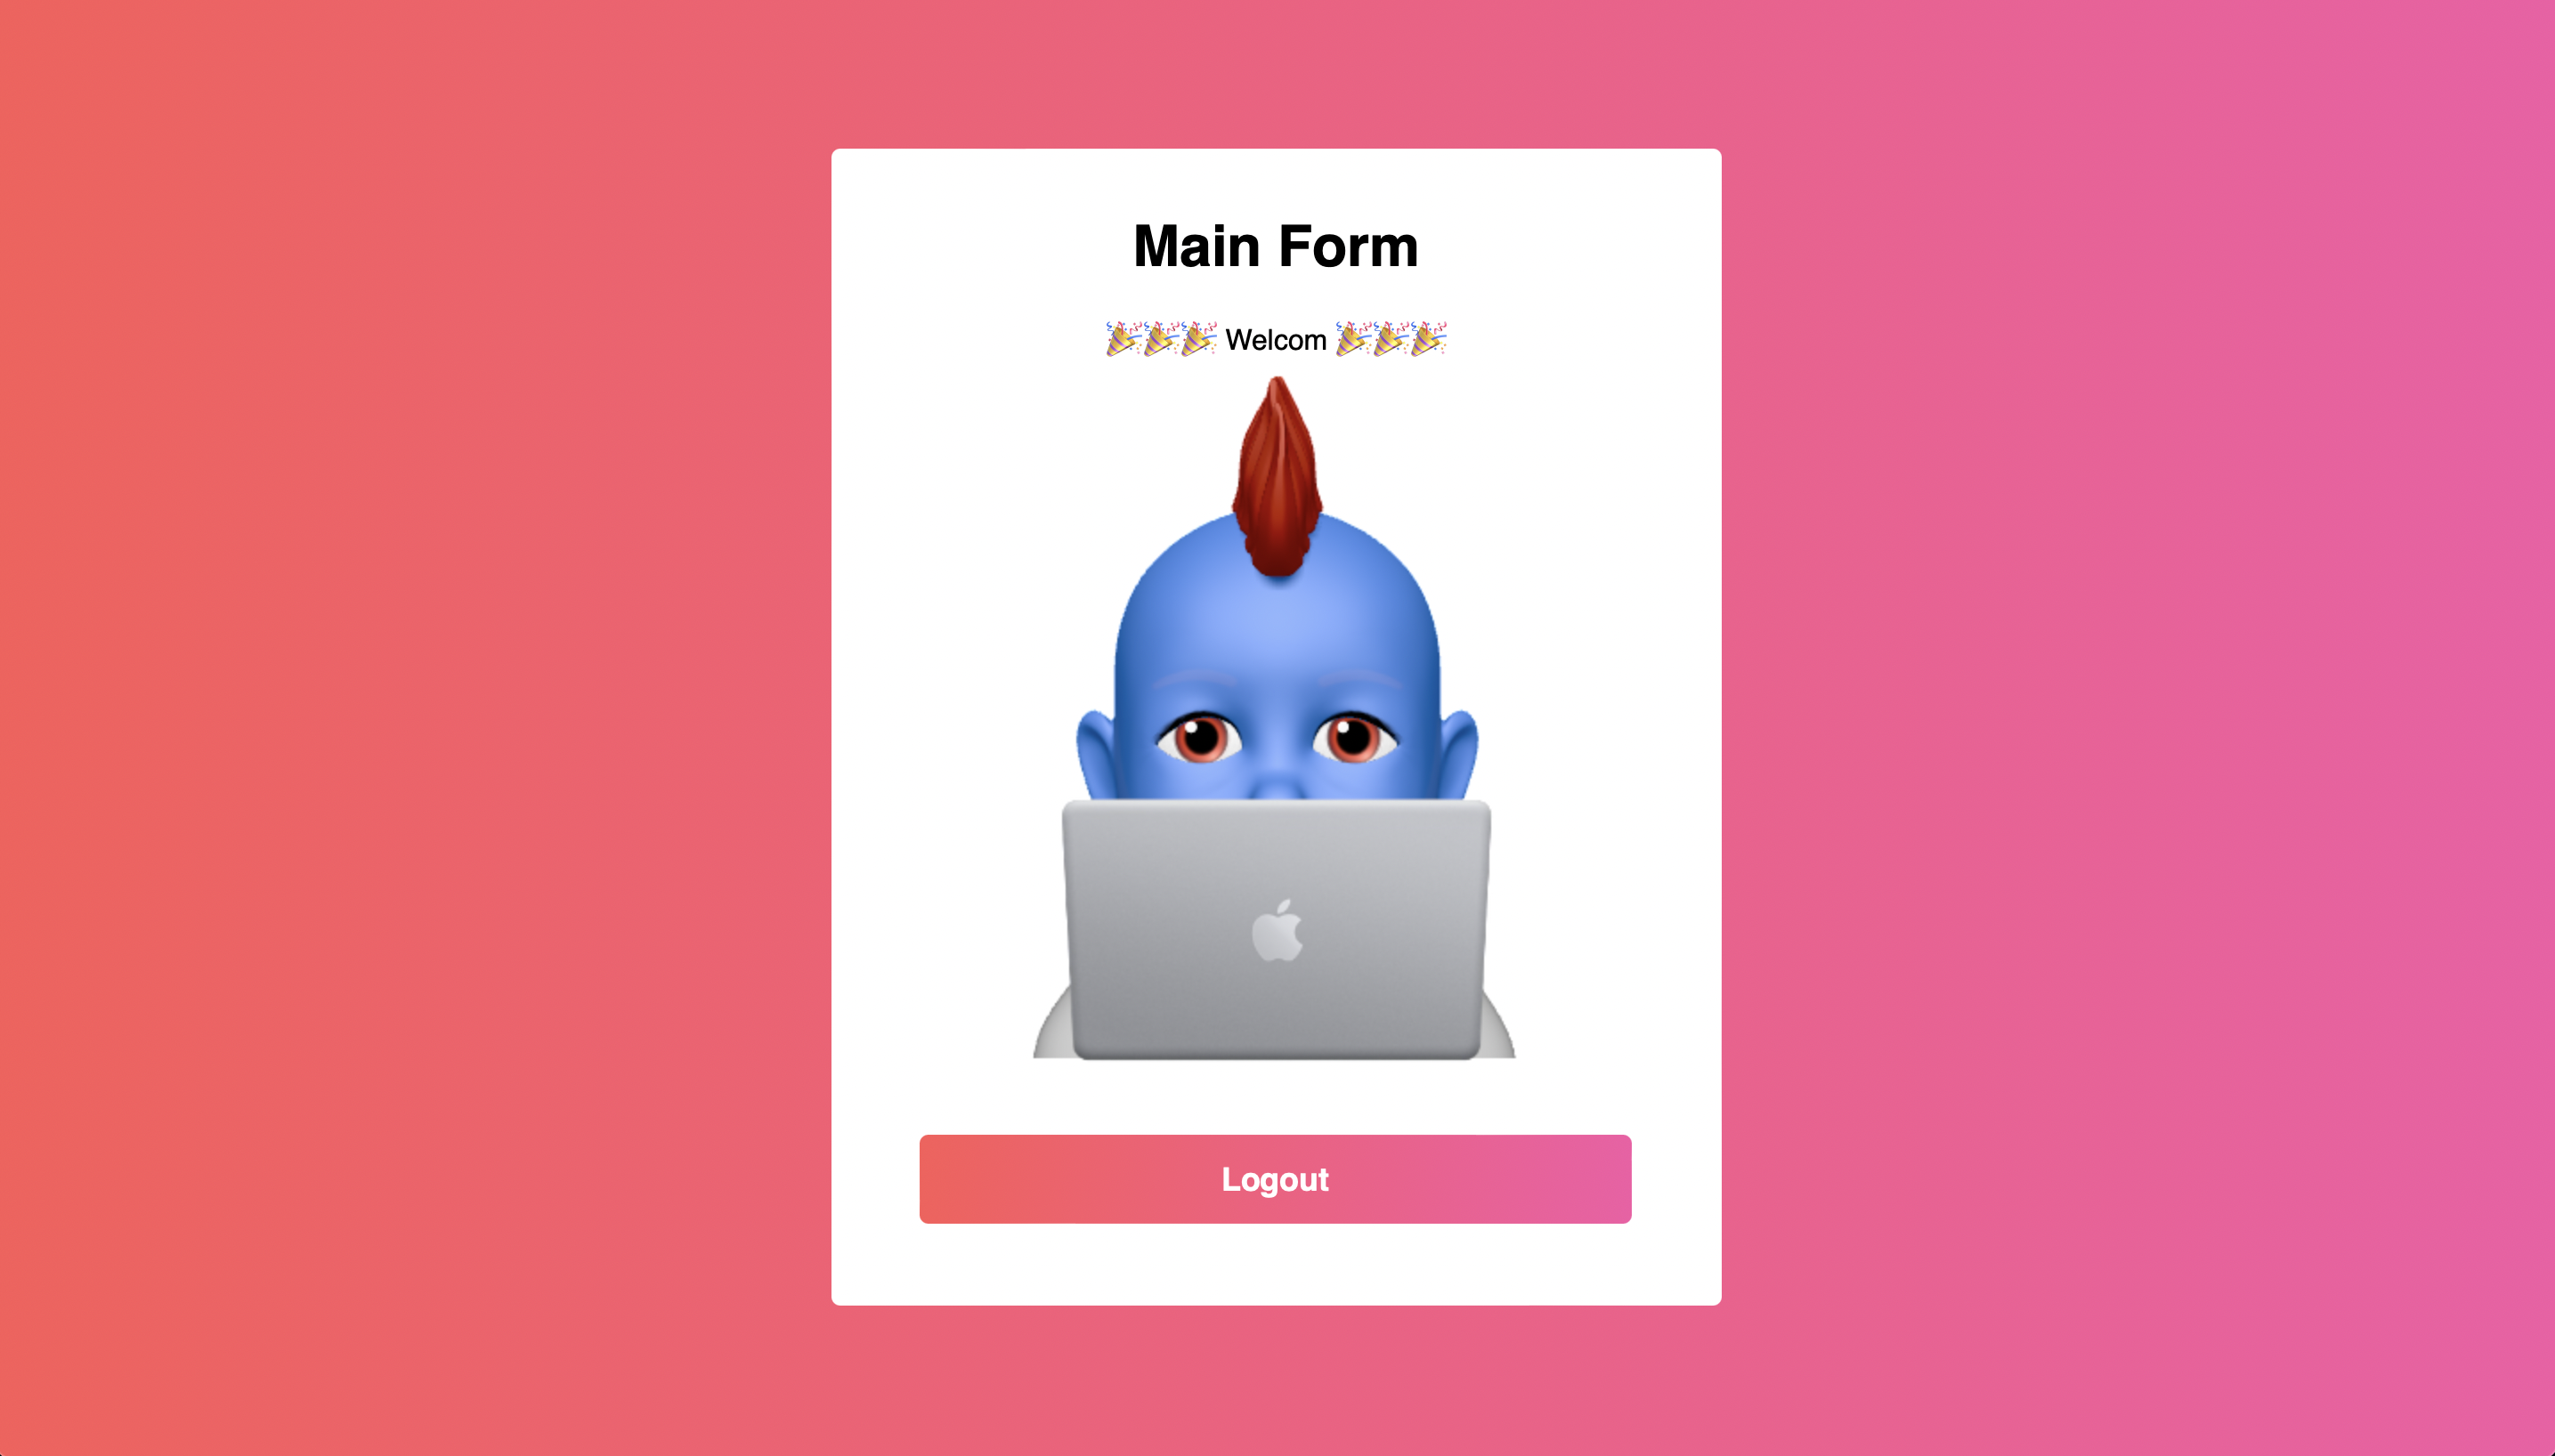
- 똑같은 방식으로 main.php와 changepw.php 파일을 만들어 줍니다.
<!-- main.php -->
<head>
	<link rel="stylesheet" href="./lib/css/style.css">
</head>
<body>
    <div id="main_wrap" class="wrap">
        <div>
            <h1>Main Form</h1>
                <p class="login_user_id">🎉🎉🎉 Welcom 🎉🎉🎉</p>
                <p><img src="./lib/image/image.png" alt="imoticon"></p>
                <p class="logout_btn form_btn"><a href="logout_ok.php">Logout</a></p>
        </div>
    </div>
</body>
/* style.css 에 추가 */
#main_wrap .logout_btn a {
height: 50px;
color: #fff;
font-weight: bold;
font-size: 18px;
display: flex;
justify-content: center;
align-items: center;
}
<!-- changepw.php -->
<head>
	<link rel="stylesheet" href="./lib/css/style.css">
</head>
<div id="change_wrap" class="wrap">
        <div>
            <h1>Change Password Form</h1>
            <form action="changepw_ok.php" method="post" name="changeform" id="change_form" class="form" onsubmit="return changepw()">
                <p><input type="text" name="userid" id="userid" placeholder="ID"></p>
                <p><input type="password" name="new_pw" placeholder="New Password"></p>
                <p><input type="password" name="new_pw_ch" placeholder="New Password Check"></p>
                <p><input type="submit" value="Change Password" class="changepw_btn form_btn"></p>
                <p class="pre_btn">Are you join? <a href="index.php">Login.</a></p>
            </form>
        </div>
    </div>
    <script src="./lib/js/changepw.js"></script>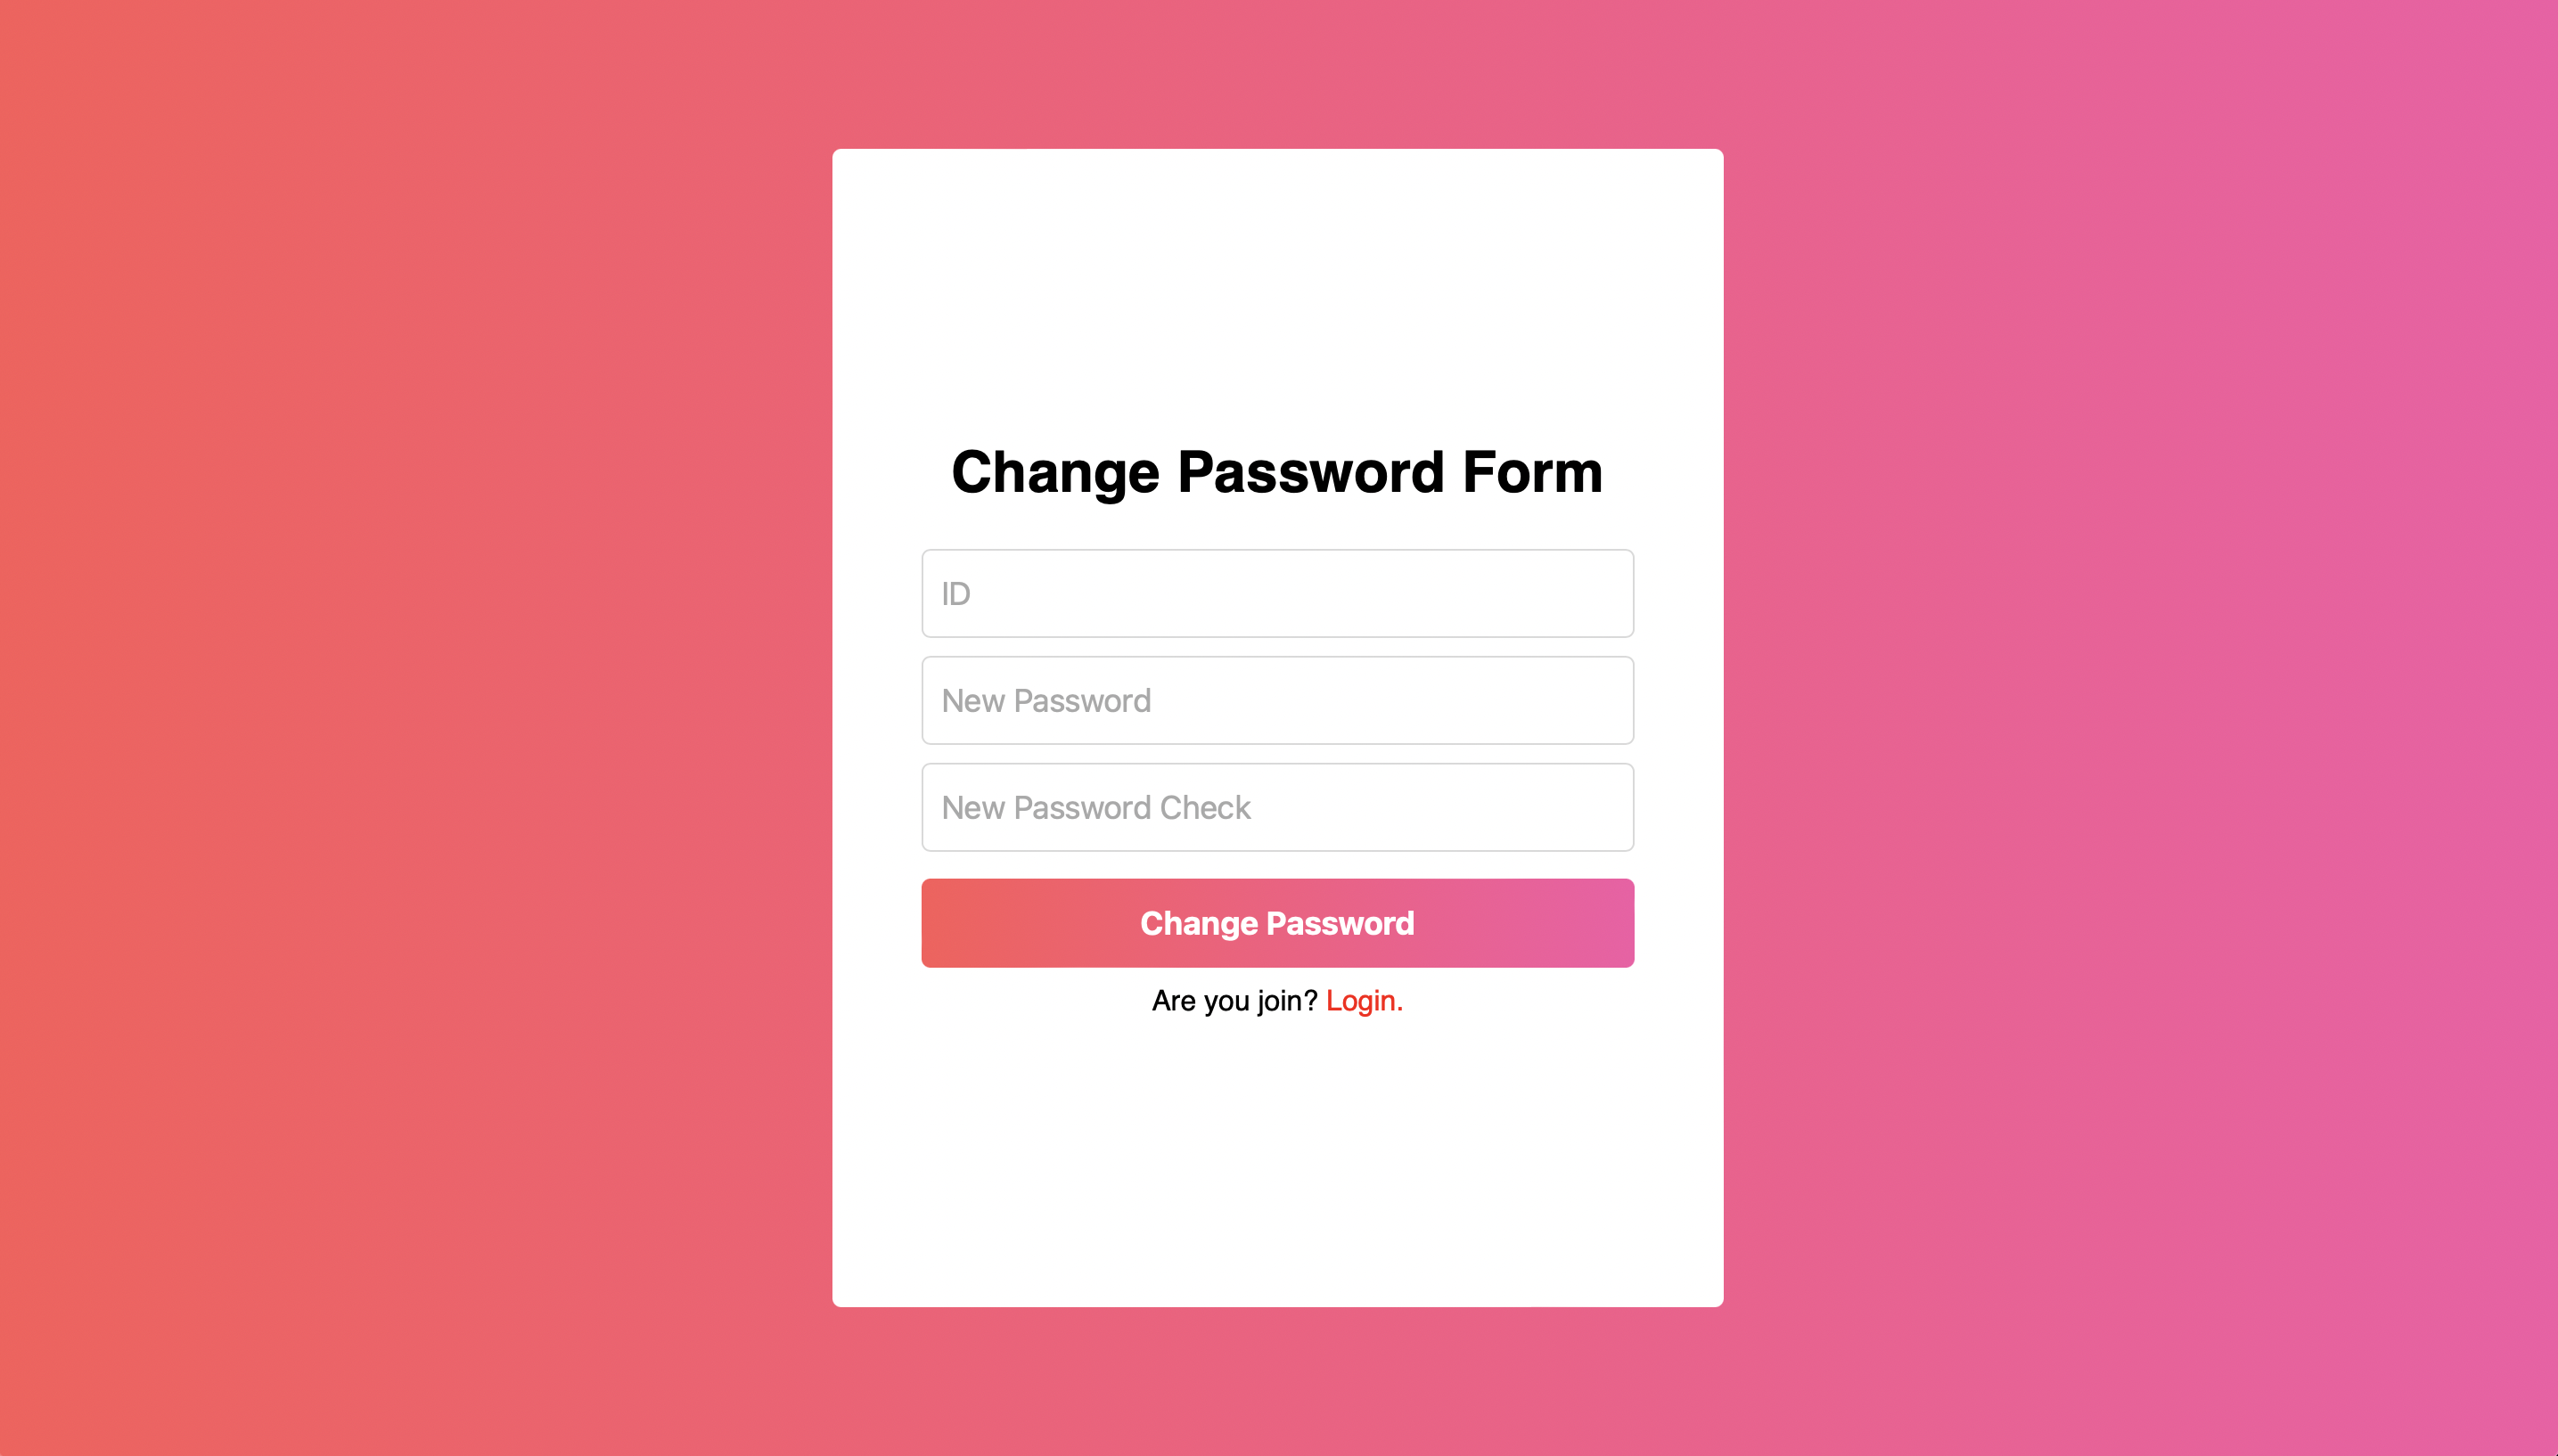
- 자 이렇게 4개의 페이지가 완성되었습니다. 수고하셨습니다.
다음 챕터에선 유효성 검사(Validation Chack)에 대해서 알아보겠습니다.
HTML5, CSS3, JavaScript, Typescript, React 프론트엔드 개발자입니다.
안녕하세요
혹시 로그인페이지에서 저 하얀 네모칸이 안나오는데 뭘 수정해야될까요?..