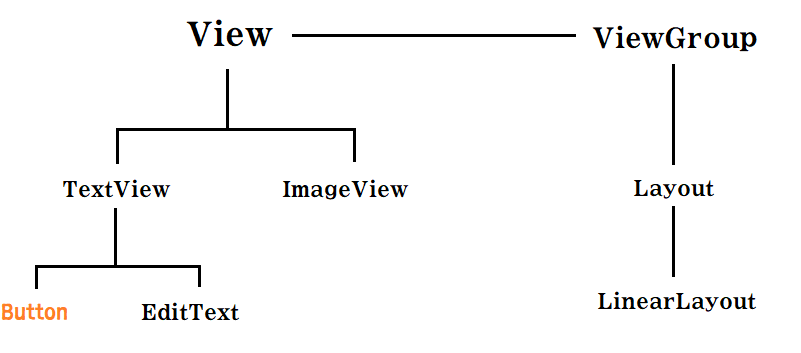
Android
Button
안드로이드 앱을 사용하면서 버튼을 클릭하는 행위는 대단히 많습니다. 실제 앱에서는 Button 뷰 대신 디자인 등의 이유로 이미지 버튼 등을 클릭하는 경우가 많습니다만, 버튼을 클릭한다는 의미 자체는 동일합니다. 그래서 이번에는 Button 뷰의 속성들을 알아보고, Button 의 ClickEvent 를 처리하는 법에 대해 알아봅시다.
Button 의 속성들
버튼 역시 TextView 를 상속받기에 TextView 의 속성들 또한 사용이 가능합니다. 버튼과 관련한 속성을 여기에서는 2가지 정도 알아볼건데, 감자 튀기기 예제로 EditText 와 버튼 클릭이벤트, TextView 까지 해서 가볍게 사용해보고 넘어갑시다.
<LinearLayout xmlns:android="http://schemas.android.com/apk/res/android"
    xmlns:app="http://schemas.android.com/apk/res-auto"
    xmlns:tools="http://schemas.android.com/tools"
    android:layout_width="match_parent"
    android:layout_height="match_parent"
    android:orientation="vertical"
    android:padding="20dp"
    tools:context=".MainActivity">

    <TextView
        android:id="@+id/potato_image"
        android:layout_width="match_parent"
        android:layout_height="wrap_content"
        android:textSize="20sp"
        android:textStyle="bold"
        android:textColor="@color/purple_700"
        android:layout_margin="20dp"
        android:background="@drawable/potato"
        android:gravity="center"/>

    <Button
        android:id="@+id/fryButton"
        android:layout_width="wrap_content"
        android:layout_height="wrap_content"
        android:layout_gravity="center"
        android:text="Fry"
        android:backgroundTint="#FF0000"
        android:textAllCaps="false"/>

    <TextView
        android:id="@+id/myText"
        android:layout_width="wrap_content"
        android:layout_height="wrap_content"

        android:layout_gravity="center"
        android:textStyle="bold"
        android:textSize="20sp"
        android:textColor="#302D2D"
        android:gravity="center"/>

    <LinearLayout
        android:layout_width="match_parent"
        android:layout_height="wrap_content"
        android:orientation="horizontal">

        <EditText
            android:id="@+id/rip"
            android:layout_width="wrap_content"
            android:layout_height="wrap_content"
            android:hint="감자에게 보낼 메시지를 입력하세요."
            android:inputType="text"
            />

        <Button
            android:id="@+id/sendBtn"
            android:layout_width="wrap_content"
            android:layout_height="match_parent"
            android:text="Send"
            />
    </LinearLayout>

</LinearLayout>
위 예제는 감자에게 명복을 비는 메시지를 작성하고, Send 버튼을 누르면 TextView 에 작성된 메시지를 뿌려주며, Fry 버튼을 누리면 감자가 감자튀김으로 바뀌는 예제 입니다. 이 예제를 토대로 버튼의 속성 2가지와 클릭 이벤트에 대해 알아봅시다.
backgroundTint
앞서 텍스트 뷰를 사용할 때 뷰의 색상을 바꾸기 위해 background 속성을 사용하여 색상을 변경시켰습니다. 버튼의 경우는 그 상황과는 조금 다릅니다. 버튼의 경우에는 버튼의 색상을 변경하기 위해 background 속성이 아닌 backgroundTint 속성을 이용해주어야 합니다. 위 그림에서 먼저 Fry 버튼을 봅시다. 색깔이 빨갛습니다. 버튼의 기본색깔은 밑에 있는 Send 버튼 처럼 파란색 계열이나, backgroundTint 속성을 이용하여 색상을 변경해주었습니다. 속성값은 background 의 속성값 지정과 동일합니다.
textAllCaps
위 그림에서 Fry 버튼과 SEND 버튼의 다른 점이 또 보이시나요? 바로 대문자와 소문자 입니다. 버튼의 경우 내부에서는 기본적으로 Caps-lock 이 설정되어 있습니다. 그래서 text 속성을 사용하여 글자를 넣어줘도 그게 소문자인지는 상관없이 대문자로 표기가 됩니다. 그런 점을 보완할 수 있는 속성이 textAllCaps 입니다. 즉, 기본적으로 이 속성이 true 로 체크되어있기 때문에 모두 대문자로 변환됩니다. 이 속성의 값을 false 로 바꿔주면 소문자와 대문자를 구별하여 작성할 수 있습니다.
Button ClickEvent
텍스트 뷰가 글씨를 보여주기 위한 뷰라면 버튼은 클릭하기 위한 뷰 입니다. 그만큼 버튼에 있어서 클릭 이벤트 처리는 중요한 부분입니다. 자바 코드를 통해 어떻게 이벤트를 처리할 수 있는지 알아봅시다.
public class MainActivity extends AppCompatActivity {

    TextView tv;
    Button fryBtn;
    Button sendBtn;
    EditText et;
    TextView tv2;

    @Override
    protected void onCreate(Bundle savedInstanceState) {
        super.onCreate(savedInstanceState);
        setContentView(R.layout.activity_main);

        tv = findViewById(R.id.potato_image);
        fryBtn = findViewById(R.id.fryButton);
        tv2 = findViewById(R.id.myText);
        et = findViewById(R.id.rip);
        sendBtn = findViewById(R.id.sendBtn);

        View.OnClickListener listener = new View.OnClickListener() {
            @Override
            public void onClick(View view) {
                Resources res = getResources();
                Drawable drawable = ResourcesCompat.getDrawable(res, R.drawable.fries, null);
                tv.setBackground(drawable);            }
        };
        fryBtn.setOnClickListener(listener);


       View.OnClickListener listener1 = new View.OnClickListener() {
            @Override
            public void onClick(View view) {
                tv2.setText(et.getText() + "\n");
                et.setText(null);

            }
        };
        sendBtn.setOnClickListener(listener1);


    }
}
위 코드는 버튼 두개의 클릭 이벤트를 처리하는 코드 입니다. fry 버튼을 누르면 감자가 감자튀김으로 바뀌고, Send 버튼을 누르면 작성했던 글이 TextView 에 올라갑니다.
앞서 TextView 를 배울때도 이야기 했듯, 뷰의 참조변수들은 클래스의 멤버변수로 작성하는것이 좋습니다. 간단하게 설명하자면, onCreate 메소드 내에 참조변수를 선언하게 되면 메소드가 끝날 때 참조변수도 메모리에서 날아가기 때문입니다. 뷰의 참조변수가 메모리에서 사라지면 뷰를 화면에 표시할 수 없기 때문에 심각한 에러를 만들게 됩니다. 이 부분은 나중에 생명주기를 배울 때 다시 한번더 언급해봅시다.
findViewById()
참조변수도 설정 해주었으니, 이제 xml 에서 만들었던 뷰들의 주솟값을 만들어진 참조변수에 담고, 참조변수를 이용하여 뷰들의 제어를 해주어야 합니다. 이게 바로 안드로이드의 핵심 메커니즘 인데요, 잘 생각해보면 좀 이상합니다. xml 과 java 는 분명 다른 언어인데 어떻게 xml 에서 만든 뷰들을 java 파일로 가져올 수 있는걸까요?
원래는 xml 의 뷰들을 가져오기 위해서는 스트림을 따로 만든뒤에 파일 입출력을 통해 뷰들을 가져와야 합니다. 하지만 정말 다행스럽게도 안드로이드에는 그걸 대신 해주는 메소드가 존재합니다. 바로 findViewById() 입니다.
위 코드에서 볼 수 있듯, tv = findViewById(R.id.potato_image); 처럼 사용하면 tv 참조변수를 통해 텍스트 뷰를 제어할 수 있게 됩니다. 한번 짚고 넘어갈 부분은 R.id.potato_image 입니다.
res 폴더에 우리가 무언갈 넣어 놓으면 Resource 라는 객체가 R 장부 에 어떤 물건이 들어왔는지 쫘악 써놓습니다. 그리고 그 물건들에 번호를 하나씩 매겨놓습니다. 그리고 나중에 물건을 찾을 때 그 번호를 찾는 방식이죠. 근데 번호는 외우기는 어려우니 대체할 수 있는 단어를 마련했습니다.
R class 안에는 섹션별로 이너 클래스가 하나씩 만들어져 있습니다. 그러한 이너 클래스 내부에 변수를 하나씩 설정하고 그 변수의 이름을 가져온 물건의 이름으로 한 뒤, 변수값을 번호로 지정합니다.
이러한 과정을 통해 우리는 xml 에서 넘어온 뷰를 java 파일에서 사용할 수 있게됩니다. 물론 자세한 설명은 아니지만 비유적으로 이러한 과정이구나 정도만 파악하고 넘어갑시다.
이렇게 해서 xml 에 있는 뷰들의 ID 값을 받아와서 참조변수에 넣었습니다. 이제 이 참조변수들을 사용하여 버튼들의 클릭 이벤트를 처리 해봅시다.
OnClickListener
버튼의 클릭을 우리가 직접 알기는 쉽지 않습니다. 사용자가 언제 버튼을 누를지 모르니까요. 그래서 스토커 마냥 버튼을 감시하는 놈을 하나 만들었습니다. 그 놈이 바로 리스너(listener) 입니다. 우리는 리스너 객체를 하나 만들어서 그 객체를 버튼에 붙여주어 버튼이 클릭되는지 안되는지를 알아낼겁니다. 위 코드를 다시 봅시다.
View.OnClickListener listener = new View.OnClickListener() {
            @Override
            public void onClick(View view) {
                Resources res = getResources();
                Drawable drawable = ResourcesCompat.getDrawable(res, R.drawable.fries, null);
                tv.setBackground(drawable);            }
        };
        btn.setOnClickListener(listener);
위 코드에서 버튼의 리스너를 붙이는 부분의 코드입니다. 사실 위의 코드는 다음 아래의 코드와 동일한 코드입니다.
public class MainActivity extends AppCompatActivity {
... 중략

    @Override
    protected void onCreate(Bundle savedInstanceState) {
        super.onCreate(savedInstanceState);
        setContentView(R.layout.activity_main);

        fryBtn = findViewById(R.id.fryButton);

        View.OnClickListener listener = new AAA();

        fryBtn.setOnClickListener(listener);
    }
}

class AAA implements View.OnClickListener {
    TextView tv;
    @Override
    public void onClick(View v) {
        MainActivity ma = new MainActivity();
        Resources res = ma.getResources();
        Drawable drawable = ResourcesCompat.getDrawable(res, R.drawable.fries, null);
        tv.setBackground(drawable);
    }
}
View.OnClickListener 인터페이스를 구현하는 클래스 하나를 만들고, onClick() 메서드를 구현합니다. 그 onClick() 메서드가 버튼이 눌렸을 때 해야할 행위에 해당합니다.
그리고 onCreate() 메서드에서 findViewById() 메서드를 통해 참조변수에 버튼의 주솟값을 넣어주고, View.OnClickListener listener = new AAA(); 를 통해 만들어진 리스너 객체를 버튼의 메소드인 setOnClickListener(listener); 를 이용하여 버튼에 리스너를 붙여줍니다. 이렇게 하면 버튼이 눌렸을 때 어떠한 동작을 할것인지 지정해줄 수 있습니다. (지금 당장 onClick() 메소드 내부에 작성된 코드들을 깊게 파진 말고, 버튼과 리스너의 관계에 집중합시다. )
클래스를 따로 만들어 눌렸을 때의 동작을 따로 정의 하니 보기도 힘들고 동떨어져 있는 느낌입니다. 그래서 우리가 예전에 배웠던 익명클래스를 이용하여 작성한 코드가 제일 위쪽에 있는 코드 입니다. 사용 원리를 잘 알아둡시다.
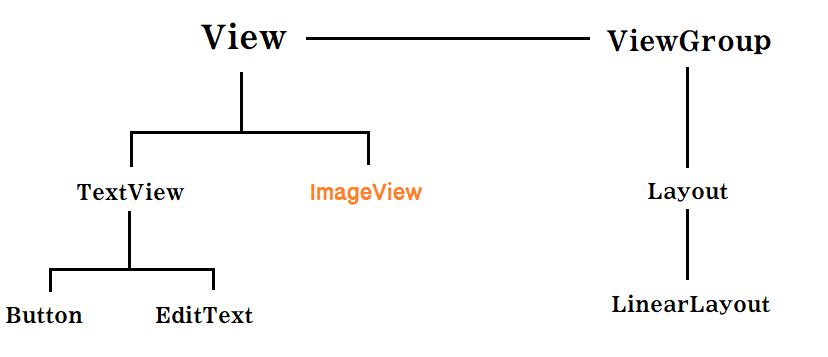
ImageView
앞서 TextView 에 감자 사진을 넣을 때, background 속성을 이용하여 사진을 넣어주는 작업을 해보았습니다. 그러면 TextView 를 이용하면 되지 ImageView 를 이용하는 이유는 무엇일까요? 두 방식의 가장 큰 차이는 원본 이미지 파일의 비율을 유지하느냐 그렇지 않느냐 에 있습니다. background 속성을 이용하여 이미지를 처리하면 원본 이미지의 비율이 깨져 이상하게 표현됩니다. ImageView 를 활용하면 그러한 문제점을 해결할 수 있죠. 이번에는 ImageView 속성들을 알아보고 버튼 클릭 이벤트를 이용하여 이미지를 바꿔주는 프로그램을 한번 짜봅시다.
ImageView 의 속성들
이미지 뷰의 경우 이미지 뷰의 가로와 세로의 크기 중에서 짧은 쪽의 크기에 이미지가 맞춰집니다. 다음 그림을 보고 이해해 봅시다.
<ImageView
    android:id="@+id/flag"
    android:layout_width="100dp"
    android:layout_height="300dp"
    android:src="@drawable/flag_korea"
    android:layout_marginBottom="20dp"
    android:background="@drawable/ic_launcher_background"/>
이미지 뷰의 가로 크기가 100dp, 세로 크기가 300dp 이므로 짧은쪽인 가로에 맞춰 이미지가 생성됩니다.
<ImageView
    android:id="@+id/flag"
    android:layout_width="300dp"
    android:layout_height="100dp"
    android:src="@drawable/flag_korea"
    android:layout_marginBottom="20dp"
    android:background="@drawable/ic_launcher_background"/>
이미지 뷰의 가로 크기가 300dp, 세로 크기가 100dp 이므로 짧은쪽인 세로에 맞춰 이미지가 생성됩니다.
src
src 속성은 이미지 뷰에 이미지를 담기 위한 속성입니다. res 폴더안에 drawable 폴더에 우리가 담고자 하는 이미지를 넣고 src 속성의 속성값으로 "@drawable/[이미지파일 이름]" 을 주면 이미지를 이미지 뷰안에 넣을 수 있습니다.
scaleType
scaleType 속성은 속성의 속성값에 따라 이미지의 비율이나 크기 등을 조절할 수 있는 속성입니다. 속성값으로는 8가지가 있는데, 여기에서는 자주 사용되는 3가지 속성값정도만 알아보겠습니다.
- centerInside
<ImageView
    android:id="@+id/flag"
    android:layout_width="match_parent"
    android:layout_height="300dp"
    android:src="@drawable/korea"
    android:scaleType="centerInside"
    android:layout_marginBottom="20dp"
    android:background="@drawable/ic_launcher_background"/>
centerInside 속성값의 경우 이미지의 가로 세로 비율을 맞춰서 이미지 뷰에 넣어줍니다. 이미지가 찌그러질 염려 없이 사용할 수 있는 속성입니다.
- centerCrop
<ImageView
    android:id="@+id/flag"
    android:layout_width="200dp"
    android:layout_height="300dp"
    android:src="@drawable/korea"
    android:scaleType="centerCrop"
    android:layout_marginBottom="20dp"
    android:background="@drawable/ic_launcher_background"/>
centerCrop 속성값의 경우 이미지를 꽉 채워서 이미지 뷰에 넣습니다. 이미지의 짧은 쪽을 기준으로 꽉 채운뒤, 이미지 뷰를 넘어가는 부분은 잘라냅니다.
- fitXY
<ImageView
    android:id="@+id/flag"
    android:layout_width="300dp"
    android:layout_height="300dp"
    android:src="@drawable/korea"
    android:scaleType="fitXY"
    android:layout_marginBottom="20dp"
    android:background="@drawable/ic_launcher_background"/>
fitXY 속성의 경우 이미지의 비율과 관계없이 이미지 뷰에 딱 맞게 맞춰서 이미지를 보여줍니다.
클릭이벤트를 활용한 이미지 변경
클릭이벤트에 대해서는 이미 알고 있기 때문에 코드를 먼저 봅시다.
<ImageView
    android:id="@+id/flag"
    android:layout_width="match_parent"
    android:layout_height="300dp"
    android:src="@drawable/flag_korea"
    android:scaleType="fitXY"
    android:layout_marginBottom="20dp"
    android:background="@drawable/ic_launcher_background"/>

<Button
    android:id="@+id/btn01"
    android:layout_width="match_parent"
    android:layout_height="wrap_content"
    android:text="KOREA"/>

<Button
    android:id="@+id/btn02"
    android:layout_width="match_parent"
    android:layout_height="wrap_content"
    android:text="BELGIUM"/>

<Button
    android:id="@+id/btn03"
    android:layout_width="match_parent"
    android:layout_height="wrap_content"
    android:text="GERMANY"/>

<Button
    android:id="@+id/btn04"
    android:layout_width="match_parent"
    android:layout_height="wrap_content"
    android:text="USA"/>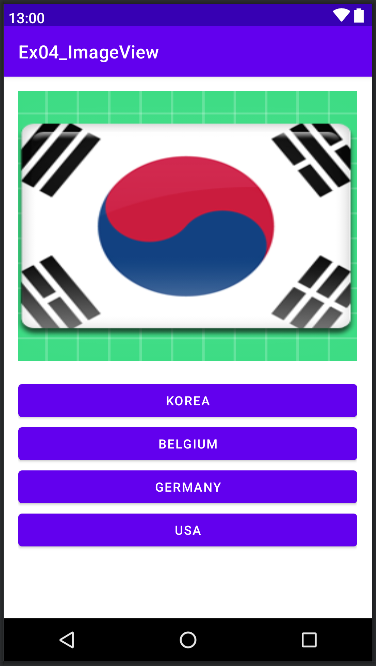
public class MainActivity extends AppCompatActivity {
    ImageView iv;
    Button btn01,btn02,btn03,btn04;

    @Override
    protected void onCreate(Bundle savedInstanceState) {
        super.onCreate(savedInstanceState);
        setContentView(R.layout.activity_main);

        iv = findViewById(R.id.flag);
        btn01 = findViewById(R.id.btn01);
        btn02 = findViewById(R.id.btn02);
        btn03 = findViewById(R.id.btn03);
        btn04 = findViewById(R.id.btn04);

        btn01.setOnClickListener(listener);
        btn02.setOnClickListener(listener);
        btn03.setOnClickListener(listener);
        btn04.setOnClickListener(listener);

    }
    View.OnClickListener listener = new View.OnClickListener() {
        @Override
        public void onClick(View view) {
            int id = view.getId();

            if( id == R.id.btn01) iv.setImageResource(R.drawable.flag_korea);
            else if( id == R.id.btn02) iv.setImageResource(R.drawable.flag_belgium);
            else if( id == R.id.btn03) iv.setImageResource(R.drawable.flag_germany);
            else if( id == R.id.btn04) iv.setImageResource(R.drawable.flag_usa);

        }
    };
}
각 버튼을 누르면 나라에 맞게 국기가 바뀌는 코드 입니다. java 코드를 봅시다. 클래스의 멤버변수로 각 뷰들의 참조변수들을 선언해주었으며, findViewById() 메서드를 통해 xml 의 뷰들의 주솟값을 java 의 참조변수에 넣어주었습니다.
버튼의 클릭 이벤트 처리 부분을 봅시다. setImageResource() 메서드와 drawable 폴더 안에 있는 이미지 파일의 이름을 이용하여 이미지 뷰의 이미지를 변경할 수 있습니다. 이런식으로 이미지뷰의 이미지를 변경할 수 있다는 점을 숙지합시다.