useEffect 활용해서 open API 데이터 가져오기
여기서 잠깐!!
- 콜백함수 (함수 안에 함수)
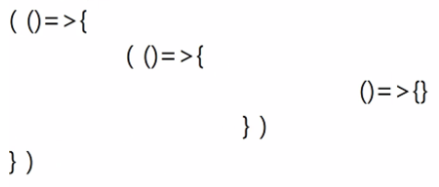
이런 콜백 지옥이 생기게 됨
그래서 promise 새로 생김
-
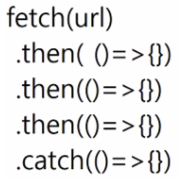
promise
-
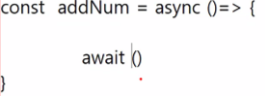
async await
너 잠깐만 비동기 할건데 잠깐 기다려!!
영화 순위 가져오기 실습
movieList배열을 통해 화면에 영화표 출력해보기
https://kobis.or.kr/kobisopenapi/webservice/rest/boxoffice/searchDailyBoxOfficeList.json?key=f5eef3421c602c6cb7ea224104795888&targetDt=20231205
-> 영화 순위 데이터
고기를 썰때 도마를 놓고 썰지 않냐
화면 렌더링 하고 나서 데이터를 가져오자 → useEffect 사용!!
Case1 fetch API
- 장점
- JS 자체 내장 라이브러리, 별도의 설치 필요 X / 속도가 상대적으로 빠름
- 속도가 상대적으로 빠름
- 단점
- 지원이 되지 않는 브라우저가 존재
=> 그러다 보니 react-native(어플)에서 많이 사용 - JSON 변환 작업 필요
- 지원이 되지 않는 브라우저가 존재
useEffect
useEffect(()=>{
        let url = `https://kobis.or.kr/kobisopenapi/webservice/rest/boxoffice/searchDailyBoxOfficeList.json?key=f5eef3421c602c6cb7ea224104795888&targetDt=20231205`

        // API 데이터를 주고받을 수 있는 문법 2가지 : fetch, axios -> 비동기 라이브러리
        // case 1) fetch API

        fetch(url)
         // url연결이 되면 데이터를 가져올거야 근데 먼저 json형태로 변환해주고
        .then(res => res.json())
        .then(res => setMovieList(res.boxOfficeResult.dailyBoxOfficeList))
    },[]);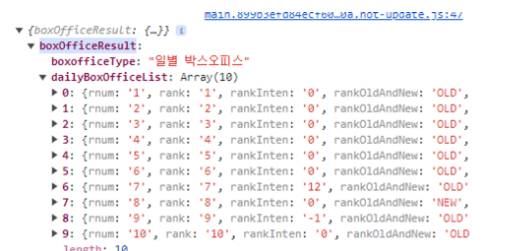
res.boxOfficeResult 안에 dailyBoxOfficeList

만약 이렇게 작성하면 자기 알아서 가벼운 거 부터 실행하므로 then then으로 해야함
return
return (
    <div>
        <h1 style={{fontWeight:"bolder"}}>영화 순위!</h1>
        <hr></hr>
        <table>
            <tbody>
                {movieList.map(item => <tr>
                    <td>{item.rank} </td>
                    <td>{item.movieNm} </td>
                    <td>{item.openDt} </td>
                </tr>)}
            </tbody>
        </table>
        <hr></hr>
    </div>
  )
Case2 Axios
-
장점
1. fetch보다 상대적으로 다양한 기능
2. 다양한 브라우저에서 사용가능
3. 상대적으로 보안에 유리
4. 자동으로 JSON 변환 -
단점
1. 별도 라이브러리 설치 (npm i axios)
2. 속도가 상대적으로 느림
"내 프로젝트는 볼륨도 작고, 설치도 귀찮아" : fetch
"나는 react-native를 통해 어플을 만들거야" : fetch
"어느정도 볼륨이 있는 그 외 모든 웹프로젝트" : axios
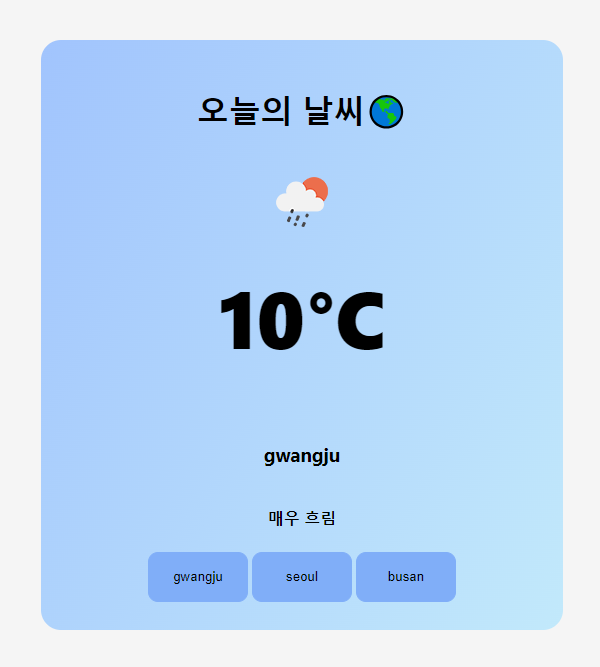
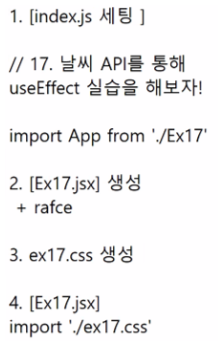
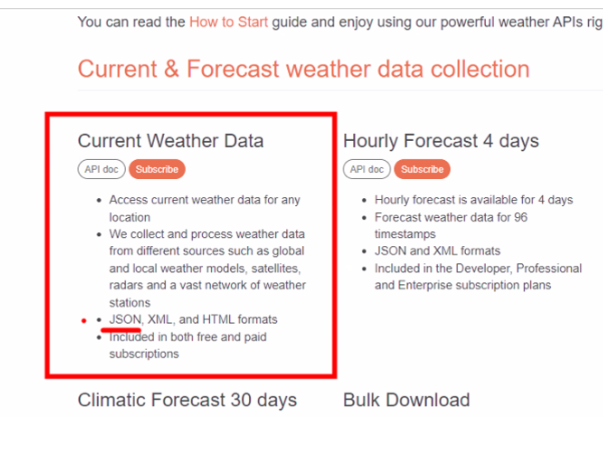
날씨 API useEffect 실습
https://api.openweathermap.org/data/2.5/weather?q={city name}&appid="d98ae2c3057b1f588501393dc077fc5f"
키 발급 받기
** 문제 풀 때 참고 사항
1. icon은 단톡에 있는 주소를 통해서 사용
2. 해당 API는 켈빈온도 사용
(켈빈온도 -273 = 섭씨온도)
3. 만약 구름의 양이 90보다 크다면 "매우 흐림"
60보다 크다면 흐림
30보다 크다면 약간 흐림
그 이외에는 맑음
** 문제풀이 STEP
1) 도시를 나타내는 city를 state로 정의 초기 값 "gwangju"
2) 첫 화면이 랜더링 되었을 때, getData 함수 호출
3) getData라는 함수를 정의
open API 값 가져오기
각각의 값을 정의 - state정의
-아이콘(icon)
-온도(temp)
-도시이름(city)
-맑음상태(cloud)
axios 사용 코드
import React, { useEffect, useState } from 'react'
import './ex17.css'
import axios from 'axios';

const Ex17 = () => {
    let cityList = ['gwangju','seoul','busan'];

    const[icon,setIcon] = useState();
    const [city,setCity] = useState("gwangju");
    const [temp,setTemp] = useState();
    const [cloud,setCloud] = useState();
    /** 내가 클릭한 도시를 가져오는 함수 */
    const getCity = (e) => {
        setCity(e.target.innerText)
    }


    /** 날씨 데이터를 가져오는 함수 */
    const getData = () => {
        let url = `https://api.openweathermap.org/data/2.5/weather?q=${city}&appid=내앱키`

        axios
        .get(url)
             // data 안에 들어가면 바로 활용 가능! json 변환 안 해줘도 됨
        .then(res => {
            console.log('getData Function', res.data)
            setTemp(parseInt(res.data.main.temp - 273))
            setIcon(`https://openweathermap.org/img/wn/${res.data.weather[0].icon}@2x.png`)
            if(res.data.clouds.all > 90){
                setCloud("매우 흐림")
            } else if (res.data.clouds.all > 60){
                setCloud("흐림")
            } else {
                setCloud("맑음")
            }
            })
    }

    useEffect(()=>{
        console.log("첫 화면 랜더링");
        getData();
       //첫화면 그리고 city가 바뀔때마다 랜더링(getData함수 실행!)
    },[city])

  return (
    <div className='weather-container'>
        <div className='weather-item'>
            <h1>오늘의 날씨🌎</h1>
            <div className='weather-data'>
                <img src={icon} width='100px' />
                <h1>{temp}°C</h1>
                <h3>{city}</h3>
                <h4>{cloud}</h4>
            </div>
            <div>
                {cityList.map(item => <button onClick={getCity}>{item}</button>)}

            </div>
        </div>
    </div>
  )
}

export default Ex17
fetch사용 코드
import React, { useState } from 'react'
import './Ex17.css'

const Ex17 = () => {
    const [city, setcity] = useState('gwangju')
    const [temp, settemp] = useState(0)
    const [cloud, setcloud] = useState("흐림")
    const [icon, seticon] = useState()
    let cityList = ['gwangju', 'seoul', 'busan'];
    let url = `https://api.openweathermap.org/data/2.5/weather?q=${city}&appid=d98ae2c3057b1f588501393dc077fc5f`
    let ions = `https://openweathermap.org/img/wn/${icon}@2x.png`

    fetch(url)
        .then(res => res.json())
        .then(res => (
            settemp(parseInt(res.main.temp - 273)),
            setcloud(res.clouds.all),
            seticon(res.weather[0].icon)))


    let cd = ''
    if (cloud > 90) {
        cd = "매우 흐림"
    } else if (cloud > 60) {
        cd = "흐림"
    } else if (cloud > 60) {
        cd = "약간 흐림"
    } else {
        cd = "맑음"
    };
    const btn = (e) => {
        console.log(e.target.innerText);
        setcity(e.target.innerText);
    }
    return (
        <div className='weather-container'>
            <div className='weather-item'>
                <h1>날씨날씨</h1>
                <div className='weather-data'>
                    <img width='100px' src={ions}></img>
                    <h1>{temp}°C</h1>
                    <h3>{city}</h3>
                    <h4>{cd}</h4>
                </div>
                <div>
                    {cityList.map(item => <button onClick={btn} key={item}>{item}</button>)}
                </div>
            </div>
        </div>
    )
}

export default Ex17
실습 결과