https://github.com/jhj6185/MSA_dream.git먼저 소스코드를 공개한다.
어떻게 했냐면
꽌뚜루웨이 블로그 참고했다
config 서버란 뭐냐..
깃허브에 config서버용 repository를 하나 파서, 거기에 ~.yml 을 다 적어줌
그럼 git에 있는 걸로 각각의 MS의 yml 파일 설정을 바꿀 수 있는 것!
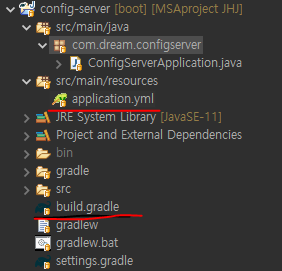
config-server

build.gradle
implementation 'org.springframework.cloud:spring-cloud-config-server'추가한다. config-server라는 것을 알려주는 것이다.
application.yml
spring:
  application:
    name: config-service

  cloud:
    config:
      server:
        git:
          uri: https://github.com/JongbaekKIm/Dream_MSA  #Github Repository 주소
읽을 config server의 git uri를 써준다
이러면 이제 그 레포지토리를 읽어준다.
ConfigServerApplication.java
package com.dream.configserver;

import org.springframework.boot.SpringApplication;
import org.springframework.boot.autoconfigure.SpringBootApplication;
import org.springframework.cloud.config.server.EnableConfigServer;

@SpringBootApplication
@EnableConfigServer //이게 필요함
public class ConfigServerApplication {

	public static void main(String[] args) {
		SpringApplication.run(ConfigServerApplication.class, args);
	}

}
MS
config는 server-client 관계이기 때문에
config-client가 필요하다

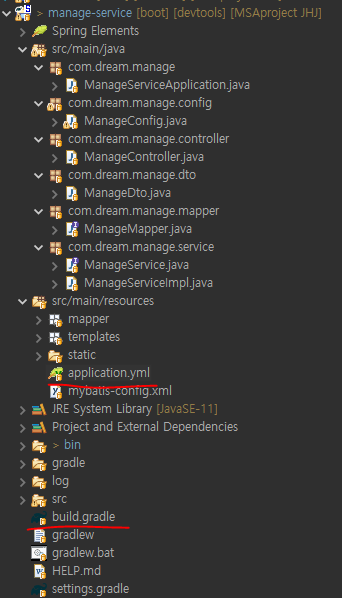
나는 각 MS에 이와같은 설정을 해주었고, 블로그 글에서는 대표적으로 manage-service 만 보여주겠다.
build.gradle
	implementation 'org.springframework.boot:spring-boot-starter-actuator'
	implementation 'org.springframework.cloud:spring-cloud-starter-config'
클라이언트에는 이와같은 설정이 필요하다
application.yml
# eureka, devtools, datasource, myBatis 외부화 완료
server:
  port: 8002


spring:
  application:
    name: manage-service
  config: //config import에 의해 읽어짐
   import: optional:configserver:http://localhost:8888
  security: # security부터 keycloak 까지는 외부화 실패
    oauth2:
     resourceserver:
        jwt:
          jwk-set-uri: http://너님의 keycloak 서버 url:8080/auth/realms/MSA/protocol/openid-connect/certs

keycloak:
  realm: MSA
  bearer-only: true
  ssl-required: external
  resource: spring-gateway-client
  auth-server-url: http://너님의 keycloak 서버 url:8080/auth
  credentials:
    secret: WEcACPUTWPfuhPrEz3bBaHcl7OLLmYX1


#logging:
#  file:
#    name: ${user.dir}/log/test.log  # 로깅 파일 위치이다.
#    max-history: 7 # 로그 파일 삭제 주기이다. 7일 이후 로그는 삭제한다.
#    max-size: 10MB  # 로그 파일 하나당 최대 파일 사이즈이다.
##  level:  # 각 package 별로 로깅 레벨을 지정할 수 있다.
##    com.project.study : error
##    com.project.study.controller : debug

#외부화 성공
#eureka:
#  instance:
#    instance-id: manage-microservice-instance
#  client:
#    register-with-eureka: true
#    fetch-registry: true
#    service-url:
#      defaultZone: http://localhost:8761/eureka

#spring:
#  devtools:
#     livereload:
#        enabled: true
#     restart:
#        enabled: true
#  datasource:
#    driver-class-name: com.mysql.cj.jdbc.Driver
#    url: jdbc:mysql://너님의 mysql url:3306/dream?useSSL=false
	 &allowPublicKeyRetrieval=true&serverTimezone=Asia/Seoul
#    username: dream
#    password: 1234

#mybatis:
#  mapper-locations: /mapper/**/*.xml
#  type-aliases-package: com.dream.manage.dto
먼저 외부화 시키고 싶은 부분을 주석 처리하거나 지우고,
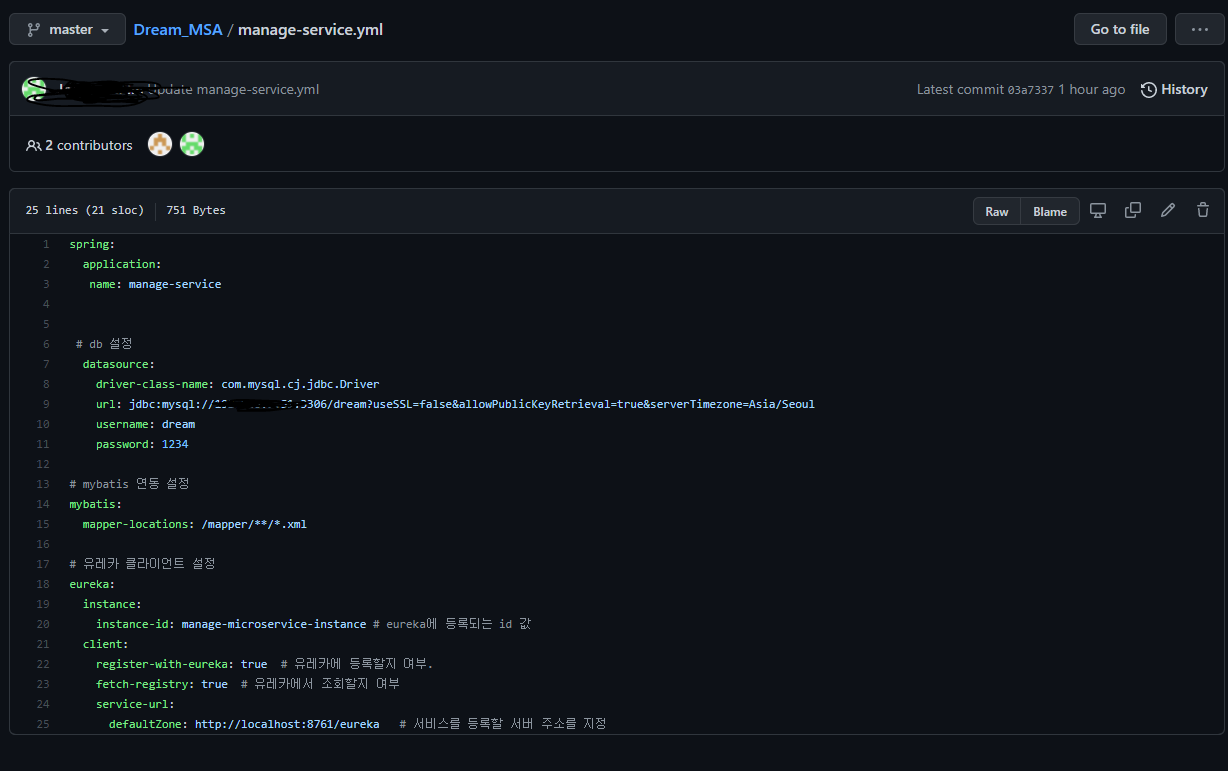
config server가 읽을 uri였던 깃repository에 가서

외부화 된 manage-service.yml
spring:
  application:
   name: manage-service


 # db 설정
  datasource:
    driver-class-name: com.mysql.cj.jdbc.Driver
    url: jdbc:mysql://너님의 mysql 서버 주소:3306/dream?useSSL=false
    &allowPublicKeyRetrieval=true&serverTimezone=Asia/Seoul
    username: dream
    password: 너님의 mysql 비번

# mybatis 연동 설정
mybatis:
  mapper-locations: /mapper/**/*.xml

# 유레카 클라이언트 설정
eureka:
  instance:
    instance-id: manage-microservice-instance # eureka에 등록되는 id 값
  client:
    register-with-eureka: true  # 유레카에 등록할지 여부.
    fetch-registry: true  # 유레카에서 조회할지 여부
    service-url:
      defaultZone: http://localhost:8761/eureka   # 서비스를 등록할 서버 주소를 지정
이런식으로 적으면 알아서 읽어준다.
