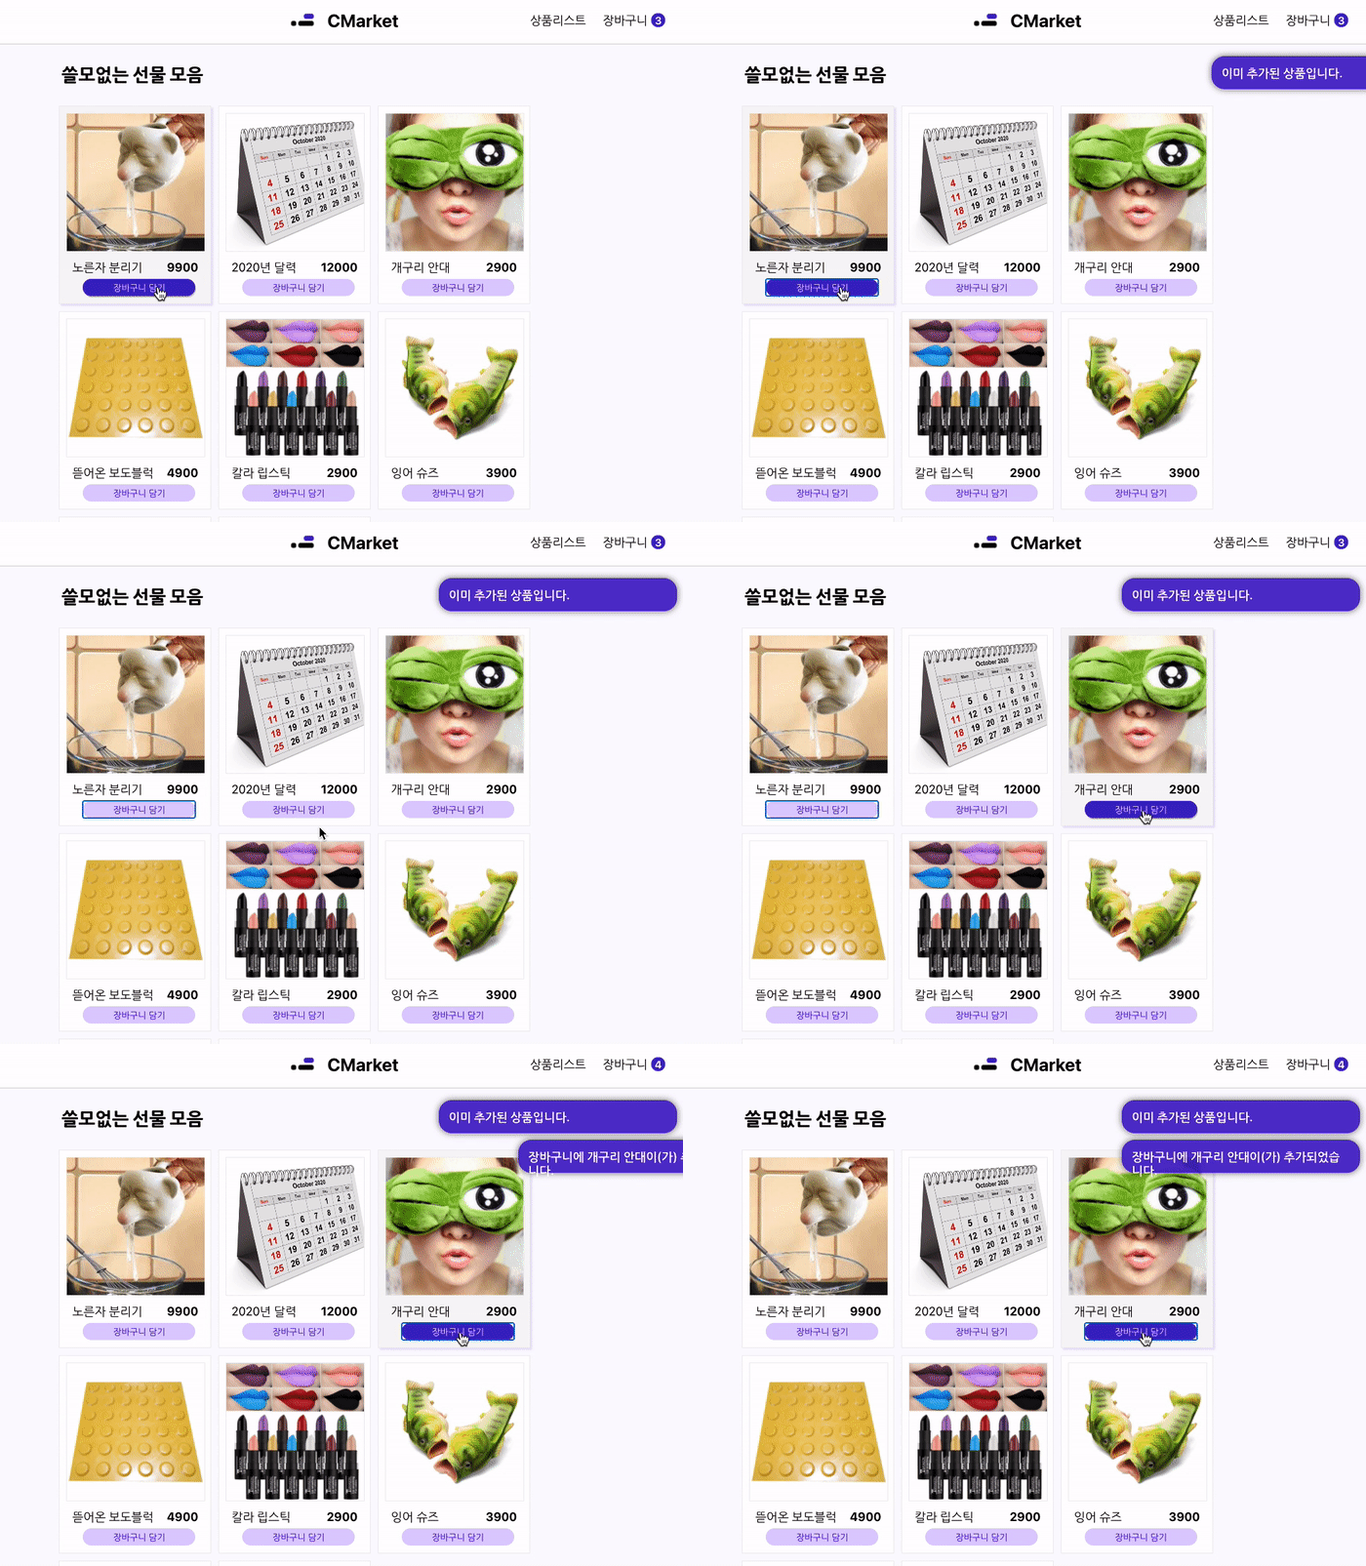
이론으로만 배웠던 리액트-리덕스를 스프린트를 통해 직접 접해보았다. 물론 스프린트 코드는 처음부터 다 짜여져 있고 우린 거기서 핵심 부분만 추가를 하여 테스트를 통과를 하면된다. 하다보면서 느낀건 역시 직접해봐야 이해가 가는구나 싶었다. 추상적으로만 생각했던 요소들 네가지 View, Action, Reducers, store를 연구할 수 있었다.
코드스테이츠에서 제공한 스프린트를 인용해 흐름을 따라 코드를 분석해 보겠다.
먼저 View 를 통해 '장바구니 담기'를 클릭하여 Action을 생성할 것이다.
export const ADD_TO_CART = "ADD_TO_CART";// 1

export const addToCart = (itemId) => {
  return {
    type: ADD_TO_CART,// 2
    payload: {
      quantity: 1,
      itemId
    } // 3
  }
}
직관적으로 말하자면, Action을 거치면서 필요한 데이터를 객체로 만들어 준다. 중요한 점은 타입을 구분하기 위한 개별적인 액션 타입이 필요하다.(1, 2) 그리고 적절한 데이터로 페이로드를 만들어준다.(3)
import React from 'react';
import { addToCart, notify } from '../actions/index';
import { useSelector, useDispatch } from 'react-redux';
// 컴포넌트 선언 생략
  const dispatch = useDispatch();

  const handleClick = (item) => {
    if (!cartItems.map((el) => el.itemId).includes(item.id)) {
      dispatch(addToCart(item.id))
      dispatch(notify(`장바구니에 ${item.name}이(가) 추가되었습니다.`))
    }
    else {
      dispatch(notify('이미 추가된 상품입니다.'))
    }
  }
컴포넌트의 클릭 함수를 통해 dispacher가 reducer를 호출하도록 만든다.
dispacher(dispatch)의 인자로는 아까 Action코드에서 만들어진 type과 payload를 포함한 객체가 들어간다.
import { REMOVE_FROM_CART, ADD_TO_CART, SET_QUANTITY } from "../actions/index";
import { initialState } from "./initialState";

const itemReducer = (state = initialState, action) => {

  switch (action.type) {
    case ADD_TO_CART:
        return Object.assign({}, state, {
          cartItems: [...state.cartItems, action.payload] // 1
        })
          default:
      return state;
  }
}
dipatcher로 전달된 Action객체는 타입에 맞게 적절한 함수를 실행하게 된다. 여기서 중요한 점은 바로 정보의 형태를 immutable하게 업데이트를 해주어야 하는것. (1) 그 이유는 데이터의 변화를 알아 볼 수 있게 하기 위해서이다.
import { combineReducers } from 'redux';
import itemReducer from './itemReducer';
import notificationReducer from './notificationReducer';

const rootReducer = combineReducers({
  itemReducer,
  notificationReducer
});

export default rootReducer;
리듀서들은 rootReducer 하나로 합쳐져 있으며,
import { compose, createStore, applyMiddleware } from "redux";
import rootReducer from '../reducers/index';
import thunk from "redux-thunk";

const composeEnhancers = window.__REDUX_DEVTOOLS_EXTENSION_COMPOSE__ ?
  window.__REDUX_DEVTOOLS_EXTENSION_COMPOSE__({})
  : compose;
const store = createStore(rootReducer, composeEnhancers(applyMiddleware(thunk)));

export default store;
store를 통해 관리가 된다. reducer에서의 변화가 업데이트가 되게 하는 코드이다.
직접 로그를 찍어보면서 어떤 데이터, 메소드 들이 담겨있는지 직접 보면서 과정에 대한 이해는 했다. 그러나 조금 복잡한 감이 없잖아 있다. 익수하게 사용하기까지 반복적인 연습이 필요할 것 같다.
