프로젝트 때 선택한 타입스크립트가 나를 크게 힘들게 할 것이란 생각을 못했다. 그러나 의외의 부분에서 정말 힘들게 했는데 그것이 바로 타입스크립트 환경에서 시퀄라이즈를 사용하는 것이었다. 실제로 그 당시 공식문서에서도 자세히 다루지도 않았고 또 둘을 연계해서 사용하는 것을 지양하라고 하였다.
타입스크립트에선 당연히 CLI를 쓸 수 없는데, CLI로만 사용하던 시퀄라이즈를 직접 바닥부터 사용해야한다는 것에 너무 멘붕이왔다. 그리고 배웠던 디자인 패턴대로 하고싶은데 공식문서에는 그렇게 나와있지 않았고 시간에 쫓기는 프로젝트라 뇌정지가 오기도 했다.
그 때 찾은 블로그가 있는데 내가 엄청나게 도움을 받았던 블로그다. 이 블로그가 없었으면 정말 포기했을 것이다.
1. 타입스크립트 환경 구축하기
먼저 타입스크립트로 개발을 할 환경을 구축할 것이다.
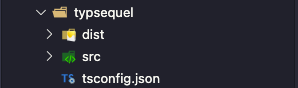
위처럼 src, dist 디렉토리를 만들어주는데 src는 타입스크립트로 작업할 폴더이고 이를 root로 생각하고 작업하면된다. dist는 src의 타입스크립트 파일이 자바스크립트 파일로 컴파일 되었을 때 담기는 곳이라고 보면된다. 쉽게 말해 src에서만 코드를 작성하고 컴파일 해주면 되는 것이다.
$ tsc --init처음엔 위 사진의 tsconfig가 없을 것인데, 위의 명령어로 tsconfig 파일을 만들자 json형식의 파일이고 타입스크립트 개발 환경에 대한 전반적인 설정을 다룬다.
{
  "compilerOptions": {
      "target": "es2020", // ECMAScript 버전 선택 ES6 이상 쓰는 것을 권장
      "module": "commonjs", // 모듈을 위한
      "outDir": "./dist", // 컴파일 후 디렉토리
      "rootDir": "./src", // 루트 디렉토리
      "strict": true, // 타입체킹 활성화 -> 타입스크립트 쓰는 이유
      "moduleResolution": "node", // 모듈 해석 방법
      "esModuleInterop": true,
      "skipLibCheck": true,
      "forceConsistentCasingInFileNames": true
   }
}
위의 항목만 건드려주면 된다. 항목에 대한 자세한 설명은 찾아보는게 좋다.
간단한 서버를 만들어주자.
먼저 필요한 패키지를 설치한다.
$ npm i express
$ npm i -D @types/express @types/node ts-node
타입스크립트에서 패키지에 포함 될 타입을 모듈로 배포 해놓았는데 대부분 @types/~~ 을 이용해서 설치하면 된다.
그리고 타입스크립트를 node 환경에서 구동할 수 있게 해주는 ts-node 모듈도 설치하면 기본적인 준비는 끝이다.
import express, { Request, Response, NextFunction } from 'express';

const app = express();
const port = 5000;

app.get('/', (req: Request, res: Response, next: NextFunction) => {
  res.send('Hello, world!');
});

app.listen(port, () => {
  console.log('http sever on 5000');
});
서버가 만들어졌다.
ts-node를 이용하여 서버를 확인해보자.


치기 번거로우면
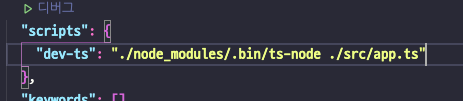
package.json에서 간단하게 명령어로 만들어 주면 된다.
2. Sequelize 환경 구축하기
먼저 필수 패키지를 설치 해야한다.
$ npm i sequelize mysql2
$ npm i -D @types/validator seqeulize-cli
참고로 Sequelize의 @types를 설치하지 않은 이유는 최근에 Sequelize 자체에서 타입을 지원하기 때문에 필요가 없다.
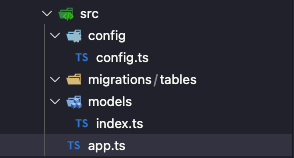
다음은 src 디렉토리 내부에 config/ migrations/ models 디렉토리를 생성하고 migrations 하위에 tables 디렉토리를 따로 만들어주면된다. config 내부에 config.ts 파일을 만들어주고 models에는 index.ts를 만들어주면 준비 완료!
위의 과정이 끝나면 다음 순서를 따라해보자.
1) config 설정
src -> config -> config.ts에 아래와 같이 작성해준다.
import dotenv from 'dotenv';
dotenv.config();

const config = {
  development : {
      username : process.env.DB_USERNAME || 'root',
      password : process.env.DB_PASSWD,
      database : process.env.DB_DBNAME || 'test',
      host : process.env.DB_HOST || 'localhost',
      dialect : "mysql"
  }
};

export default config;
이 과정은 일반 CLI를 이용해 만들어지는 코드와 다를게 없다.
2) Sequelize 객체 생성
src -> models -> index.ts에 아래와 같이 작성해준다.
import { Sequelize } from 'sequelize';
import config from '../config/config';

const sequelzie = new Sequelize(
  config.development.database,
  config.development.username,
  config.development.password,
  {
      host: config.development.host,
      dialect: 'mysql',
      timezone: '+09:00' //? MySQL 내부의 디폴트 시간 UTC를 한국 시간으로 바꿔주기 위해
  }
);

export default sequelzie;
이 과정은 CLI를 이용해서 만들어지는 DB객체를 생성하는 과정은 생략이 되어있고 간단하게 Sequelize 객체를 생성하는 것이다.
3) 연결확인
src -> app.ts
import express, { Request, Response, NextFunction } from 'express';
import sequelize from './models'; // 만들어진 객체 임포트

const app = express();
const port = 5000;

app.get('/', (req: Request, res: Response, next: NextFunction) => {
  res.send('Hello, world!');
});

app.listen(port, async () => {
  console.log('http sever on 5000');
  // authenticate 메소드로 연결 확인
  await sequelize.authenticate()
  .then(async () => {
    console.log('connection success');
  })
  .catch(e => {
    console.log(e);
  })
});
authenticate 메소드로 연결 확인을 한다.
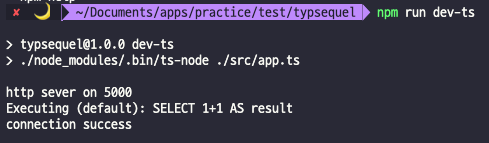
위와 같이 나오면 연결 성공!
4) model 생성
src -> model -> user.ts 생성 후 작성.
import {
  DataTypes,
  Model,
} from 'sequelize';
import sequelize from './index';

// user 모델의 구성요소를 명시
interface UsersAttributes {
  id?: number; //? id는 not null autoincrement로 ?를 이용해 와일드 카드 적용.
  email : string; //? 필요한 요소를 적어준다.
};

export class Users extends Model<UsersAttributes>{
  //? 조회 후 사용 되어질 요소들의 타입명시 설정이 되어 있지 않으면 조회시 또는 조회 후 데이터 타입체크에서 오류
  public readonly id!: number;
  public email!: string;
  public readonly createdAt!: Date;
  public readonly updatedAt!: Date;

  public static associations: {
  };
}

//? 모델 생성
Users.init(
  {
      email: {
        type: DataTypes.STRING(45),
        allowNull: false
      },
  },
  {
      modelName: 'Users',
      tableName: 'users',
      sequelize, //? 생성한 Sequelize 객체 패싱
      freezeTableName: true,
  }
);
5) migration 생성
migration파일 생성시 주의할 점은 파일의 정렬 순서대로 migrate 된다는 점을 잘 고려하여 생성하여야한다. 파일 앞에 1, 2 . . 처럼 숫자로 명시 해주는 방법도 있는데 이는 ASCII코드로 인해 10이 넘어 가면 1, 10, 2 . . 와 같은 순서로 진행 되기 때문에 좋은 방법이 아니다.
그래서 내가 선택한 방법은 CLI로 migration 파일을 생성하면 고유의 번호를 주어 생각한대로 순서를 정렬할 수 있다는 점을 이용하여 만들었다.
$ npx sequelize-cli migration:generate --name users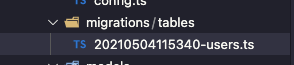
만들어진 파일을 ts로 바꿔주고 위처럼 tables 디렉토리에 넣는다.
그리고 여기서 기존의 up down 방식을 사용해 코드를 짠다면 자바스크립트 컴파일 후 에러가 날 것이다. 그래서 사용된 방법은 sync 메소드를 이용하는 방식인데, 이는 model에 기입된 코드대로 migrate해주는 메소드이다.
import { Users } from '../../models/user';

console.log("======Create users Table======");
const create_table_users = async() => {
    await Users.sync({force : true})
    .then(() => {
        console.log("✅Success Create users Table");
    })
    .catch((err) => {
        console.log("❗️Error in Create users Table : ", err);
    })
}

create_table_users();
위와같이 작성이 되었다면 table 생성을 해볼 차례이다.


성공! 잠깐만 그러면 migrate 할 때마다 하나씩 하나씩 해줘야 한다고...?
6) migration all
당연 한꺼번에 하는 방법이 있다.
src -> migrations에 createTableAll 이라는 파일을 만들어주자.
//? 모든 마이그레이션 파일을 한꺼번에 마이그레이트 해주는 명령어를 만드는 모듈
import * as fs from 'fs';
import * as path from 'path'
import { exec } from 'child_process'; //? 새로운 프로세스를 생성하여 실행하는 node.js 내장 모듈
import * as util from 'util';//? 내장 모듈

const asyncExec = util.promisify(exec); //? 위 child_process 모듈의 exec을 이용해 반복문으로 프로세스를 생성할 때 비동기를 동기로 바꿔줄 때 필요

console.log("migration-all-table");


console.log(`
  --------------------------------------
  +++Laggard Project Migration Start+++
  --------------------------------------
`);


let migrationAllTable = async () => {
  let migrationFiles : string[] = [];
//? 파일 시스템으로 디렉토리 자체를 읽어온다.
  fs.readdir(path.join(__dirname,"/","tables"), async (err,files) => {
    if(err) console.log("err : ", err);
    if(files) {
      //? 읽어온 파일들의 이름을 하나씩 배열에 담아준다.
      files.forEach(el => {
        migrationFiles.push(el);
      })

      //? 배열에 담은 파일의 이름을 이용해 마이그레이션 실행
      for(let el of migrationFiles) {
        console.log("Migration File Name : ", el);

        const { stdout, stderr } = await asyncExec(`./node_modules/.bin/ts-node "${__dirname}/tables/${el}"`)
        if(stdout) console.log(stdout);
        if(stderr) console.error("Std Err : ",stderr);
      }
    }
  })
}
migrationAllTable()
(참고로 위 코드는 내가 참고한 블로그의 코드와 똑같다. 정말 대단하신분 ...)
내가 이해한대로 해석하자면 npm의 명령어로 for문을 돌려서 파일을 실행 시켜줄 수 없으므로 childe_process라는 node.js의 자체모듈에 있는 exec 메소드를 이용하여 프로세스화 시켜주어 migration이 가능하게 만드는 것이다.
간단하게 세개의 테이블을 만들어 테스트 해보았다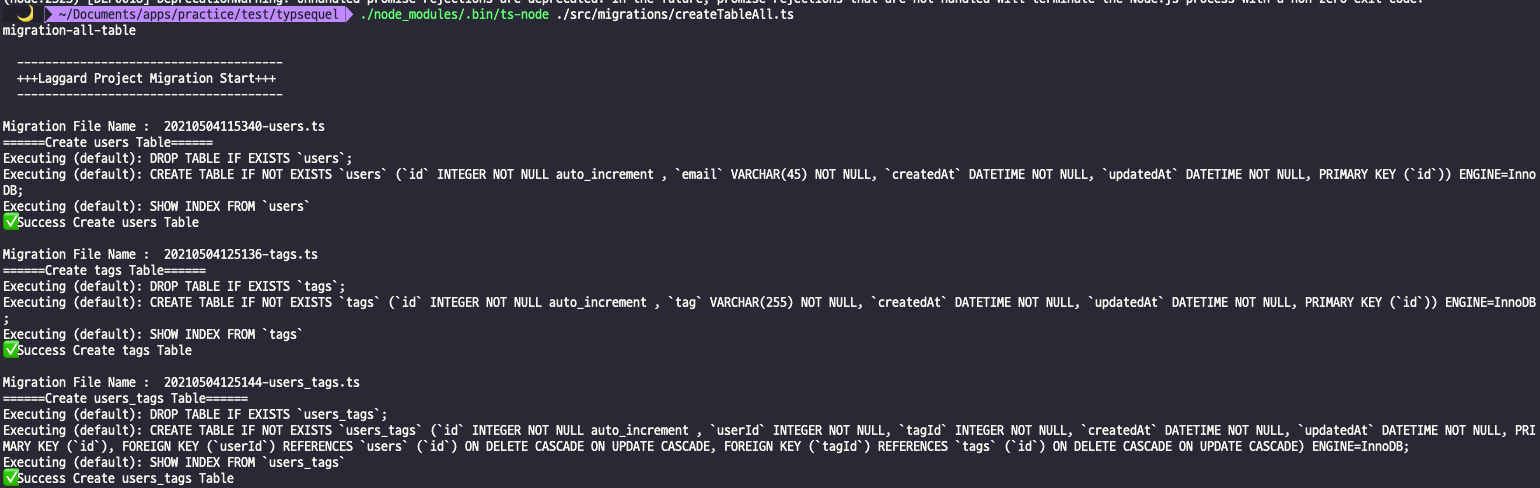
위와같이 된다면 성공이다.
7) Association
MySQL 사용의 꽃은 Association을 사용해 교차조회를 하는것이다. Sequelize를 이용해 Association을 적용하는 방법을 알아보자.
테스트를 위해 user/tag/users_tag 모델을 만들었다.
다 대 다 관계를 원했고 users_tags 테이블이 다의 관계의 중심이 되게 설계하였다.
- user모델
import {
  DataTypes,
  Model,
} from 'sequelize';
import sequelize from './index';

interface UsersAttributes {
  id?: number;
  email: string;
  usesIdTags?: any;
  tagIdUsers?: any;
};

export class Users extends Model<UsersAttributes>{
  public readonly id! : number;
  public email!: string;
  public tagId!: number;
  public readonly createdAt!: Date;
  public readonly updatedAt!: Date;

  public static associations: {
  };
}

//? 모델 생성
Users.init(
  {
      email: {
        type: DataTypes.STRING(45),
        allowNull: false
      },
  },
  {
      modelName: 'Users',
      tableName: 'users',
      sequelize,
      freezeTableName: true,
  }
);- tag 모델
import {
  DataTypes,
  Model,
} from 'sequelize';
import sequelize from './index';

interface TagsAttributes {
  id?: number;
  tag: string;
  usesIdTags?: any;
  tagIdUsers?: any;
};

export class Tags extends Model<TagsAttributes>{
  public readonly id!: number;
  public tag!: string;
  public readonly createdAt!: Date;
  public readonly updatedAt!: Date;

  public static associations: {
  };
}

//? 모델 생성
Tags.init(
  {
      tag: {
        type: DataTypes.STRING(255),
        allowNull: false
      },
  },
  {
      modelName: 'Tags',
      tableName: 'tags',
      sequelize,
      freezeTableName: true,
  }
);- users_tag 모델
import {
  Association,
  DataTypes,
  Model,
} from 'sequelize';
import sequelize from './index';
import { Tags } from './tag';
import { Users } from './user';

interface Users_tagsAttributes {
  id?: number;
  userId: number;
  tagId: number;
  usesIdTags?: any;
  tagIdUsers?: any;
};

export class Users_tags extends Model<Users_tagsAttributes>{
  public readonly id!: number;
  public tagId!: number;
  public userId!: number;
  public readonly createdAt!: Date;
  public readonly updatedAt!: Date;

  public static associations: {
    userIdTags: Association<Users, Users_tags>;
    tagIdUsers: Association<Tags, Users_tags>;
  };
}

//? 모델 생성
Users_tags.init(
  {
      userId: {
        type: DataTypes.INTEGER,
        allowNull: false
      },
      tagId: {
        type: DataTypes.INTEGER,
        allowNull: false
      }
  },
  {
      modelName: 'Users_tags',
      tableName: 'users_tags',
      sequelize,
      freezeTableName: true,
  }
);

Users.hasMany(Users_tags, {
  sourceKey: 'id',
  foreignKey: 'userId',
  as: 'userIdTags'
});

Users_tags.belongsTo(Users, {
  foreignKey: 'userId',
  as: 'userIdTags'
});

Tags.hasMany(Users_tags, {
  sourceKey: 'id',
  foreignKey: 'tagId',
  as: 'tagIdUsers'
});

Users_tags.belongsTo(Tags, {
  foreignKey: 'tagId',
  as: 'tagIdUsers'
});
위처럼 가장 나중에 만들어져야할 users_tags 테이블에 어소시에이션을 설정해주면 된다. 그러나 이 코드는 아직 타입스크립트를 100퍼센트 활용한게 아니다 왜냐하면 interface의 Assciation 요소에 any를 주는게 아닌 연결될 모델을 타입으로 주고 각 모델에 요소를 명시해줘야하고 또 각 메소드를 만들어 넣어줘야한다. 다음 프로젝트 땐 100퍼센트 활용해보자.
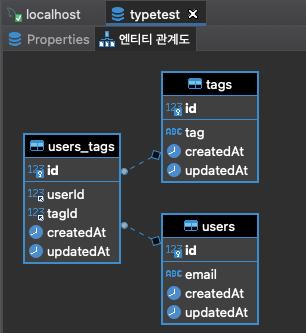
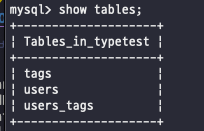
GUI를 통해 확인해보자. 위 처럼 나오면 성공이다.
3. 마치며
공부하면서 알게된건데 typeORM이라는 더욱 적절한 스택이 있다고 한다. Sequelize도 지속적으로 업데이트 중인 것 같지만 typeORM을 배워 두는 것도 나쁘지 않다 생각이든다. 많이 배우면 배울수록 좋기 때문이다! 당연한 얘기!