저번 글에서 나는 '프론트는 리액트를 사용할 것이다'라고 얘기했다.
하지만 개발자 커뮤니티에 조언을 구했을 때 백엔드로서 최대한 프론트에 시간을 적게 쓰려면 타임리프를 사용하는 것이 좋을 거 같다는 의견이 많았다.
타임리프를 사용하기 전에는 @RestController를 사용해서 json형식으로 response를 반환하는 REST API를 구현했다. 하지만 타임리프는 컨트롤러에서 전달하는 값을 바로 프론트에 적용할 수 있기 때문에 @RestController -> @Controller로 바꾸고 타임리프로 구현한 html 페이지를 리턴하도록 회원가입 및 로그인 API를 모두 변경해야했다...
생각보다 타임리프가 너무 헷갈려서 엄청 헤매고 고통을 겪었다..(리액트로 하는게 더 빨랐을지도.ㅋ.ㅋ)

타임리프 페이지 구현
우선 컨트롤러 코드를 수정하기 전에 html 페이지를 구현해야했다.
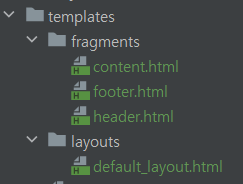
리액트의 컴포넌트처럼 타임리프도 HEADER, BODY, FOOTER를 따로 구현하고 이를 퍼즐처럼 끼워 공통 레이아웃을 만들어 사용할 수 있다.
참고로 디자인은 부트스트랩 사용했습니당
https://getbootstrap.com/docs/5.3/getting-started/download/
header.html
<!doctype html>
<html xmlns:th="http://www.thymeleaf.org">
<!-- 네비바 -->
<header th:fragment="header">
    <nav class="navbar navbar-expand-lg bg-body-tertiary border-bottom">
        <div class="container-fluid">
            <a class="navbar-brand" href="/index">해축GG</a>
            <button class="navbar-toggler" type="button" data-bs-toggle="collapse" data-bs-target="#navbarSupportedContent"
                    aria-controls="navbarSupportedContent" aria-expanded="false" aria-label="Toggle navigation">
                <span class="navbar-toggler-icon"></span>
            </button>
            <div class="collapse navbar-collapse" id="navbarSupportedContent">
                <ul class="navbar-nav me-auto mb-2 mb-lg-0">
                    <li class="nav-item">
                        <a class="nav-link" href="/login">로그인</a>
                    </li>
                    <li class="nav-item">
                        <a class="nav-link" href="/join">회원가입</a>
                    </li>
                </ul>
            </div>
        </div>
    </nav>
</header>
</html>
content.html
<!DOCTYPE html>
<html xmlns:th="http://www.thymeleaf.org" xmlns:layout="http://www.ultraq.net.nz/thymeleaf/layout"
      layout:decorator="~{layouts/layout}">
// 해당 html페이지에서만 사용할 css, script
<th:block layout:fragment="css"></th:block>
<th:block layout:fragment="script"> </th:block>
<div layout:fragment="content" id="content">
  <div>
    content.html
  </div>
</div>
</html>
footer.html
<!DOCTYPE html>
<html xmlns:th="http://www.thymeleaf.org">
  <footer th:fragment="footer">
    <p> 해축GG © 2023 Elmo All rights reserved.</p>
  </footer>
</html>
default.html
<!DOCTYPE html>
<html xmlns:th="http://www.thymeleaf.org"
      xmlns:layout="http://www.ultraq.net.nz/thymeleaf/layout">
<head>
  <meta charset="UTF-8">
  <title>Title</title>
  <script src="https://cdn.jsdelivr.net/npm/bootstrap@5.3.2/dist/js/bootstrap.bundle.min.js"></script>
  <link rel="stylesheet" href="https://cdn.jsdelivr.net/npm/bootstrap@5.3.2/dist/css/bootstrap.min.css">
  <link rel="stylesheet" href="/css/default_layout.css">
</head>
<link rel="icon" href="data:;base64,iVBORw0KGgo=">
<body>
  <div class="wrapper">
    <header th:replace="fragments/header::header"></header>
    <div id="content" layout:fragment="content"></div>
  </div>

  <footer th:replace="fragments/footer::footer"></footer>
</body>
</html>
login.html
<!DOCTYPE html>
<html xmlns:th="http//www.thymeleaf.org"
      xmlns:layout="http://www.ultraq.net.nz/thymeleaf/layout"
      layout:decorate="~{layouts/default_layout}">
<head>
  <link rel="stylesheet" href="/css/login.css">
</head>
<div layout:fragment="content" class="login-body">
  <img src="/image/logo.png" class="logo">
  <form class="form" role="form" th:action="@{/user/login/email}" method="post" th:object="${emailLoginRequestDto}">
    <div class="form-group">
      <label class="h5" th:for="email">이메일 </label>
      <input type="email" th:field="*{email}" class="form-control" placeholder="이메일을 입력하세요."
             th:class="${#fields.hasErrors('email')} ? 'form-control fieldError' : 'form-control'"/>
      <p id="error-message" th:if="${#fields.hasErrors('email')}" th:errors="*{email}">INPUT ERROR</p>
    </div>
    <div class="form-group">
      <label class="h5" th:for="password">비밀번호 </label>
      <input type="password" th:field="*{password}" class="form-control" placeholder="비밀번호를 입력하세요."
             th:class="${#fields.hasErrors('password')} ? 'form-control fieldError' : 'form-control'"/>
      <p th:if="${#fields.hasErrors('password')}" th:errors="*{password}">INPUT ERROR</p>
    </div>
    <button type="submit" class="btn btn-primary">로그인</button>
  </form>
</div>
</html>
join.html
<!DOCTYPE html>
<html xmlns:th="http//www.thymeleaf.org"
      xmlns:layout="http://www.ultraq.net.nz/thymeleaf/layout"
      layout:decorate="~{layouts/default_layout}">
<head>
    <link rel="stylesheet" href="/css/join.css">
</head>
<div layout:fragment="content" class="join-body">
    <h1>회원가입</h1>
    <form class="form" th:action="@{/user/join/email}" method="post" th:object="${emailJoinRequestDto}">
        <div class="form-group">
            <label class="h5" th:for="nickname">닉네임 </label>
            <input type="text" th:field="*{nickname}" class="form-control" placeholder="닉네임을 입력하세요."
                   th:class="${#fields.hasErrors('nickname')}? 'form-control fieldError' : 'form-control'"/>
            <p class="error-message" th:if="${#fields.hasErrors('nickname')}" th:errors="*{nickname}">INPUT ERROR</p>
        </div>
        <div class="form-group">
            <label class="h5" th:for="email">이메일 </label>
            <input type="email" th:field="*{email}" id="email" class="form-control" placeholder="이메일을 입력하세요."
                   th:class="${#fields.hasErrors('email')}? 'form-control fieldError' : 'form-control'"/>
            <p class="error-message" th:if="${#fields.hasErrors('email')}" th:errors="*{email}">INPUT ERROR</p>
        </div>
        <div class="form-group">
            <div id="email-auth">
                <label class="h5" th:for="code">인증 코드 </label>
                <button type="button" id="codeSendBtn" class="btn btn-sm btn-primary" th:disabled="${success}">인증 코드 발송</button>
                <p class="error-message" th:if="${msg}!=null" th:text="${msg}"></p>
            </div>
            <input type="text" th:field="*{code}" class="form-control" placeholder="인증코드를 입력하세요.(제한시간 30분)"
                   th:class="${#fields.hasErrors('code')}? 'form-control fieldError' : 'form-control'"/>
            <p class="error-message" th:if="${#fields.hasErrors('code')}" th:errors="*{code}">INPUT ERROR</p>
        </div>
        <div class="form-group">
            <label class="h5" th:for="password">비밀번호 </label>
            <input type="password" th:field="*{password}" class="form-control" placeholder="비밀번호를 입력하세요."
                   th:class="${#fields.hasErrors('password')}? 'form-control fieldError' : 'form-control'"/>
            <p class="error-message" th:if="${#fields.hasErrors('password')}" th:errors="*{password}">INPUT ERROR</p>
        </div>
        <button type="submit" class="btn btn-primary">회원가입</button>
    </form>
    <script src="https://code.jquery.com/jquery-latest.min.js"></script>
    <script th:inline="javascript">
        /*<![CDATA[*/
        document.getElementById("codeSendBtn").addEventListener("click", sendCode);
        function sendCode() {
            let email = $('#email').val();
            if (email.length !== 0) {
                $.ajax({
                    type: 'GET',
                    url: '/email/send',
                    data: {
                        email: email
                    }
                }).done(function (result) {
                    $("#email-auth").replaceWith(result);
                })
                    .fail(function (jqXHR) {
                        console.log(jqXHR);
                    });
            }
            else{
                console.log("fieldError : 이메일 값이 없음");
                alert("이메일을 입력해주세요.");
            }
        }
        /*]]>*/
    </script>
</div>
</html>
sendCode()는 ajax를 이용해서 이메일 인증 API를 호출한다. 이것도 구현하는데 시간 좀 들였다...이메일 인증 API는 다음 포스트에서 설명하겠습니당
타임리프 문법이 익숙하지 않았던 점이 힘들었다.
<form class="form" th:action="@{/user/join/email}" method="post" th:object="${emailJoinRequestDto}">폼 태그를 통해서 API에 request를 보낸다. 이때 dto를 object에 지정해줘야한다.
<input type="text" th:field="*{nickname}" class="form-control" placeholder="닉네임을 입력하세요."
                   th:class="${#fields.hasErrors('nickname')}? 'form-control fieldError' : 'form-control'"/>
<p class="error-message" th:if="${#fields.hasErrors('nickname')}" th:errors="*{nickname}">INPUT ERROR</p>
이 부분에서 에러도 많이 겪고 이해하기 힘들었다. 중요하다!
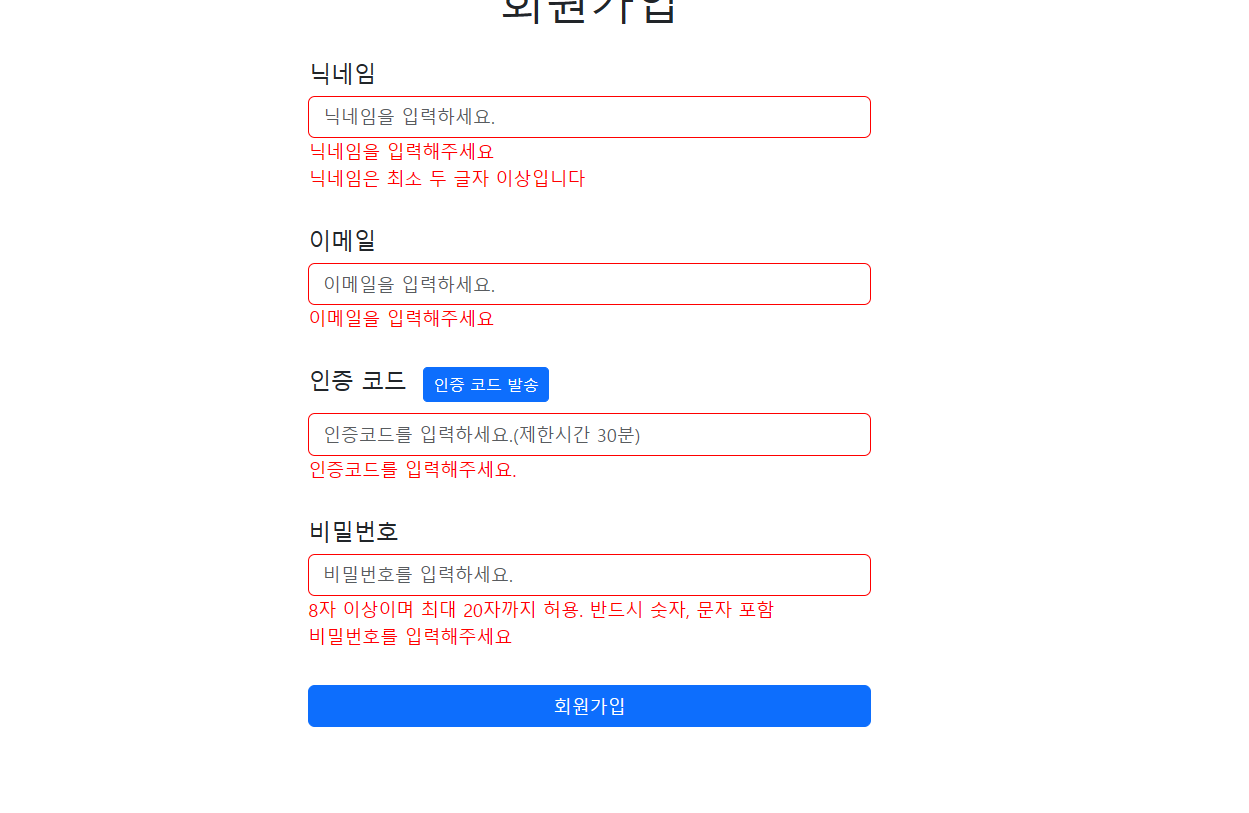
이전 포스트를 보면 회원가입 request dto를 구현할 때 @NotEmpty, @NotNull, @Email, @Pattern 등 형식이 유효한지를 검사해주는 어노테이션을 이용했다. 컨트롤러에서 이 부분을 검사해서 자동으로 에러를 잡아주는데, 에러를 감지할 시 타임리프에 전달되고 위의 타임리프 문법을 이용해서 에러 메세지를 출력할 수 있다.
이게 어떻게 쓰일 수 있냐면
UserController
/**
     * 회원가입 뷰
     */
    @GetMapping("/join")
    public String join(Model model)
    {
        model.addAttribute("emailJoinRequestDto",new EmailJoinRequestDto());
        return "join";
    }

    /**
     * 이메일 회원가입
     * [POST] /user/join/email
     * @Body  emailRequestDto : nickname,email, password
     */
    @PostMapping("/user/join/email")
    public String joinByEmail(@Valid EmailJoinRequestDto emailJoinRequestDto, BindingResult bindingResult, Model model){
        if(bindingResult.hasErrors())
            return "join";

        if(userService.isDuplicatedEmail(emailJoinRequestDto.getEmail())){
            model.addAttribute("msg","중복된 이메일입니다.");
            return "join";
        }

        // 이메일 인증 실패 시
        if(!emailAuthService.verifyAuthCode(emailJoinRequestDto.getEmail(), emailJoinRequestDto.getCode())) {
            model.addAttribute("msg", "이메일 인증에 실패하였습니다.");
            return "join";
        }
        userService.emailSignUp(emailJoinRequestDto);
        return "redirect:/login";
    }
타임리프에 맞춰 수정된 join api 부분이다. 보면 뷰를 반환하는 메소드와 api 메소드로 나눠진다. 위에는 페이지라고 생각하면 되고, 아래는 프론트에서 호출하는 api를 구현한 부분이다.
소스를 살펴보면
public String joinByEmail(@Valid EmailJoinRequestDto emailJoinRequestDto, BindingResult bindingResult, Model model){
        if(bindingResult.hasErrors())
            return "join";
요 부분에서 dto 앞에 @Valid가 있기 때문에 dto에서 설정했던 어노테이션에 맞춰 자동으로 유효성을 검사해준다. 그리고 만약 검사과정에서 에러가 발견되면 뒤에 BindingResult가 이를 감지하여 에러를 타임리프 페이지에 알려준다.
참고로 스프링부트 최근 버전들은 @Valid를 사용하려면 따로 dependency에 추가해줘야한다.
implementation 'org.springframework.boot:spring-boot-starter-validation' // 유효성 검증아오 이것때문에 @Valid가 제대로 작동하지 않아서 고생했다...
jakarta.validation.Valid를 import해서 사용하면 된다.(혹시 @Valid가 제대로 에러를 잡지 못한다면 확인해보세용..)
반드시 사용하려는 dto 바로 뒤에 BindingResult를 추가해야한다!
그리고 컨트롤러에서 타임리프 페이지에 변수값을 전달하기 위해서 model을 사용한다.
model.addAttribute(name, value) 형태로 지정해주고 return "페이지 이름"을 해주면 해당 값이 페이지에 전달된다.
회원가입이 성공하면 return "redirect:/login"을 이용해서 로그인 페이지로 리다이렉트한다.
이런 구조로 로그인 API도 비슷하게 변경했다.
🔥 트러블 슈팅
여기서 문제였던 점이 ajax를 이용해서 sendCode()를 호출하고 이메일 인증 API에 요청했을 때, 중복 이메일인 경우 에러 메세지를 반환하는 과정에서 에러를 겪었다.
분명 컨트롤러에서는 제대로된 값을 전달하고 있는데, 타임리프가 이를 받지 못하고 있었다. 처음에 타임리프가 알아서 값을 받겠거니~하고 th:if="${message}!=null" 이런식으로 메세지 값이 존재하면 출력하도록 구현했었다.
내가 생각한 문제 원인은 폼태그에서 호출하는 api는 join api이고, sendCode()를 호출하는 부분은 이메일 인증 api라서 서로 다른 api를 호출한다. 아무래도 폼태그 부분은 ajax를 사용하지않고 타임리프 문법을 사용하기 때문에 회원가입 api 부분에서 model로 변수값을 전달하는 순간 렌더링이 되면서 메세지가 잘 출력되는데, ajax를 사용한 부분은 따로 api를 호출하는 느낌이라 자동으로 렌더링이 되지 않는 건가..? 싶다. 그래서 위의 소스를 보면
$.ajax({
  type: 'GET',
  url: '/email/send',
  data: {
    email: email
  }
}).done(function (result) {
  $("#email-auth").replaceWith(result);
})
  .fail(function (jqXHR) {
  console.log(jqXHR);
});
api 요청이 성공한 순간 id email-auth를 가지는 div 안에 있는 변수값들을 response 값으로 대체해주는 코드를 직접 넣어줬다. 그랬더니 성공적으로 에러 메세지를 출력할 수 있었다.
p class="error-message" th:if="${msg}!=null" th:text="${msg}"></p>이 부분이 ajax 호출을 통해 replace된 메세지값을 출력하는 부분이다. 다음 포스트에 나올 이메일 인증 컨트롤러를 보면 중복된 이메일로 요청할 경우 model에 에러메세지를 설정해서 회원가입 페이지에 반환한다. 그 메세지값이 null이 아니라면 에러메세지를 페이지에서 출력할 수 있다.
SecurityConfig
    @Bean
    public SecurityFilterChain filterChain(final @NotNull HttpSecurity http) throws Exception {
        // 스프링부트 3.1.x~ 시큐리티 설정 방식이 변경됨. .and()를 사용하지 않음
        http.httpBasic(HttpBasicConfigurer::disable);
        http.csrf(AbstractHttpConfigurer::disable);
        http.sessionManagement(configurer-> // 세션 사용안해서 STATELESS 상태로 설정
                configurer.sessionCreationPolicy(SessionCreationPolicy.STATELESS))
                .authorizeHttpRequests(authorize->
                authorize
                        .requestMatchers("/login","/join","/index").permitAll() // 페이지
                        .requestMatchers("/user/login/**","/user/join/**","/email/send").permitAll() // API
                        .requestMatchers("/user/profile/**","/user/test").hasRole("USER")
                        .requestMatchers("/**").permitAll() // CSS, JS 파일 허용
                        .anyRequest().authenticated()
                )
                .formLogin(login -> login	// form 방식 로그인 사용
                        .loginPage("/login")
                        .permitAll()
                )
                .logout(withDefaults())
                .addFilterBefore(new JwtAuthenticationFilter(jwtTokenProvider), UsernamePasswordAuthenticationFilter.class);


        return http.build();
    }
원래는 폼로그인을 사용하지 않을거라 막았는데, formLogin을 추가해주었다.
JWT 토큰 부여 방식 변경
이 부분을 정말 고민 많이 했다. jwt토큰 방식을 계속 사용하게 되면 타임리프이기 때문에 좀 변경되는 부분이 많아졌다..그냥 jwt토큰을 포기하고 session방식으로 사용하는게 맘편하긴 한데 욕심부려서 타임리프 + jwt토큰도 도전했다.
타임리프를 사용하게 되면서 이전처럼 액세스 토큰을 json으로 반환하면, 프론트가 이를 로컬에 저장했다가 api 호출 시 헤더에 넣어 사용하는 방식을 사용하기 어려워졌다. 대신 쿠키에 넣어 반환해주는 방식으로 변경했다.
JwtTokenProvider
// 나머지 부분은 이전과 같다..
    public String resolveToken(HttpServletRequest request) {
        String bearerToken = request.getHeader("Authorization");

        /*헤더에 값이 없다면 토큰 확인*/
        if (bearerToken == null) {
            Cookie[] cookies = request.getCookies(); // 모든 쿠키 가져오기
            if (cookies != null) {
                for (Cookie c : cookies) {
                    String name = c.getName(); // 쿠키 이름 가져오기

                    String value = c.getValue(); // 쿠키 값 가져오기
                    if (name.equals("Authorization")) {
                        bearerToken = value;
                    }
                }
            }
        }
        if (StringUtils.hasText(bearerToken)) {
            return bearerToken;
        }
        return null;
    }

 // 이하 동일..
이전에는 header에서 'Authorization'값을 꺼내와서 검증하는 방식이었는데 이제는 쿠키에서 'Authorization'을 찾아서 토큰값을 파싱한다.
UserService
 @Transactional
    public EmailLoginResponseDto emailLogin(EmailLoginRequestDto emailLoginRequestDto, HttpServletResponse response){

   // 생략

     /*ACCESS TOKEN 쿠키로 발급*/
        Cookie accessCookie = new Cookie("Authorization", accessToken);
        accessCookie.setMaxAge(60 * 60); // 1시간 동안 유효
        accessCookie.setPath("/");
        accessCookie.setDomain("localhost");
        accessCookie.setSecure(false);

        response.addCookie(accessCookie);

  // 생략

}
UserService에서 이메일로그인 부분도 이전이랑 코드는 같고 바뀐 부분은 쿠키로 액세스 토큰을 발급하는 정도이다. 액세스토큰 만료시간이랑 똑같이 1시간동안 유효하게끔 쿠키를 설정했다.
사실 refresh토큰을 이미 구현해놔서 refresh토큰을 쿠키에 넣고 발급하면서 사용하고 싶었는데 생각보다 복잡하고 시간이 좀 걸릴거 같아서 이 부분은 좀 미뤘다..일단 지금은 액세스 토큰만 사용할 것이다.
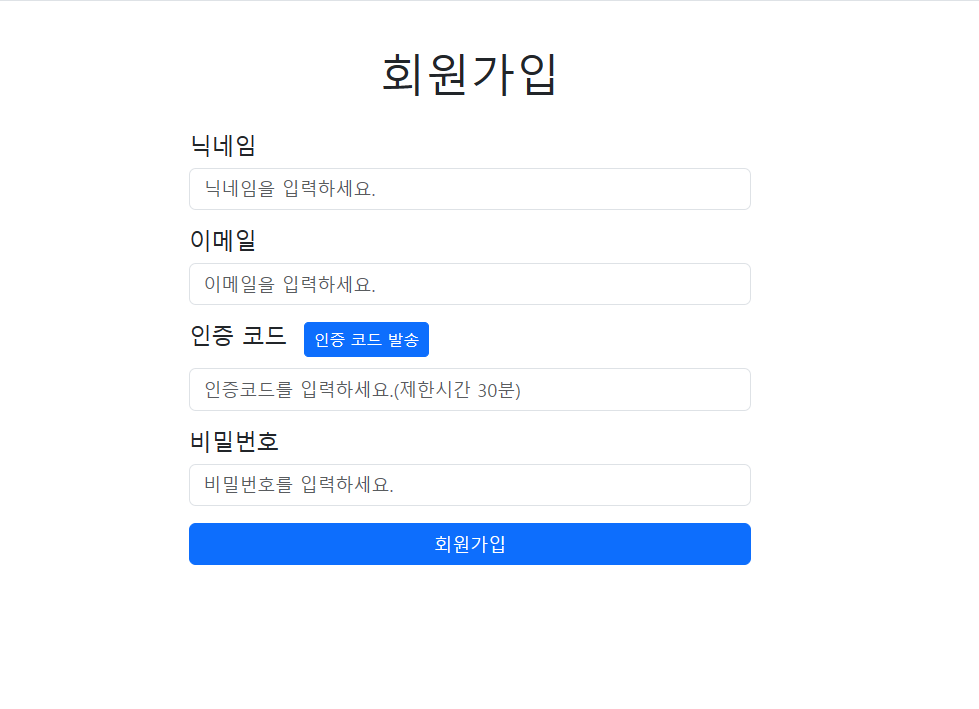
결과화면
회원가입
입력없이 버튼 누를 경우
로그인
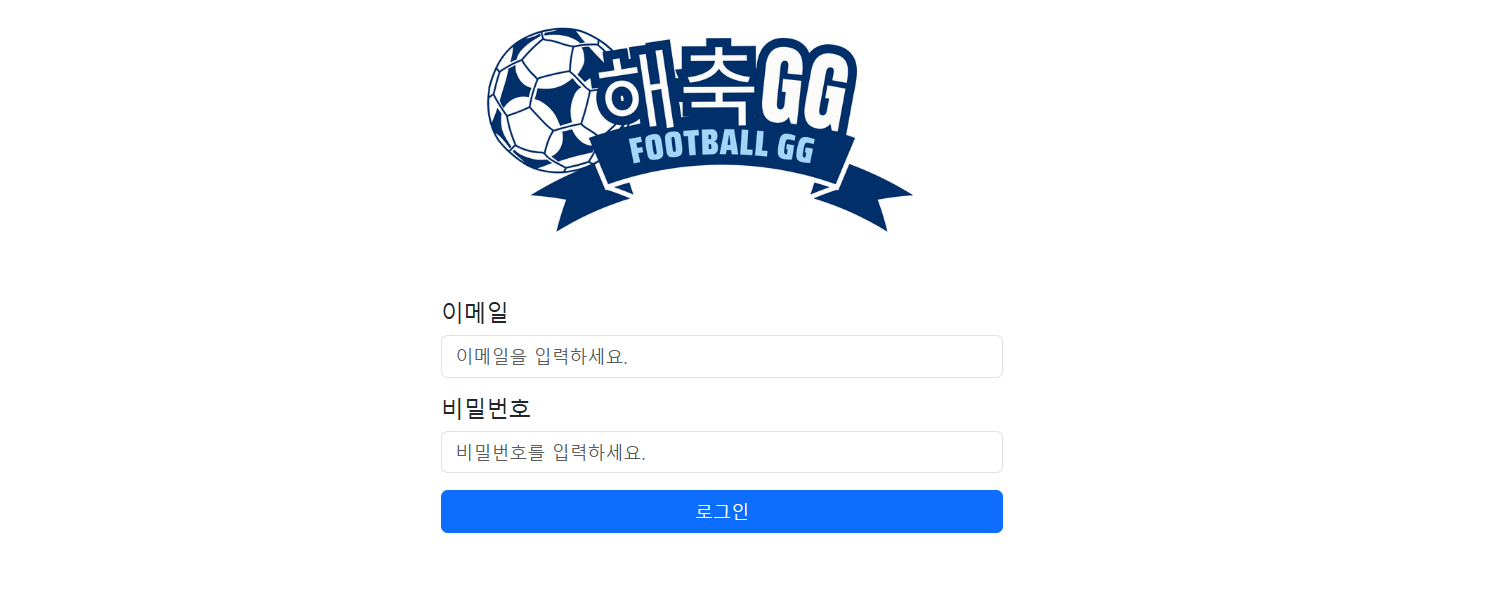
디자인이 좀 조촐하긴 한데 그럭저럭 잘 작동한다..ㅎㅎ
타임리프를 처음 공부할때는 머리아프고 그냥 익숙한 리액트가 훨씬 빠를거 같아서 포기할까 고민했었다. 근데 사용하다보니 확실히 편하다! 리액트로 프론트 구현할 때는 비동기도 신경쓰고 api 메소드 매번 구현하고 귀찮았는데, 확실히 타임리프는 동기화방식에 스프링부트에 최적화돼있어서 익숙해지기만하면 훨씬 빠른거같다.
물론 리액트가 디자인 구현이나 프론트 측면에서는 훨씬 퀄리티있게 만들 수 있다. 하지만 난 백엔드 개발자이기 때문에 그 부분은 좀 놓아주기로 했다...
확실히 프로젝트의 퀄리티나 백엔드의 편의성을 높이려면 프론트를 따로 구해서 프론트 / 서버 따로 분리해서 구현하는 것이 훠얼씬 편하다..!