git hub : https://github.com/ultralytics/yolov5
코드를 다운받고
$ pip install -r requirements.txt를 통해서 필요한 패키지를 다운 받습니다.
환경구성
gpu : RTX 3090
ram : 64gb
nvidia driver : 455.32
cuda toolkit : 11.1
cudnn : 8.0.4
tensorRT : 7.2.3.4
pytorch : 1.8.1 + cu11
위의 환경구성은 따로 작성을 진행하도록 하겠습니다.
custom dataset으로 yolov5를 진행하려면 원하는 data.yaml파일이 필요로 합니다.
cocodataset 예시
# COCO 2017 dataset http://cocodataset.org - first 128 training images
# Train command: python train.py --data coco128.yaml
# Default dataset location is next to /yolov5:
#   /parent_folder
#     /coco128
#     /yolov5


# download command/URL (optional)
download: https://github.com/ultralytics/yolov5/releases/download/v1.0/coco128.zip

# train and val data as 1) directory: path/images/, 2) file: path/images.txt, or 3) list: [path1/images/, path2/images/]
train: ../coco128/images/train2017/  # 128 images
val: ../coco128/images/train2017/  # 128 images

# number of classes
nc: 80

# class names
names: [ 'person', 'bicycle', 'car', 'motorcycle', 'airplane', 'bus', 'train', 'truck', 'boat', 'traffic light',
         'fire hydrant', 'stop sign', 'parking meter', 'bench', 'bird', 'cat', 'dog', 'horse', 'sheep', 'cow',
         'elephant', 'bear', 'zebra', 'giraffe', 'backpack', 'umbrella', 'handbag', 'tie', 'suitcase', 'frisbee',
         'skis', 'snowboard', 'sports ball', 'kite', 'baseball bat', 'baseball glove', 'skateboard', 'surfboard',
         'tennis racket', 'bottle', 'wine glass', 'cup', 'fork', 'knife', 'spoon', 'bowl', 'banana', 'apple',
         'sandwich', 'orange', 'broccoli', 'carrot', 'hot dog', 'pizza', 'donut', 'cake', 'chair', 'couch',
         'potted plant', 'bed', 'dining table', 'toilet', 'tv', 'laptop', 'mouse', 'remote', 'keyboard', 'cell phone',
         'microwave', 'oven', 'toaster', 'sink', 'refrigerator', 'book', 'clock', 'vase', 'scissors', 'teddy bear',
         'hair drier', 'toothbrush' ]
위와 같이 비슷한 구조로 패스와 클래스의 갯수 그리고 클래스의 이름들을 정해주면 된다.
from utils.autoanchor import *;_=kmean_anchors(path='/{path}/data/fire_data.yaml', n=9, img_size=480, thr=4.0, gen=1000, verbose=True)위의 코드를 추가해서 사용하는 yaml를 넣어주면 먼저 앵커값들의 최적화를 진행후에 train을 진행한다.
사실 github에 정리가 너무 잘 되어 있어서 참고로만 보면 될 거 같습니다.
그리고 원하는 파라미터를 넣고 싶으시다면 data/hyp.scratch.yaml 파일을 수정해서 사용하면 됩니다.
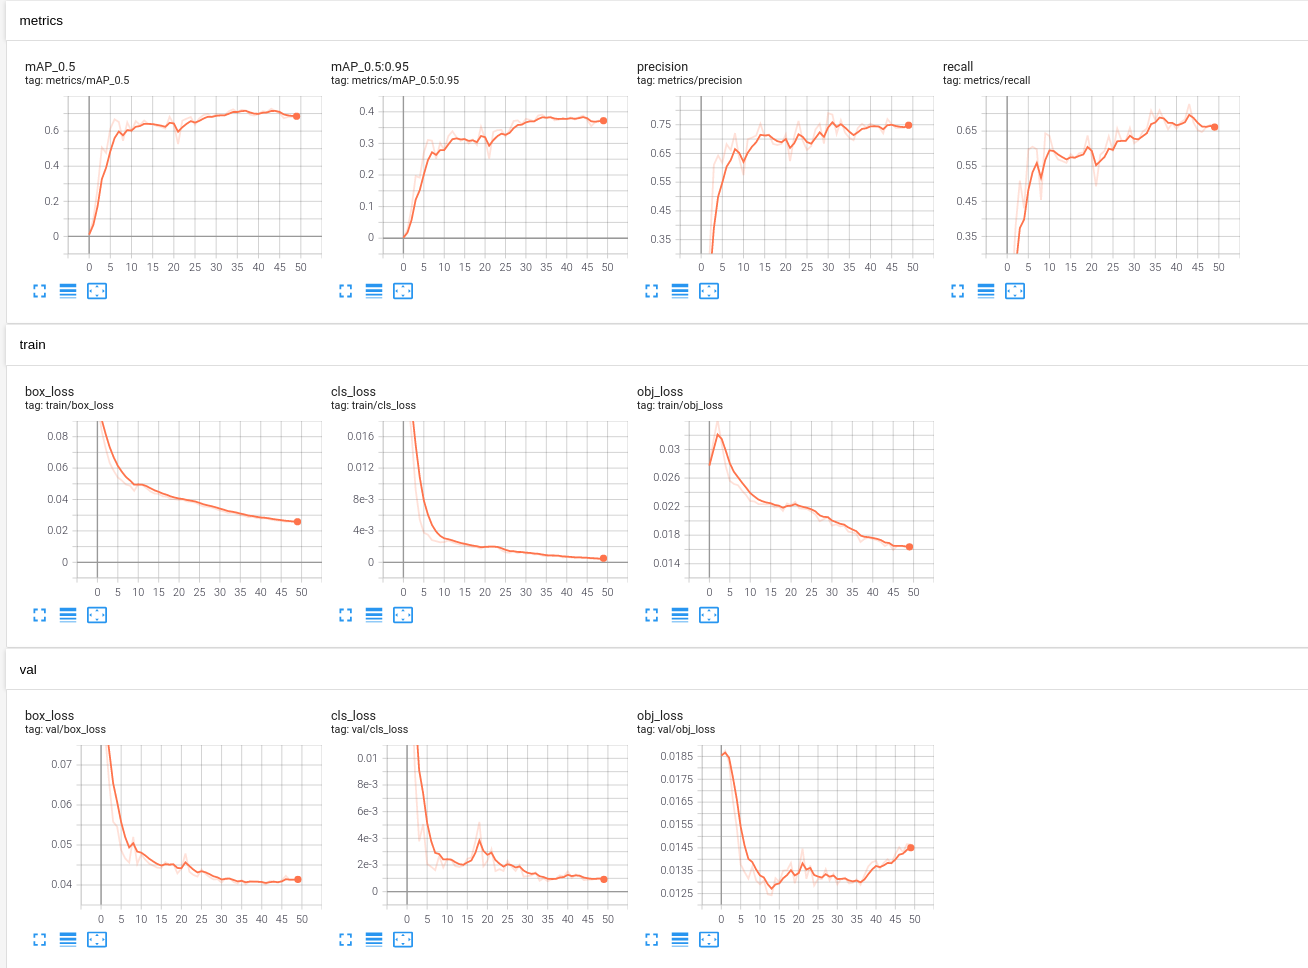
그렇게 train을 돌리고 나서 mAP를 확인하려면 run/train/exp*
exp폴더의 경우 train코드상에서 수정을 하지 않았다면 그저 순서대로 epx1 exp2 순으로 train한 순서대로 저장됨
이 경로에서 tensorboard를 통해서 확인할 수 있는데
$ tensorboard --logdir=./을 통해서 확인할 수 있다
이제 여기서 제공하는 결과는 아래의 그림과 같다

여기서 사용한 데이터는 화재 데이터인데 클래스는 2개 smoke와 fire라벨을 이용했다
아래는 Yolov5 학습에 사용된 라벨 데이터이다.
1 0.642969 0.406944 0.164062 0.175000기본적인 학습이 끝났으니 Yolov5에서 제공해주고 있는 TensorRT를 이용해보자.
그리고 TensorRT를 사용하기 위해
github : https://github.com/wang-xinyu/tensorrtx 를 다운 받습니다.
그리고 tensorRT/yolov5 디렉토리로 들어가서 gen_wts.py을 yolov5 폴더로 옮겨서 weight파일을 가지고 weight파일의 모델구조 및 파라미터를 뽑는 과정이다
- generate .wts from pytorch with .pt, or download .wts from model zoo
$ cp {tensorrtx}/yolov5/gen_wts.py {ultralytics}/yolov5
$ cd {ultralytics}/yolov5
$ python gen_wts.py yolov5s.pt
// a file 'yolov5s.wts' will be generated. {yolov5s}는 weight파일 이름에 귀속- build tensorrtx/yolov5 and run
cd {tensorrtx}/yolov5/
// update CLASS_NUM in yololayer.h if your model is trained on custom dataset
// yoloayer.h파일에서 class 갯수를 사용한 weight파일에 맞춰줘야함 본인은 2개로 수정함
mkdir build
cd build
cp {ultralytics}/yolov5/yolov5s.wts {tensorrtx}/yolov5/build
cmake ..
make
sudo ./yolov5 -s [.wts] [.engine] [s/m/l/x/s6/m6/l6/x6 or c/c6 gd gw]  // serialize model to plan file
// [s/m/l/x/s6/m6/l6/x6 or c/c6 gd gw] 의 경우 사용한 모델을 적어주면 된다.
sudo ./yolov5 -d [.engine] [image folder]  // deserialize and run inference, the images in [image folder] will be processed.
// For example yolov5s
sudo ./yolov5 -s yolov5s.wts yolov5s.engine s
sudo ./yolov5 -d yolov5s.engine ../samples
// For example Custom model with depth_multiple=0.17, width_multiple=0.25 in yolov5.yaml
sudo ./yolov5 -s yolov5_custom.wts yolov5.engine c 0.17 0.25
sudo ./yolov5 -d yolov5.engine ../samples
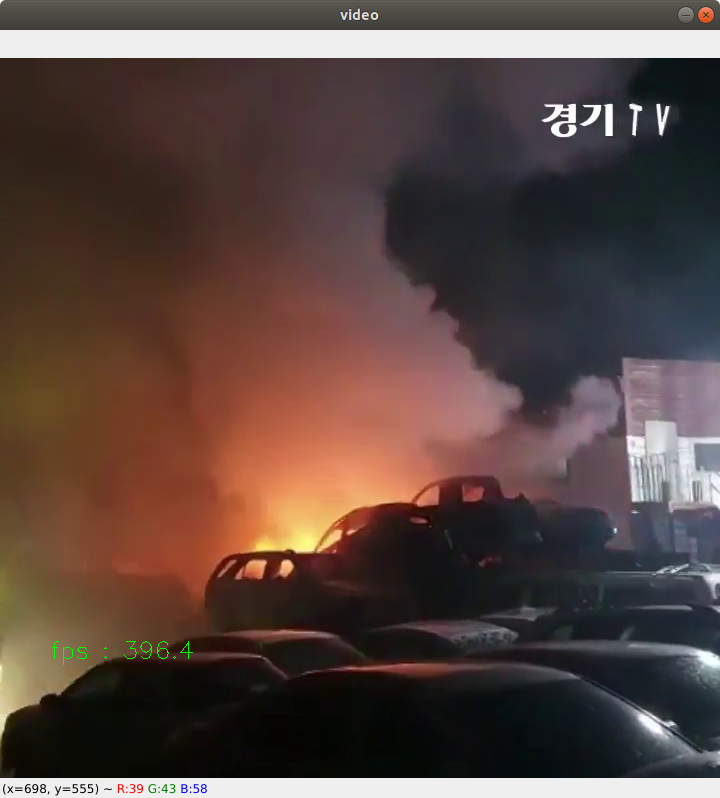
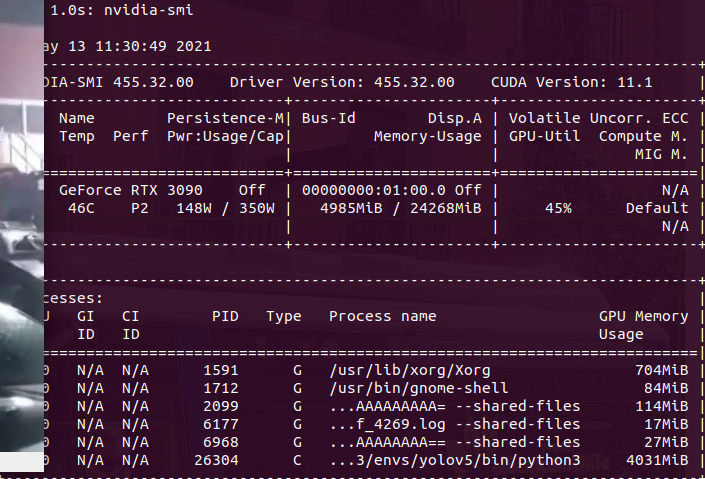
Yolov5m모델을 TensorRT로 변환해서 영상을 실행한 결과인데 FPS 396.4로 굉장히 높게 나옴... 하지만 메모리가
대략 4GB를 사용한다

