1. Template
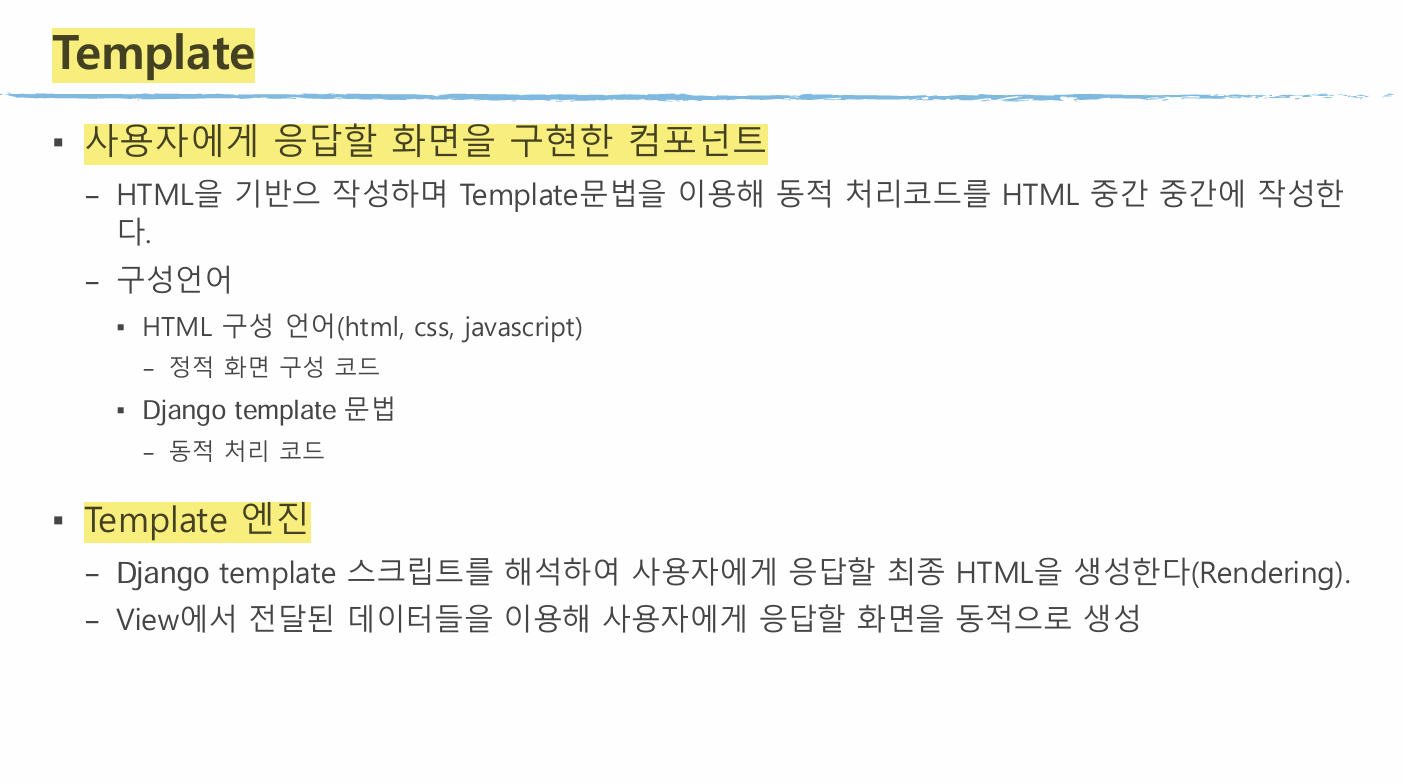
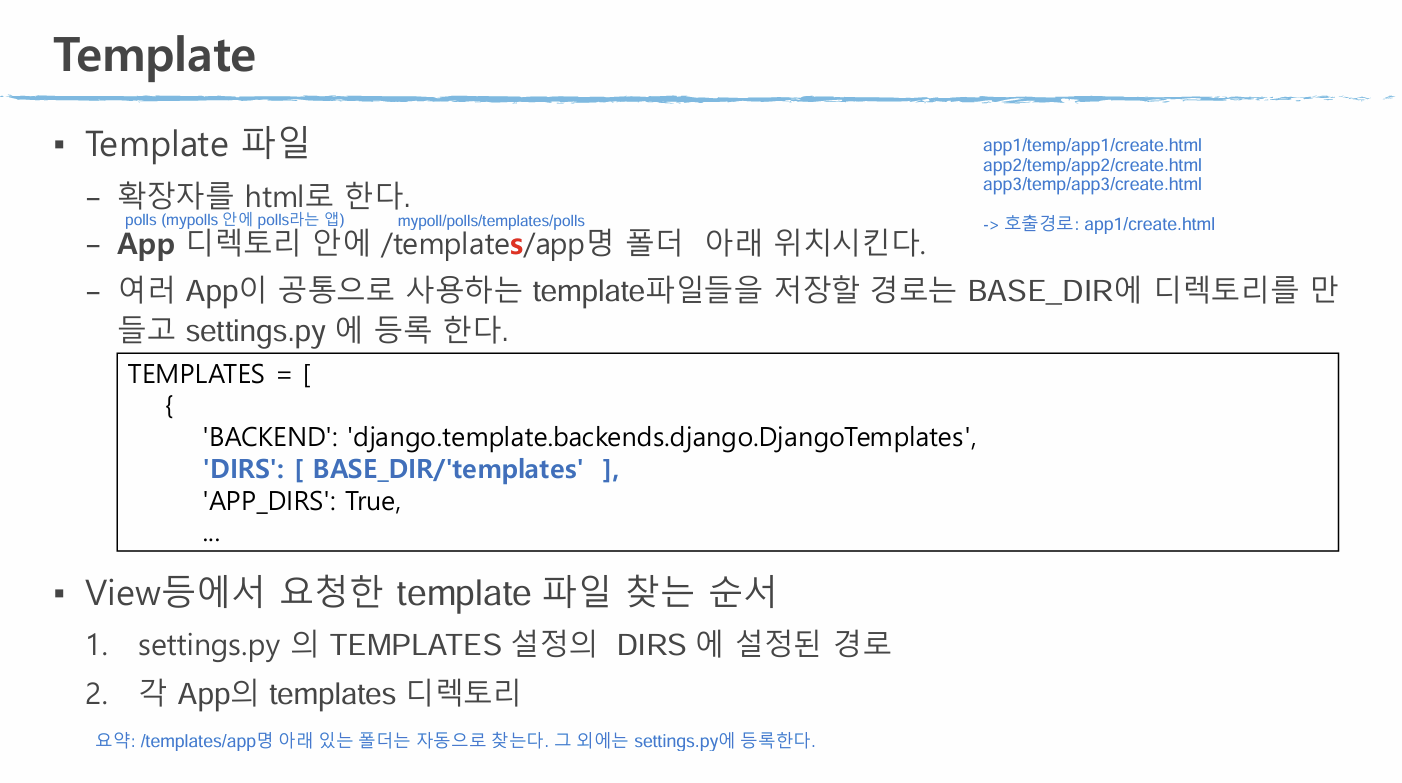
2. settings.py -> TEMPLATES 수정
TEMPLATES = [
    {
        'BACKEND': 'django.template.backends.django.DjangoTemplates',
        'DIRS': [BASE_DIR/"templates"], // 여기!
        'APP_DIRS': True,
        'OPTIONS': {
            'context_processors': [
                'django.template.context_processors.request',
                'django.contrib.auth.context_processors.auth',
                'django.contrib.messages.context_processors.messages',
            ],
        },
    },
]
3. TemplateView (/config/urls.py)
home.html
<!-- polls/templates/home.html -->
 <!DOCTYPE html>
 <html lang="en">
 <head>
    <meta charset="UTF-8">
    <meta name="viewport" content="width=device-width, initial-scale=1.0">
    <title>home</title>
 </head>
 <body>
    <a href="/polls/vote_create">설문 등록</a>
    <a href="/polls/list">설문 목록</a>
    <hr>
    <h1>설문 앱입니다.</h1>
    목록에 다양한 설문 문항이 있습니다.
 </body>
 </html>
 {% comment %}
    url-pattern(configs.py)
    path("", views.home, name="home")
    def home(request):
        return render(request, "home.html")
    단순히 template 실행결과를 응답하는 View ==> TemplateView를 사용하면 View 함수를 만들 필요 없다
 {% endcomment %}
urls.py
from django.views.generic import TemplateView

urlpatterns = [
    path("", TemplateView.as_view(template_name="home.html"), name="home"),
    path('admin/', admin.site.urls),
    # path('polls/welcome', views.welcome_poll, name="welcome"),
    path("polls/", include('polls.urls')),
]
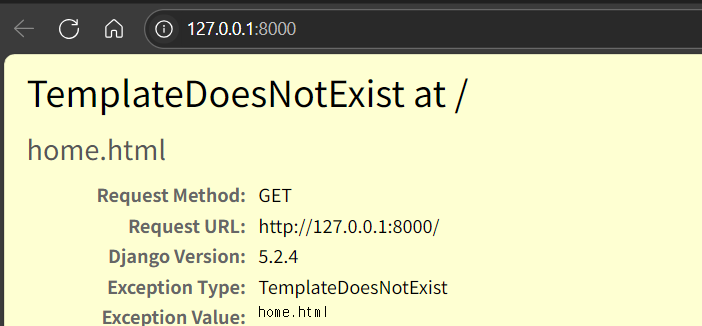
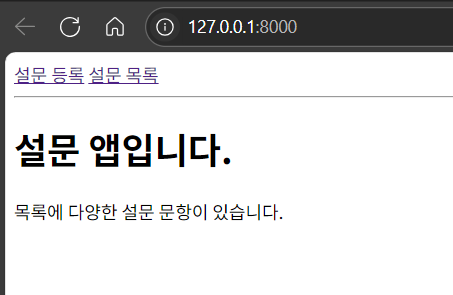
결과
Before
After
4. template 문법
filter
vote_form.html
<h1>설문</h1>
    <h2>질문: {{question.pk}}. {{question.question_text}}</h2>
    설문등록일시: {{question.pub_date|date:'Y/m/d H:i:s'}} <!-- | 앞뒤로 공백 있으면 안 됨.-->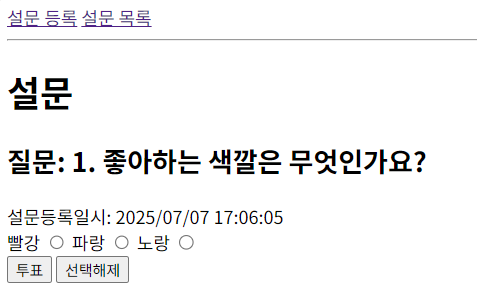
반복문
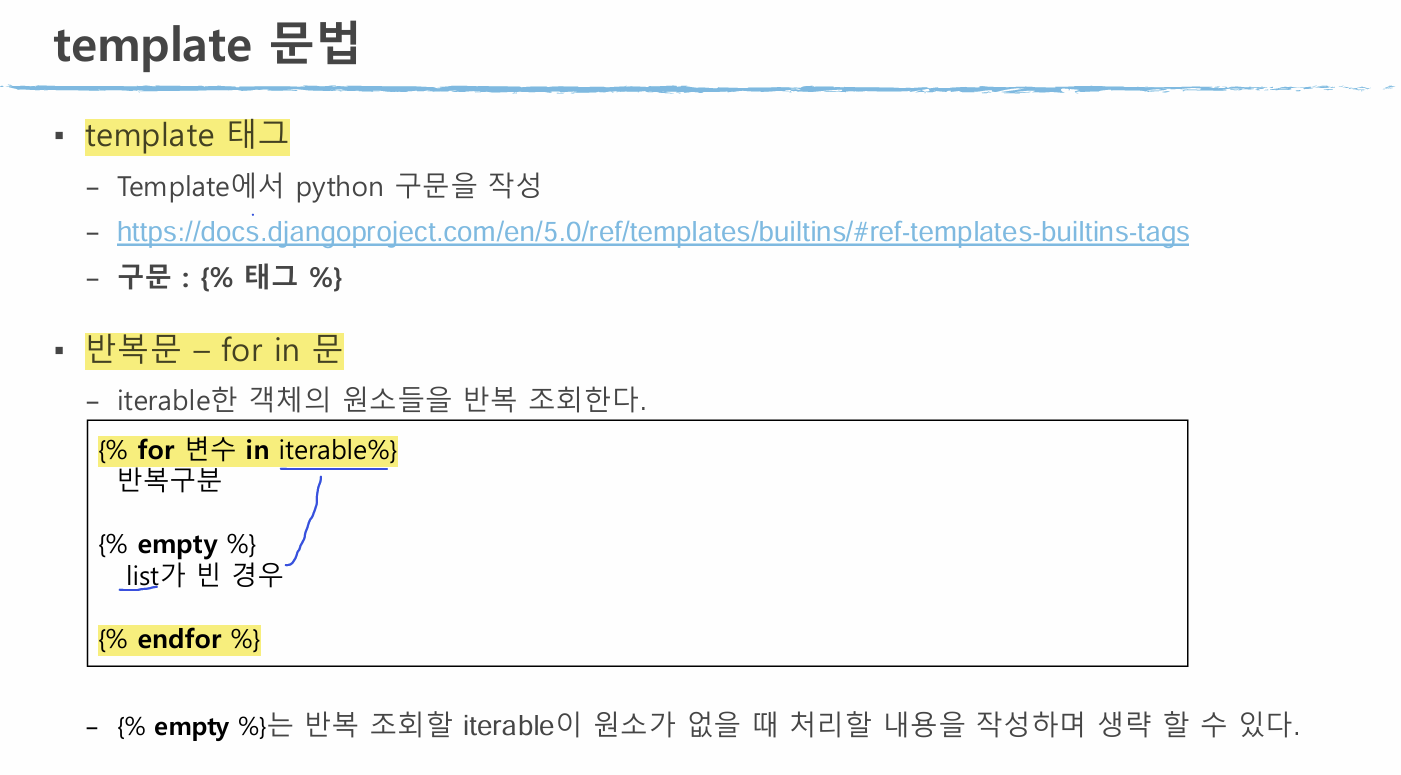
아래는 list.html이다.
<h1>설문 목록</h1>
    <!-- Context Value를 출력 -->
    {% for question in question_list %} <!-- for문 시작 -->
        <a href="/polls/vote_form/{{question.pk}}">
        {{question.pk}}. {{question.question_list}}<br>
        </a>
    {% empty %}
        <b>등록된 설문이 없습니다.</b>
    {% endfor %} <!-- for문 끝 -->
</body>
if문
views.py
{% if error_message %}
        <div style="color: red;font-size: 0.8em;">
            {{error_message}}
        </div>
    {% endif %}
url 태그
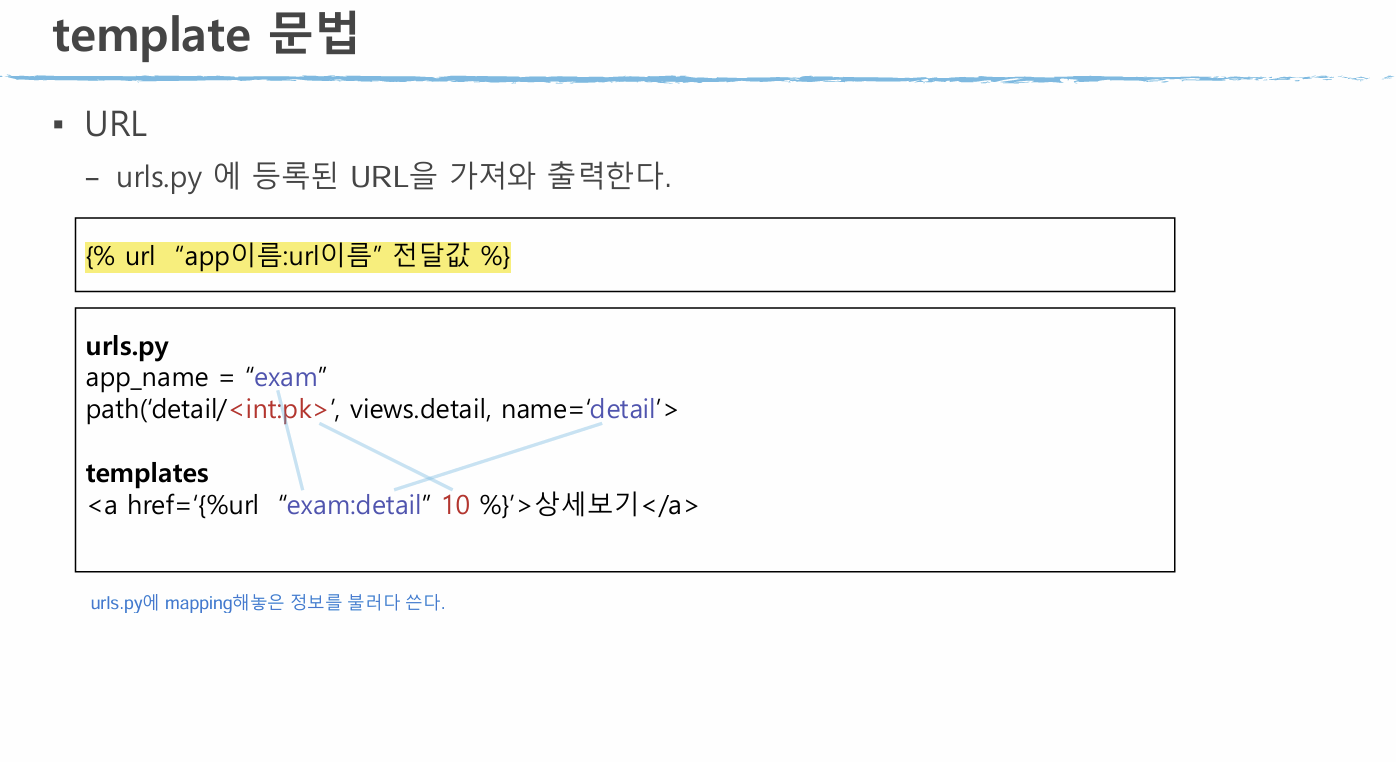
⭐ 장점: 변수처럼 값 수정이 용이하다!
<a href="/polls/vote_create">설문 등록</a>
    <a href="{%url 'vote_create'%}">설문 등록 2</a>
    <a href="/polls/list">설문 목록</a>
    <a href="{% url 'list' %}">설문 목록 2</a>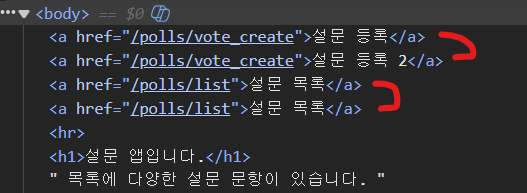
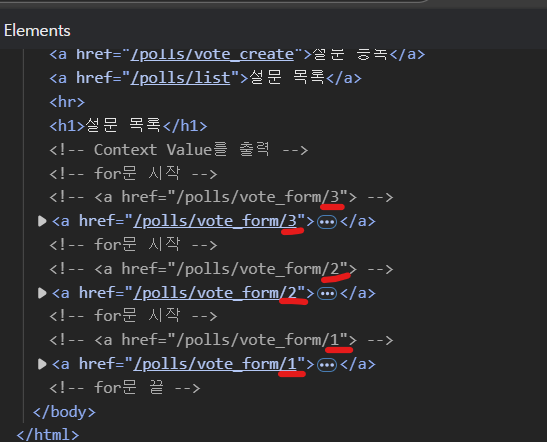
f12->Elements 확인하면 두 표현이 결과적으로 같아짐.
url 매핑 접두어 설정
# urls.py
app_name = "polls"
# url mapping 설정으로 호출할 때 사용할 접두어 설정.
## welcome 호출 -> polls:welcome (welcome -> polls:welcome)
<body>
    <a href="/polls/vote_create">설문 등록</a>
    <a href="{%url 'polls:vote_create'%}">설문 등록 2(앞에 polls: 붙었죠?)</a>
    <a href="/polls/list">설문 목록</a>
    <a href="{% url 'polls:list' %}">설문 목록 2</a>
    <hr>
    <h1>설문 앱입니다.</h1>
    목록에 다양한 설문 문항이 있습니다.
 </body>
list.html 수정
<h1>설문 목록</h1>
    <!-- Context Value를 출력 -->
    {% for question in question_list %} <!-- for문 시작 -->
        <!-- <a href="/polls/vote_form/{{question.pk}}"> -->
        <a href="{% url 'polls:vote_form' question.pk %}">
            {{question.pk}}. {{question.question_text|truncatewords:4}}
</a>- path parameter
- 주석은 Elements에 보내지지 않지만, html 주석은 html로서 보내진다.
url 불러오기 - reverse
# views.py
from django.urls import reverse # urls.py의 path 이름으로 설정된 url을 조회하는 메소드
# views.py
def welcome_poll(request):
now = datetime.now().strftime("%Y년 %m월 %d일 %H시 %M분 %S초")
# template 을 이용해서 응답 페이지를 생성.
response = render(
request, # HttpRequest
"polls/welcome.html", # template파일의 경로(app_directory/templates 이후 경로)
{"now": now, "name":"홍길동"}
# view가 template에 전달할 값들을 dictionary에 name-value 로 묶어서 전달.
# -> context value라고 한다.
)
# response: HttpResponse(polls/welcome.html 처리 내용)
# http 응답 상태 코드: 302, 이동할 url ==> redirect() ⭐
url = reverse("polls:vote_result") # app_name이 polls인 urls.py에서 name=vote_result인 설정의 url을 조회
print("reverse()가 생성한 url:", type(url), url)
response = redirect(url) # ⭐
print("=============", type(response))
return response
# http://127.0.0.1:8000/polls/welcome
def vote_create(request):
http_method = request.method
if http_method == "GET":
return render(request, "polls/vote_create.html")
elif http_method == "POST":
# 요청 파라미터 읽기 - 질문, 보기들
question_text = request.POST.get("question_text")
# 같은 이름으로 여러 개의 값이 전달된 경우 getlist("요청파라미터 이름"): list
choice_list = request.POST.getlist("choice_text")
# DB에 저장
q = Question(question_text=question_text)
q.save()
for choice_text in choice_list:
c = Choice(choice_text=choice_text, question=q)
c.save()
# 응답 - list로 redirect 방식으로 이동
# return redirect("/polls/list")
return redirect(reverse("polls:list")) # ⭐menu의 url을 url태그로 변환
💡 Django 템플릿에서 {% url %} 태그를 사용할 때 URL 경로 문자열이 아니라 urls.py에서 지정한 name을 넣어야 합니다.
<a href="{% url 'polls:vote_create' %}">설문 등록</a>
<a href="{% url 'polls:list' %}">설문 목록</a>
extends
main_layout.html생성
<!-- mypoll/templates/layouts/main_layout.html -->
<!-- 모든 페이지의 공통부분을 구현한 template -->
<!DOCTYPE html>
<html lang="ko">
<head>
    <meta charset="UTF-8">
    <meta name="viewport" content="width=device-width, initial-scale=1.0">
    <title>{%block title%}설문{%endblock title%}</title>
</head>
<body>
    <a href="{% url 'polls:vote_create' %}">설문 등록</a>
    <a href="{% url 'polls:list' %}">설문 목록</a>
    <br>
    {%block contents%}
    {%endblock contents%}
</body>
</html>- 이를
list.html에 적용
<!-- polls/templates/polls/list.html -->
 {%extends "layouts/main_layout.html%}

 {%block title%}설문 목록{%endblock title%}

 {%block contents%}
    <h1>설문 목록</h1>
    <!-- Context Value를 출력 -->
    {% for question in question_list %} <!-- for문 시작 -->
        <!-- <a href="/polls/vote_form/{{question.pk}}"> -->
        <a href="{% url 'polls:vote_form' question.pk %}">
            {{question.pk}}. {{question.question_text|truncatewords:4}}<br>
        </a>
    {% empty %}
        <b>등록된 설문이 없습니다.</b>
    {% endfor %} <!-- for문 끝 -->
{%endblock contents%}
main_layout.html 레이아웃을 바탕으로
{%block contents%}
    {%endblock contents%}
안에 들어갈 코드를 적는 것이다!
- 다른 파일들에도 적용~!
 {%extends "layouts/main_layout.html%}
 {%block title%}설문 목록{%endblock title%}
 {%block contents%}
 ...
 {%endblock contents%}
5. 화면 꾸미자! 부트스트랩 적용
main_layout.html
<!-- mypoll/templates/layouts/main_layout.html -->
<!-- 모든 페이지의 공통부분을 구현한 template -->
<!DOCTYPE html>
<html lang="ko">
<head>
    <meta charset="UTF-8">
    <meta name="viewport" content="width=device-width, initial-scale=1.0">
    <link rel="stylesheet" type="text/css" href="https://cdn.jsdelivr.net/npm/bootstrap@5.3.7/dist/css/bootstrap.min.css">
    <script src="https://cdn.jsdelivr.net/npm/bootstrap@5.3.7/dist/js/bootstrap.bundle.min.js"></script>
    <title>{%block title%}설문{%endblock title%}</title>
</head>
<body>
    <!-- 메뉴 - nav -->
     <nav class="navbar navbar-expand-sm bg-success bg-opacity-20">
        <!-- bg-success: 배경 초록색 / bg-opacity-10: 투명도 조절 (숫자 작을수록 투명) -->
        <div class="container">
            <div class="navbar-nav">
                <a href="{% url 'polls:vote_create' %}" class="nav-link">설문 등록</a>
                <a href="{% url 'polls:list' %}" class="nav-link">설문 목록</a>
            </div>
        </div>
     </nav>
    <div class="container mt-3">
        {%block contents%}{%endblock contents%}
    </div>
</body>
</html>
class="form-control" (vote_create.py)
class="form-control"을 추가한다.
<h1>설문 질문 등록</h1>
    <!-- ACTION 생략: 현재 url로 요청. form 요청, 등록 처리가 같은 url이기 때문에 action을 생략 -->
    <form method="post">
        {% csrf_token %} <!-- post 방식으로 보낼 때 반드시 넣어줘야 하는 토큰 -->
        <h2>질문</h2>
        <input type="text" name="question_text" required class="form-control">
        <!-- required: 적어도 하나의 값은 입력해야 함 -->
        <h2>보기</h2>
        <div id="choice_layer">
            <input type="text" name="choice_text" required class="form-control">
        </div>
        <div class="mt-3">
            <button type="button" onclick="addChoice();" class="btn btn-primary">보기 추가</button>
            <button type="button" onclick="delChoice();" class="btn btn-primary">보기 삭제</button>
            <button type="submit" class="btn btn-primary">문제 등록</button>
        </div>
    </form>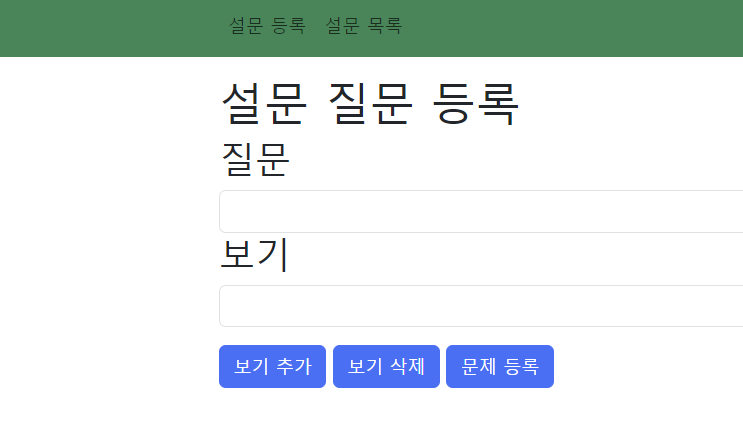
1. 질문, 보기 입력칸 가로로 길게 바뀜.
2. 보기 버튼 파란색으로 바뀜.