
Background
- Apache flink ver 1.19.0 로컬 개발 환경 구성 및 로컬 테스트 방법(with. Python) 게시글에서 로컬 환경에
apache flink ver 1.19.0을 설치하고 로컬 개발 환경을 구성하여 AWS MSK(Kafka) 데이터를 S3 로 업로드하는 예제를 진행해 보았다. - 이어서, 로컬 환경에서 개발한
pyflink app을AWS Managed Apache Flink에 직접 배포하는 과정을 기록해보자.
1. AWS Managed Flink 런타임 속성 설정하기
AWS Managed Apache Flink 앱에서는 아래 이미지와 같이 콘솔 화면의구성탭에서런타임 속성을 설정하여pyflink app에 변수를 할당할 수 있다.- 앱 배포 시 런타임 속성 값을 할당 받아 유연하게 값을 변경해야 하는 부분의 일부 코드를 수정하고 로컬 테스트 시 사용할 수 있도록 런타임 속성 값을
~/Study/Flink/config/application_properties.json에 기재 하여 로컬 테스트 진행 후 앱 배포까지의 과정을 정리하려 한다.- 참고로 앱 배포 시 Managed Apache Flink 콘솔 화면에서 지정한 런타임 속성 값은 내부적으로
/etc/flink/application_properties.json에 위치한 파일을 읽어서 할당 받을 수 있다.- 즉, 로컬에서 실행 시
~/Study/Flink/config/application_properties.json를 읽고 aws 에 배포하여 실행 시/etc/flink/application_properties.json를 읽도록 코드를 수정하면 된다.

1-1. application_properties.json 파일 작성하기
- 아래 json 행 별 주석 내용을 참고하고, 실제 사용 시 주석은 제거하여 사용하길 바란다.
- 참고 소스: https://github.com/aws-samples/amazon-managed-service-for-apache-flink-examples/blob/main/python/S3Sink/application_properties.json
# json 파일 생성
$ touch ~/Study/Flink/config/application_properties.json

# json 파일 편집
$ vim ~/Study/Flink/config/application_properties.json
>>> 아래 내용 입력 후 저장
[
{
"PropertyGroupId": "kinesis.analytics.flink.run.options", # 당장 코드에 적용하지 않지만 aws managed flink 배포 시 반드시 필요한 런타임 속성이므로 기억해두자.
"PropertyMap": {
"python": "run.py", # 앱 배포 시 런타임 속성으로 main() 메서드가 실행될 스크립트 경로를 이런식으로 입력해주어야 한다.(필수 런타임 속성)
"jarfile": "lib/pyflink-dependencies.jar" # 앱 배포 시 flink connector 사용을 위한 jar 종속성 파일 위치를 이런식으로 입력해주어야 한다.(종속성 이슈가 있다면, 필수 런타임 옵션)
}
},
{
"PropertyGroupId": "application.config",
"PropertyMap": {
"pipeline.name": "my-flink-app" # pyflink app 배포 시 스트림 앱 이름으로 지정할 속성 값이다.
}
},
{
"PropertyGroupId": "kafka.source.config", # kafka connector 사용 시 필요한 속성 값을 정의 했다.
"PropertyMap": {
"connector": "kafka",
"topic": "test-topic",
"properties.bootstrap.servers": "my-bootstrap-server:9096",
"properties.group.id": "flink_test_group",
"scan.startup.mode": "latest-offset",
"format": "json",
"properties.security.protocol": "SASL_SSL",
"properties.sasl.mechanism": "SCRAM-SHA-512",
"properties.sasl.jaas.config": "org.apache.kafka.common.security.scram.ScramLoginModule required username=\"my-username\" password=\"my-password\";",
"table": "source_kafka_table"
}
},
{
"PropertyGroupId": "s3.sink.config", # filesystem(s3) connector 사용 시 필요한 속성 값을 정의 했다.
"PropertyMap": {
"connector": "filesystem",
"path": "s3a://my-s3-bucket/jaeminkim_test/",
"format": "json",
"sink.rolling-policy.file-size": "32MB",
"sink.rolling-policy.rollover-interval": "1 min",
"sink.rolling-policy.check-interval": "1 min",
"auto-compaction": "false", # 만약 true 지정할 경우 flink 스트림에서 자체적으로 압축된 json 을 s3 에 올려준다.
"partitionedBy": "`year`, `month`, `day`, `hour`"
}
}
]$ pwd
~/Study/Flink
# json 파일 생성 후 작업 tree 현황
$ tree ./
./
├── assembly
├── config
│ └── application_properties.json
├── lib
│ ├── flink-connector-kafka-3.2.0-1.19.jar
│ ├── flink-sql-connector-kafka-3.2.0-1.19.jar
│ └── kafka-clients-3.2.0.jar
├── plugin
├── pom.xml
└── run.py
1-2. run.py 소스코드 수정
- Apache flink ver 1.19.0 로컬 개발 환경 구성 및 로컬 테스트 방법 - 데이터 소싱용 Flink App(run.py) 개발 에서 개발했던 코드 기준으로
application_properties.json파일을 읽어서 런타임 속성을 할당 받아 동작할 수 있도록 코드를 수정했다.
[ 주요 수정 내용 ]
APPLICATION_PROPERTIES_FILE_PATH변수에 로컬 환경일 경우"~/Study/Flink/config/application_properties.json"를 선언하고 클라우드 환경일 경우"/etc/flink/application_properties.json"를 선언하도록 하였다.get_application_properties()함수를 추가하여application_properties.json를 읽고 런타임 속성 값을 파싱할 수 있도록 했다.property_map()함수를 추가하여 파싱한 런타임 속성 json 값에서 각 속성 값을 선택할 수 있도록 하였다.
# run.py

import pyflink
import os
import json
import logging

from numpy.lib.utils import source
from pyflink.table import EnvironmentSettings, TableEnvironment


def set_checkpoint(table_env: TableEnvironment):
    ''' Flink checkpoint 설정하는 함수 '''

    # Set Flink stream checkpoint
    table_env.get_config().get_configuration().set_string("execution.checkpointing.mode", "EXACTLY_ONCE")
    table_env.get_config().get_configuration().set_string("execution.checkpointing.interval", "1 min") # 60초마다 체크포인트

def set_jar_classpath(table_env: TableEnvironment, current_dir: str):
    ''' 로컬 환경 테스트 시 Flink connector 관련 종속성 해결을 위한 jar 경로 선언하는 함수 '''

    libs_dir = os.path.join(current_dir, "lib")
    jar_files = [f"file:///{os.path.abspath(os.path.join(libs_dir, jar))}" for jar in os.listdir(libs_dir) if jar.endswith(".jar")]
    jar_files_str = ";".join(jar_files)

    table_env.get_config().get_configuration().set_string("pipeline.jars", jar_files_str)

    for jar in jar_files_str.split(";"):
        print(jar)

def get_application_properties(path: str) -> list:
    ''' path 에 입력된 application_properties.json 파일을 읽은 후 list 로 반환하는 함수 '''
    if os.path.isfile(path):
        with open(path, "r") as file:
            contents = file.read()
            properties = json.loads(contents)
            return properties
    else:
        print('A file at "{}" was not found'.format(path))

def property_map(props, property_group_id):
    ''' props 에서 PropertyGroupId 에 해당하는 PropertyMap 값을 반환하는 함수 '''
    for prop in props:
        if prop["PropertyGroupId"] == property_group_id:
            return prop["PropertyMap"]

def main(table_env: TableEnvironment, app_props: list, is_local: bool):
    ''' Flink Job 실행하는 함수 '''
    # PropertyGroupId 값이 kafka.source.config 에 해당하는 PropertyMap 값을 반환
    source_config = property_map(app_props, "kafka.source.config")
    # PropertyGroupId 값이 s3.sink.config 에 해당하는 PropertyMap 값을 반환
    sink_config = property_map(app_props, "s3.sink.config")

    table_env.execute_sql(f"""
        CREATE TABLE {source_config['table']} (
            id STRING,
            city STRING,
            number STRING,
            ins_time STRING
        ) WITH (
            'connector' = '{source_config['connector']}',
            'topic' = '{source_config['topic']}',
            'properties.bootstrap.servers' = '{source_config['properties.bootstrap.servers']}',
            'properties.group.id' = '{source_config['properties.group.id']}',
            'scan.startup.mode' = '{source_config['scan.startup.mode']}',
            'format' = '{source_config['format']}',
            'properties.security.protocol' = '{source_config['properties.security.protocol']}',
            'properties.sasl.mechanism' = '{source_config['properties.sasl.mechanism']}',
            'properties.sasl.jaas.config' = '{source_config['properties.sasl.jaas.config']}'
        )
    """)

    # Kafka source table 로 선언한 테이블 데이터를 조회할 수 있다.
    # 단, 해당 코드는 반드시 로컬 테스트 환경에서만 사용하자.
    if is_local:
        kafka_records = table_env.execute_sql(f"""SELECT * FROM source_kafka_table""").collect()
        num = 0
        for record in kafka_records:
            print(record)
            num += 1
            if num > 10:
                # 로컬 환경 실행 시 데이터가 잘 들어 오는지 확인을 위해 10개만 출력 하고 종료
                break

    table_env.execute_sql(f"""
        CREATE TABLE {sink_config['table']} (
            id STRING,
            city STRING,
            number STRING,
            ins_time STRING,
            `year` STRING,
            `month` STRING,
            `day` STRING,
            `hour` STRING
        ) PARTITIONED BY ({sink_config['partitionedBy']})
        WITH (
            'connector' = '{sink_config['connector']}',
            'path' = '{sink_config['path']}',
            'format' = '{sink_config['format']}',
            'sink.rolling-policy.file-size' = '{sink_config['sink.rolling-policy.file-size']}',
            'sink.rolling-policy.rollover-interval' = '{sink_config['sink.rolling-policy.rollover-interval']}',
            'sink.rolling-policy.check-interval' = '{sink_config['sink.rolling-policy.check-interval']}',
            'auto-compaction' = '{sink_config['auto-compaction']}'
        )
    """)

    table_insert = table_env.execute_sql(f"""
        INSERT INTO {sink_config['table']}
        SELECT *,
            DATE_FORMAT(TO_TIMESTAMP(ins_time, 'yyyyMMddHHmmss'), 'yyyy') AS `year`,
            DATE_FORMAT(TO_TIMESTAMP(ins_time, 'yyyyMMddHHmmss'), 'MM') AS `month`,
            DATE_FORMAT(TO_TIMESTAMP(ins_time, 'yyyyMMddHHmmss'), 'dd') AS `day`,
            DATE_FORMAT(TO_TIMESTAMP(ins_time, 'yyyyMMddHHmmss'), 'HH') AS `hour`
        FROM {source_config['table']}
    """)

    if is_local:
        # 로컬 환경일 경우 insert 객체에 wait() 메서드를 사용하지 않으면 앱이 바로 종료 된다.
        table_insert.wait()


if __name__ == "__main__":

    # Check ENV
    IS_LOCAL = True if bool(os.environ.get("IS_LOCAL")) else False
    # Get Directory path
    CURRENT_DIR = os.path.dirname(os.path.realpath(__file__))

    # Create Execution environment
    env_settings = EnvironmentSettings.in_streaming_mode()
    table_env = TableEnvironment.create(env_settings)

    # If Local
    if IS_LOCAL:
        print("IS_LOCAL=True")
        logging.info("IS_LOCAL is True")
        # Set flink stream checkpoint
        set_checkpoint(table_env)
        # Set JAR Dependencies
        set_jar_classpath(table_env, CURRENT_DIR)
        # 로컬일 경우  ~/Study/Flink/config/application_properties.json 파일을 읽어서 런타임 속성 선언
        APPLICATION_PROPERTIES_FILE_PATH = os.path.join(CURRENT_DIR, "config", "application_properties.json")
    else:
        # AWS Managed Flink 환경에서는 /etc/flink/application_properties.json 파일을 읽어서 런타임 속성 선언
        APPLICATION_PROPERTIES_FILE_PATH = "/etc/flink/application_properties.json"

    # appliacation_properties.json 파일을 읽어서 런타임 속성 객체 선언
    app_props = get_application_properties(APPLICATION_PROPERTIES_FILE_PATH)
    # PropertyGroupId 값이 application.config 에 해당하는 PropertyMap 값을 반환
    app_config = property_map(app_props, "application.config")
    # application.config 의 PropertyMap 값 중 pipeline.name 값을 app_name 변수에 할당
    app_name = app_config["pipeline.name"]
    # pyflink table_env 에 pipeline.name 속성값을 설정(job 이름 설정)
    table_env.get_config().set("pipeline.name", f"{app_name}")

    # main 함수 실행
    main(table_env, app_props, IS_LOCAL)
- 게시글이 좀 길어 지겠지만, 복사해서 그대로 사용할 수 있도록 코드 전문을 기재 했다.
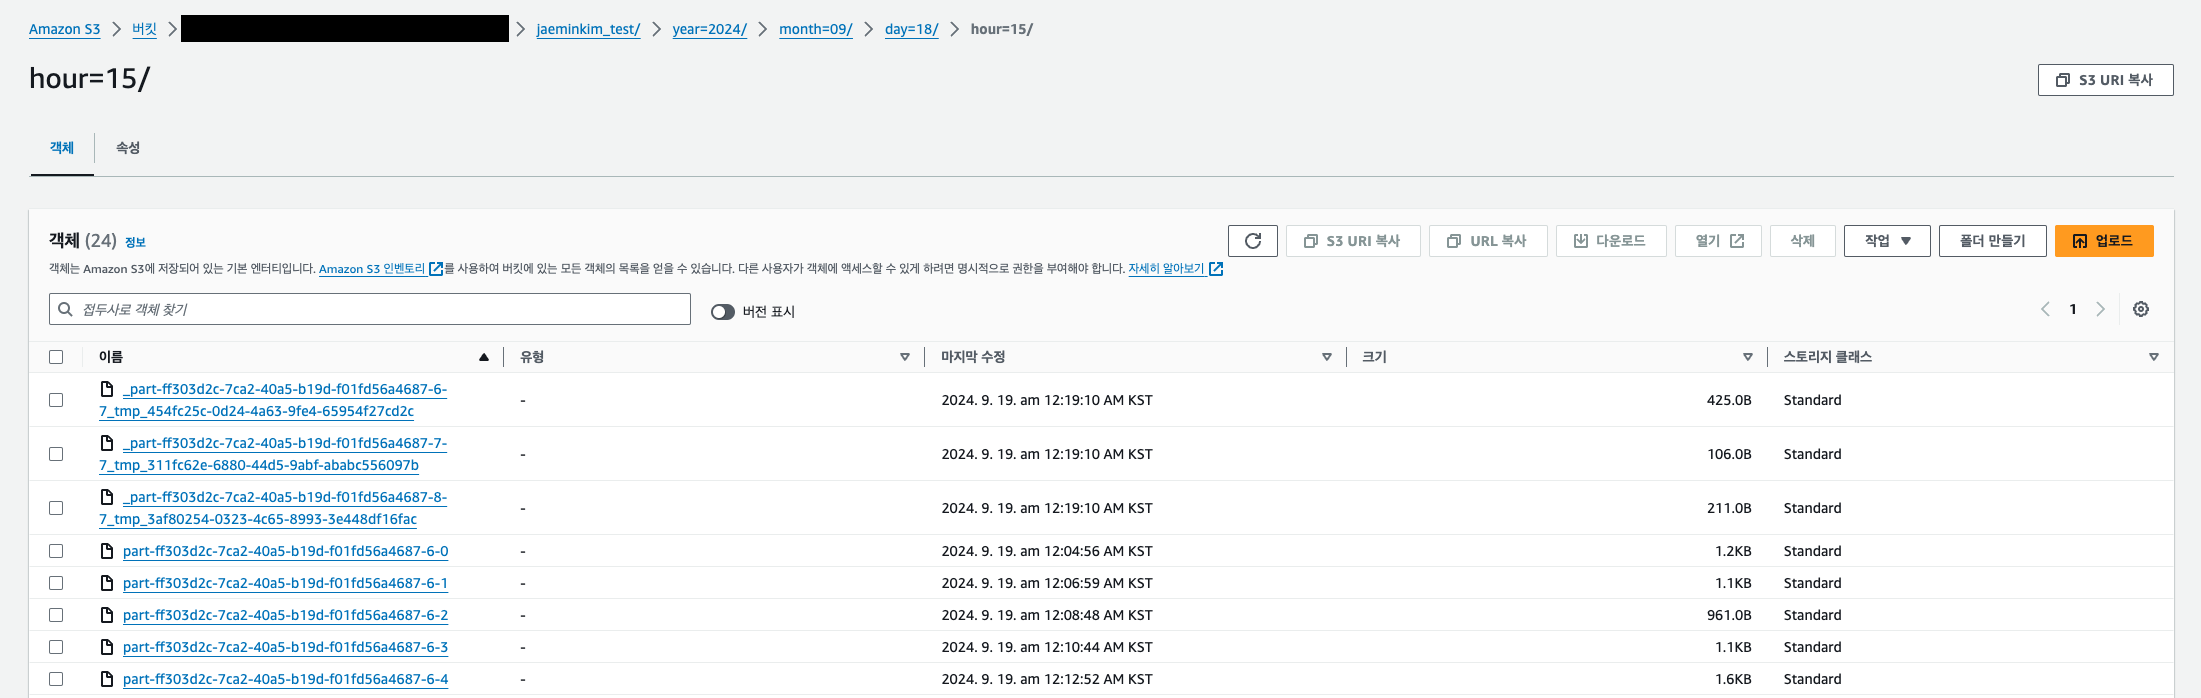
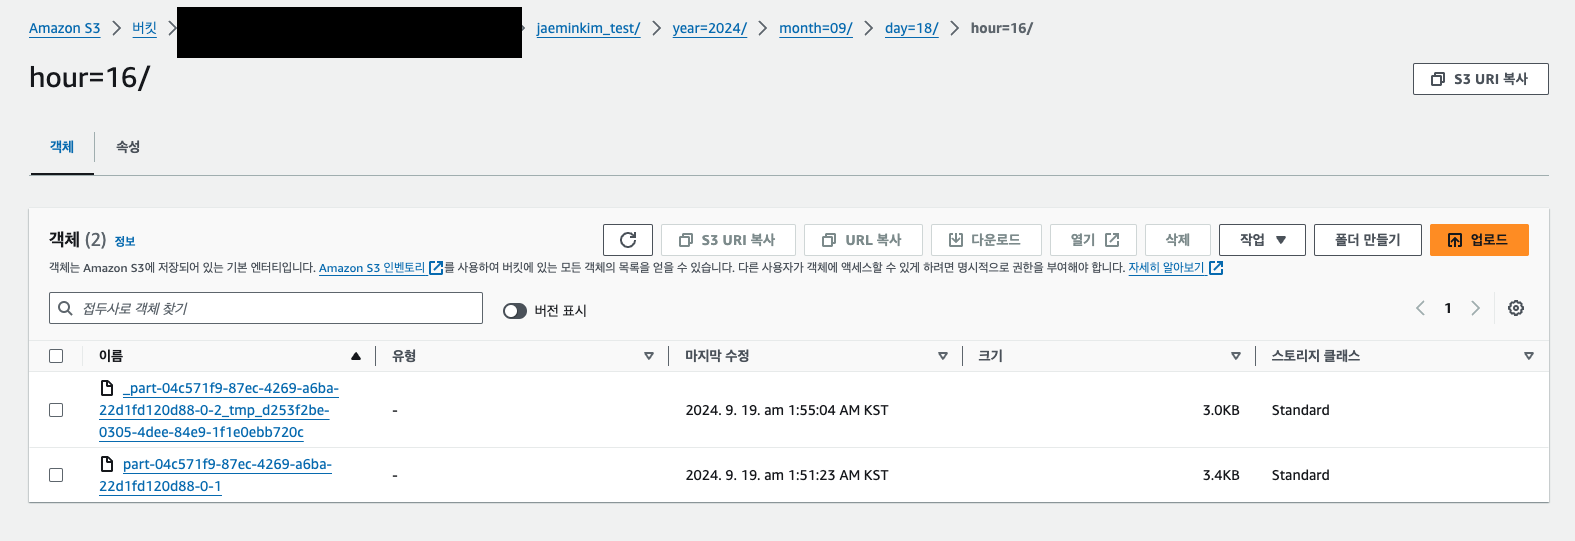
- 위와 같이
application_properties.json과run.py를 개발한 후 실행하니까 이전과 동일하게 AWS S3 에 정상적으로 데이터가 적재 되었다.(적재 결과 아래 이미지 참고)- 이제 해당
app을AWS Managed Apache Flink에 배포할 수 있도록zip으로 빌드해보자.
2. AWS Managed Flink 앱 배포를 위한 zip 빌드하기
- AWS Managed Flink 앱으로 배포하기 위해서는
main()메서드가 실행될파이썬 스크립트(run.py)와 connector 사용을 위한 종속성jar파일이 존재하는zip파일을AWS S3에 업로드 해야한다.- 콘솔에서 Flink 앱을 생성하고 zip 파일이 존재하는 S3 경로를 입력해주면 앱이 실행 되면서 해당 자료들을 읽어서 실행 되는 구조이다.
- 이 때, 최종 zip 자료를 빌드하기 위해 assembly.xml 과 pom.xml 스크립트가 필요하다.
- 참고 소스: https://github.com/aws-samples/amazon-managed-service-for-apache-flink-examples/blob/main/python/S3Sink/pom.xml
2-1. assembly.xml
- pom.xml 에서 maven 빌드 시 사용할 maven-assembly-plugin 내용을 아래와 같이 기재하면 된다.
- zip 으로 최종 빌드하며, zip 내부에 run.py 위치와 maven 에서 내려받은 jar 파일들의 위치를 기재 하겠다는 내용을 아래와 같이 작성한다.
- assembly.xml 스크립트는 https://github.com/aws-samples/amazon-managed-service-for-apache-flink-examples/blob/main/python/S3Sink/assembly/assembly.xml 를 참고하였다.
$ touch ~/Study/Flink/assembly/assembly.xml

$ vim  ~/Study/Flink/assembly/assembly.xml
>>> 아래 xml 내용 입력 후 저장<assembly xmlns="http://maven.apache.org/plugins/maven-assembly-plugin/assembly/1.1.3"
xmlns:xsi="http://www.w3.org/2001/XMLSchema-instance"
xsi:schemaLocation="http://maven.apache.org/plugins/maven-assembly-plugin/assembly/1.1.3 http://maven.apache.org/xsd/assembly-1.1.3.xsd">
<id>my-assembly</id>
<formats>
<format>zip</format>
</formats>
<includeBaseDirectory>false</includeBaseDirectory>
<fileSets>
<fileSet>
<directory>${project.basedir}</directory>
<outputDirectory>/</outputDirectory>
<includes>
<include>run.py</include>
</includes>
</fileSet>
<fileSet>
<directory>${project.build.directory}</directory>
<outputDirectory>lib</outputDirectory>
<includes>
<include>*.jar</include>
</includes>
</fileSet>
</fileSets>
</assembly>2-2. pom.xml 스크립트 작성하기
- 앱 실행 시 필요한 jar 종속성 목록과 빌드 시 필요한 포맷 등을 아래와 같이 작성하면 된다.
- pom.xml 스크립트는 https://github.com/aws-samples/amazon-managed-service-for-apache-flink-examples/blob/main/python/S3Sink/pom.xml 를 참고하였다.
$ touch ~/Study/Flink/pom.xml

$ vim ~/Study/Flink/pom.xml
>>> 아래 xml 내용 입력 후 저장<project xmlns="http://maven.apache.org/POM/4.0.0"
xmlns:xsi="http://www.w3.org/2001/XMLSchema-instance"
xsi:schemaLocation="http://maven.apache.org/POM/4.0.0 http://maven.apache.org/xsd/maven-4.0.0.xsd">
<modelVersion>4.0.0</modelVersion>
<groupId>com.amazonaws</groupId>
<artifactId>my-flink-app</artifactId>
<version>1.0.0</version>
<properties>
<project.build.sourceEncoding>UTF-8</project.build.sourceEncoding>
<buildDirectory>${project.basedir}/target</buildDirectory>
<zip.finalName>${project.name}-${project.version}</zip.finalName>
<jar.finalName>pyflink-dependencies</jar.finalName>
<flink.version>1.19.0</flink.version>
<aws.managed.flink.version>1.19</aws.managed.flink.version>
<kafka.version>3.2.0</kafka.version>
<aws.connector.version>4.3.0-1.19</aws.connector.version>
<kda.runtime.version>1.2.0</kda.runtime.version>
</properties>
<!-- Specify any jar dependencies (e.g. connectors) required -->
<dependencies>
<dependency>
<groupId>org.apache.kafka</groupId>
<artifactId>kafka-clients</artifactId>
<version>${kafka.version}</version>
</dependency>
<dependency>
<groupId>org.apache.flink</groupId>
<artifactId>flink-sql-connector-kafka</artifactId>
<version>${kafka.version}-${aws.managed.flink.version}</version>
</dependency>
<dependency>
<groupId>org.apache.flink</groupId>
<artifactId>flink-connector-kafka</artifactId>
<version>${kafka.version}-${aws.managed.flink.version}</version>
</dependency>
<dependency>
<groupId>org.apache.flink</groupId>
<artifactId>flink-s3-fs-hadoop</artifactId>
<version>${flink.version}</version>
</dependency>
</dependencies>
<build>
<directory>${buildDirectory}</directory>
<plugins>
<!-- Maven Shade Plugin to create the "fat-jar" with all required dependencies -->
<plugin>
<groupId>org.apache.maven.plugins</groupId>
<artifactId>maven-shade-plugin</artifactId>
<version>3.2.1</version>
<executions>
<!-- Run shade goal on package phase -->
<execution>
<phase>package</phase>
<goals>
<goal>shade</goal>
</goals>
<configuration>
<!-- This configuration prevents the plugin from generating the "original" jar file -->
<outputDirectory>${project.build.outputDirectory}</outputDirectory>
<artifactSet>
<excludes>
<exclude>org.apache.flink:force-shading</exclude>
<exclude>com.google.code.findbugs:jsr305</exclude>
<exclude>org.slf4j:*</exclude>
<exclude>log4j:*</exclude>
</excludes>
</artifactSet>
<filters>
<filter>
<!-- Do not copy the signatures in the META-INF folder.
Otherwise, this might cause SecurityExceptions when using the JAR. -->
<artifact>*:*</artifact>
<excludes>
<exclude>META-INF/*.SF</exclude>
<exclude>META-INF/*.DSA</exclude>
<exclude>META-INF/*.RSA</exclude>
</excludes>
</filter>
</filters>
<transformers>
<transformer
implementation="org.apache.maven.plugins.shade.resource.ServicesResourceTransformer"/>
<transformer
implementation="org.apache.maven.plugins.shade.resource.ManifestResourceTransformer">
</transformer>
</transformers>
</configuration>
</execution>
</executions>
</plugin>
<!-- Maven Assembly Plugin to create the zip file containing the Python code and the fat-jar -->
<plugin>
<artifactId>maven-assembly-plugin</artifactId>
<version>3.3.0</version>
<configuration>
<descriptors>
<descriptor>assembly/assembly.xml</descriptor>
</descriptors>
<finalName>${zip.finalName}</finalName>
<outputDirectory>${buildDirectory}</outputDirectory>
<appendAssemblyId>false</appendAssemblyId>
</configuration>
<executions>
<execution>
<id>make-assembly</id>
<phase>package</phase>
<goals>
<goal>single</goal>
</goals>
</execution>
</executions>
</plugin>
<!-- Maven jar plugin controls the name of the generated jar -->
<plugin>
<groupId>org.apache.maven.plugins</groupId>
<artifactId>maven-jar-plugin</artifactId>
<version>3.2.0</version>
<configuration>
<finalName>${jar.finalName}</finalName>
</configuration>
</plugin>
</plugins>
</build>
</project># 현재 작업 경로 현황
$ tree .
.
├── assembly
│ └── assembly.xml
├── config
│ └── application_properties.json
├── lib
│ ├── flink-connector-kafka-3.2.0-1.19.jar
│ ├── flink-sql-connector-kafka-3.2.0-1.19.jar
│ └── kafka-clients-3.2.0.jar
├── plugin
├── pom.xml
└── run.py2-3. maven 빌드하기
- assembly.xml 과 pom.xml 을 모두 생성 하였다면 mvn 명령어로 빌드하여 zip 파일을 생성해보자.
(java, maven 이 설치 되어 있지 않다면 이전 문서를 참고하여 설치하고 오길 바란다.)
$ cd ~/Study/Flink

$ mvn clean package
>>> 빌드 로그
...
Downloaded from central: https://repo.maven.apache.org/maven2/org/apache/maven/shared/maven-filtering/3.1.1/maven-filtering-3.1.1.jar (51 kB at 2.3 MB/s)
Downloaded from central: https://repo.maven.apache.org/maven2/org/codehaus/plexus/plexus-interpolation/1.25/plexus-interpolation-1.25.jar (85 kB at 3.7 MB/s)
Downloaded from central: https://repo.maven.apache.org/maven2/org/apache/maven/shared/maven-artifact-transfer/0.11.0/maven-artifact-transfer-0.11.0.jar (128 kB at 5.3 MB/s)
Downloaded from central: https://repo.maven.apache.org/maven2/commons-codec/commons-codec/1.6/commons-codec-1.6.jar (233 kB at 8.0 MB/s)
[INFO] Reading assembly descriptor: assembly/assembly.xml
[INFO] Building zip: /Users/kimjaemin/Study/Flink/target/my-flink-app-1.0.0.zip
[INFO] ------------------------------------------------------------------------
[INFO] BUILD SUCCESS
[INFO] ------------------------------------------------------------------------
[INFO] Total time:  10.690 s
[INFO] Finished at: 2024-09-19T00:40:18+09:00
[INFO] ------------------------------------------------------------------------

# 빌드 후 작업 경로 현황
$ tree .
.
├── assembly
│   └── assembly.xml
├── config
│   └── application_properties.json
├── dependency-reduced-pom.xml
├── lib
│   ├── flink-connector-kafka-3.2.0-1.19.jar
│   ├── flink-sql-connector-kafka-3.2.0-1.19.jar
│   └── kafka-clients-3.2.0.jar
├── plugin
├── pom.xml
├── run.py
└── target
    ├── archive-tmp
    ├── classes
    │   └── original-pyflink-dependencies.jar
    ├── maven-archiver
    │   └── pom.properties
    ├── my-flink-app-1.0.0.zip
    └── pyflink-dependencies.jar
📌 빌드 완료 후 위와 같이 많은 파일이 생성된 것을 볼 수 있다. 여기서 ./target/my-flink-app-1.0.0.zip 파일만 AWS S3 에 업로드 하면 된다.
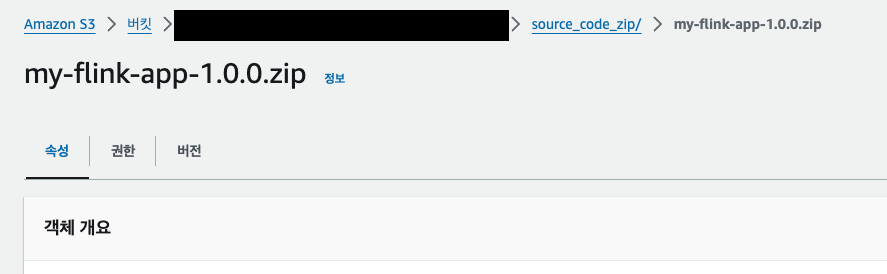
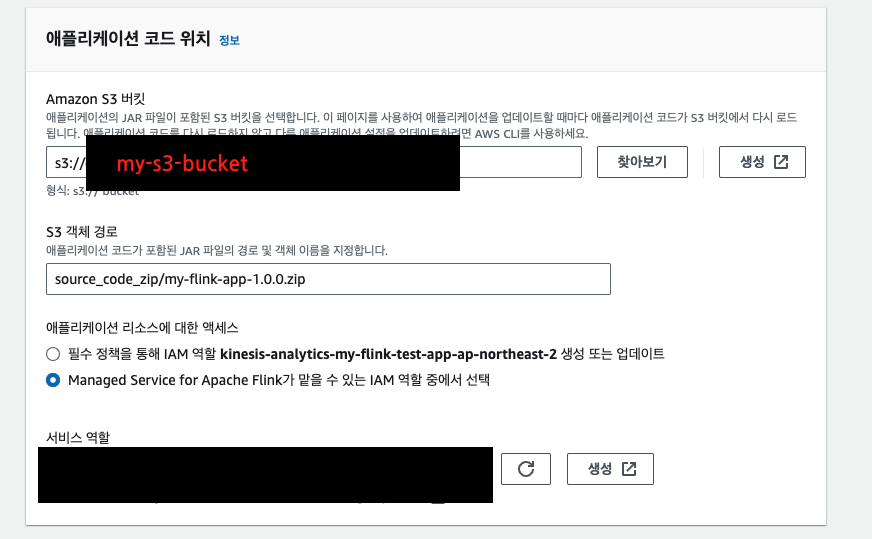
2-4. zip 파일을 AWS S3 에 업로드하기
나는
s3a://my-s3-bucket/source_code_zip/my-flink-app-1.0.0.zip경로와 같이 업로드 하였다.
3. IAM Role, Policy 설정하기(참고)
- Flink 앱을 생성하기 전에 아래와 같이 IAM 권한이 필요하다.
- Flink 앱 실행 시 권한 문제가 생길 경우 아래 권한 내용을 참고하고 부족한 권한을 추가하도록 하자.
3-1. IAM Policy 생성
- IAM Policy name: s3-flink-bucket-readonly-policy
- 내용: zip 파일을 업로드 해둔 s3 bucket 에 대한 읽기 권한이 필요하기 때문에 생성하였다.
- 참고: S3 에 json 데이터를 write 해야하기 때문에 필요에 따라 write 권한도 추가 해주자.
{
    "Version": "2012-10-17",
    "Statement": [
        {
            "Sid": "VisualEditor0",
            "Effect": "Allow",
            "Action": [
                "s3:GetObject",
                "s3:GetObjectVersion"
            ],
            "Resource": "arn:aws:s3:::my-s3-bucket/*"
        }
    ]
}
- IAM Policy name: eni-readwrite-policy
- 내용: Flink 앱 실행 시 eni(ec2) 에 아래와 같은 권한이 필요하기 때문에 생성하였다.
{
    "Sid": "ENIReadWritePermissions",
    "Effect": "Allow",
    "Action": [
        "ec2:CreateNetworkInterface",
        "ec2:CreateNetworkInterfacePermission",
        "ec2:DescribeNetworkInterfaces",
        "ec2:DeleteNetworkInterface"
    ],
    "Resource": "*"
}
- 위 두 개의 policy 외에는 aws 관리형 policy 인
CloudWatchLogsFullAccess와AmazonVPCReadOnlyAccess가 필요하다.
3-2. IAM Role 생성
위에 언급한 4개의 policy 가 모두 연결 되어 있는
Kinesis Analytics 서비스용 IAM Role을 생성하면 된다.
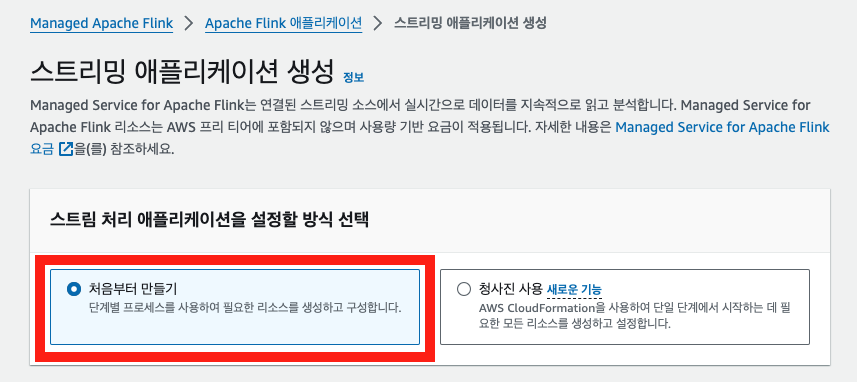
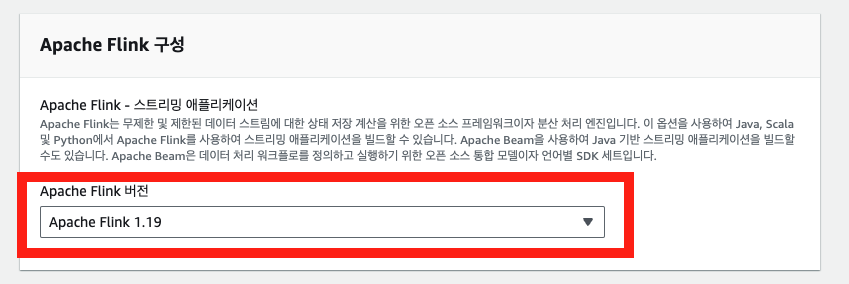
4. AWS Managed Apache Flink 앱 생성 및 배포
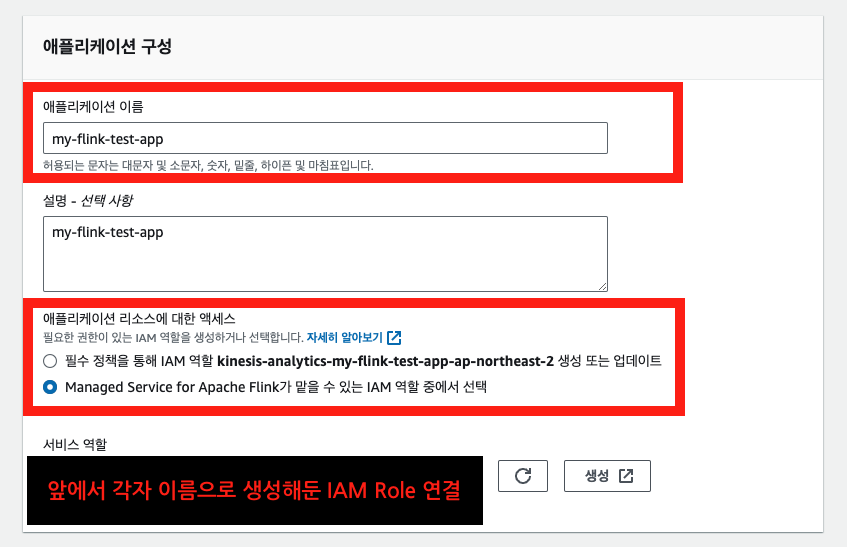
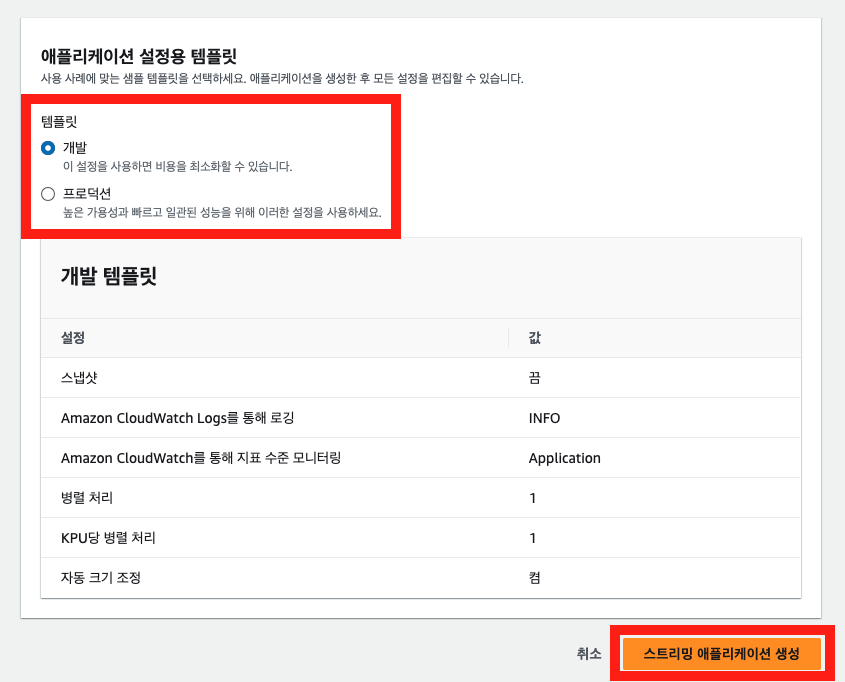
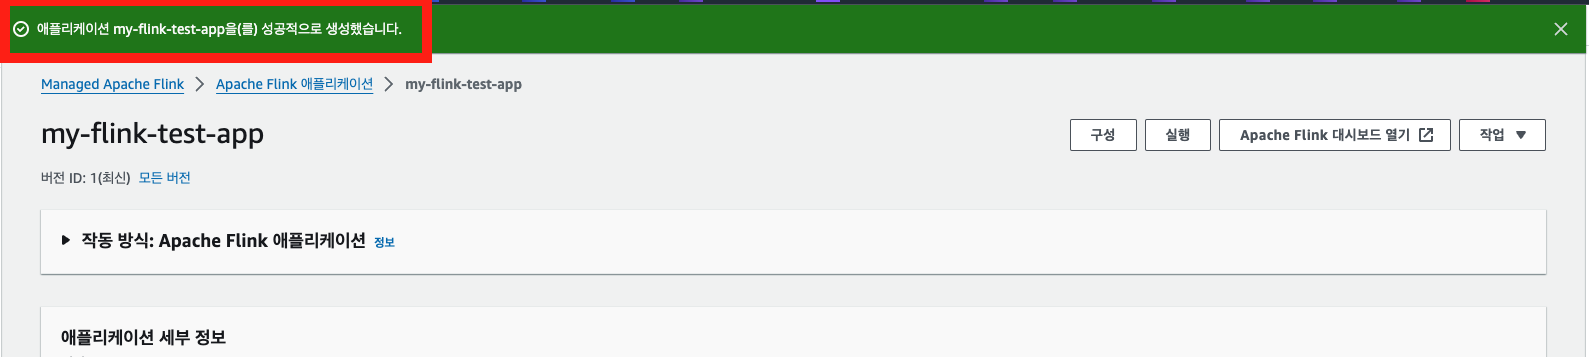
4-1. Flink 앱 생성하기
아래와 같이 AWS 콘솔 화면에서 Flink 앱을 생성할 수 있다.


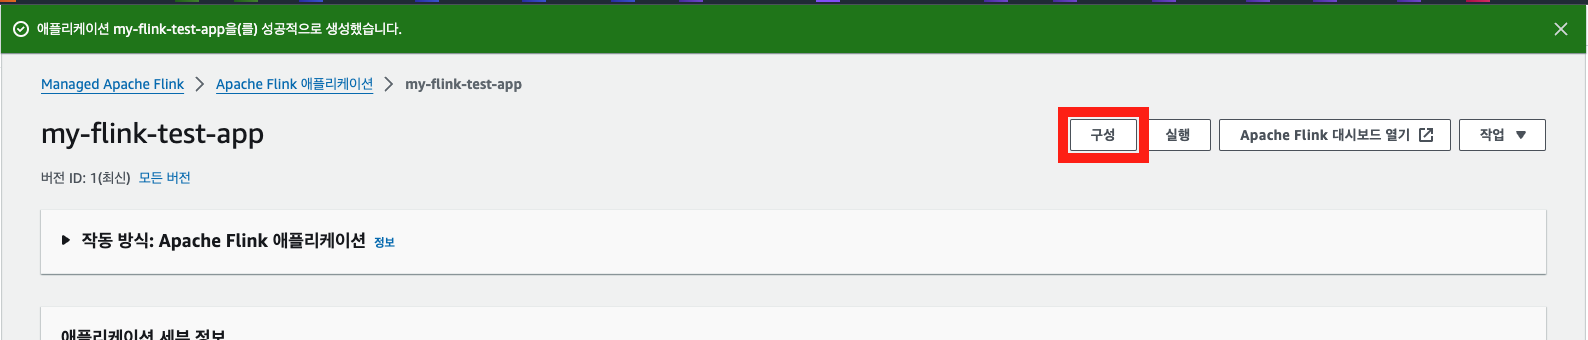
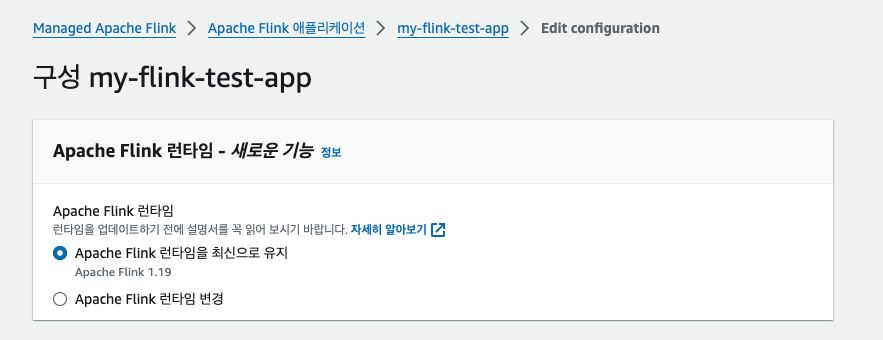
4-2. Flink 앱 구성 편집
Flink 앱 구성 편집을 통해 zip 파일 코드 위치, 런타임 속성 등을 설정할 수 있다.
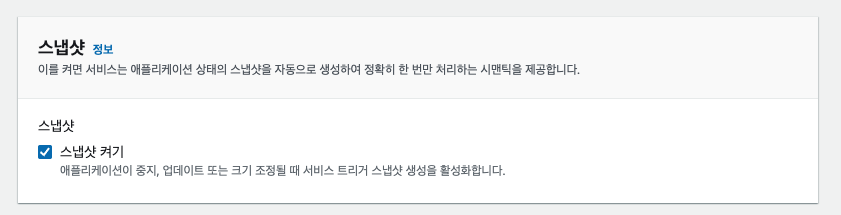
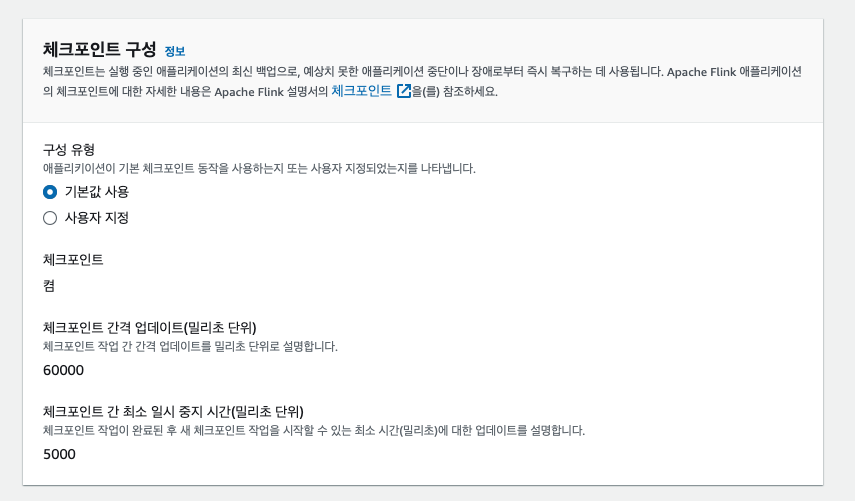
아래와 같이 스냅샷을 활성화 하면 Flink 체크포인트와 연동하여 앱이 업데이트 되거나 중지된 이후 다시 실행 될 때에도 스트림에 대한 Exactly Once 를 보장한다고 한다.
로컬 테스트 시
set_checkpoint()함수를 통해 체크포인트를 활성화 하였지만, 앱 배포 시에는 콘솔에서 체크포인트를 설정해준다. 그래서set_checkpoint()함수는IS_LOCAL값이True일 경우에만 실행한 것이다.
- 이미지 첨부는 하지 않았지만,
로깅 및 모니터링과네트워킹은 개인 작업 환경에 맞게 설정하면 된다.- 참고로 나는
네트워킹의 경우 MSK(kafka) 가 사용중인VPC,Subnet,Sg를 참고하여 할당 하였다.

📌 위 이미지와 같이 런타임 속성은 우선 비워두고 AWS CLI 를 통해서 한 번에 런타임 속성을 업데이트할 예정이다.
4-3. AWS CLI 를 이용하여 런타임 속성 업데이트하기
- 상용 버전 앱을 개발하면 지금보다 더 많은 런타임 속성이 필요할 수 있다.
- 이런 경우를 대응하기 위해 나는
AWS CLI의UpdateApplication API를 이용하여 런타임 속성을 업데이트 하려 한다.- 아래 명령어를 참고하여 런타임 속성을 업데이트할 수 있다.
--application-name: Flink 앱 이름--current-application-version-id: 콘솔 화면에 표시되는 Flink 앱 버전 ID 값- 참고 문서: https://awscli.amazonaws.com/v2/documentation/api/latest/reference/qbusiness/update-application.html
$ aws --version
aws-cli/2.17.46 Python/3.11.10 Darwin/24.0.0 source/arm64

$ aws kinesisanalyticsv2 update-application \
    --application-name my-flink-test-app \
    --current-application-version-id 6 \
    --application-configuration-update '{
    "EnvironmentPropertyUpdates":
    {
        "PropertyGroups":
        [
            {
                "PropertyGroupId": "application.config",
                "PropertyMap":
                {
                    "pipeline.name": "my-flink-app"
                }
            },
            {
                "PropertyGroupId": "kafka.source.config",
                "PropertyMap":
                {
                    "connector": "kafka",
                    "topic": "test-topic",
                    "properties.bootstrap.servers": "my-bootstrap-server:9096",
                    "properties.group.id": "flink_test_group",
                    "scan.startup.mode": "latest-offset",
                    "format": "json",
                    "properties.security.protocol": "SASL_SSL",
                    "properties.sasl.mechanism": "SCRAM-SHA-512",
                    "properties.sasl.jaas.config": "org.apache.kafka.common.security.scram.ScramLoginModule required username=\"my-username\" password=\"my-password\";",
                    "table": "source_kafka_table"
                }
            },
            {
                "PropertyGroupId": "s3.sink.config",
                "PropertyMap":
                {
                    "connector": "filesystem",
                    "path": "s3a://my-s3-bucket/jaeminkim_test/",
                    "format": "json",
                    "sink.rolling-policy.file-size": "32MB",
                    "sink.rolling-policy.rollover-interval": "1 min",
                    "sink.rolling-policy.check-interval": "1 min",
                    "auto-compaction": "false",
                    "partitionedBy": "`year`, `month`, `day`, `hour`",
                    "table": "sink_s3_table"
                }
            }
        ]
    }
}'
명령어 실행해 성공 하였다면, 아래와 같이 콘솔화면에서 런타임 속성이 업데이트 된 것을 확인할 수 있다.
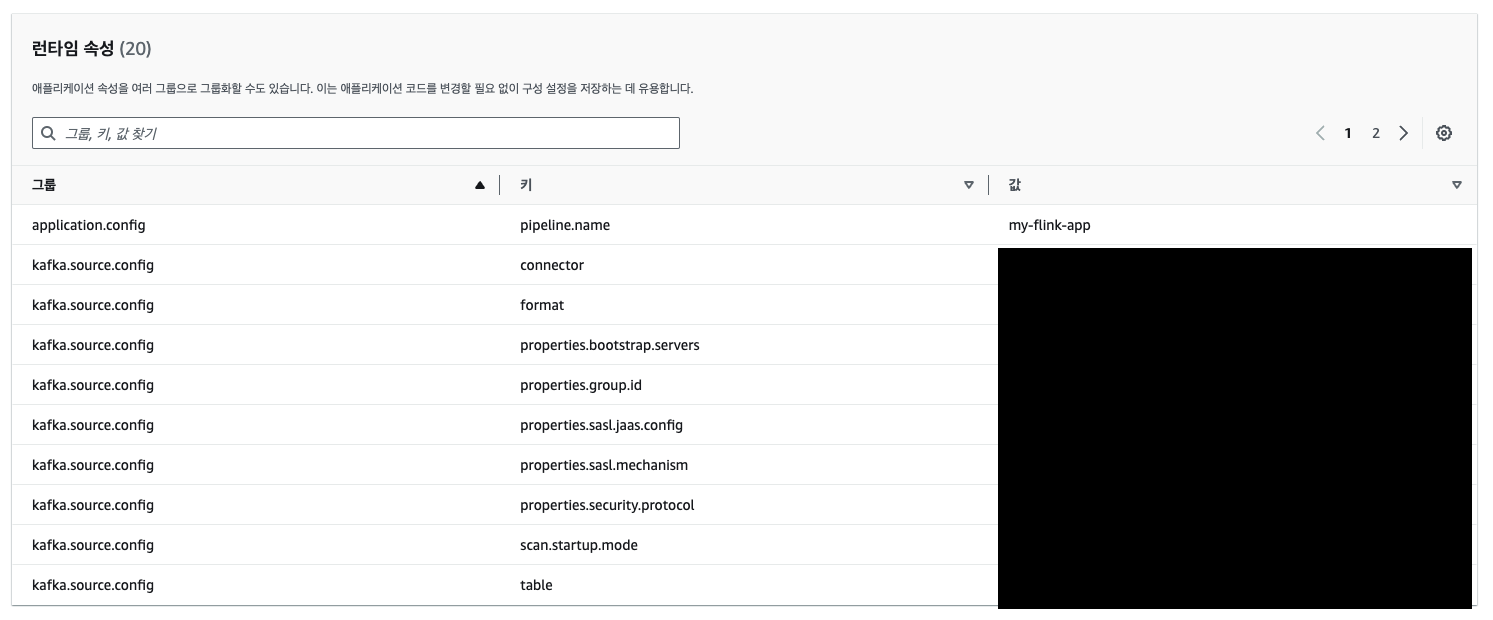
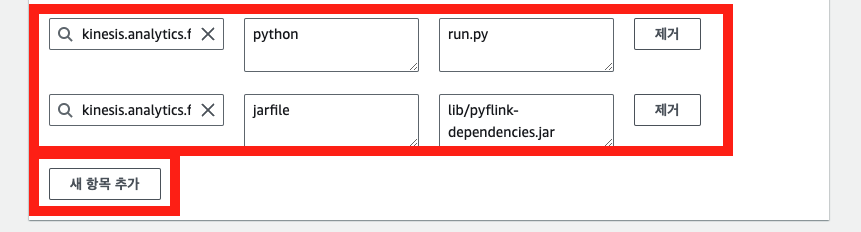
- 이제 콘솔 화면에서 Flink 앱 구성 편집을 통해 필수 런타임 속성 2개만 추가해주자.
- 해당 런타임 속성 2개 역시 AWS CLI 로 업데이트할 수 있으나, 오류가 계속 발생하여 맘편하게 따로 업데이트 하였다.
- 그룹ID: kinesis.analytics.flink.run.options
- 키: python, jarfile
- 값: run.py, lib/pyflink-dependencies.jar
5. Flink 앱 실행 및 모니터링
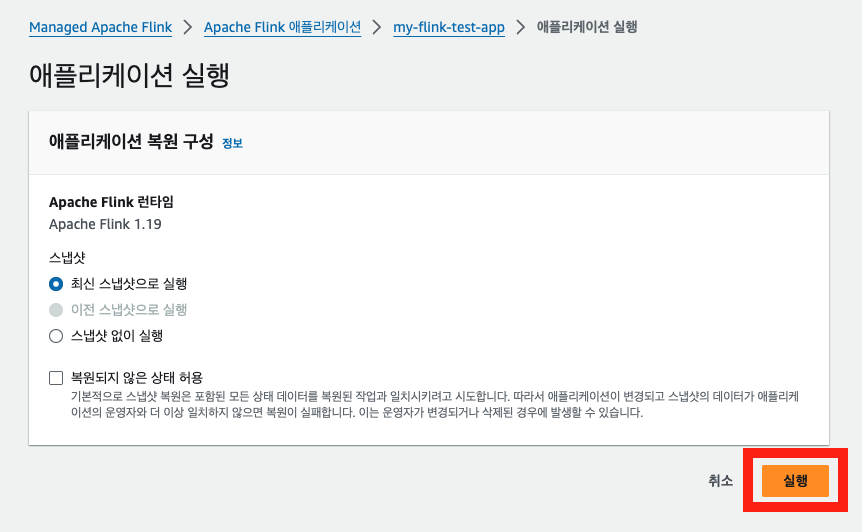
Flink 앱 구성 편집이 완료 되었다면, Flink 앱을 실행 시켜보자.
5-1. Flink 앱 실행

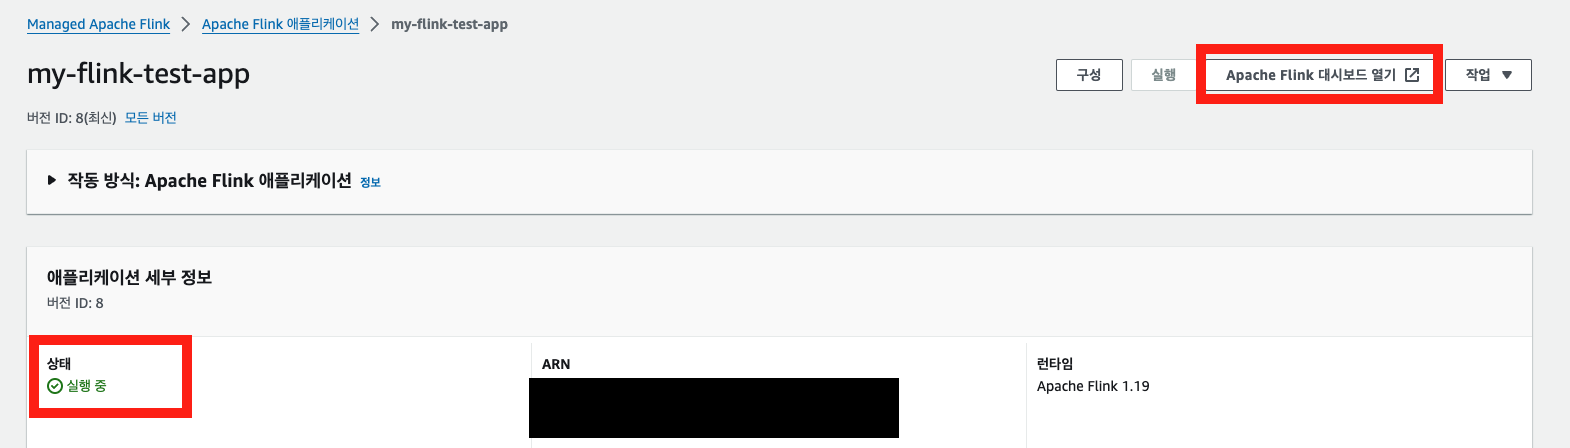
5-2. Flink 앱 모니터링
Flink 앱 상태가
실행 중으로 잘 나온다면Apache Flink 대시보드 열기를 눌러 실행 중인 job 의 상태를 확인할 수 있다.
아래와 같이
Job State가RUNNING일 경우 정상적으로 동작하는 것이다. 만약Fail같은 이상 값으로 표시 될 경우Exceptions탭에서 장애 로그를 확인할 수 있다.

참고 문서
-
Flink class 종속성 관리(pipeline.jars): https://nightlies.apache.org/flink/flink-docs-master/docs/dev/python/dependency_management/
-
Flink kafka connector 개발 방법: https://nightlies.apache.org/flink/flink-docs-release-1.19/docs/connectors/table/kafka/
-
Flink FileSystem connector 문서: https://nightlies.apache.org/flink/flink-docs-release-1.19/docs/deployment/filesystems/overview/
-
Flink FileSystem(s3) connector 문서: https://nightlies.apache.org/flink/flink-docs-release-1.19/docs/deployment/filesystems/s3/
-
Flink python debugging 문서: https://nightlies.apache.org/flink/flink-docs-master/docs/dev/python/debugging/
-
AWS Flink 버전별 jar 파일 목록: https://docs.aws.amazon.com/managed-flink/latest/java/how-flink-connectors.html
-
AWS Flink github 예제코드: https://github.com/aws-samples/amazon-managed-service-for-apache-flink-examples/blob/main/python/S3Sink/main.py
-
Table API Tutorial: https://nightlies.apache.org/flink/flink-docs-release-1.15/docs/dev/python/table_api_tutorial/
-
AWS Cli update-application api docs: https://awscli.amazonaws.com/v2/documentation/api/latest/reference/qbusiness/update-application.html
정리하며
- 내가 아직 Apache Flink python api 를 완벽히 숙지하지 못한 탓도 있겠지만, 게시글 작성 시점에서 상용 앱을 개발하기에는 pyflink 의 table api 보다는 datastream api 를 사용해야할 것 같다. table api 만 사용하기에는 아직 데이터 스트림별 예외처리 가능한 방법이 부족한 것 같다.
- 혹시, table api 만으로도 충분히 데이터 예외처리가 가능하다면 부디 댓글로 공유해주길 바란다.
