본 글은 Youtube - 홍팍님의 강의를 참고하여 작성하였습니다.
[ 📦 Form ]
폼 데이터란, HTML 요소인 Form에 담긴 데이터입니다.
게시글을 작성하면
- 제목
- 내용
- 첨부파일
등 여러 개의 항목들이 있습니다.
이를 하나로 묶은 것을 폼이라고 할 수 있습니다.
예를 들어, 택배에 비유하자면
- 수령자
- 배송일 등...
이 데이터를 컨트롤러가 받습니다. (DTO)
📁 templates 폴더 안에 📁 article 이라는 폴더를 생성하여 그 안에 👨🏻 new.mustache 파일을 생성해줍니다.
[ 👨🏻 new.mustache ]
데이터를 받을 폼을 작성해줍니다.
{{>layouts/header}}
<form class="container" action="/articles/create" method="post">
    <div class="mb-3">
        <label class="form-label">제목</label>
        <input type="text" class="form-control" name="title">
    </div>
    <div class="mb-3">
        <label class="form-label">내용</label>
        <textarea class="form-control" rows="3" name="content"></textarea>
    </div>
    <button type="submit" class="btn btn-primary">Submit</button>
</form>
{{>layouts/footer}}
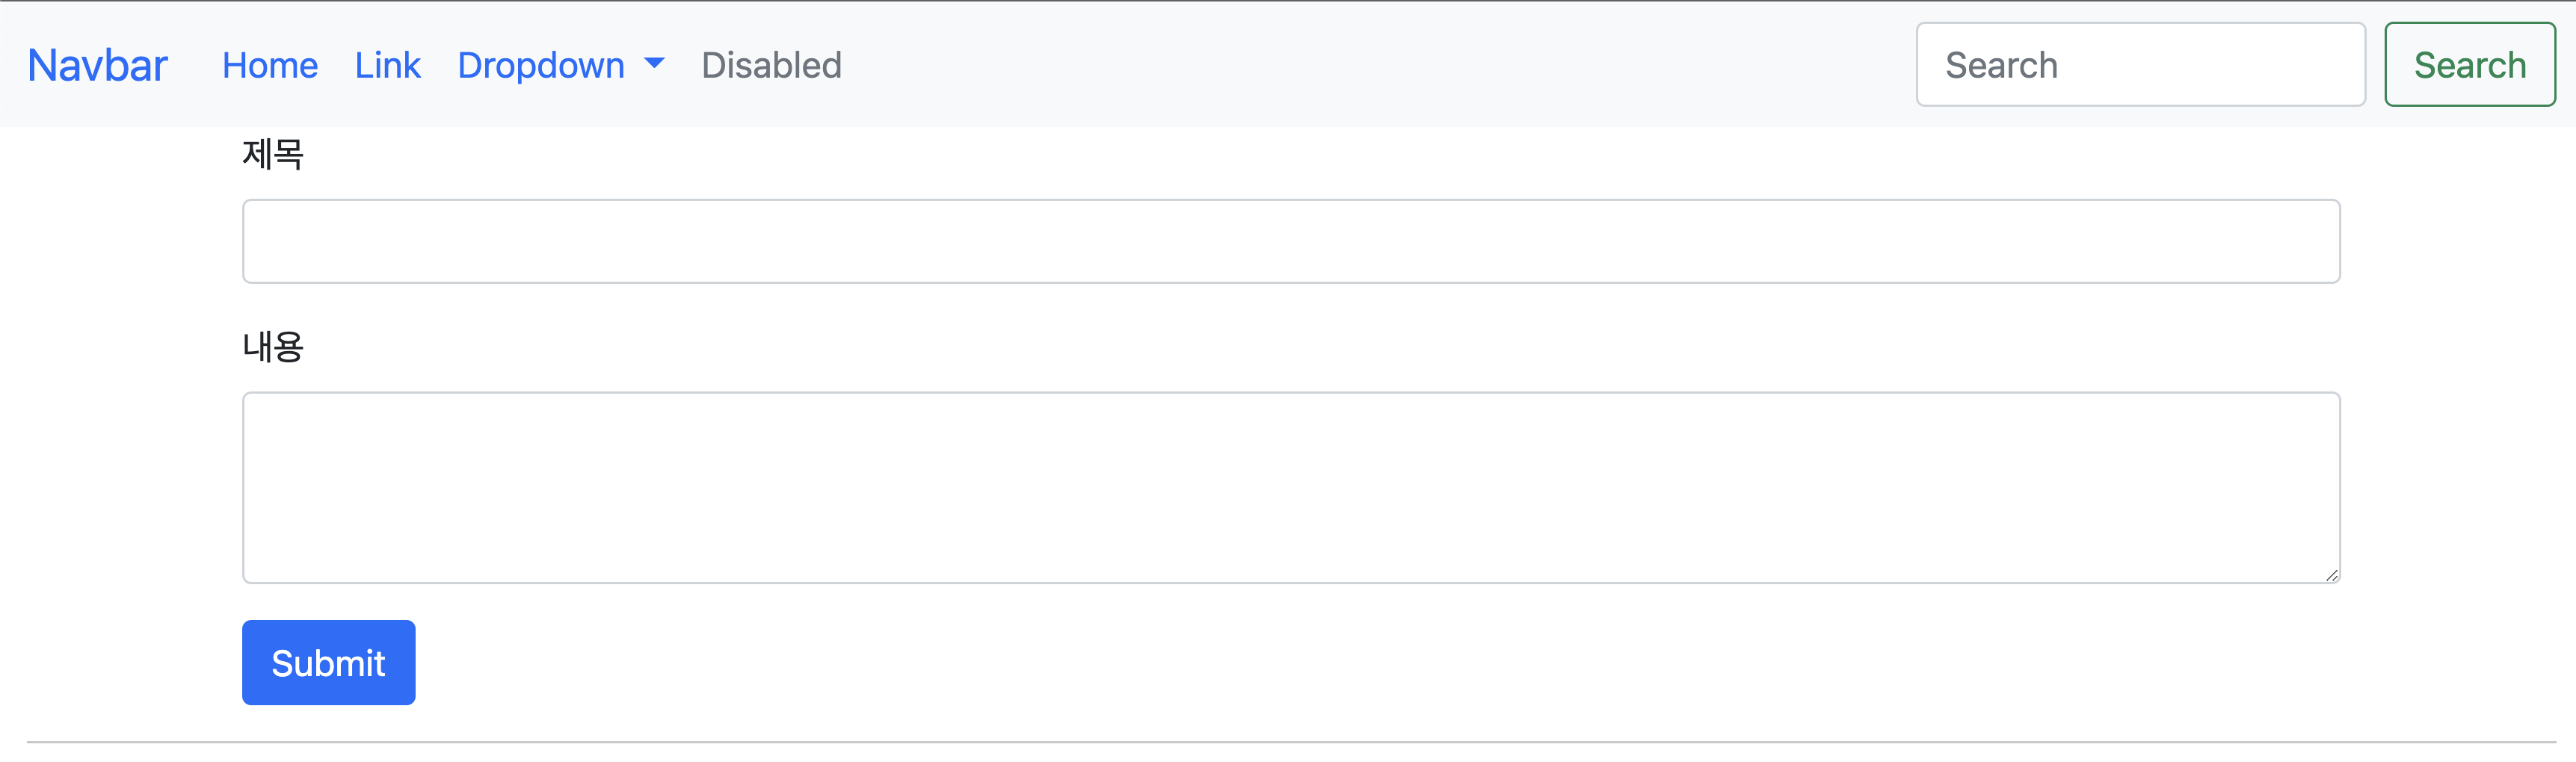
작성하면 위와 같은 페이지를 만들게 됩니다.
이제 이 페이지를 띄워주기 위해 Controller를 작성해줍니다.
👨🏻.mustache에 있는 데이터를 관리해주는 Controller를 파일을 생성합니다.
[ ArticleController.java ]
package com.example.firstproject.controller;

import com.example.firstproject.dto.ArticleForm;
import org.springframework.stereotype.Controller;
import org.springframework.web.bind.annotation.GetMapping;
import org.springframework.web.bind.annotation.PostMapping;

@Controller
public class ArticleController {

    @GetMapping("/articles/new")
    public String newArticleForm() {
        return "articles/new";
    }
}
URL에 /articles/new를 입력하면 위에 📁articles/👨🏻new 리턴되도록
@GetMapping 해줍니다.
이제 제목과 내용을 작성하여 submit버튼을 눌러 데이터를 받아보겠습니다.
📁 main / 📁 java / 📦 pakage / 📁 dto를 생성하여 데이터를 다룰
자바 파일을 생성해줍니다.
[ ArticleForm.java ]
package com.example.firstproject.dto;

public class ArticleForm {

    private String title;
    private String content;
}
👨🏻 new.mustache에서 text와 textarea의 name값과 동일한 변수를 생성하여줍니다.
마우스 우클릭 - Generate - Constructor를 클릭하여 생성자를 만들어 값을 입력해줍니다.
public ArticleForm(String title, String content) {
    this.title = title;
    this.content = content;
}
마우스 우클릭 - Generate - toString()을 클릭하여 변수들을 문자열로 출력하기 위한 메서드를 자동 생성해줍니다.
@Override
    public String toString() {
        return "ArticleForm{" +
                "title='" + title + '\'' +
                ", content='" + content + '\'' +
                '}';
    }
최종적인 ArticleForm.java의 코드는 아래와 같습니다.
package com.example.firstproject.dto;

public class ArticleForm {

    private String title;
    private String content;

    public ArticleForm(String title, String content) {
        this.title = title;
        this.content = content;
    }

    @Override
    public String toString() {
        return "ArticleForm{" +
                "title='" + title + '\'' +
                ", content='" + content + '\'' +
                '}';
    }
}
[ 👨🏻 new.mustache ]
👨🏻 new.mustache 코드를 확인하면

submit을 눌렀을 때 액션이 있습니다. 이는 /articles/create이며,
method 방식은 POST입니다.
이것을 실행하기 위해서는
[ ArticleController.java ]
ArticleController.java에 코드를 추가해주어야합니다.
@PostMapping("/articles/create")
    public String createArticle(ArticleForm form) {
        System.out.print(form.toString());
        return "";
    }
👨🏻 new.mustache 에서 POST 방식으로 넘겼으므로
@PostMapping()해줍니다. 아까 적은 액션값을 @PostMapping()의 괄호 안에 적어줍니다.
매개변수에는 ArticleForm.java의 객체를 넣어주고 form이라는 객체를 생성하여줍니다.
이제 이 form을 출력해주면
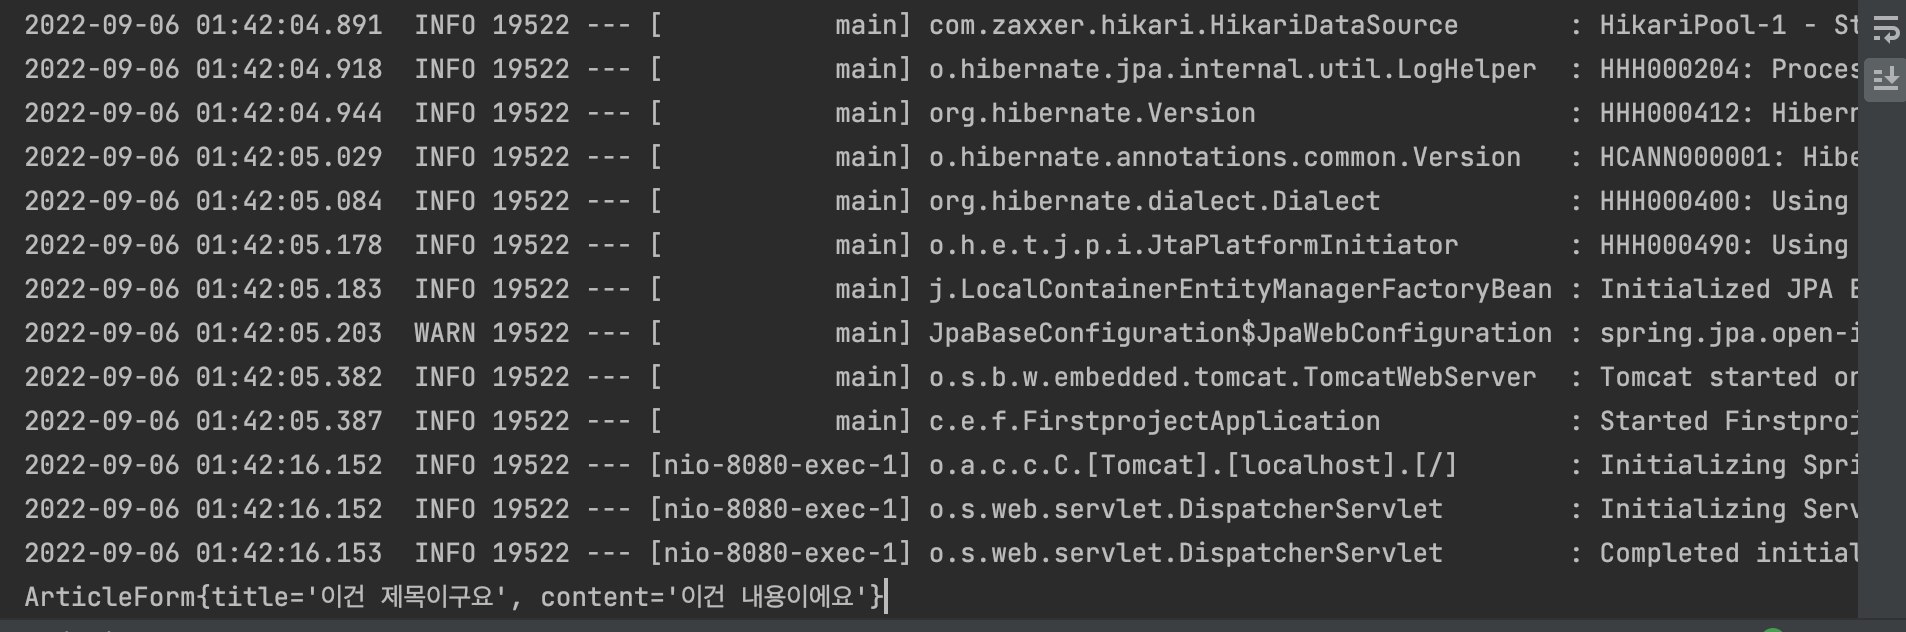
위와 같이 데이터가 담겨있는 모습을 볼 수 있습니다.
