- 특징
- 스크립트 언어 -->
<script>
- 객체 기반 언어 (= 객체 지향 언어)
- 객체 : 복잡한 데이터를 간단하게 묶어줄 수 있는 형태 ( 포장지 개념 )
- 스크립트 언어 -->
- 사용방법
***
CSS가 HTML 을 도와주는 방법과 같다 ! ( inline 방식, internal 방식, external 방식 )
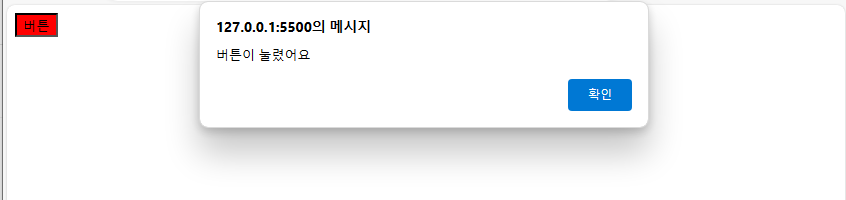
inline 방식
<body>안에서 실행- onclick : 이벤트 속성
--> 이 버튼을 클릭했을때 실행
(ex)
onclick = "window.alert('버튼이 눌렸어요')"
--> 객체는 항상 (.) 달고 다니는 것 주의 !
ex) inline.html
<!DOCTYPE html>
<html lang="ko">
<head>
  <meta charset="UTF-8">
  <meta name="viewport" content="width=device-width, initial-scale=1.0">
  <title>Document</title>
</head>
<body>
  <!-- css가 inline 방식으로 html 을 도와주는 방식 -->
  <input type="button" value="버튼"
      style="background-color: red;"
      onclick="window.alert('버튼이 눌렸어요')"/>
</body>
</html>
-->
internal 방식
- css 는
<style>로 했다면 javascript 에서는<script>로 설정
ex)
<script>
   window.alert("Hello World!");
</script>
ex) internal.html
 <!DOCTYPE html>
<html lang="ko">
<head>
    <meta charset="UTF-8">
    <meta name="viewport" content="width=device-width, initial-scale=1.0">
    <title>Document</title>

    <style>
        body {
            font-size: 20px;
            background-color: aqua;
        }
    </style>

    <script>
        window.alert("Hello World!");
    </script>

</head>
<body>

</body>
</html>
-->

external 방식
<head>안에서 실행- css 는 link 로 불러왔다면 javascript 는 확장자 ( 파일명.js ) 를 만들어서 가져옴
(ex)
extern.js 라는 확장자를 만들고 src를 이용하여 불러온다
<script src="./extern.js"></script>
ex)
<!DOCTYPE html>
<html lang="ko">
<head>
    <meta charset="UTF-8">
    <meta name="viewport" content="width=device-width, initial-scale=1.0">
    <title>Document</title>

    <script src="./extern.js"></script>

</head>
<body>

</body>
</html>
ex) extern.js
window.alert("이것은 외부에서 실행되는 스크립트입니다.");-->

주석
// 주석 내용: 한 줄만 주석처리/* 주석 내용 */: 여러 줄 주석처리
문법 ( 변수 )
변수 : 변할 수 있는 값을 저장할 수 있는 임시 기억 장소
변수명 : 변수공간을 지칭하는 것
(ex)
a = 10; --> a라는 공간에 10이라는 값을 저장하겠다
a = 11; --> 저장했던 10을 11로 바꿔준다
**
출력하는 두가지 형태
- document.write(a) ;
- console.log(a);
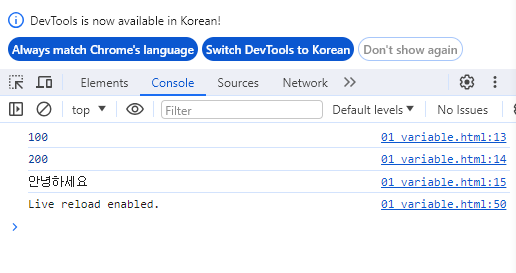
문법 ( 변수선언 )
- let
사용시 공간낭비가 X - const
변수와는 약간 상반된 공간, 값의 변질을 막기위함
ex)
  <!DOCTYPE html>
<html lang="ko">
<head>
    <meta charset="UTF-8">
    <meta name="viewport" content="width=device-width, initial-scale=1.0">
    <title>Document</title>

    <script>

        let a1 = 100;
        const a2 = 200;

        console.log(a1);
        console.log(a2);
        console.log("안녕하세요");

    </script>

</head>
<body>

</body>
</html>
-->
문법 ( 변수 표기법 )
-
dash-case : dash 를 이용하여 변수를 표기하는 방법
ex)
the-quick-brown-fox -
snake_case ( HTML이나 CSS에서 주로 사용 )
ex)
the_quick_brown_fox -
camelCase ( javascript 에서 주로 사용 )
ex)
theQuickBrownFox -
PascalCase ( 첫글자 대문자로 시작하는 방식 )
ex)
TheQuickBrownFox
Data Type
String
- 백팁(
) 과 $ 을 사용해서 참조 기능 사용 ex) let str3 =Hello${str2}`;
Number
ex)
let num2 = 3.14;
let num3 = .15; (.15는 0.15를 나타냄)
***
NaN : Not a Number (숫자형태가 아니다)
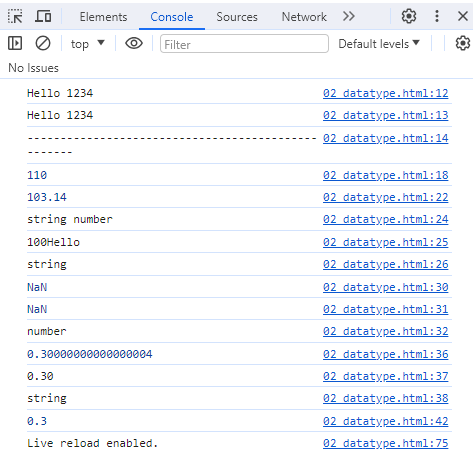
ex) 02_datatype.html
<!DOCTYPE html>
<html lang="ko">
<head>
    <meta charset="UTF-8">
    <meta name="viewport" content="width=device-width, initial-scale=1.0">
    <title>Document</title>
    <script>
        // String
        let str1 = "Hello";
        let str2 = '1234';
        let str3 = `Hello ${str2}`;
        console.log(str1,str2);
        console.log(str3);
        console.log("---------------------------------------------------")

        //Number
        let num1 = 100;
        console.log(num1+10);

        let num2 = 3.14;
        let num3 = .15;
        console.log(num1+num2);

        console.log(typeof(str1), typeof(num1)); // 변수가 어떤 타입의 값을 가지는 지 확인
        console.log(num1+str1); // 더하는 둘중에 하나가 숫자가 아니면 그냥 연결시킴
        console.log(typeof(num1+str1));

        let num4;
        console.log(num1+undefined); // undefined : 값이 아직 할당되지 않은 경우
        console.log(num1+num4);
        console.log(typeof(num1+num4));

        num1 = 0.1;
        num2 = 0.2;
        console.log(num1+num2); //오차발생
        console.log((num1+num2).toFixed(2)); // 오차 때문에 toFixed() 함수를 이용하기
        console.log(typeof((num1+num2).toFixed(2))); // 숫자가 아니라 문자임을 주의

        //위의 값이 문자이므로 숫자로 다시 바꿔주기

        console.log(Number(((num1+num2).toFixed(2))));
    </script>
</head>
<body>

</body>
</html>
-->
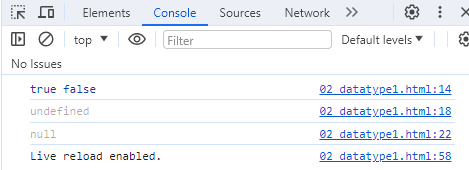
Boolean
- 논리형 ( 참 or 거짓 )
Undefined
-
값이 할당되지 않은 상태
ex)
let un1;
console.log(un1);
--> un1의 값을 할당하지 않아서 undefined가 출력
Null
-
값이 비어져있다는 것을 표현
ex)
let age = null
console.log(null);
--> null 출력ex) 02_datatype1.html
<!DOCTYPE html>
<html lang="ko">
<head>
   <meta charset="UTF-8">
   <meta name="viewport" content="width=device-width, initial-scale=1.0">
   <title>Document</title>

   <script>

       // Boolean
       let b1 = true;
       let b2 = false;
       console.log(b1,b2);

       // undefined
       let un1;
       console.log(un1);

       //Null
       let age = null;
       console.log(age);

   </script>
-->
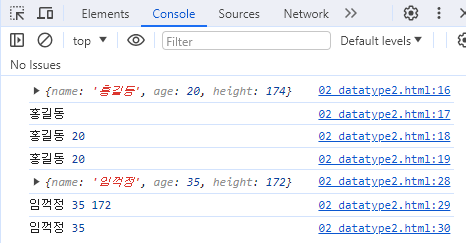
Object
- 지금까지는 하나의 데이터를 받았는데 객체는 여러개의 데이터를 가질수 있음
- (.) 을 가지고 다님
- 새로운 객체를 만들때 new Object(); 사용
- 포장지 ({}) 를 만들었다고 생각하기
***
객체를 출력하는 2가지 방법
1) (.) 사용하기
2) [" "] 사용하기
ex)
console.log(user1.name, user1.age);
console.log(user1["name"], user1["age"]);
ex)
user1.name = "홍길동" // user1의 name 이라는 요소에 접근
user1.age = 20; // user1의 age라는 요소에 접근
ex) 02_datatype2.html
<script>

    //Object
    let user1 = new Object();
    user1.name = "홍길동"
    user1.age = 20;
    user1.height = 174;

    console.log(user1);
    console.log(user1.name);
    console.log(user1.name, user1.age);
    console.log(user1["name"], user1["age"]); // 위의 코드와 같은 내용

    // user2라는 변수를 만들면서 초기화
    let user2 = {
        name:"임꺽정",
        age:35,
        height:172
    }

    console.log(user2);
    console.log(user2.name, user2.age, user2.height);
    console.log(user2["name"], user2["age"]);

</script>
-->
Array ( 객체보다는 덜 복잡한 형태 )
- 쓰기 좋게 하나로 묶어주는 역할
- 객체는 키와 값을 묶어서 저장하고, 배열은 값만 저장
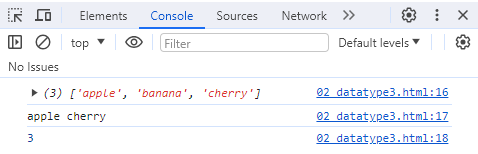
ex) 02_datatype3.html
<!DOCTYPE html>
<html lang="ko">
<head>
    <meta charset="UTF-8">
    <meta name="viewport" content="width=device-width, initial-scale=1.0">
    <title>Document</title>

    <script>

        // Array
        let fruit1 = "apple";
        let fruit2 = "banana";
        let fruit3 = "cherry";

        let fruit = new Array("apple","banana","cherry");
        console.log(fruit);
        console.log(fruit[0], fruit[2]);
        console.log(fruit.length); //배열의 길이

    </script>

</head>
<body>

</body>
</html>
-->