-
50) 스프링 3계층 Annotation 적용
👉 [스프링 Annotation]
@Componet, @Autowired앞에 '@' 를 붙여 선언 → 스프링이 처리
-
스프링 3계층 Annotation 은 모두 @Component
- @Controller, @RestController
- @Service
- @Repository
-
@Repository 간단 설명

-
JpaRepository<"@Entity 클래스", "@Id 의 데이터 타입">를 상속받는 interface 로 선언
- 스프링 Data JPA 에 의해 자동으로 @Repository 가 추가됨
- 스프링 Data JPA 에 대한 자세한 내용은 4장에서 다뤄봅니다.
- 아래 @Repository 역할 대부분을 자동으로 수행해 줌[적용 순서]
- ProductRepository 파일 리팩토링
- [코드스니펫] ProductRepository
import org.springframework.data.jpa.repository.JpaRepository;

public interface ProductRepository extends JpaRepository<Product, Long> { }
- [코드스니펫] ProductRepository
- DB 의 id, pw 입력
- [코드스니펫] application.properties
spring.h2.console.enabled=true
spring.datasource.url=jdbc:h2:mem:springcoredb
spring.datasource.username=sa
spring.datasource.password=
- [코드스니펫] application.properties
- BeanConfiguration.java 파일은 삭제
- ProductService 파일 리팩토링
- [코드스니펫] ProductService
import org.springframework.beans.factory.annotation.Autowired;
import org.springframework.stereotype.Service;

import java.sql.SQLException;
import java.util.List;

@Service
public class ProductService {

    private final ProductRepository productRepository;

    @Autowired
    public ProductService(ProductRepository productRepository) {
        this.productRepository = productRepository;
    }

    public Product createProduct(ProductRequestDto requestDto) throws SQLException {
        // 요청받은 DTO 로 DB에 저장할 객체 만들기
        Product product = new Product(requestDto);

        productRepository.save(product);

        return product;
    }

    public Product updateProduct(Long id, ProductMypriceRequestDto requestDto) throws SQLException {
        Product product = productRepository.findById(id)
                .orElseThrow(() -> new NullPointerException("해당 아이디가 존재하지 않습니다."));

        int myprice = requestDto.getMyprice();
        product.setMyprice(myprice);
        productRepository.save(product);

        return product;
    }

    public List<Product> getProducts() throws SQLException {
        List<Product> products = productRepository.findAll();

        return products;
    }
}
- [코드스니펫] ProductService
- ProductController 1주차 최종코드
- [코드스니펫] ProductController
import org.springframework.beans.factory.annotation.Autowired;
import org.springframework.web.bind.annotation.*;

import java.sql.SQLException;
import java.util.List;

@RestController // JSON으로 데이터를 주고받음을 선언합니다.
public class ProductController {

    private final ProductService productService;

    @Autowired
    public ProductController(ProductService productService) {
        this.productService = productService;
    }

    // 신규 상품 등록
    @PostMapping("/api/products")
    public Product createProduct(@RequestBody ProductRequestDto requestDto) throws SQLException {
        Product product = productService.createProduct(requestDto);

        // 응답 보내기
        return product;
    }

    // 설정 가격 변경
    @PutMapping("/api/products/{id}")
    public Long updateProduct(@PathVariable Long id, @RequestBody ProductMypriceRequestDto requestDto) throws SQLException {
        Product product = productService.updateProduct(id, requestDto);

        // 응답 보내기 (업데이트된 상품 id)
        return product.getId();
    }

    // 등록된 전체 상품 목록 조회
    @GetMapping("/api/products")
    public List<Product> getProducts() throws SQLException {
        List<Product> products = productService.getProducts();

        // 응답 보내기
        return products;
    }
}
- [코드스니펫] ProductController
-
-
-
51) 패키지 나누기
👉 패키지는 폴더의 개념으로 생각하시면 됩니다.
-
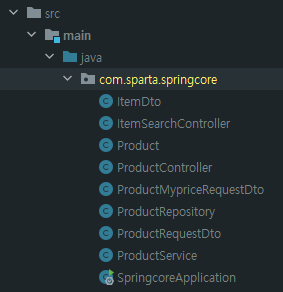
현재: "com.sparta.springcore" 패키지
-
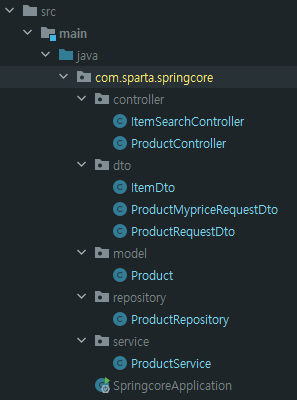
변경 후: 역할 별 폴더 나누기
-
👉 리팩토링이 끝나면 테스트 수행!!
힘들어도 계속 습관화가 되어야 합니다~!!!