-
21) 스프링 MVC?
-
MVC (Model - View - Controller) 디자인 패턴
-
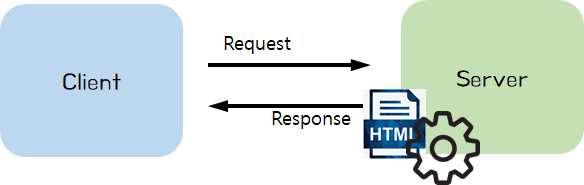
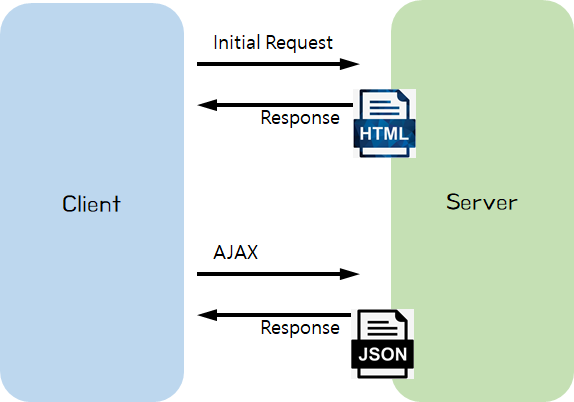
Server 에서 HTML 을 내려 주는 경우
-
정적 (static) 웹 페이지

- Controller
- Client 의 요청을 Model 로 받아 처리
- 예) 회원가입을 위한 개인 정보들 (id, password, name)
- Client 에게 View (정적 웹 페이지, HTML) 를 내려줌
- Client 의 요청을 Model 로 받아 처리
- Controller
-
동적 (dynamic) 웹 페이지
- Controller
- Client 의 요청을 Model 로 받아 처리
- Template engine 에게 View, Model 전달
- View: 동적 HTML 파일
- Model: View 에 적용할 정보들
- Template engine
- View 에 Model 을 적용 → 동적 웹페이지 생성
- 예) 로그인 성공 시, "로그인된 사용자의 id" 를 페이지에 추가
- Template engine 종류: 타임리프 (Thymeleaf), Groovy, FreeMarker, Jade 등 (스프링에서 JSP 이용은 추천하지 않고 있음)
- View 에 Model 을 적용 → 동적 웹페이지 생성
- Client 에게 View (동적 웹 페이지, HTML) 를 내려줌
- Controller
-
-
-
23) HTTP 메시지 이해

-
Client 와 Server 간 Request, Response 는 HTTP 메시지 규약을 따름
-
HTTP 메시지는 웹 서비스 개발자(백엔드, 프론트 개발자)에게 매우 중요한 내용!!
-
스프링 MVC 이해를 위한 필수 내용만 학습
[HTTP 메시지]
-
(1) 메시지 구조
🌐 참고: HTTP 메시지 설명 (MDN Web Docs)
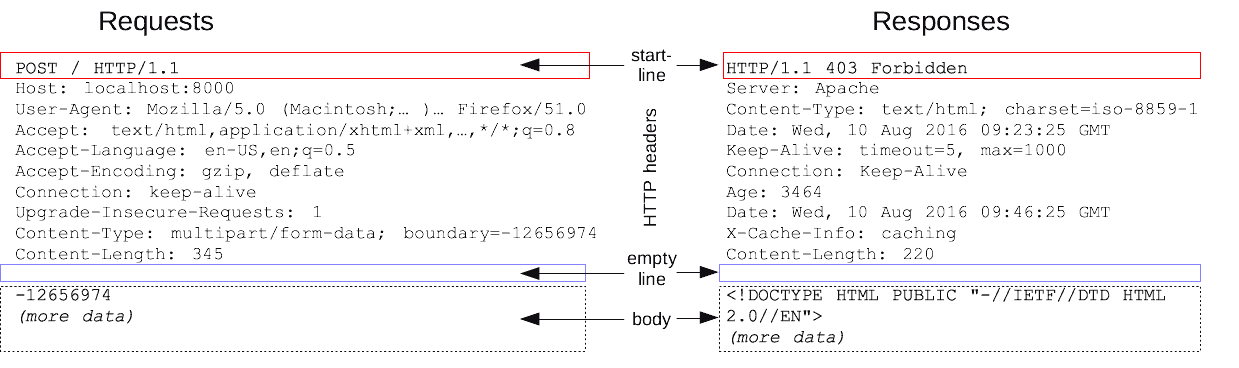
- 시작줄 (start line)
- Response 에선 '상태줄 (status line)' 이라고 부름
- 헤더 (headers)
- 본문 (body)
- 시작줄 (start line)
-
(2) Request 메시지
-
시작줄: API 요청 내용
GET **naver.com** HTTP/1.1 -
헤더
- "Content type"
-
없음
-
HTML
태그로 요청 시Content type: application/x-www-form-urlencoded -
AJAX 요청
Content type: application/json
-
- "Content type"
-
본문
-
GET 요청 시: (보통) 없음
-
POST 요청 시: (보통) 사용자가 입력한 폼 데이터
name=홍길동&age=20
-
-
-
(3) Response 메시지
-
상태줄: API 요청 결과 (상태 코드, 상태 텍스트)
HTTP/1.1 **404** **Not Found** -
헤더
- "Content type"
-
없음
-
Response 본문 내용이 HTML 인 경우
Content type: text/html -
Response 본문 내용이 JSON 인 경우
Content type: application/json
-
- "Location" Redirect 할 페이지 URL
Location: http://localhost:8080/hello.html
- "Content type"
-
본문
-
HTML
<!DOCTYPE html> <html> <head><title>By @ResponseBody</title></head> <body>Hello, Spring 정적 웹 페이지!!</body> </html> -
JSON
{
  "name":"홍길동",
  "age": 20
}
-
-
-
-
24) Controller 와 HTTP Response 메시지

-
(1) 정적 웹페이지
-
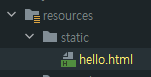
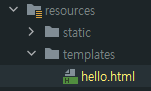
static 폴더
🌐 http://localhost:8080**/hello.html**
resources/static/hello.html
-
Redirect
🌐 http://localhost:8080**/hello/response/html/redirect**
@Controller
@RequestMapping("**/hello/response**")
public class HelloResponseController {
		@GetMapping("**/html/redirect**")
    public String htmlFile() {
        return "**redirect:/hello.html**";
    }
}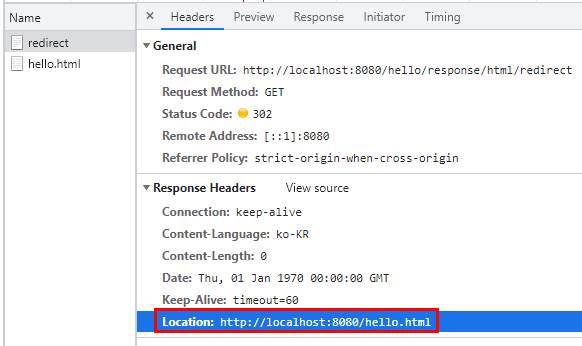
-
Template engine 에 View 전달
🌐 http://localhost:8080**/hello/response/html/templates**
@GetMapping("/html/templates")
public String htmlTemplates() {
    return **"hello"**;
}
타임리프 default 설정
- prefix: classpath:/templates/
- suffix: .html
resources/templates/hello.html
-
@ResponseBody
🌐 http://localhost:8080**/hello/response/html/templates**
@GetMapping("/body/html") @ResponseBody public String helloStringHTML() { return "<!DOCTYPE html>" + "<html>" + "<head><title>By @ResponseBody</title></head>" + "<body> Hello, 정적 웹 페이지!!</body>" + "</html>"; }- @ResponseBody
- View 를 사용하지 않고, HTTP Body 에 들어갈 String 을 직접 입력
- @ResponseBody
-
-
(2) 동적 웹페이지
🌐 http://localhost:8080**/hello/response/html/dynamic**
private static long visitCount = 0; @GetMapping("/html/dynamic") public String helloHtmlFile(Model model) { visitCount++; model.addAttribute("visits", visitCount); return "hello-visit"; }- View, Model 정보 → 타임리프에게 전달
- 타임리프 처리방식
- View 정보
-
"hello-visit" → resources/templates/hello-visit.html
<div>
  (방문자 수: <span th:text="${**visits**}"></span>)
</div>
-
- Model 정보
-
visits: 방문 횟수 (visitCount)
-
예) 방문 횟수: 1,000,000 번
<div>
  (방문자 수: <span>**1000000**</span>)
</div>
-
- View 정보
-
(3) JSON 데이터
-
반환값: String
🌐 http://localhost:8080**/hello/response/json/string**
@GetMapping("/json/string") @ResponseBody public String helloStringJson() { return "{\"name\":\"BTS\",\"age\":28}"; } -
반환값: String 외 자바 클래스
🌐 http://localhost:8080**/hello/response/json/class**
@GetMapping("/json/class") @ResponseBody public Star helloJson() { return new Star("BTS", 28); }- "자바 객체 → JSON 으로 변환" 은 스프링이 해 줌
-
-
Response 트렌드의 변화
-
정적 웹페이지

-
동적 웹페이지

-
JSON 데이터
-
-
@RestController
= @Controller + @ResponseBody
- [코드스니펫] HelloRestController.java
import org.springframework.web.bind.annotation.GetMapping;
import org.springframework.web.bind.annotation.RequestMapping;
import org.springframework.web.bind.annotation.RestController;

import java.util.Arrays;
import java.util.List;

@RestController
@RequestMapping("/hello/rest")
public class HelloRestController {

    @GetMapping("/json/string")
    public String helloHtmlString() {
        return "<html><body>Hello @ResponseBody</body></html>";
		}
    @GetMapping("/json/list")
    public List<String> helloJson() {
        List<String> words = Arrays.asList("Hello", "Controller", "And", "JSON");

        return words;
    }
}
- [코드스니펫] HelloRestController.java
-
-
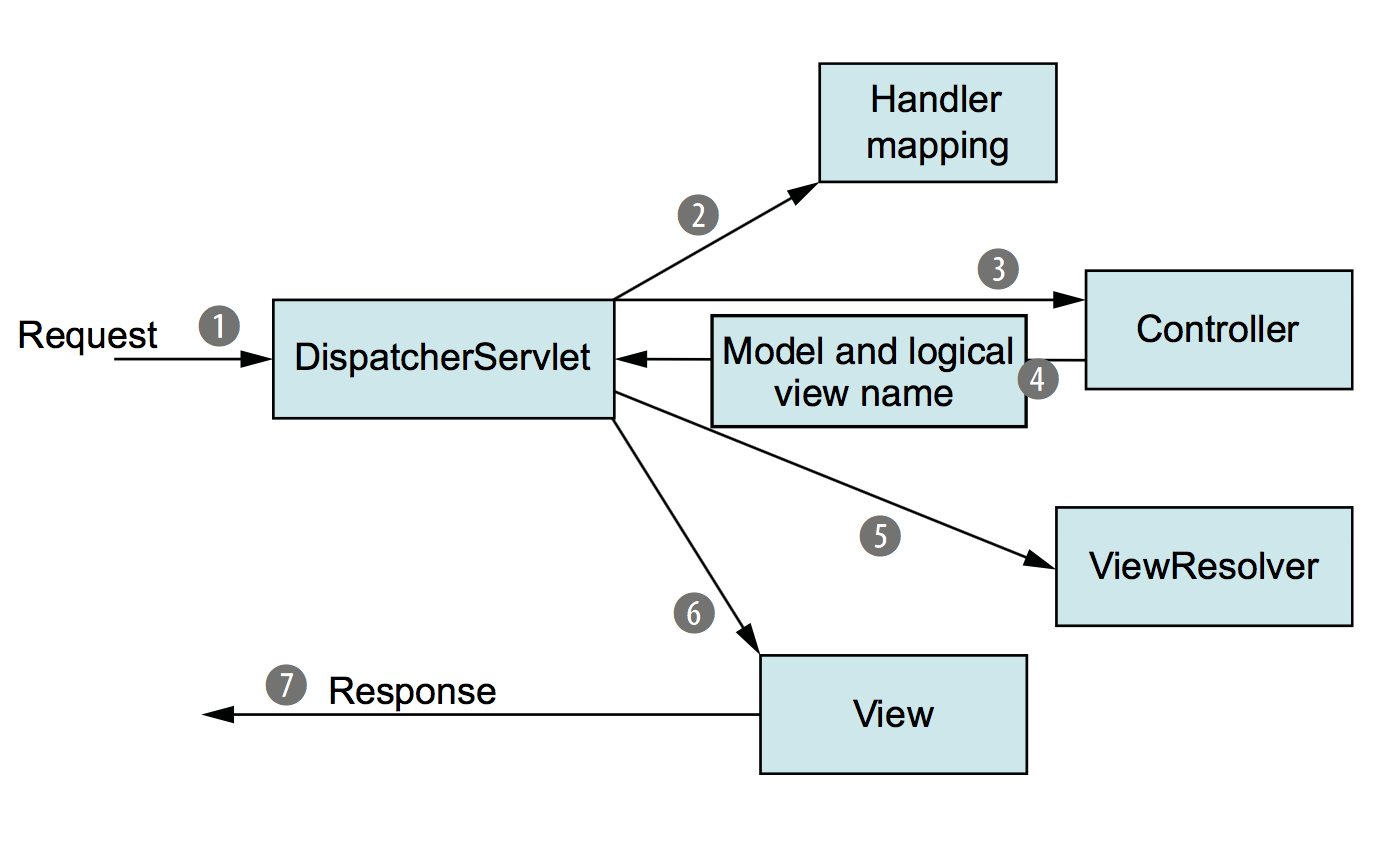
25) 스프링 MVC 동작원리
👉 @Controller 는 스프링 서버 개발자 입장에서는 시작점과 끝점으로 보이지만, 사실 스프링이 뒤에서 많은 부분을 보이지 않게 처리해 주고 있습니다.
-
Client → DispatcherServlet
- 가장 앞 단에서 요청을 받아 FrontController 라고도 불림
-
DispatcherServlet → Controller
- API 를 처리해 줄 Controller 를 찾아 요청을 전달
- Handler mapping 에는 API path 와 Controller 함수가 매칭되어 있음
💡 [Sample]
GET /hello/html/dynamic →HomeController의 helloHtmlFile() 함수
GET /user/login →UserController의 login() 함수
GET /user/signup →UserController의 signup() 함수
POST /user/signup →UserController의 registerUser() 함수- 함수 이름을 내 마음대로 설정 가능했던 이유!!
- Controller 에서 요청하는 Request 의 정보 ('Model') 전달
@Controller
public class ItemSearchController {
		@GetMapping("/api/search")
    @ResponseBody
    public List<ItemDto> getItems(**@RequestParam String query**) {
			// ...
		}
}
-
Controller → DispathcerServlet
- Controller 가 Client 으로 받은 API 요청을 처리
- 'Model' 정보와 'View' 정보를 DispatcherServlet 으로 전달
-
DispatcherServlet → Client
- ViewResolver 통해 View 에 Model 을 적용
- View 를 Client 에게 응답으로 전달
-