Http 통신 / Rest API 호출하기 2편 - Dio
Http 통신 / Rest API 호출하기 1편 - Http
Http 통신 / Rest API 호출하기 3편 - Get Connect
dio | Dart Packages
url_launcher | Flutter Package
이번 글에서는 이전 시간에 살펴본 http 라이브러리만큼 유명한 라이브러리인 Dio를 통해서 API를 호출하는 방법에 대해서 살펴보겠다.
UI 구조는 이전 시간과 동일하고 API 호출 부분의 코드만 Dio 라이브러리를 사용하였다.
Dio 사용 법에 대해서 자세히 살펴보고 싶으면 위 링크를 참고하시기 바란다.
Flutter
Dio 라이브러리로 API를 호출해 보자.
dependencies
dependencies:
	dio: ^5.0.0
Model
Rest API로 리턴 구조의 객체 모델이다. 이미지를 가져오는 API를 get 방식으로 호출할 것이고, 이미지 id, 작성자, 가로 세로 높이, 이미지 웹 url, 이미지를 다운받을 수 있는 downloadUrl 이렇게 되어 있다.
해당 API 데이터를 가져올 때 json 형태의 구조를 앱에서 사용할 객체로 변환하여야 한다.
class PiscumPhotoModel {
  final String id;
  final String author;
  final int width;
  final int height;
  final String url;
  final String downloadUrl;

  PiscumPhotoModel({
    required this.id,
    required this.author,
    required this.width,
    required this.height,
    required this.url,
    required this.downloadUrl,
  });
}
json을 변환할 때는 아래 두 가지 코드 모두 변환할 수 있는 코드이기에, 편한 방법을 사용하면 된다.
 PiscumPhotoModel.fromJson(Map<String, dynamic> json)
      : id = json["id"],
        author = json["author"],
        width = json["width"],
        height = json["height"],
        url = json["url"],
        downloadUrl = json["download_url"];
factory PiscumPhotoModel.fromJson(Map<String, dynamic> json) {
    return PiscumPhotoModel(
      id: json["id"],
      author: json["author"],
      width: json["width"],
      height: json["height"],
      url: json["url"],
      downloadUrl: json["download_url"],
    );
  }
UI
UI 구조는 이전 시간에 살펴본 구조와 동일하다.
 return GetBuilder<HttpWithDioGetx>(
        init: HttpWithDioGetx()..started(),
        builder: (controller) {
          return Scaffold(
            appBar: appBar(title: "Dio"),
            body: ListView.builder(
                controller: controller.scrollController,
                itemCount: controller.photos.length,
                itemBuilder: ((context, index) {
                  return Padding(
                    padding:
                        const EdgeInsets.symmetric(horizontal: 20, vertical: 8),
                    child: Column(
                      children: [
                        SizedBox(
                          child: Row(
                            crossAxisAlignment: CrossAxisAlignment.start,
                            children: [
                              SizedBox(
                                width: MediaQuery.of(context).size.width * 0.2,
                                height: MediaQuery.of(context).size.width * 0.2,
                                child: ClipRRect(
                                  borderRadius: BorderRadius.circular(12),
                                  child: Image.network(
                                    controller.photos[index].downloadUrl,
                                    fit: BoxFit.cover,
                                    frameBuilder: (BuildContext context,
                                        Widget child,
                                        int? frame,
                                        bool wasSynchronouslyLoaded) {
                                      return Container(
                                        decoration: BoxDecoration(
                                          borderRadius:
                                              BorderRadius.circular(12),
                                          color: const Color.fromRGBO(
                                              91, 91, 91, 1),
                                        ),
                                        child: child,
                                      );
                                    },
                                    loadingBuilder: (BuildContext context,
                                        Widget child,
                                        ImageChunkEvent? loadingProgress) {
                                      if (loadingProgress == null) {
                                        return child;
                                      }
                                      return Container(
                                        decoration: BoxDecoration(
                                          borderRadius:
                                              BorderRadius.circular(12),
                                          color: const Color.fromRGBO(
                                              91, 91, 91, 1),
                                        ),
                                        child: const Center(
                                          child: CircularProgressIndicator(
                                            color: Colors.amber,
                                          ),
                                        ),
                                      );
                                    },
                                  ),
                                ),
                              ),
                              const SizedBox(width: 12),
                              Column(
                                crossAxisAlignment: CrossAxisAlignment.start,
                                children: [
                                  _content(
                                      url: controller.photos[index].url,
                                      title: "ID : ",
                                      content: controller.photos[index].id),
                                  _content(
                                      url: controller.photos[index].url,
                                      title: "Author : ",
                                      content: controller.photos[index].author),
                                  _content(
                                      url: controller.photos[index].url,
                                      title: "Width : ",
                                      content:
                                          "${controller.photos[index].width}"),
                                  _content(
                                      url: controller.photos[index].url,
                                      title: "Height : ",
                                      content:
                                          "${controller.photos[index].height}"),
                                ],
                              )
                            ],
                          ),
                        ),
                        if (controller.photos.length - 1 == index &&
                            controller.isAdd) ...[
                          const SizedBox(
                            height: 100,
                            child: Center(
                                child: CircularProgressIndicator(
                              color: Colors.deepOrange,
                            )),
                          ),
                        ],
                      ],
                    ),
                  );
                })),
          );
        });
  }
GestureDetector _content({
required String title,
required String content,
required String url,
}) {
return GestureDetector(
onTap: () async {
if (await canLaunchUrlString(url)) {
await launchUrlString(url, mode: LaunchMode.externalApplication);
}
},
child: Row(
children: [
Text(
title,
style: const TextStyle(
fontSize: 14,
fontWeight: FontWeight.bold,
),
),
Text(
content,
style: const TextStyle(
fontSize: 14, color: Color.fromRGBO(215, 215, 215, 1)),
),
],
),
);
}GetxController
Get X를 사용해서 상태관리를 진행하였다. 먼저 Dio 사용을 위해서 Dio 객체를 인스턴스하자.
API를 호출할 때 페이지 넘버를 넣어주기 위해 currentPageNo 변수에 초기 값을 1로 생성하였고, photos는 API로 부터 리턴 받는 데이터 구조이다.
class HttpWithDioGetx extends GetxController {
  final Dio _dio = Dio();
  ScrollController scrollController = ScrollController();
  List<PiscumPhotoModel> photos = [];
  int currentPageNo = 1;
  bool isAdd = false;
  ...
초기 데이터 세팅을 위해서 페이지 진입시 API를 호출하는 부분의 코드이다.
fecthPost 호출이 후 currentPageNo를 1 페이지 올린 값으로 변경해 주어 호출시 다음 페이지를 정상적으로 불러오게 해주자.
 Future<void> started() async {
    await _getPhotos();
} Future<void> _getPhotos() async {
photos = await _fetchPost(pageNo: currentPageNo);
currentPageNo = 2;
update();
}Dio 라이브러리르 사용해서 API를 호출해보자. 사실 http 라이브러리랑 사용법은 똑같다. 다만 차이점이 하나 있는데, 응답 데이터가 http 라이브러리에서는 json 형태로 변환해서 데이터를 변환하여야 하는데, dio는 json으로 변형된 형태로 리턴해 준다.
  Future<List<PiscumPhotoModel>> _fetchPost({
    required int pageNo,
  }) async {
    try {
      final _response =
          await _dio.get("https://picsum.photos/v2/list?page=$pageNo&limit=10");
      if (_response.statusCode == 200) {
        List<dynamic> _fromData = _response.data as List<dynamic>;
        List<PiscumPhotoModel> _data = _fromData
            .map((e) => PiscumPhotoModel.fromJson(e as Map<String, dynamic>))
            .toList();
        return _data;
      } else {
        return [];
      }
    } catch (error) {
      logger.e(error);
      return [];
    }
  }
무한 스크롤 기능을 위해 ListView의 ScrollController의 리스너를 사용하였다.
void onInit() {
scrollController.addListener(() {
if (scrollController.position.maxScrollExtent * 0.85 <
scrollController.position.pixels) {
_morePhotos();
}
});
super.onInit();
}morePhotos도 fecthPost를 통해서 API 데이터를 가져오면 된다.
Future<void> _morePhotos() async {
if (!isAdd) {
isAdd = true;
update();
List<PiscumPhotoModel> _data = await _fetchPost(pageNo: currentPageNo);
Future.delayed(const Duration(milliseconds: 1000), () {
photos.addAll(_data);
currentPageNo = currentPageNo + 1;
isAdd = false;
update();
});
}
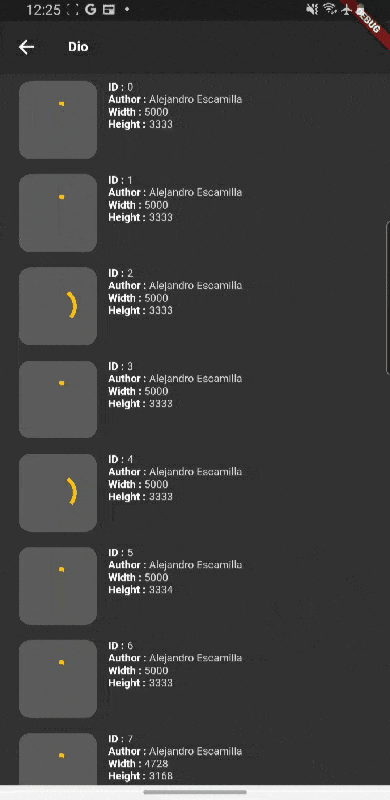
}Result
Git
https://github.com/boglbbogl/flutter_velog_sample/tree/main/lib/http/dio
마무리
지금까지 간단한 API 호출을 위해서 Flutter에서 가장 유명한 방법인 http와 dio에 대해서 살펴봤다.
dio가 기능도 많고 사용성도 좋아서 자주 사용하기는 했지만, 개인적으로는 http 라이브러리로 처리하는 것을 더 선호한다.
http, dio 외에도 Get 라이브러리를 통해서도 API 통신을 할 수 있다. 다음 시간에는 Get으로 API 호출을 하는 방법에 대해서 살펴보도록 하겠다.

좋은글 감사합니다 :)