
Elasticsearch를 Spring에 적용하면 나중에 Spring boot 프로젝트 작업 시에 한결 수월하게 연결 할 수 있을 것 같아서 Spring Data Elasticsearch를 사용해보기로 했다!
1. 개발 환경
- OS: Windows
- Elasticsearch(ES): 8.13.4
- Kibana: 8.13.4
2. Spring - Elasticsearch 연결하기
1) Spring Data Elasticsearch 의존성 추가
build.gradle에 의존성 추가
implementation 'org.springframework.boot:spring-boot-starter-data-elasticsearch'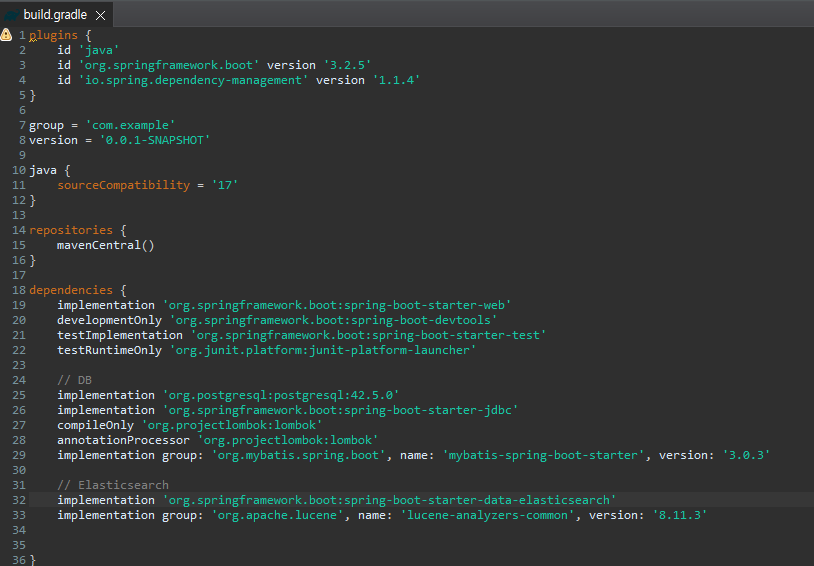
2) application.properties에 Elasticsearch 연결정보 입력
spring.elasticsearch.socket-timeout=10s
spring.elasticsearch.username=[계정이름]
spring.elasticsearch.password=[비밀번호]
spring.data.elasticsearch.repositories.enabled=true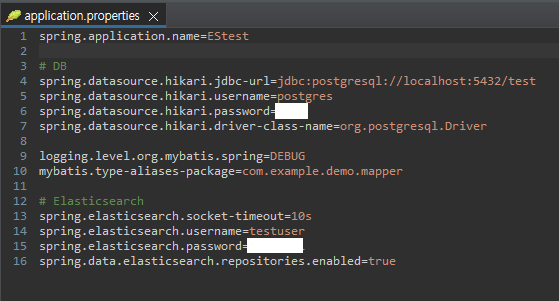
*username과 password는 3)에서 user 등록한 내용으로 입력
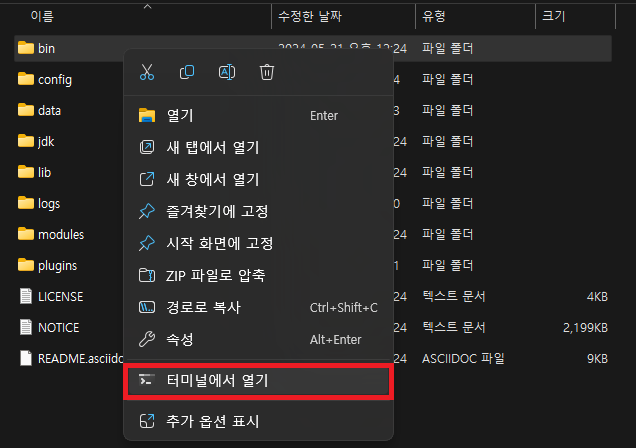
3) Elasticsearch에 user 등록하기
Elasticsearch 폴더/bin 폴더에서 터미널을 열어준다.
.\elasticsearch-users useradd [만들 계정이름] -p [비밀번호] -r [역할명]
계정이름, 비밀번호, 역할명을 적어주면 되는데,
test라는 role이 없다고 머라머라 하는것이 뜨긴 하지만...
.\elasticsearch-users list로 user list를 검색해보면 생성되어있다!!
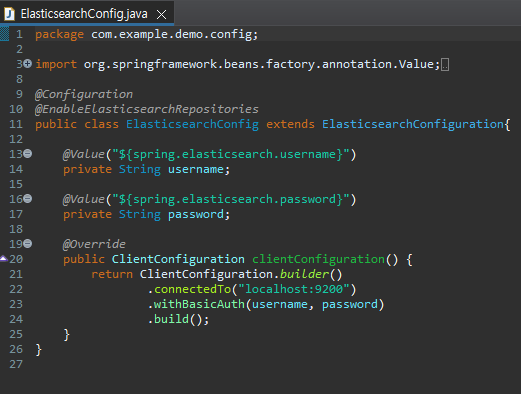
4) ElasticsearchConfig.java 작성
Spring 과 Elasticsearch를 연결해주는 Configuration 코드를 작성한다.
package com.example.demo.config;

import org.springframework.beans.factory.annotation.Value;
import org.springframework.context.annotation.Configuration;
import org.springframework.data.elasticsearch.client.ClientConfiguration;
import org.springframework.data.elasticsearch.client.elc.ElasticsearchConfiguration;
import org.springframework.data.elasticsearch.repository.config.EnableElasticsearchRepositories;

@Configuration
@EnableElasticsearchRepositories
public class ElasticsearchConfig extends ElasticsearchConfiguration{

	@Value("${spring.elasticsearch.username}")
	private String username;

	@Value("${spring.elasticsearch.password}")
	private String password;

	@Override
	public ClientConfiguration clientConfiguration() {
		return ClientConfiguration.builder()
				.connectedTo("localhost:9200")
				.withBasicAuth(username, password)
				.build();
	}
}
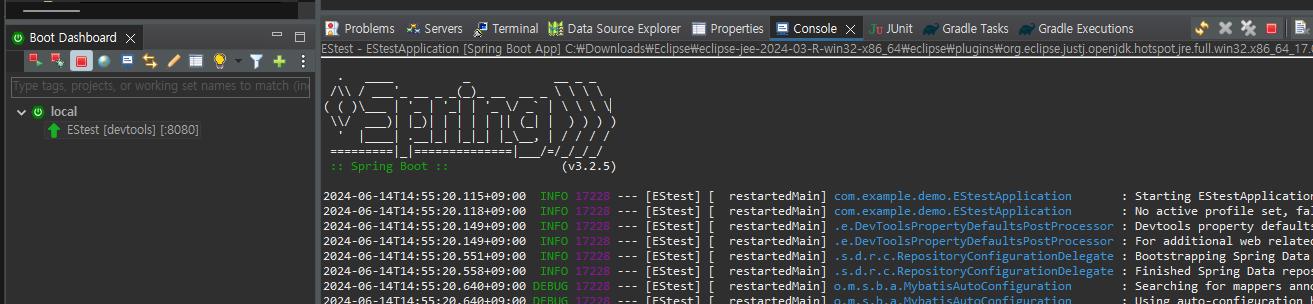
5) Elasticsearch 실행 후 Spring boot 실행
Spring boot 실행 전에 Elasticsearch 폴더/bin 폴더에서 elasticsearch.bat 파일을 관리자 권한으로 실행 시켜주고,
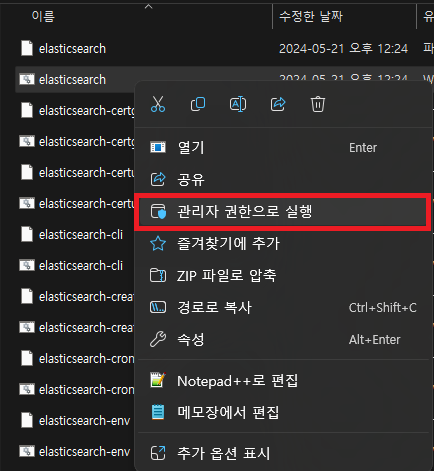
Spring boot를 실행시켜주면
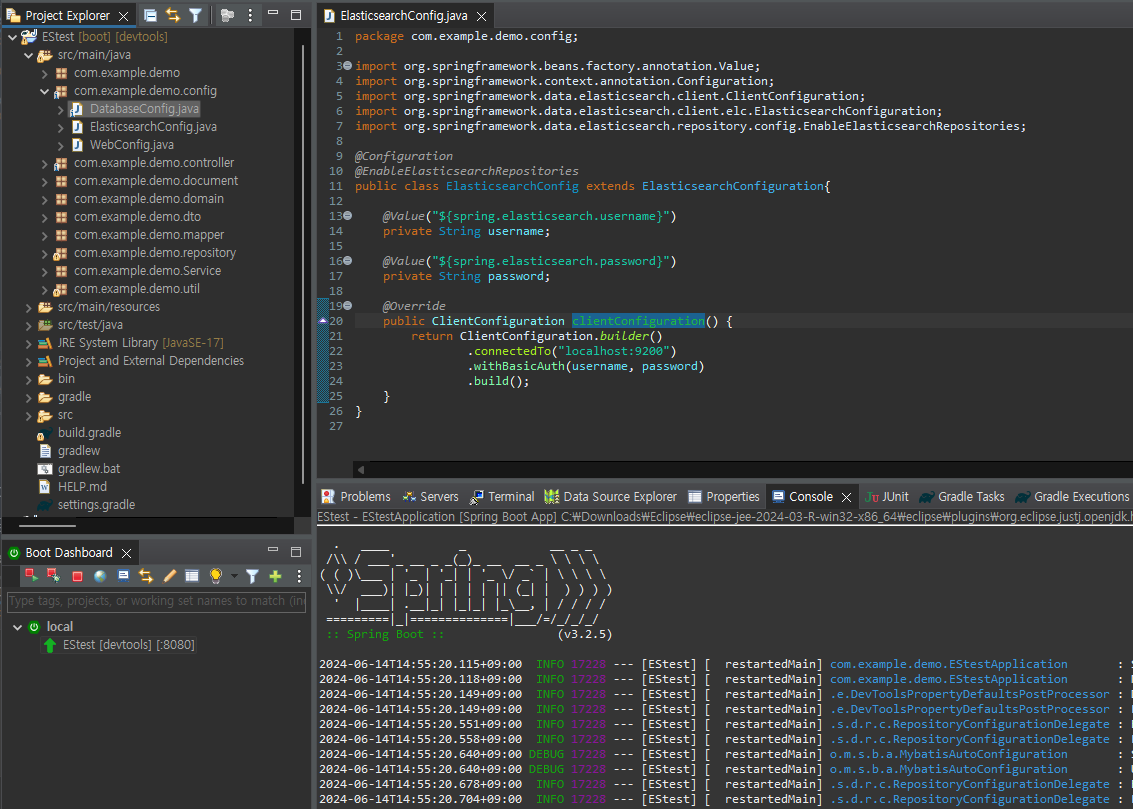
연결 성공!!!
3. Index 생성하기
1) Document.java (Index) 파일 생성하기
Spring Data Elasticsearch는 JPA형식으로 index 생성 및 쿼리 작성이 가능하다.
Index 생성을 위해서 @Document 어노테이션을 달아 클래스를 생성해준다.
package com.example.demo.document;

import org.springframework.data.annotation.Id;
import org.springframework.data.elasticsearch.annotations.Document;
import org.springframework.data.elasticsearch.annotations.Field;
import org.springframework.data.elasticsearch.annotations.FieldType;
import org.springframework.data.elasticsearch.annotations.Setting;

import lombok.AllArgsConstructor;
import lombok.Builder;
import lombok.Getter;
import lombok.RequiredArgsConstructor;
import lombok.Setter;

@Document(indexName="test")
@Getter
@Setter
@Setting(replicas = 0)
@Builder
@AllArgsConstructor
@RequiredArgsConstructor
public class TestDocument {

	@Id
	private Integer student_id;

	@Field(type = FieldType.Text)
	private String student_name;

	@Field(type = FieldType.Text)
	private String student_class;
}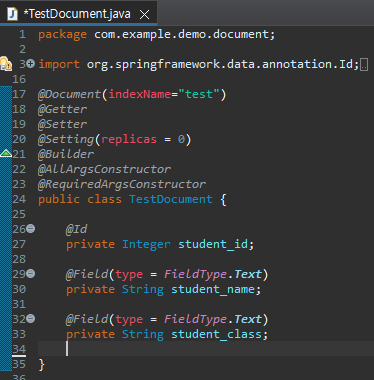
- @Document(indexName = [인덱스 이름]) : indexName에 사용할 인덱스 이름을 입력해준다. @Document 어노테이션을 통해 해당 클래스가 ES에 매핑될 클래스임을 명시해준다.
- @Id, @Field : JPA의 @Id, @Column처럼 인덱스의 필드를 의미한다.
2) Repository.java 파일 작성
Repository를 작성하기 위해 interface로 Repository 파일을 생성해준다.
package com.example.demo.repository;

import org.springframework.data.elasticsearch.repository.ElasticsearchRepository;
import com.example.demo.document.TestDocument;

public interface TestElasticsearchRepository extends ElasticsearchRepository<TestDocument, Integer>{

}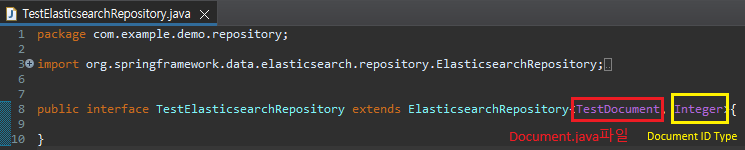
ElasticsearchRepository<[Document명],[Id type]> 를 extends 해주고, @Repository 어노테이션을 명시해줌으로서 ES가 인덱스를 생성하게 된다.
이 Repository를 생성 안하면 인덱스 생성이 안됐었다...
3) Index 생성 확인하기
Spring boot를 실행하고
cmd 창을 열어서 인덱스를 조회한다.
curl -XGET http://localhost:9200/_cat/indices?v
뭐가 많긴 한데.... breed 명으로 인덱스가 잘 생성된 것을 확인할 수 있다.
4. Spring으로 Elasticsearch에 데이터 저장 및 검색하기
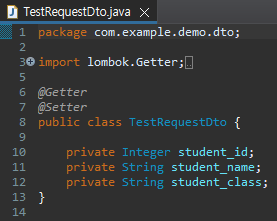
1) TestRequestDto.java (DTO) 만들기
데이터를 저장하기 위해 json 형태로 들어오는 데이터를 받아줄 DTO를 만들어준다.
package com.example.demo.dto;

import lombok.Getter;
import lombok.Setter;

@Getter
@Setter
public class TestRequestDto {

	private Integer student_id;
	private String student_name;
	private String student_class;
}
2) Document.java 파일에 Dto build 추가
DTO로 받아준 데이터를 Document 형식으로 변환해주기 위해 Document.java 파일에 다음과 같은 코드를 추가한다.
package com.example.demo.document;

import org.springframework.data.annotation.Id;
import org.springframework.data.elasticsearch.annotations.Document;
import org.springframework.data.elasticsearch.annotations.Field;
import org.springframework.data.elasticsearch.annotations.FieldType;
import org.springframework.data.elasticsearch.annotations.Setting;

import com.example.demo.dto.TestRequestDto;

import lombok.AllArgsConstructor;
import lombok.Builder;
import lombok.Getter;
import lombok.RequiredArgsConstructor;
import lombok.Setter;

@Document(indexName="test")
@Getter
@Setter
@Setting(replicas = 0)
@Builder
@AllArgsConstructor
@RequiredArgsConstructor
public class TestDocument {

	@Id
	private Integer student_id;

	@Field(type = FieldType.Text)
	private String student_name;

	@Field(type = FieldType.Text)
	private String student_class;

    // 추가부분
	public static TestDocument save(TestRequestDto testRequestDto) {
		return TestDocument.builder()
				.student_id(testRequestDto.getStudent_id())
				.student_name(testRequestDto.getStudent_name())
				.student_class(testRequestDto.getStudent_class())
				.build();
	}
}
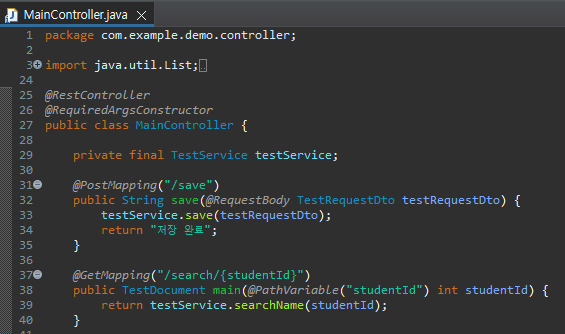
3) Controller.java 만들기
프론트에서 호출할 API를 만들어 줄 Controller를 만들어준다.
package com.example.demo.controller;

import java.util.List;

import org.springframework.web.bind.annotation.GetMapping;
import org.springframework.web.bind.annotation.PathVariable;
import org.springframework.web.bind.annotation.PostMapping;
import org.springframework.web.bind.annotation.RequestBody;
import org.springframework.web.bind.annotation.RestController;

import com.example.demo.Service.TestService;
import com.example.demo.document.TestDocument;
import com.example.demo.dto.TestRequestDto;

import lombok.RequiredArgsConstructor;

@RestController
@RequiredArgsConstructor
public class MainController {

	private final TestService testService;

	@PostMapping("/save")
	public String save(@RequestBody TestRequestDto testRequestDto) {
		testService.save(testRequestDto);
		return "저장 완료";
	}

	@GetMapping("/search/{studentId}")
	public TestDocument main(@PathVariable("studentId") int studentId) {
		return testService.searchName(studentId);
	}
} 
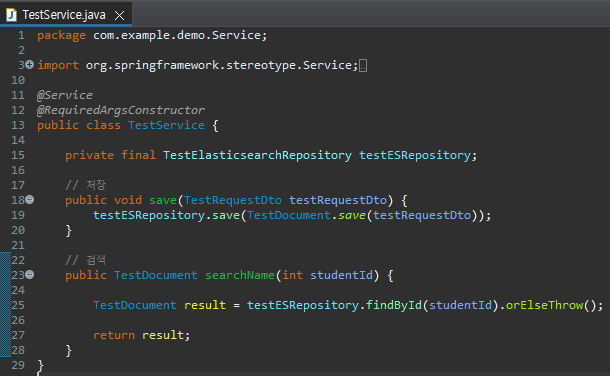
4) Service.java 만들기
Repository를 불러와서 저장 및 검색을 해줄 Service 단을 만든다.
package com.example.demo.Service;

import org.springframework.stereotype.Service;

import com.example.demo.document.TestDocument;
import com.example.demo.dto.TestRequestDto;
import com.example.demo.repository.TestElasticsearchRepository;

import lombok.RequiredArgsConstructor;

@Service
@RequiredArgsConstructor
public class TestService {

	private final TestElasticsearchRepository testESRepository;

	// 저장
	public void save(TestRequestDto testRequestDto) {
		testESRepository.save(TestDocument.save(testRequestDto));
	}

	// 검색
	public TestDocument searchName(int studentId) {

		TestDocument result = testESRepository.findById(studentId).orElseThrow();

		return result;
	}
}
5) 저장하기
Elasticsearch 실행 후, Spring boot를 실행시켜준다.
Postman을 실행시킨 후
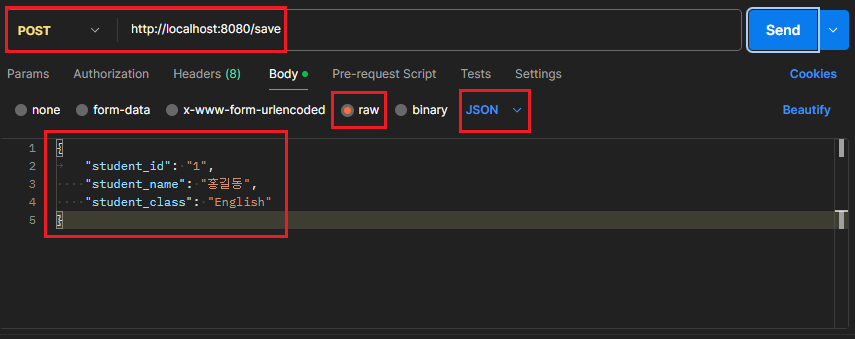
- POST로 설정해주고, Controller에서 작성한 /save API를 호출해준 뒤
- Body 부분을 raw JSON 타입으로 설정해주고,
- Body 부분을 Document.java에 작성한 형식에 맞게 입력할 데이터를 작성해준다.
Send를 누르면
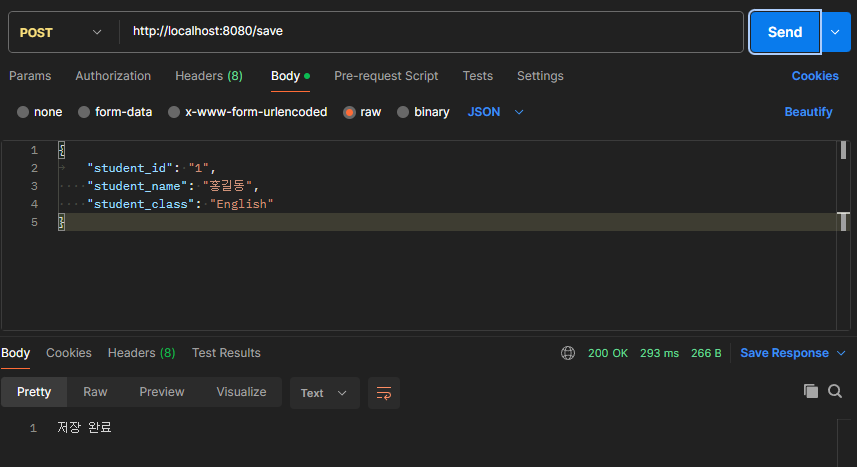
Controller에서 /save에 return으로 작성했던 "저장 완료" 응답을 받을 수 있다.
6) 호출하기
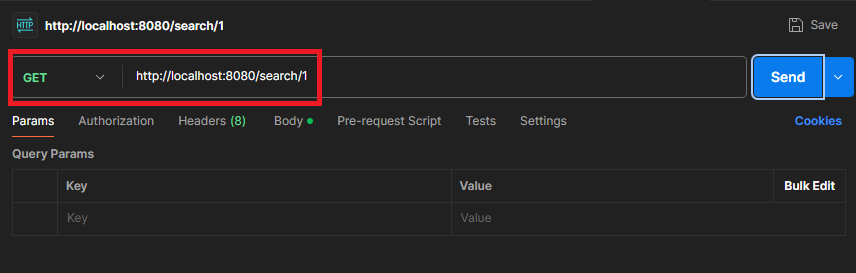
이번엔
- GET으로 설정해주고, Controller에서 작성한 /search/1 API로 ID 1번 데이터를 불러온다.
Send를 누르면
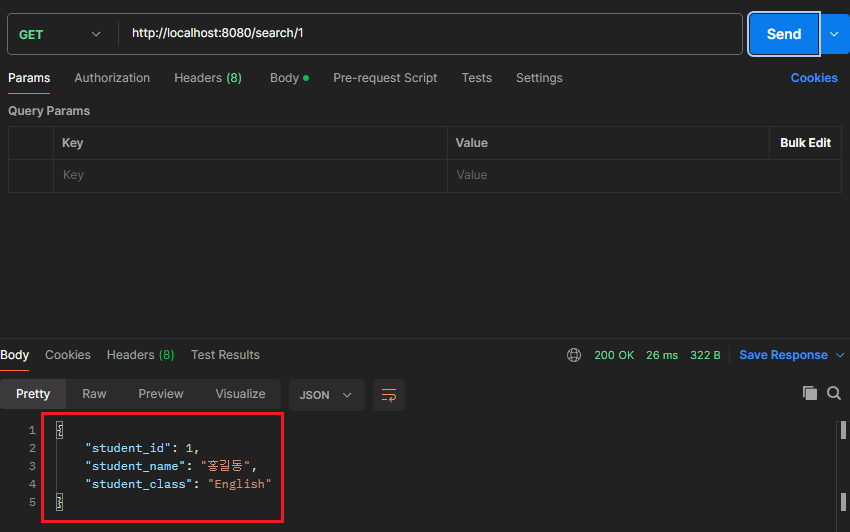
아까 저장했던 데이터를 받아올 수 있다.
Reference
https://j-1001000.tistory.com/1
https://velog.io/@haden/spring-Spring-에서-Elastic-Search-활용-1
https://www.elastic.co/guide/en/elasticsearch/reference/6.2/users-command.html