
오늘 공부한 내용
- navigationitem 코드 작성법
- UITableview & tableviewcell
- UIAlertController
navigationitem 코드
navigationItem.rightBarButtonItem = UIBarButtonItem(barButtonSystemItem: .add, target: self, action: #selector(해당버튼 함수 이름))UITableViewController
- 테이블 관리를 전문으로 하는 뷰 컨트롤러 ⇢ 테이블을 보여주고 관리할 수 있는 컨트롤러
뷰 컨트롤러에서 tableView 를 검색해 추가해주고

밑의 사진처럼 설정해준다. 화살표로 지정한 곳을 전부 0으로 설정해주면 화면에 꽉 차는 테이블 뷰를 볼 수 있다.

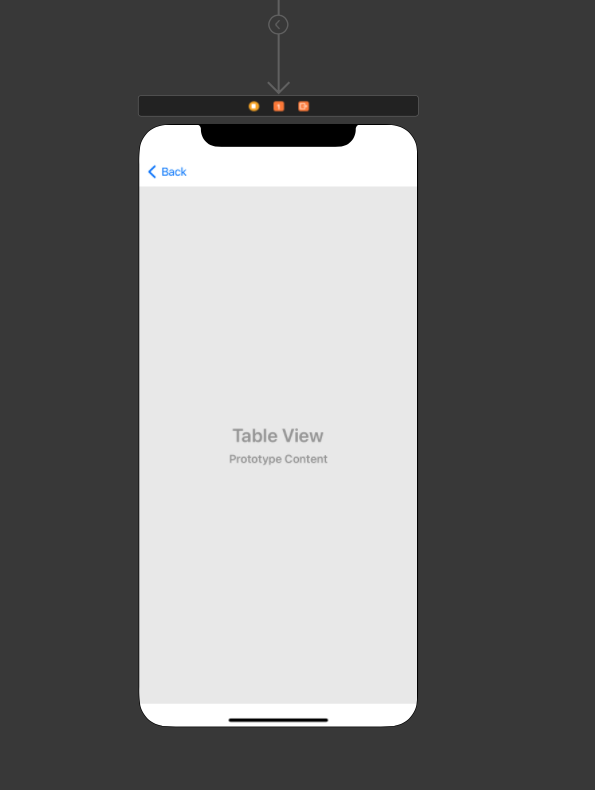
그 다음 table view cell를 검색해서 추가해준다.

UIAlertController
- iOS 앱에서 경고, 알림, 입력을 포함한 팝업 스타일의 사용자 인터페이스를 생성하기 위해 사용되는 클래스
구성 요소
-
제목 (Title): 경고의 제목 설정 가능. 일반적으로 사용자에게 메시지를 간략하게 설명하는 용도로 사용
-
메시지 (Message): 제목 아래에 보여줄 추가적인 설명 또는 내용을 설정. 상세한 정보를 제공하는 데 사용
-
액션 (Action): 사용자가 경고를 닫거나 추가 동작을 수행할 수 있도록 버튼을 추가 가능
예제 코드
import UIKit

class ViewController: UIViewController {

    @IBAction func showAlertButtonTapped(_ sender: UIButton) {
        // UIAlertController 인스턴스 생성
        let alertController = UIAlertController(title: "알림",
                                                message: "버튼이 눌렸습니다!",
                                                preferredStyle: .alert)

        // 알림 창에 액션(버튼) 추가
        let okAction = UIAlertAction(title: "확인", style: .default) { (action) in
            // 버튼이 눌렸을 때 실행되는 클로저
            print("확인 버튼이 눌렸습니다.")
        }
        alertController.addAction(okAction)

        // 알림 창 표시
        present(alertController, animated: true, completion: nil)
    }
}- 코드로 작성 시
@objc func addButtonTapped() {
        let alertController = UIAlertController(title: "할 일 목록", message: "할 일을 적어주세요.", preferredStyle: .alert)

        alertController.addTextField { (textField) in
            textField.placeholder = "내용을 입력해주세요."
        }

        // 저장 버튼
        let saveAction = UIAlertAction(title: "저장", style: .default) { [unowned alertController] _ in
            if let textField = alertController.textFields?.first, let text = textField.text {
                // 텍스트 필드의 값이 비어 있지 않다면 UserDefaults에 저장합니다.
                if !text.isEmpty {
                    self.task.append(text)
                    self.tableView.reloadData()
                }

              print(self.task)

            }
        }

        // 취소 버튼
        let cancelAction = UIAlertAction(title: "Cancel", style: .cancel, handler: nil)

        alertController.addAction(saveAction)
        alertController.addAction(cancelAction)

        present(alertController, animated: true, completion: nil)
    }

    func tableView(_ tableView: UITableView, numberOfRowsInSection section: Int) -> Int {
        return self.task.count
    }
“누군가는 너를 사랑하고 있다.”