DrawScope
- Canvas or Modifier.drawWithContent, drawWithCache, drawBehind 수정자를 사용하면 DrawScope을 사용하여 원하는 그림을 그릴 수 있다.
모든 그리기 작업은 픽셀단위로 진행되기 때문에 단순히 100이 아니라 100.dp.toPx()로 해야 density가 유지가 된다.
Modifier.drawWithContent
- 콘텐츠의 앞이나 뒤에 그림을 그릴 수 있는 수정자
Column(
        modifier = Modifier
            .fillMaxSize()
            .drawWithContent {
                //콘텐츠 뒤에 그려짐

                drawContent()

                //콘텐츠 앞에 그려짐
            }
    ) {
        //content
    }
Modifier.drawBehind
- 콘텐츠 뒤에 그리는 수정자
Modifier.drawWithCache
- 내부에서 생성된 객체를 캐시할 수 있는 수정자
- 내부에서 생성한 Brush나 Path, TextMeasure같은 객체는 캐싱하는 것이 좋음
- 컴포저블의 사이즈가 변경될 때까지 캐시
기본도형 그리기
- https://developer.android.com/develop/ui/compose/graphics/draw/overview?hl=ko#draw-basic-shapes 를 참고하여 구현하였다.
- drawRect, drawCircle 같은 간단한 도형은 생략
drawRoundedRect
모서리가 둥근 사각형을 그려주는 메서드.
Canvas(modifier = Modifier.fillMaxSize()) {
    drawRoundRect(
        color = Color.Magenta,
        size = size,
        cornerRadius = CornerRadius(x = 100.dp.toPx(), y = 100.dp.toPx()))
    )
}
근데 CornerRadius에서 x,y값은 왜 따로 설정해야하는 건지 궁금해서 x는 200을, y에는 100을 설정해봤다.
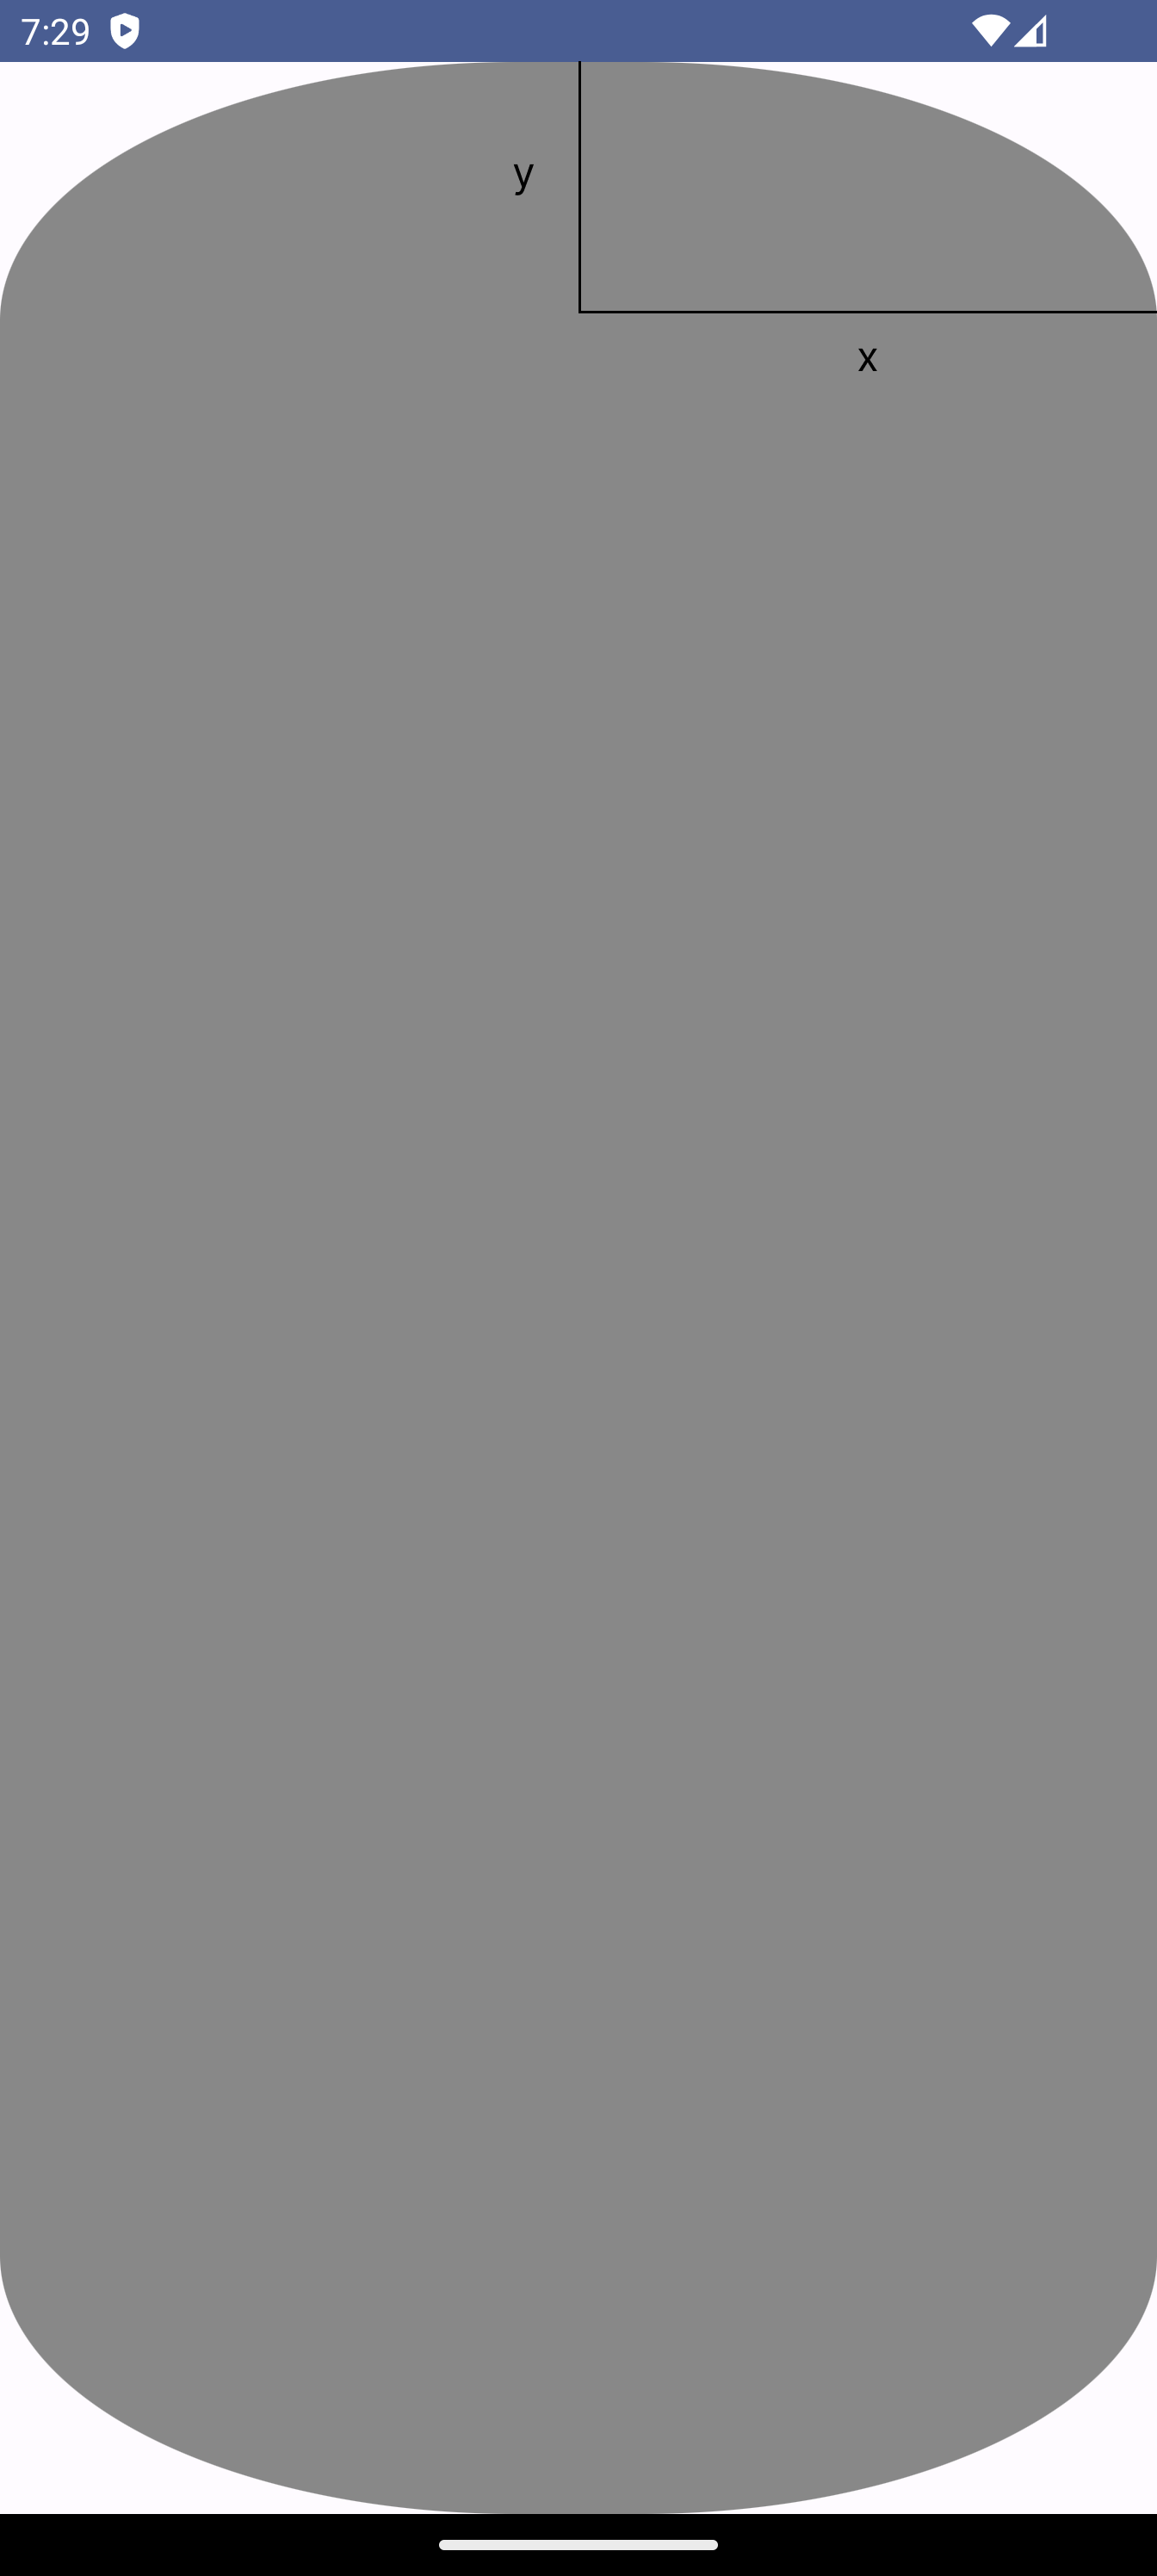
다음과 같이 꼭짓점에서부터 둥글어지기 시작하는 위치까지의 거리를 나타냄을 알 수 있었다.
drawArc
Canvas(modifier = Modifier.fillMaxSize()) {
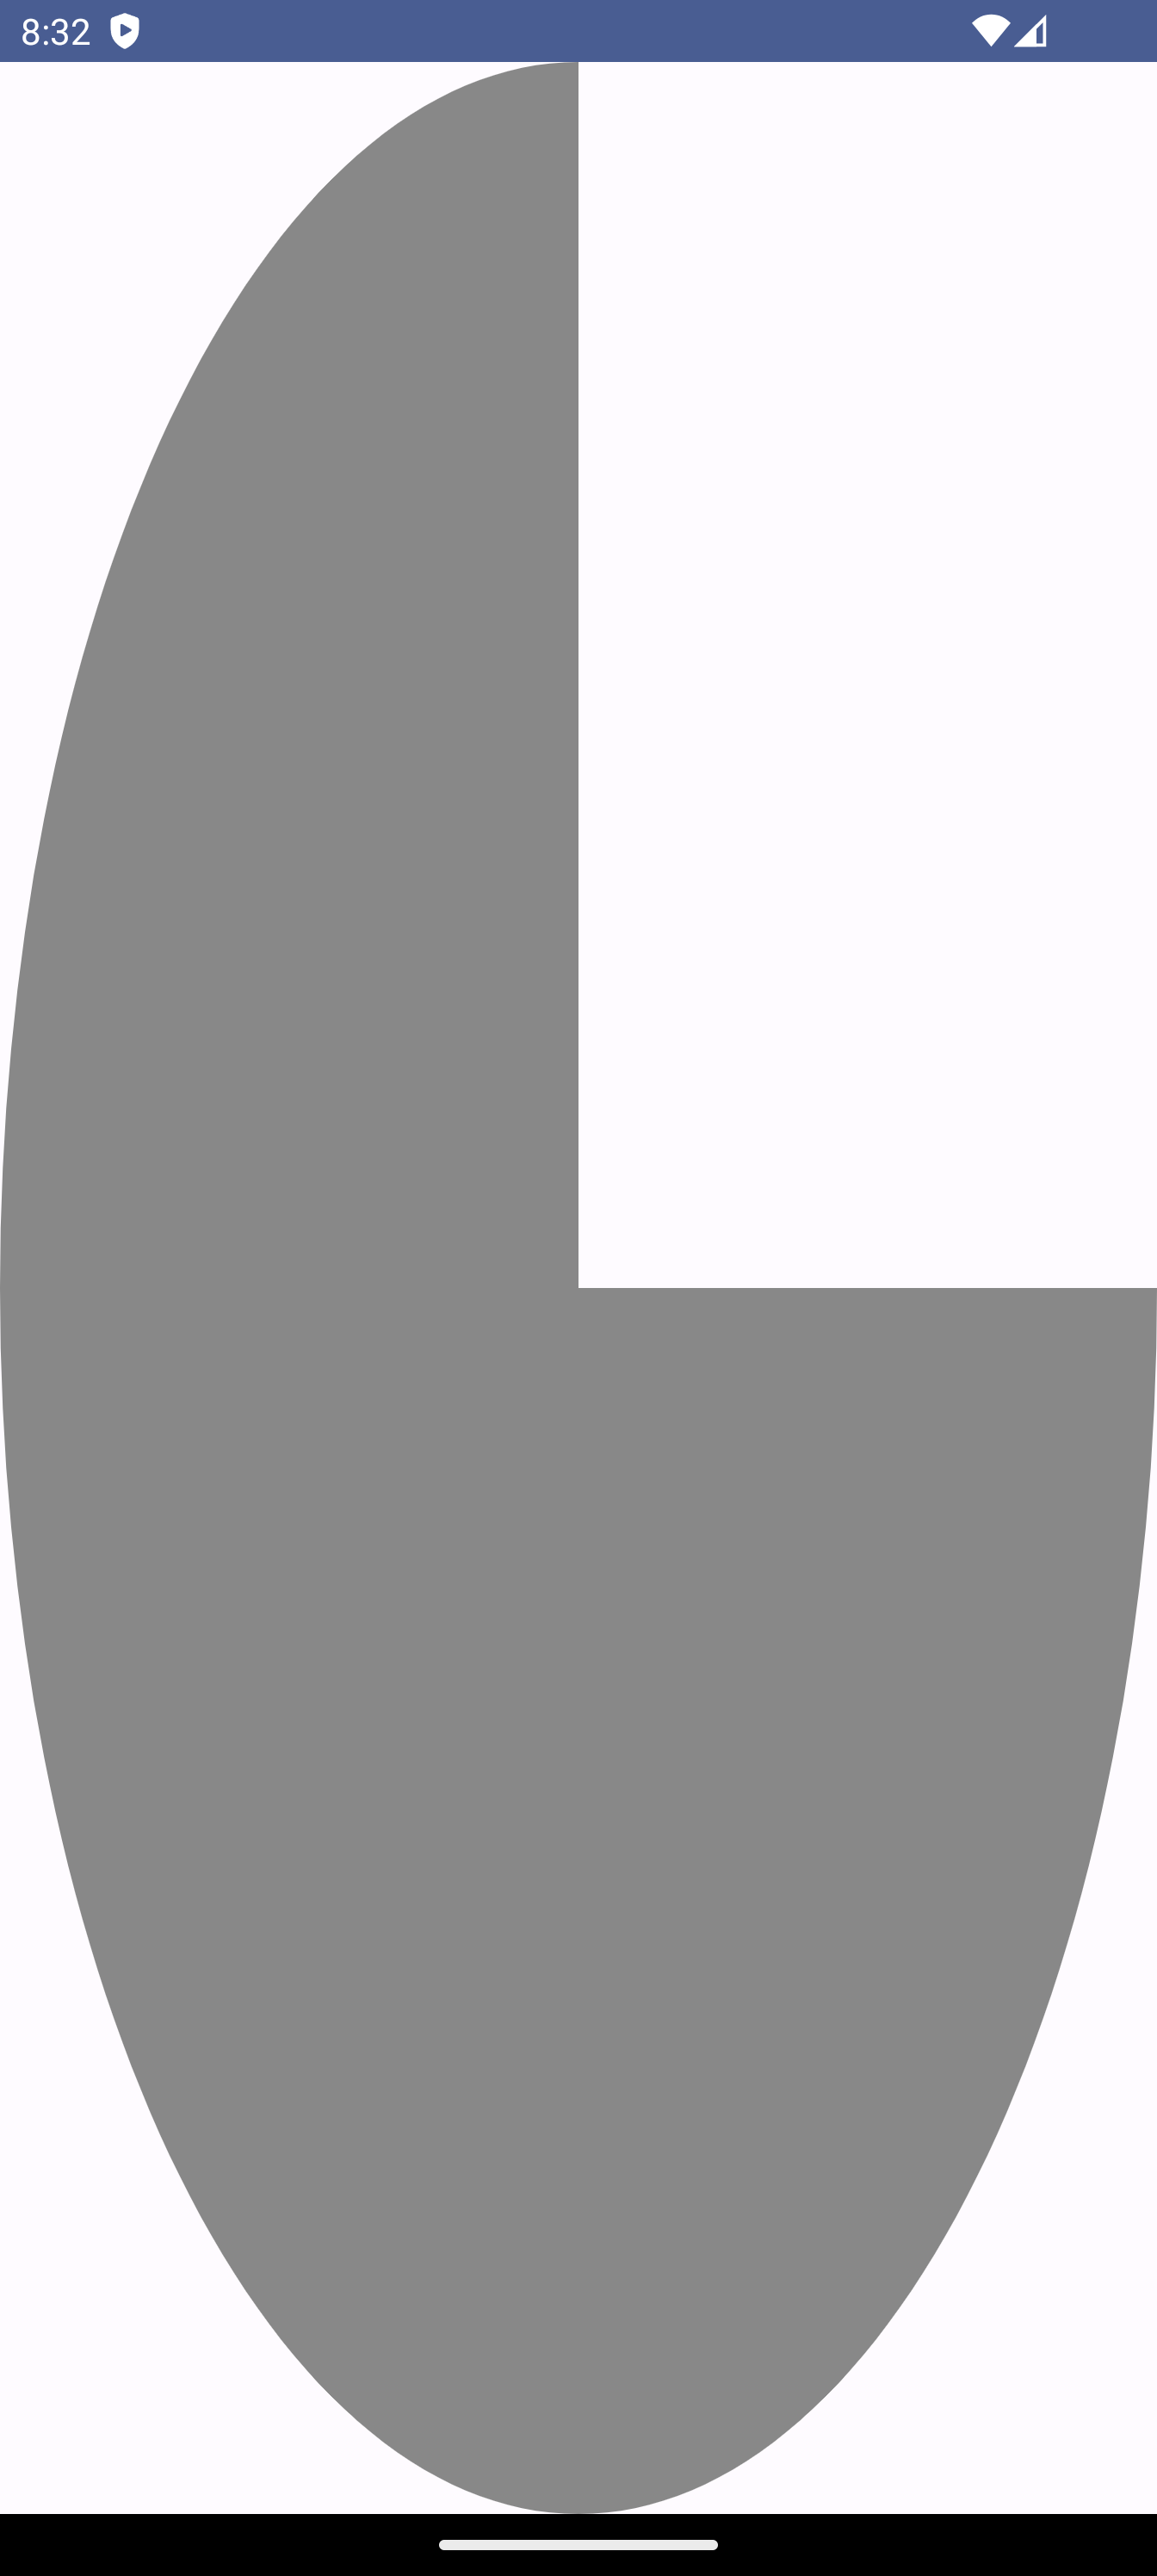
drawArc(color = Color.Gray, startAngle = 0f, sweepAngle = 270f, useCenter = false)
}시작 angle에서부터 sweepAngle만큼의 원을 그려주는 메서드이다.
angle은 동 -> 남 -> 서 -> 북 순서대로 0도 -> 90도 -> 180도 -> 270도이다.
useCenter는 끝나는 지점에서 원의 가운데 부분으로 모여서 끝날 것인지 아닐 것인지를 설정하는 값이다.
| useCenter = "true" | useCenter = "false" |
|---|---|
 | 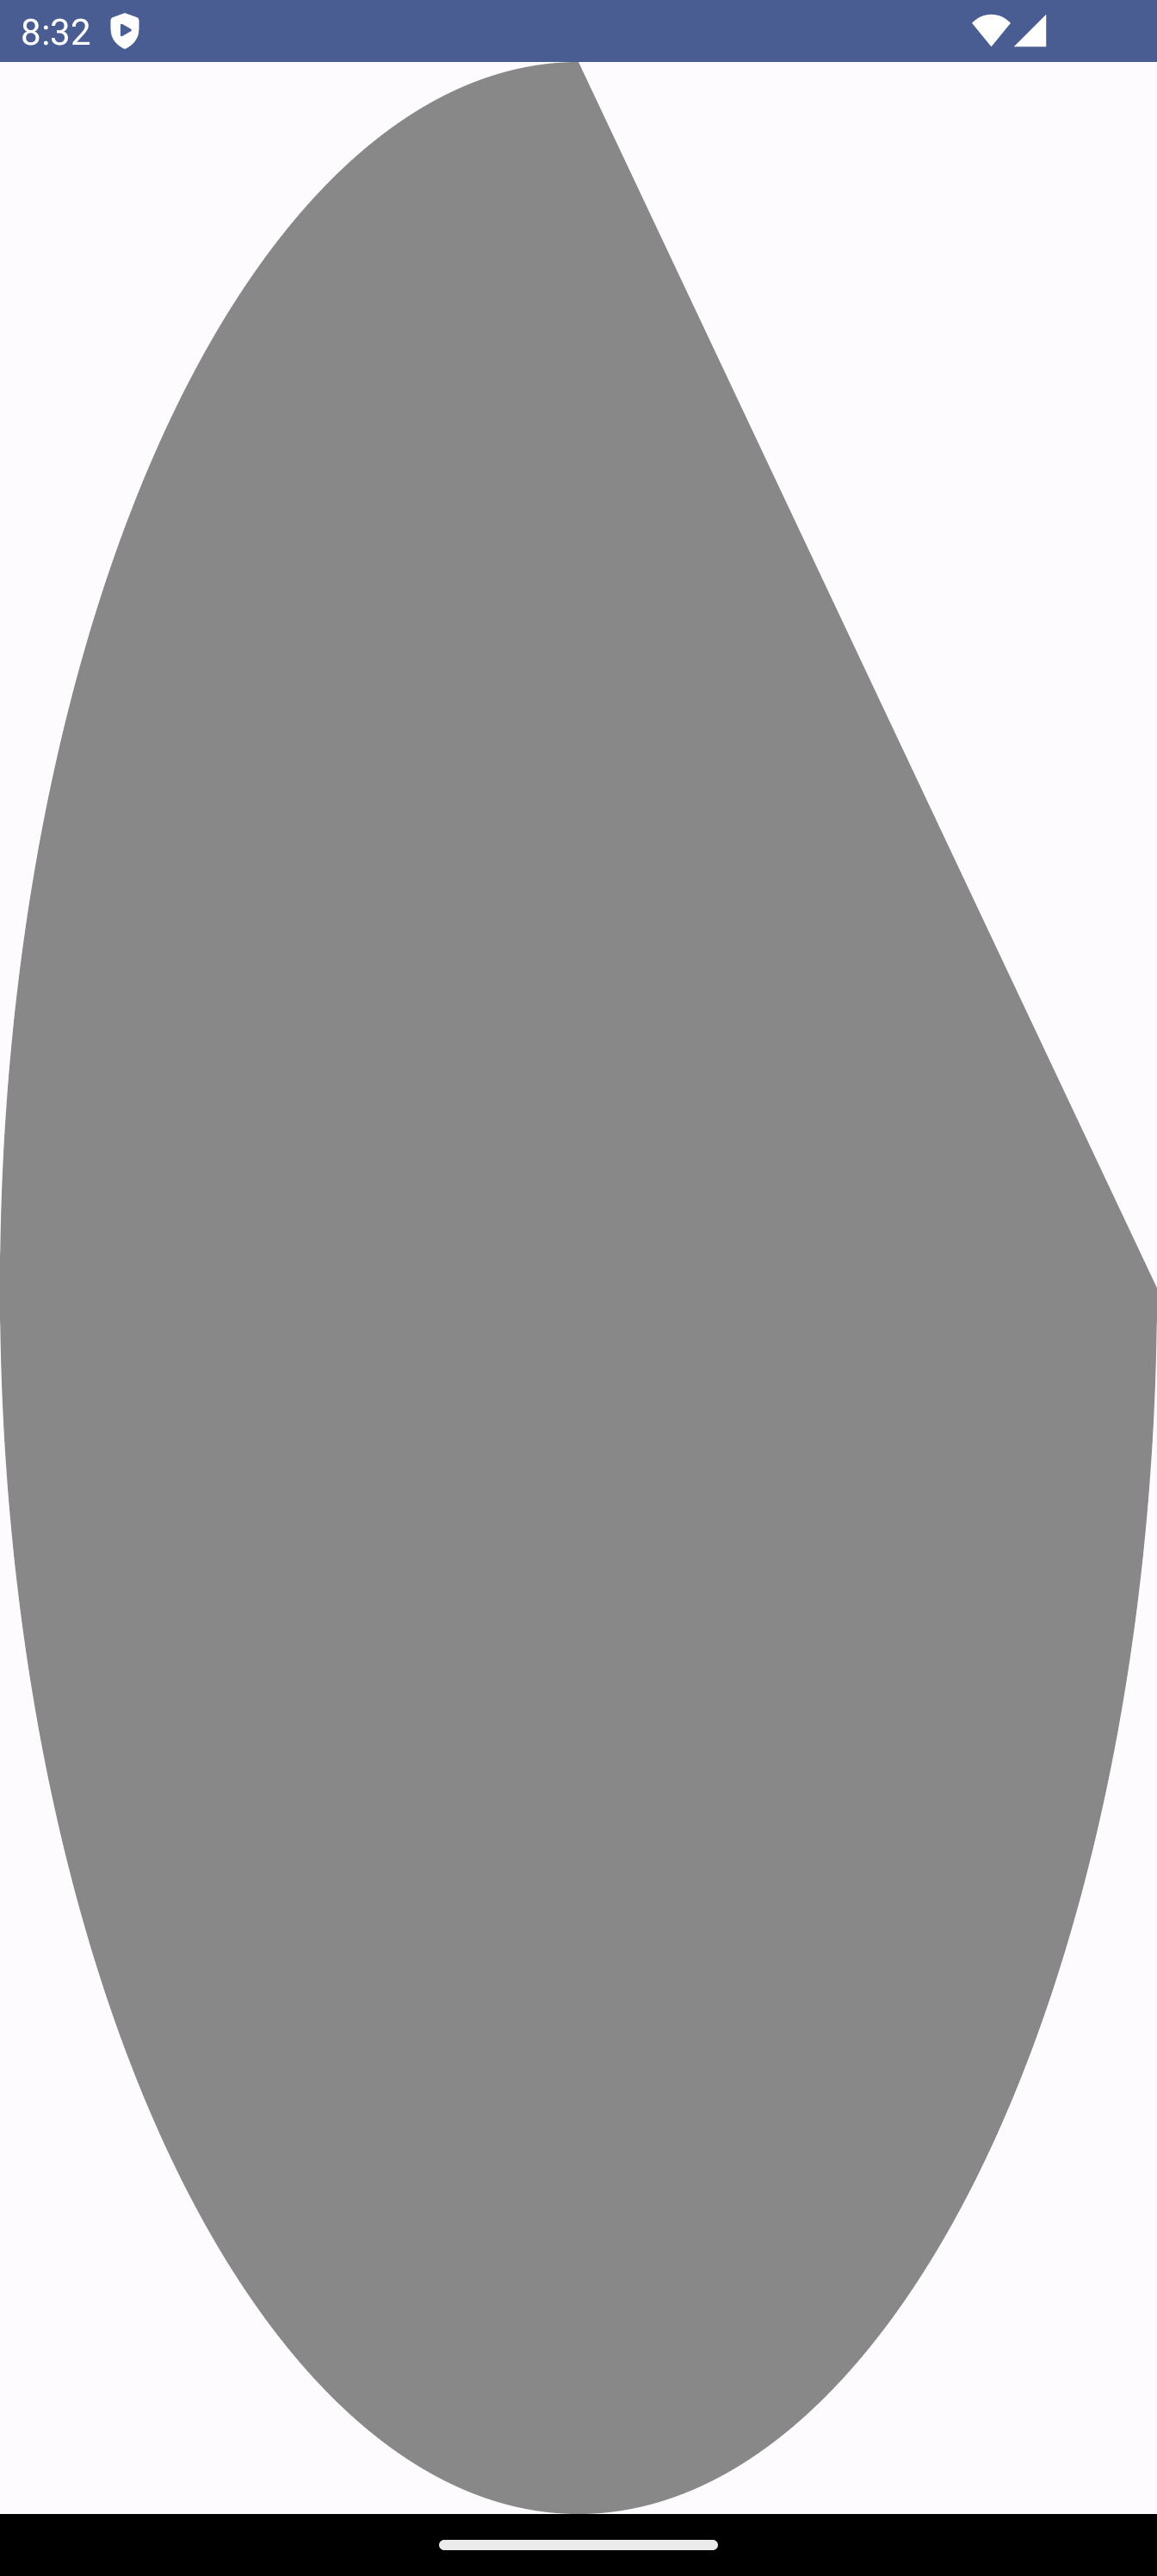 |
drawPoints
Canvas(modifier = Modifier.fillMaxSize()) {
     drawPoints(
            listOf(
                Offset(100.dp.toPx(), 100.dp.toPx()), Offset(200.dp.toPx(), 200.dp.toPx())
            ),
            pointMode = PointMode.Points,
            Color.Blue,
            strokeWidth = 50f
        )
}
list에 전달된 점들을 화면에 그려주는 메서드. 점끼리 연결할여 다각형을 만들수도 있다.
| pointMode = PointMode.Points | pointMode = PointMode.Polygon |
|---|---|
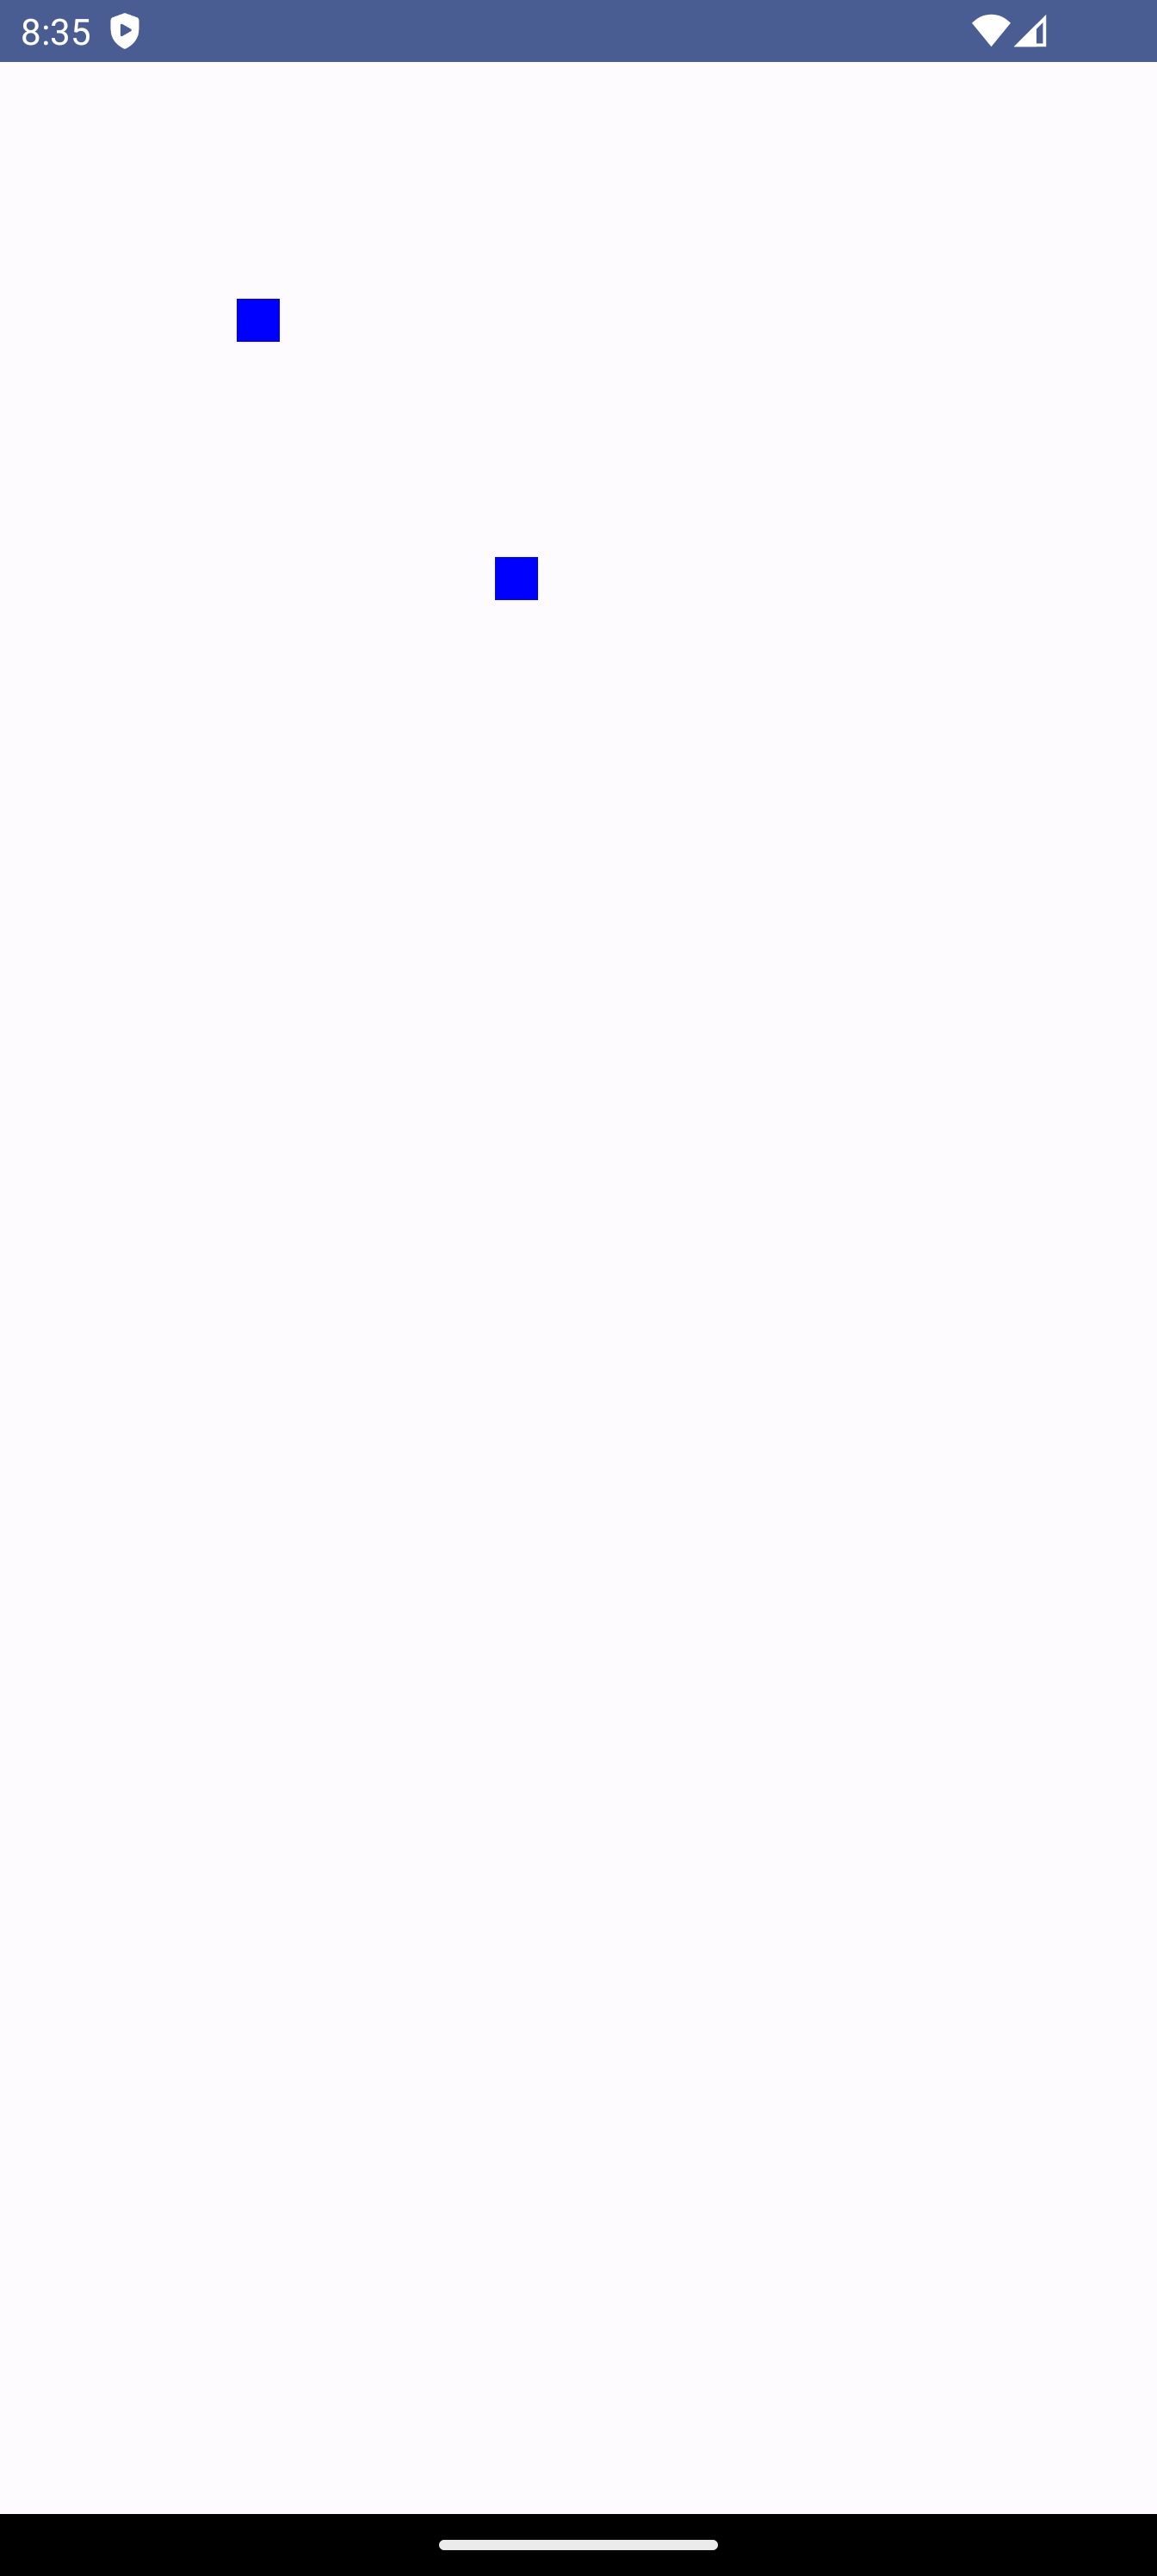 | 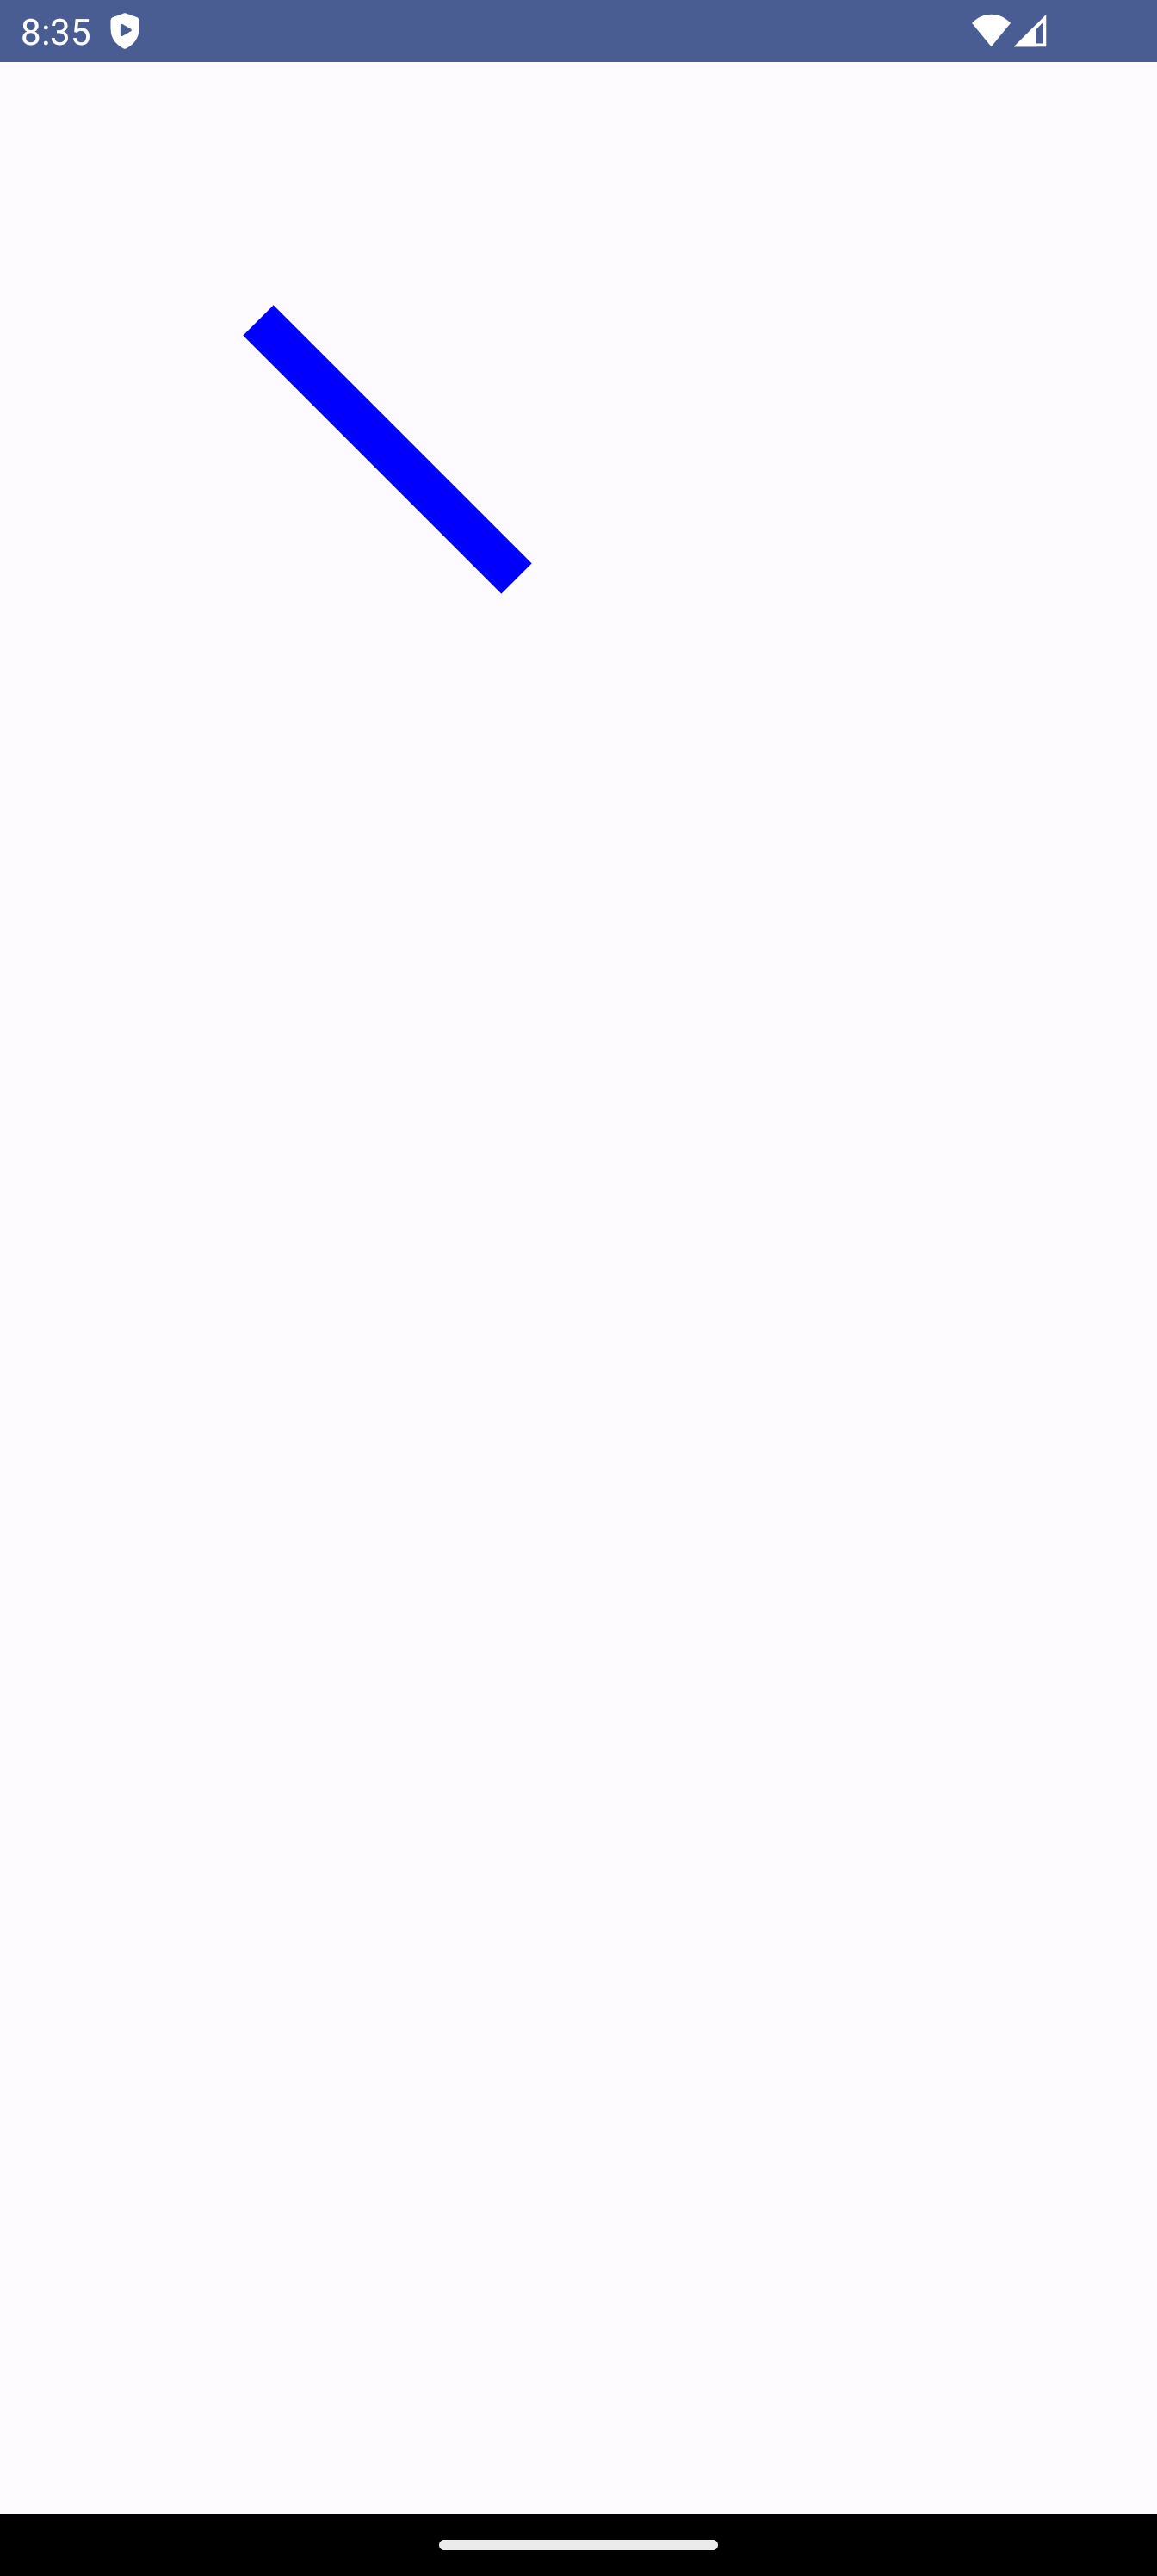 |
경로를 이용해 그리기
복잡한 도형을 그리고 싶다면 Path()와 drawPath를 이용해서 직접 좌표를 찍어가며 그릴 수 있다.
drawPath
Canvas(modifier = Modifier.fillMaxSize()) {
	 val path = Path()
     drawPath(
            path = path,
            color = Color.Black,
            style = Stroke(width = 4.dp.toPx())
        )
}
전달받은 Path 객체를 따라 그림을 그린다.
lineTo, moveTo 와 같은 메서드를 이용해 그릴 수 있다.
- 별을 그려본다면
val path = Path()
val width = size.width
val height = size.height
val centerX = width / 2f
val centerY = height / 2f
val cos18 = cos(Math.toRadians(18.0).toFloat())
val sin18 = sin(Math.toRadians(18.0).toFloat())

val starLength =
    minOf(width / (2 * (sin18 + 1)), height / (2 * cos18 * (1 + sin18)))
val lenSin18 = starLength * sin18
val lenCos18 = starLength * cos18

val starWidth = 2 * (starLength + lenSin18)

val startY = centerY - starWidth / 2

path.apply {
    moveTo(centerX, startY)
    lineTo(centerX + lenSin18, startY + lenCos18)
    lineTo(centerX + lenSin18 + starLength, startY + lenCos18)
    lineTo(
        centerX + (starLength + lenSin18 * 2) * sin18,
        startY + (starLength + lenSin18 * 2) * cos18
    )
    lineTo(centerX + 2 * (starLength + lenSin18) * sin18, startY + starWidth)

    lineTo(centerX, startY + starWidth - starLength * cos(Math.toRadians(36.0).toFloat()))

    lineTo(centerX - 2 * (starLength + lenSin18) * sin18, startY + starWidth)
    lineTo(
        centerX - (starLength + lenSin18 * 2) * sin18,
        startY + (starLength + lenSin18 * 2) * cos18
    )
    lineTo(centerX - lenSin18 - starLength, startY + lenCos18)
    lineTo(centerX - lenSin18, startY + lenCos18)
    lineTo(centerX, startY)

    close()
}
다음과 같이 각 꼭직점의 위치를 찍어가며 line을 그릴 수 있다.
결과는
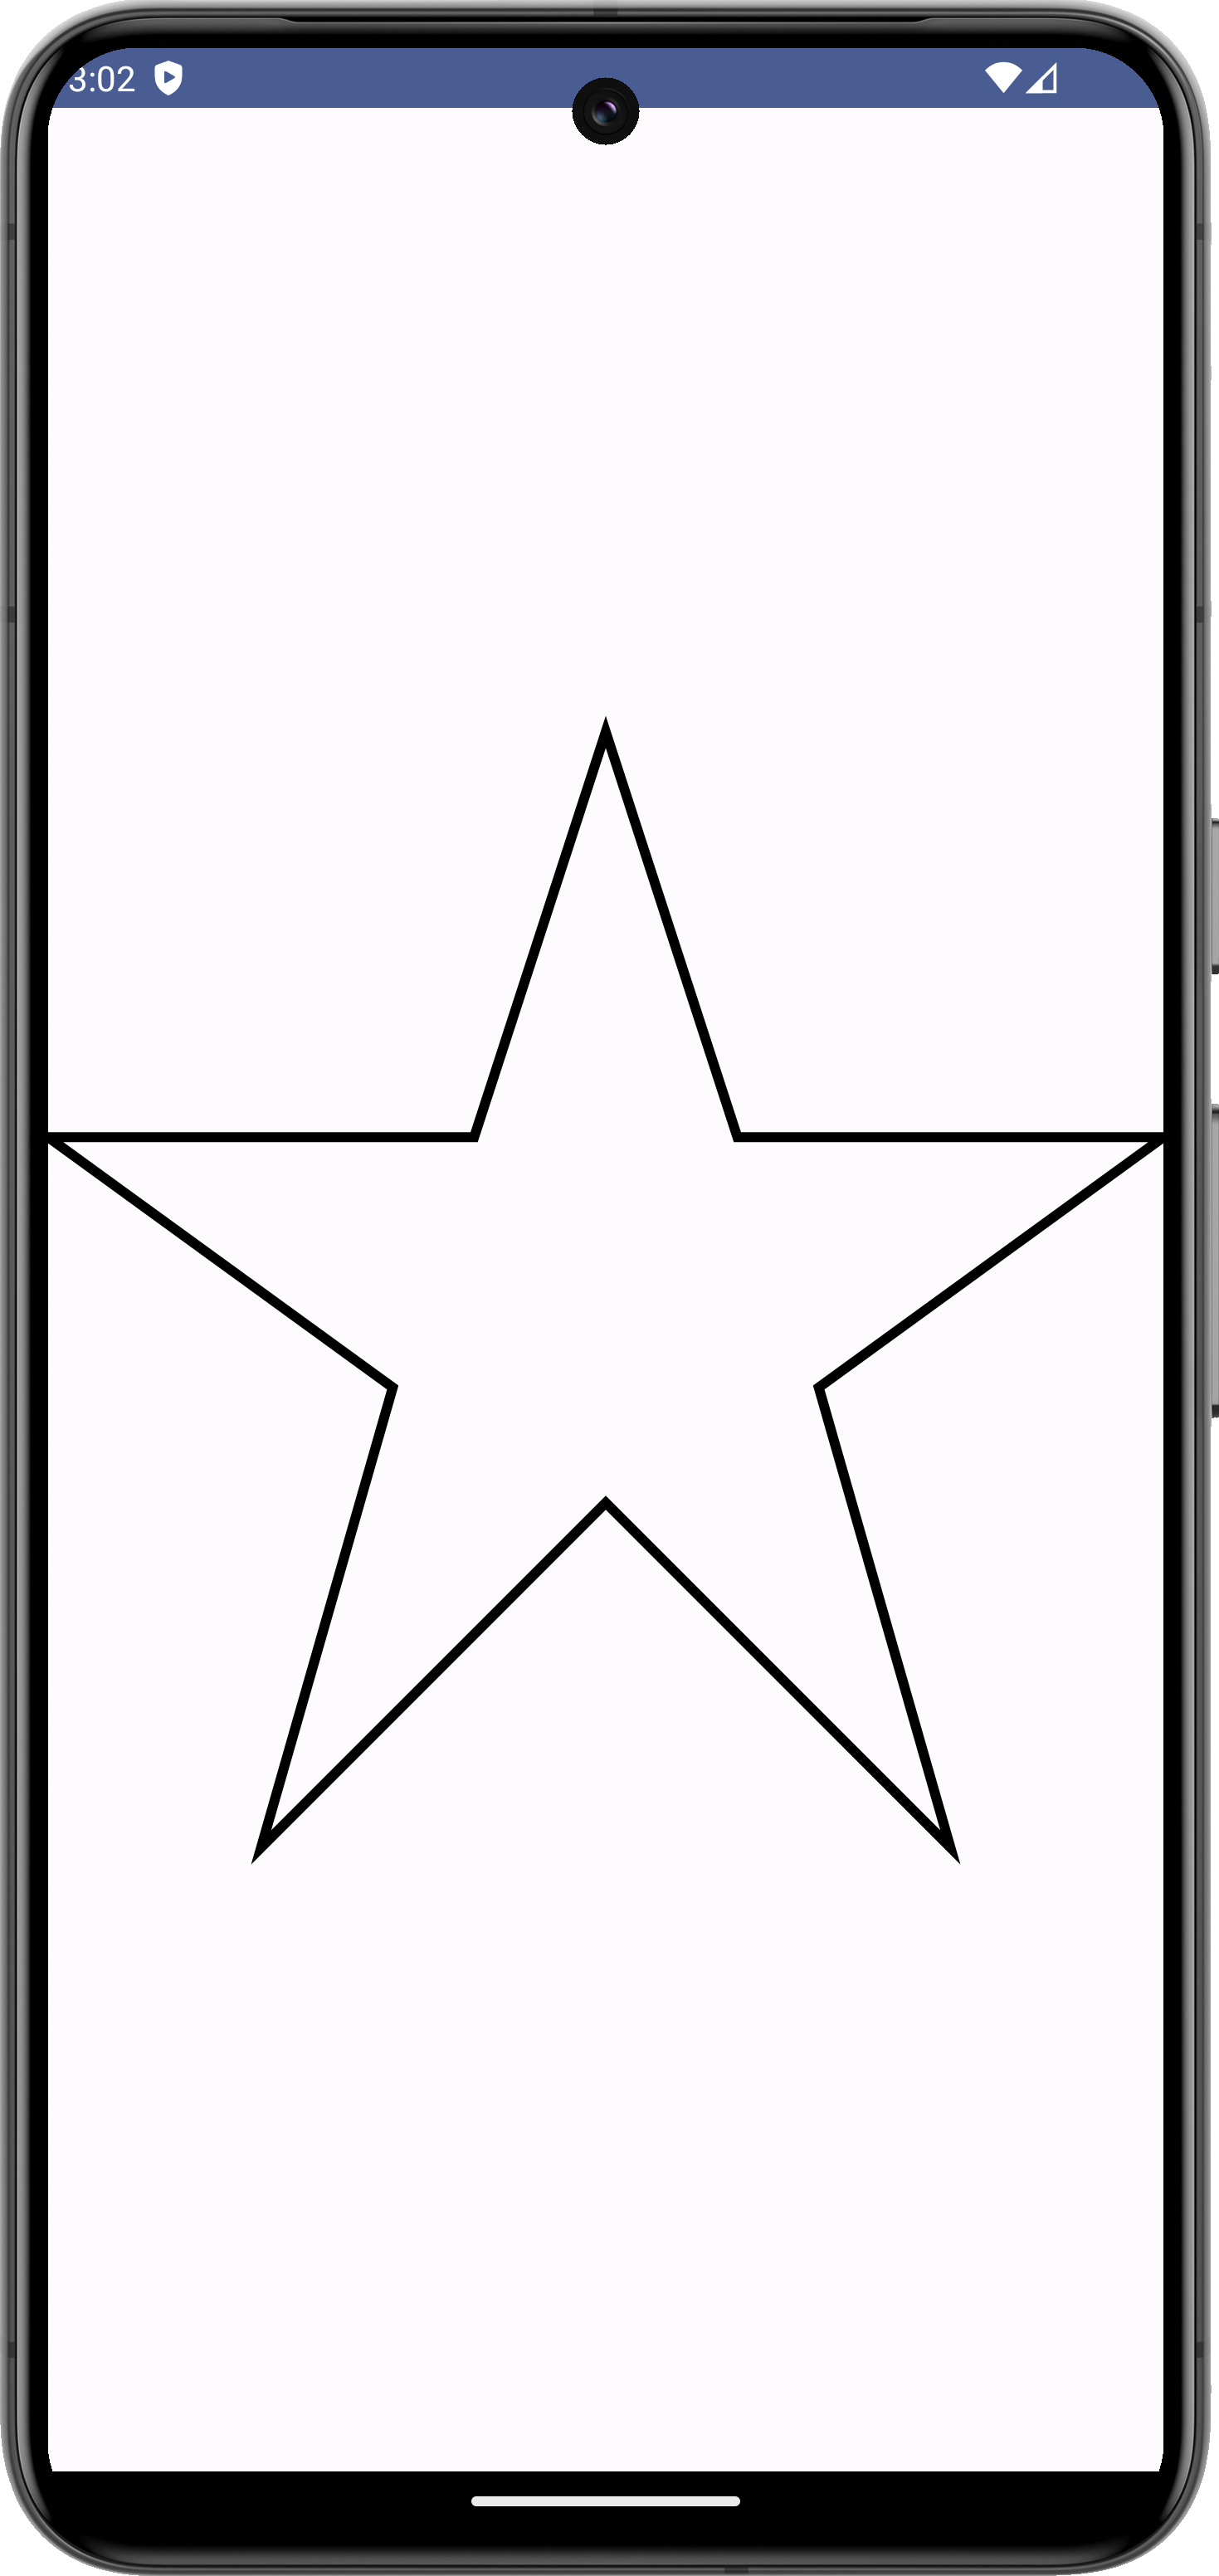
다음과 같이 그려진다.
Frontend Developer