
라이브러리
여러 프로젝트에서 재사용할 수 있는 코드들을 매번 복붙하지 않고 하나의 모듈로 분리한 후 의존성으로 불러와서 사용할 수 있으면 나중에 수정도 쉽고 용이할 것이다.
이를 라이브러리라고 부르는데 모든 라이브러리가 다 오픈소스인 건 아니니까 라이센스를 잘 확인하고 사용하자
프로젝트 생성하기
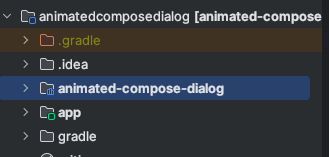
빈 프로젝트를 생성한 후 내가 라이브러리화 할 코드가 담근 모듈을 생성하자
설정하기
라이브러리로 배포하기 위해 필요한 정보를 설정하자
settings.gradle
dependencyResolutionManagement {
    repositoriesMode.set(RepositoriesMode.FAIL_ON_PROJECT_REPOS)
    repositories {
        google()
        mavenCentral()
        maven(url = "https://jitpack.io")
    }
}- jitpack url을 추가해준다.
build.gradle(library module)
plugins {
    alias(libs.plugins.androidLibrary)
    alias(libs.plugins.jetbrainsKotlinAndroid)
    id("maven-publish")
}
"maven-publish"를 추가하여서 maven을 통해 빌드가 가능하도록 하자
그리고 dependencies 밑에
afterEvaluate {
    publishing {
        publications {
            // Creates a Maven publication called "release".
            create<MavenPublication>("release") {
                // Applies the component for the release build variant.
                from(components["release"])

                // You can then customize attributes of the publication as shown below.
                groupId = "com.github.uuranus"
                artifactId = "animated-dialog-compose"
                version = "1.0.0"
            }
            // Creates a Maven publication called “debug”.
            create<MavenPublication>("debug") {
                // Applies the component for the debug build variant.
                from(components["debug"])

                groupId = "com.github.uuranus"
                artifactId = "animated-dialog-compose"
                version = "1.0.0"
            }
        }
    }
}- 다음과 같이 코드를 추가하여 publish에 관한 정보도 작성한다.
배포하기
- 생성한 프로젝트를 깃헙 레포지토리에 올린다.
- 라이브러리로 배포할 레포지토리에 들어간다.
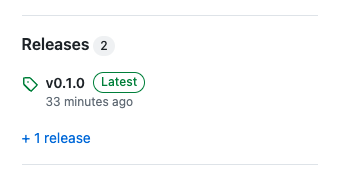
- 오른쪽 목록에 보면 다음과 같이 Release 가 있을 것이다. 여기에 들어가서 새로운 버전을 release해보자

- JitPack 사이트에 들어가서 나의 레포지토리를 검색한다

- 내가 release해놓은 버전을
. Get it 버튼을 눌러서 배포를 해보자

- 위와 같이 왼쪽에 초록색 문서가 표시가 되면 성공적으로 배포를 하였다는 의미이다.
- 다른 프로젝트에서 implement가 되는지 한 번 확인해보자
배포 시 발생한 문제
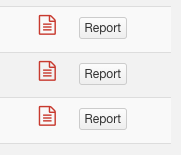
한 번에 성공적으로 배포가 되면 좋겠지만^^ 이렇게 빨간색 문서가 뜨면 문제가 생겨 배포에 실패했다는 의미이다. 빨간 문서를 클릭하여서 어디서 문제가 되었는지 확인해보자.
* What went wrong:
A problem occurred configuring root project 'animated-compose-dialog'.
> Could not resolve all files for configuration ':classpath'.
   > Could not resolve com.android.tools.build:gradle:8.3.1.
     Required by:
         project : > com.android.application:com.android.application.gradle.plugin:8.3.1
         project : > com.android.library:com.android.library.gradle.plugin:8.3.1
      > No matching variant of com.android.tools.build:gradle:8.3.1 was found. The consumer was configured to find a library for use during runtime, compatible with Java 8, packaged as a jar, and its dependencies declared externally, as well as attribute 'org.gradle.plugin.api-version' with value '8.4' but:
          - Variant 'apiElements' capability com.android.tools.build:gradle:8.3.1 declares a library, packaged as a jar, and its dependencies declared externally:
              - Incompatible because this component declares a component for use during compile-time, compatible with Java 11 and the consumer needed a component for use during runtime, compatible with Java 8
//...- 대충 읽어보니 java 버전 문제인 것 같다.
- 프로젝트는 자바 11버전 이상이 필요한데 자바 8버전으로 선언이 되어있어서 안 된다는 것 같다.
해결과정
- Android Gradle 플러그인 8.3 에 가보면
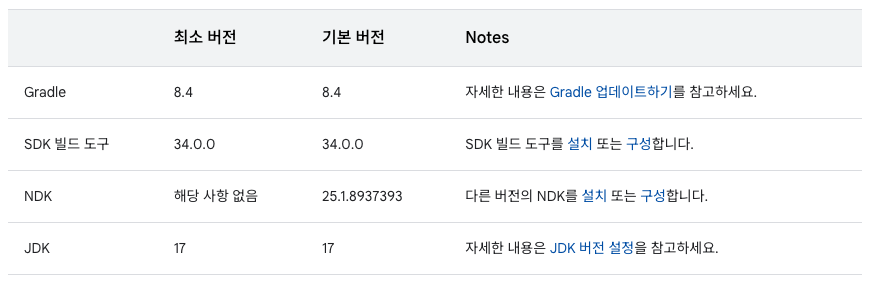
- gradle plugin 8.3 버전 부터는 jdk가 17이상이어야 한다.
- 그러나 프로젝트를 처음 생성하면
 compileOptions {
        sourceCompatibility = JavaVersion.VERSION_1_8
        targetCompatibility = JavaVersion.VERSION_1_8
}- 이렇게 1.8 버전으로 설정이 되기 때문에 이 부분이 안 맞아서 그런 거라고 생각하고
compileOptions {
        sourceCompatibility = JavaVersion.VERSION_17
        targetCompatibility = JavaVersion.VERSION_17
}
kotlinOptions {
        jvmTarget = "17"
}- 다음과 같이 17 버전으로 수정해줬다.
하지만 다시 배포해도 자바 버전 오류는 사라지지 않았다.
- 그래서 오류 log 전체를 찬찬히 읽어보았다. 그러다 발견한 게 있었다.
Build time:   2023-10-04 20:52:13 UTC
Revision:     e9251e572c9bd1d01e503a0dfdf43aedaeecdc3f

Kotlin:       1.9.10
Groovy:       3.0.17
Ant:          Apache Ant(TM) version 1.10.13 compiled on January 4 2023
JVM:          1.8.0_292 (Private Build 25.292-b10)
OS:           Linux 4.18.0-13-generic amd64

0m2.988s
Picked up JAVA_TOOL_OPTIONS: -Dfile.encoding=UTF-8 -Dhttps.protocols=TLSv1.2
openjdk version "1.8.0_292"
OpenJDK Runtime Environment (build 1.8.0_292-8u292-b10-0ubuntu1~16.04.1-b10)
OpenJDK 64-Bit Server VM (build 25.292-b10, mixed mode)
Getting tasks: ./gradlew tasks --all
Tasks: -
나는 자바 버전을 17로 올려줬는데 왜 아직도 1.8 버전으로 빌드를 하고 있지???
-
JitPack에서 빌드를 할 때 프로젝트의 자바 버전에 맞춰서 빌드를 하는 게 아니고 자체 jdk로 빌드를 하는 것 같다.
그럼 JitPack의 자바 버전을 어떻게 바꾸지????
JitPack jdk 설정하기
- 답은 간단했다.
- 프로젝트 단위에서 jipack.yml 파일을 만들고
jdk:
- openjdk17- 다음과 같이 jdk 버전을 설정해주면 된다.
배포완료
야호! 이제 내가 만든 코드를 다른 프로젝트에서 사용할 수 있다.
참고자료
https://android-developer.tistory.com/11
https://rkdxowhd98.tistory.com/199

Frontend Developer