
Python
Pythonic code
list comprehension
>>> templist=[i for i in range(1,11) if i%2==0]
>>> templist
[2, 4, 6, 8, 10]
>>>
필터를 사용해 똑같은 흉내를 낼 수 있다.
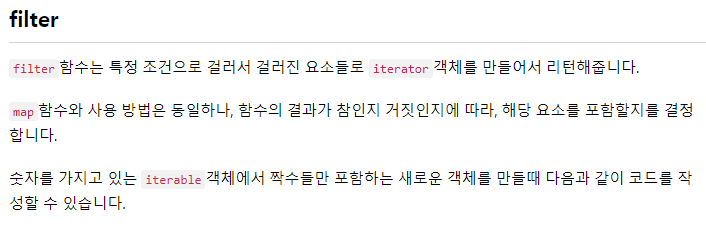
>>> target = [1, 2, 3, 4, 5, 6, 7, 8, 9, 10]
>>> result = filter(lambda x : x%2==0, target)
>>> print(list(result))
[2, 4, 6, 8, 10]
>>>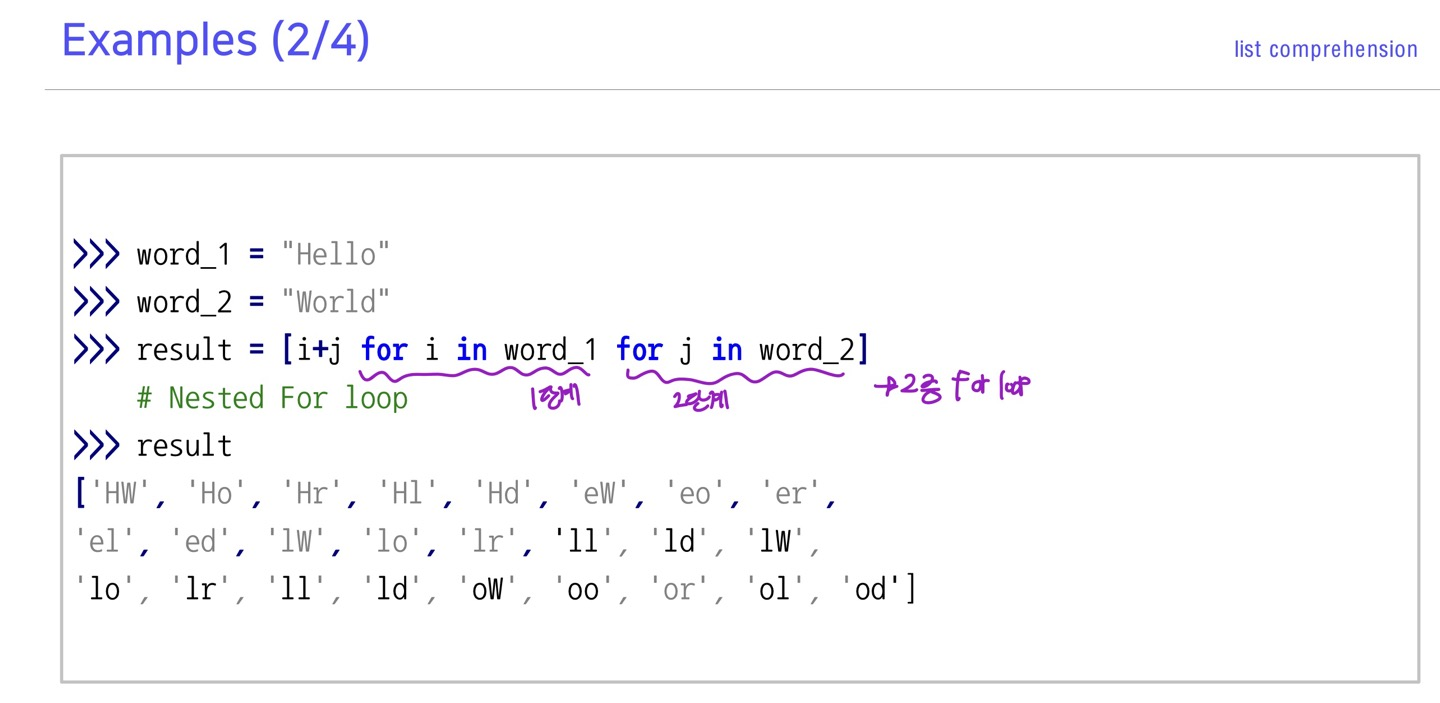
list comprehension 의 2중 반복문
>>>#2중 반복문에서는 j가 내부루프가 되어 i,j loop 형식으로 저장됨
>>> temp1=[[i,j] for i in [1,2,3] for j in [-1,-2,-3]]
>>> temp1
[[1, -1], [1, -2], [1, -3], [2, -1], [2, -2], [2, -3], [3, -1], [3, -2], [3, -3]]
>>>
>>> #이런 구조에서는 내부에있는 list의 forloop(i)가 끝나고 외부의 forloop(j)가 넘어가므로
>>> #i loop,j 형식으로 저장됨
>>> temp2=[[[i,j] for i in [1,2,3]] for j in [-1,-2,-3]]
>>> temp2
[[[1, -1], [2, -1], [3, -1]], [[1, -2], [2, -2], [3, -2]], [[1, -3], [2, -3], [3, -3]]]
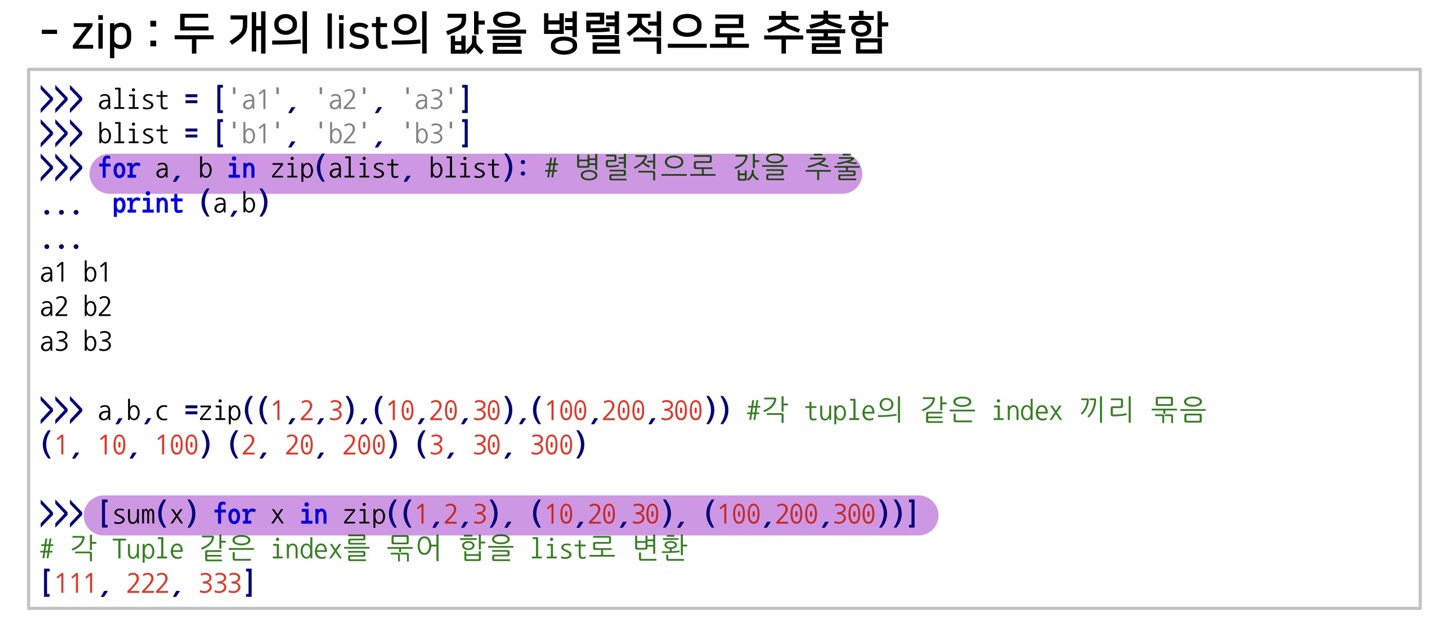
>>>enumerate & zip
>>> temp=['A','B','C','D']
>>> for i,c in enumerate(temp):
...     print(i,c)
...
0 A
1 B
2 C
3 D
>>>
enumerate : 리스트 원소 추출시에 idx도 같이 추출함
lambda & map &reduce
# map, filter는 list로 케스팅해줘야 함
>>> list(map(lambda x:x**2 if x%2==0 else x,[1,2,3,4,5]))
[1, 4, 3, 16, 5]
>>>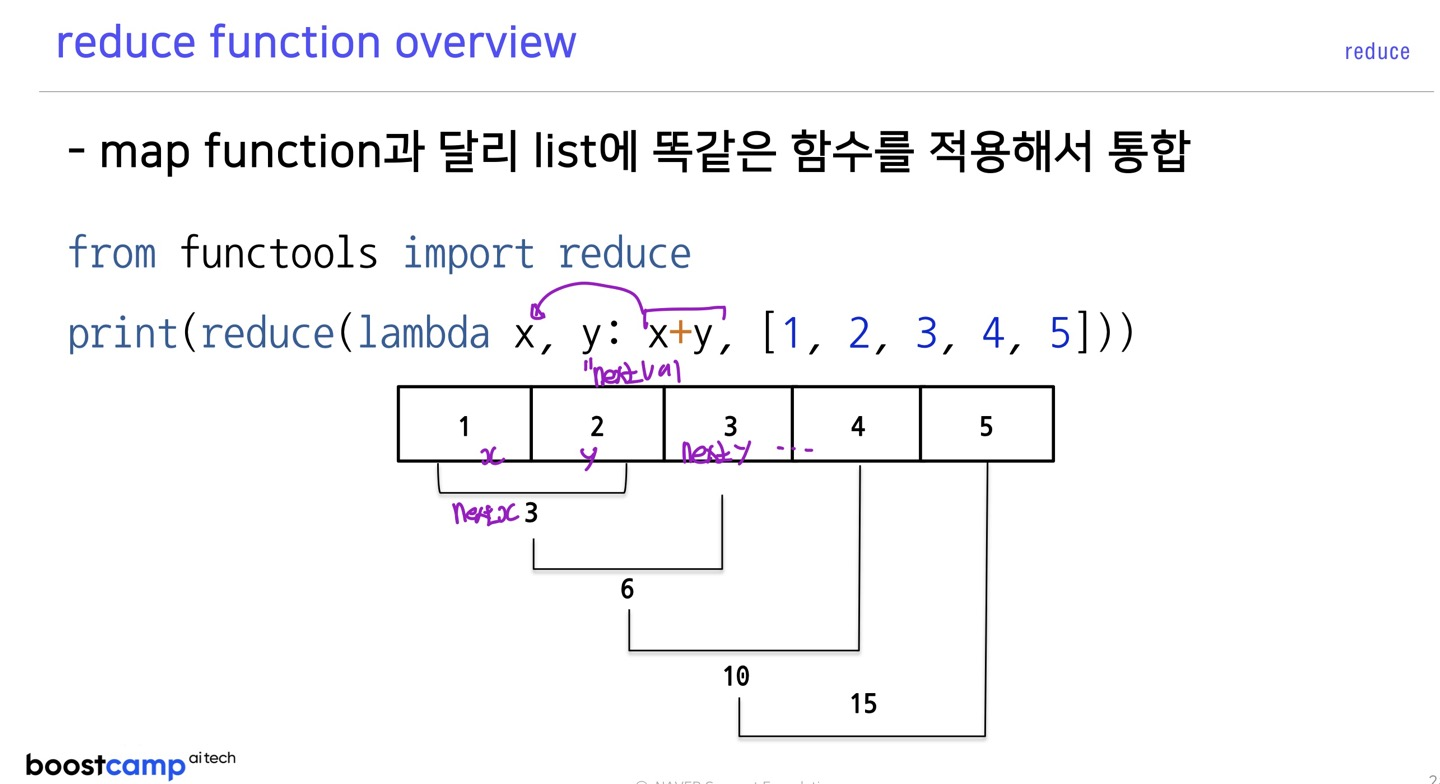
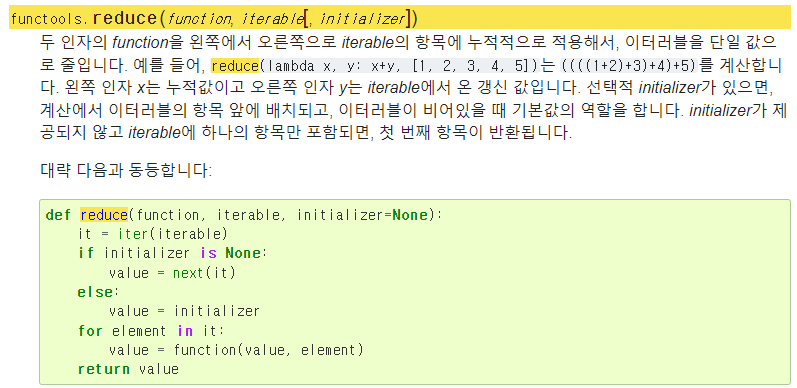
>>> from functools import reduce
>>> print(reduce(lambda x,y:x+y,[1,2,3,4,5]))
15
>>>
iterable object
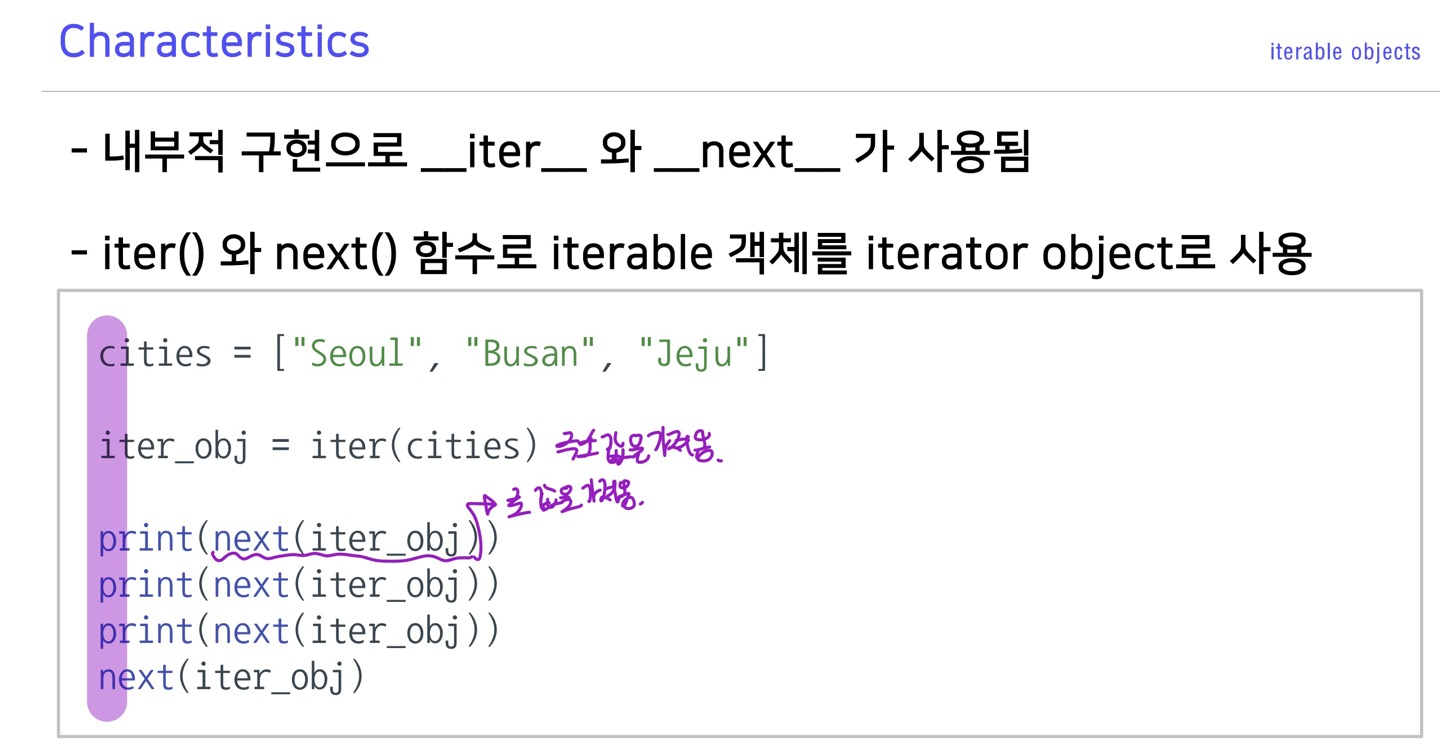
딥러닝에서 next 를 사용하는 이유는 단순 list보다 메모리 효율성이 좋기 때문이다.
yield+next : 다음 값의 주소만 기억
list : 모든 값을 한번에 기억
generator

generator를 list comprehension처럼 만들 수 있음. [ ] 대신 ( ) 를 사용
>>> list_compre=[i for i in range(5)]
>>> list_compre
[0, 1, 2, 3, 4]
>>> type(list_compre)
<class 'list'>
>>> gen_compre=(i for i in range(5))
>>> gen_compre
<generator object <genexpr> at 0x00000224CA1E2EC8>
>>> type(gen_compre)
<class 'generator'>
>>>
gen이 훨씬 적은 메모리 용량 사용
>>> from sys import getsizeof
>>> gen_compre=(i for i in range(500))
>>> list_compre=[i for i in range(500)]
>>> getsizeof(list_compre)
4272
>>> getsizeof(gen_compre)
120
>>>
가변인자 asterisk
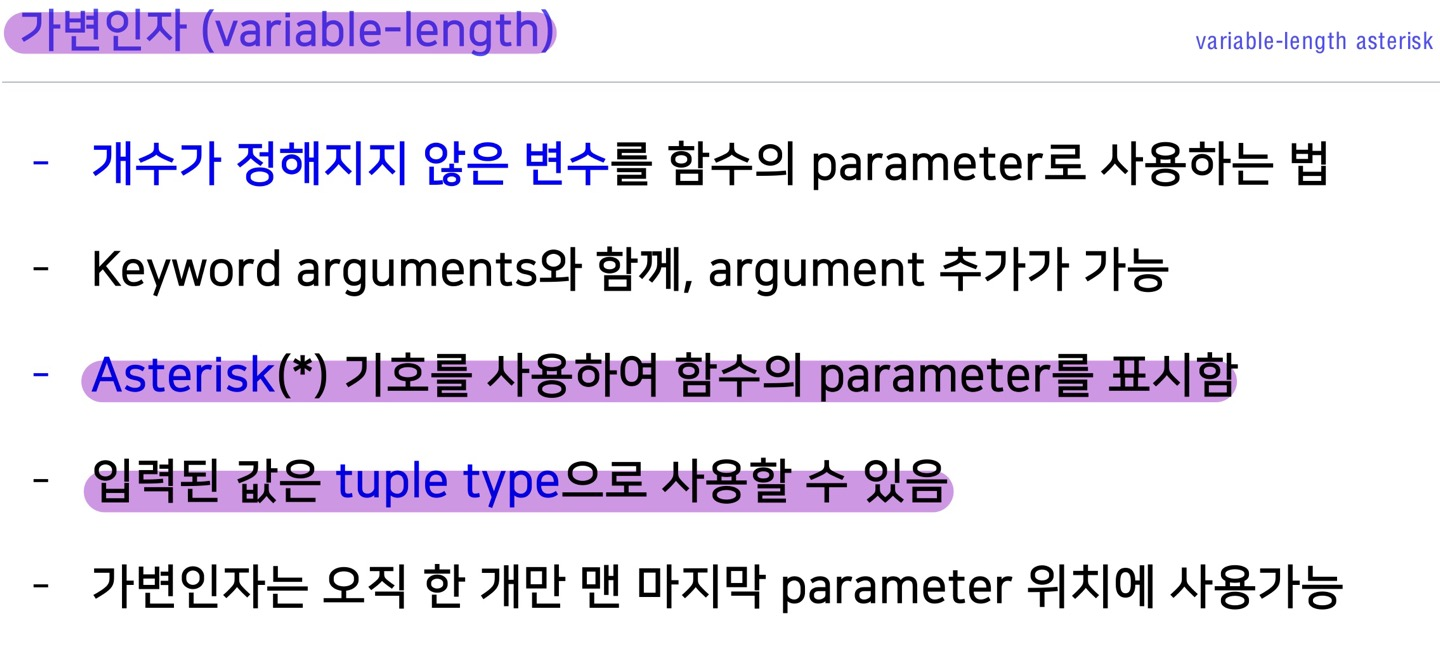
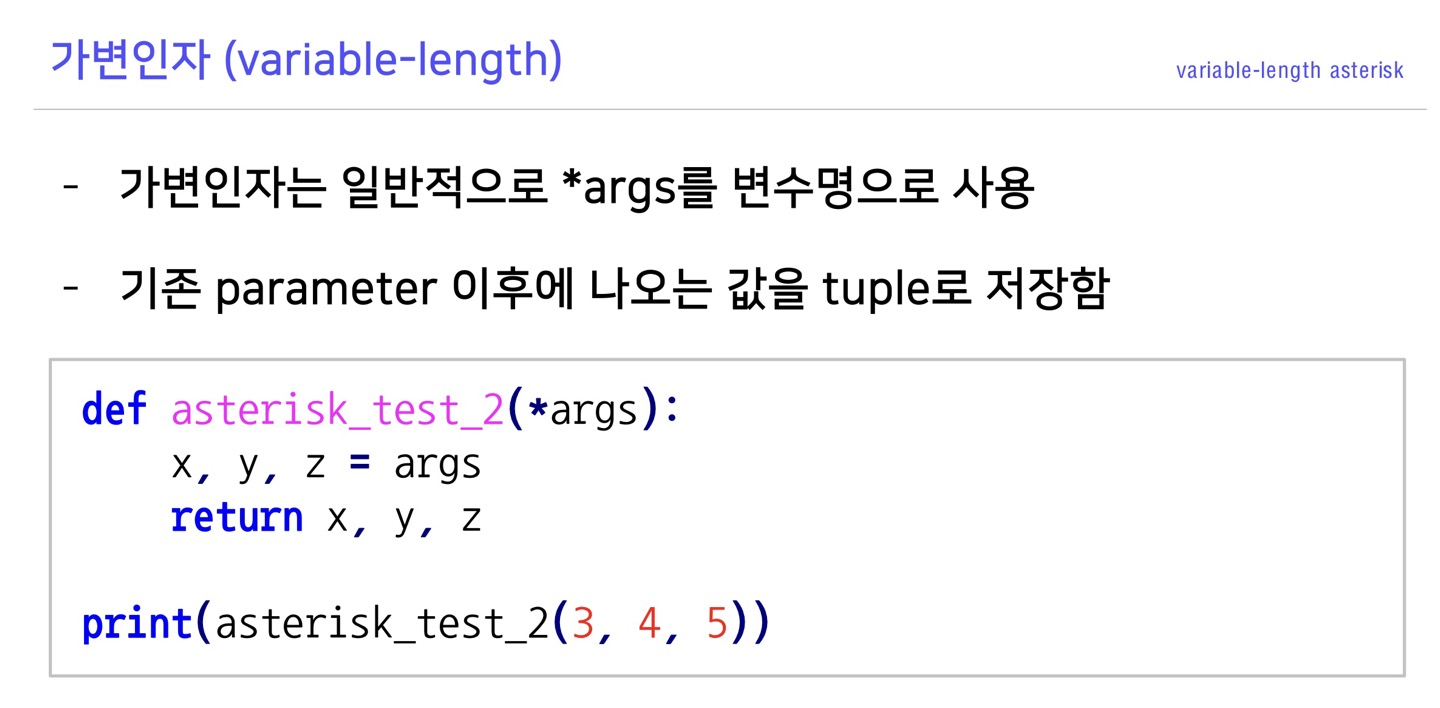
>>> def asterisk_test(a,b,*args):
...     print(args)
...     return a+b+sum(args)
...
#3,4,5 가 튜플로 들어감
>>> asterisk_test(1,2,3,4,5)
(3, 4, 5)
15
>>>
키워드 가변인자(keyword variable_length)
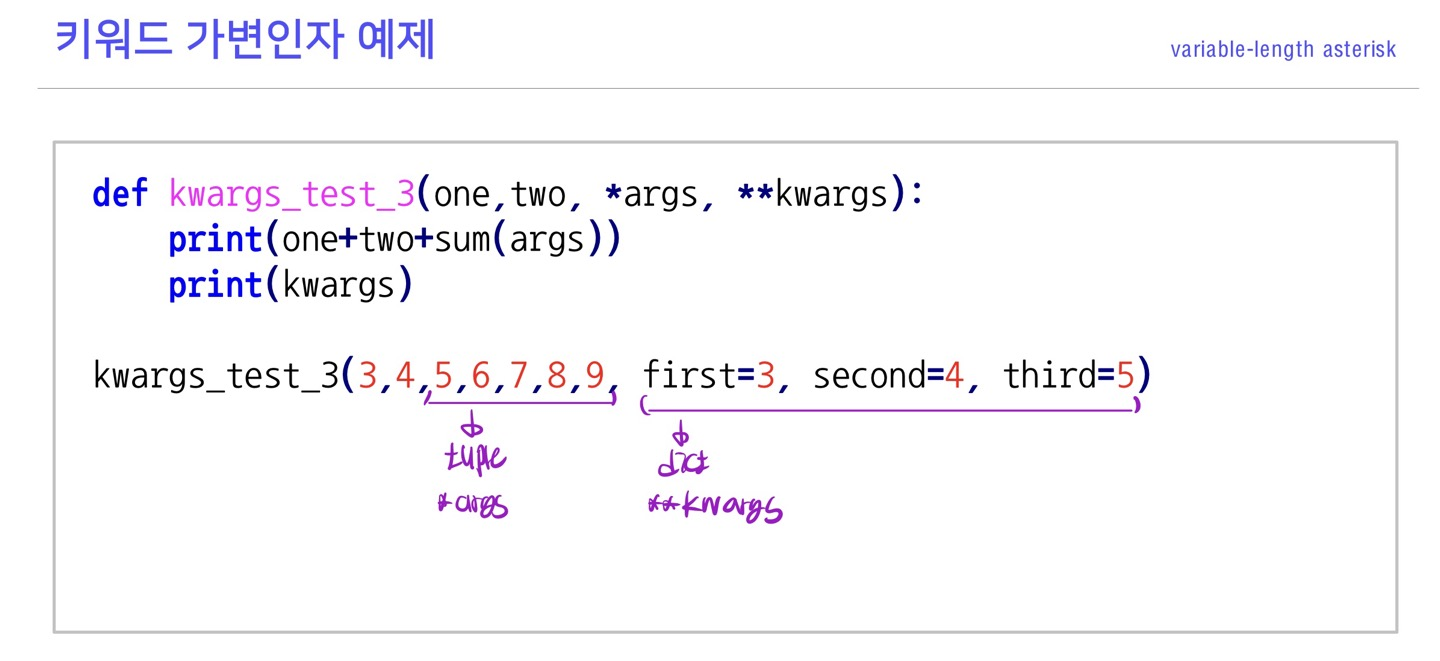
asterisk(*) 두개를 사용해 함수의 피라미터를 dict 타입으로 사용
asterisk들 사용법 : 튜플 가변인자를 먼저 사용한 후 키워드 가변인자를 사용
asterisk-unpacking a container
입력값(묶여있는)에 *를 붙이면 튜플이나 리스트가 풀리면서 각각의 개별 피라미터로 입력됨
>>> def asterisk_test(a,b,*args):
...     print(args)
...     return a+b+sum(args)
...
>>> temp_input=[-1,-2,-3,-4]
#list가 언패킹되어 피라미터로 들어감
>>> asterisk_test(1,2,*temp_input) #==asterisk_test(1,2,-1,-2,-3,-4)
(-1, -2, -3, -4)
-7

#언패킹하지 않을경우 *args= ([list],) 가 되어 에러가 발생
>>> asterisk_test(1,2,temp_input)
([-1, -2, -3, -4],)
Traceback (most recent call last):
  File "<stdin>", line 1, in <module>
  File "<stdin>", line 3, in asterisk_test
TypeError: unsupported operand type(s) for +: 'int' and 'list'
>>>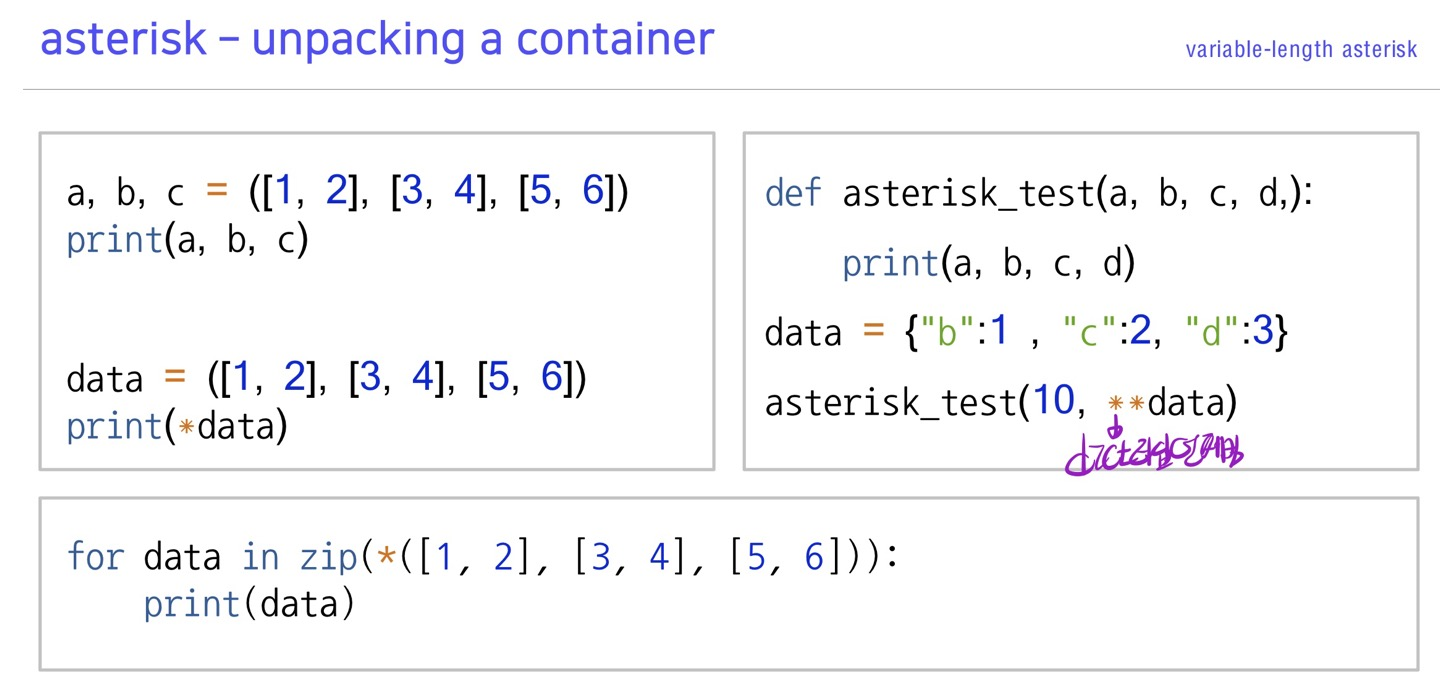
zip+unpacking응용 :
>>> for data in zip(*([1,2],[3,4],[5,6])):
...     print(data)
...
#튜플로 들어감
(1, 3, 5)
(2, 4, 6)
>>>
Python Object-Oriented Programming
Inheritance (상속)
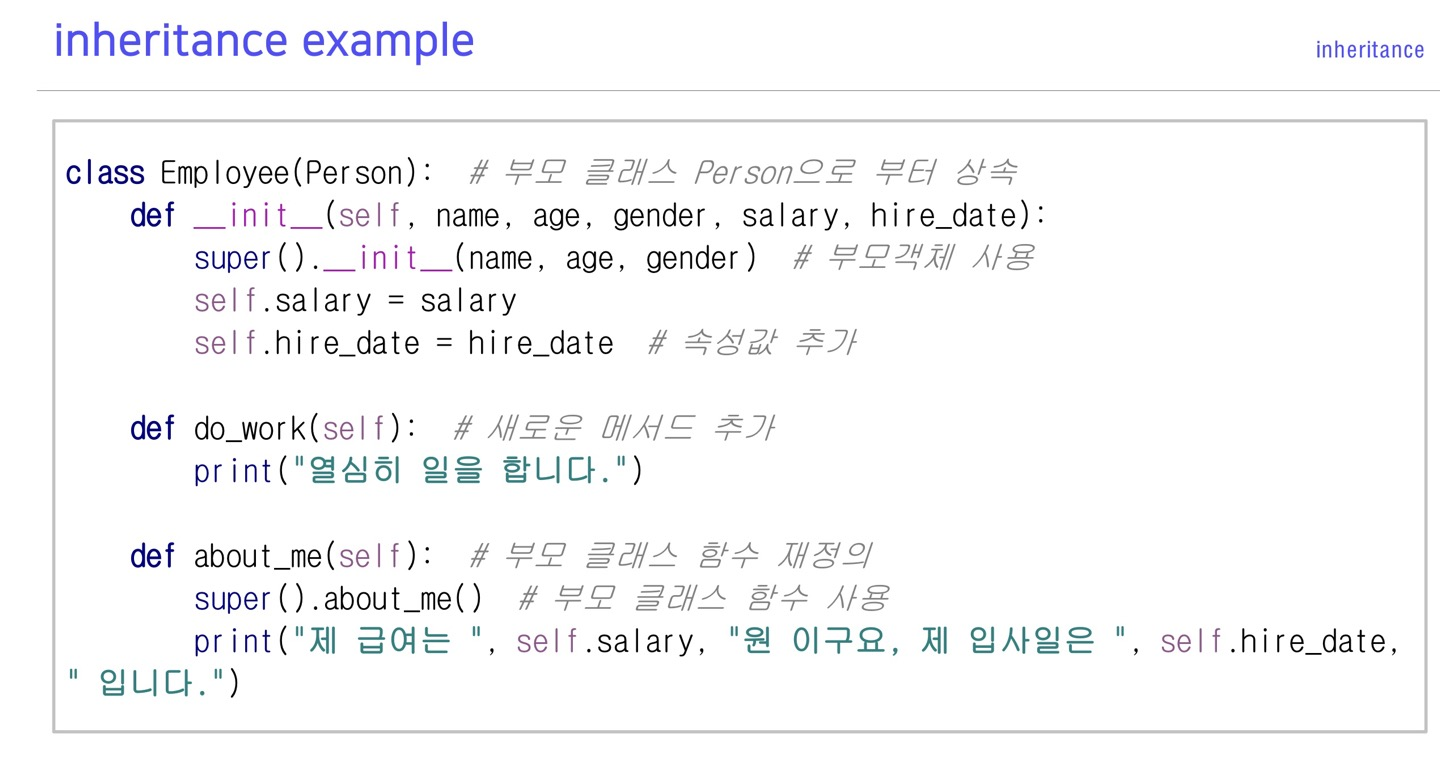
부모객체의 method를 사용하고싶으면 super. 사용
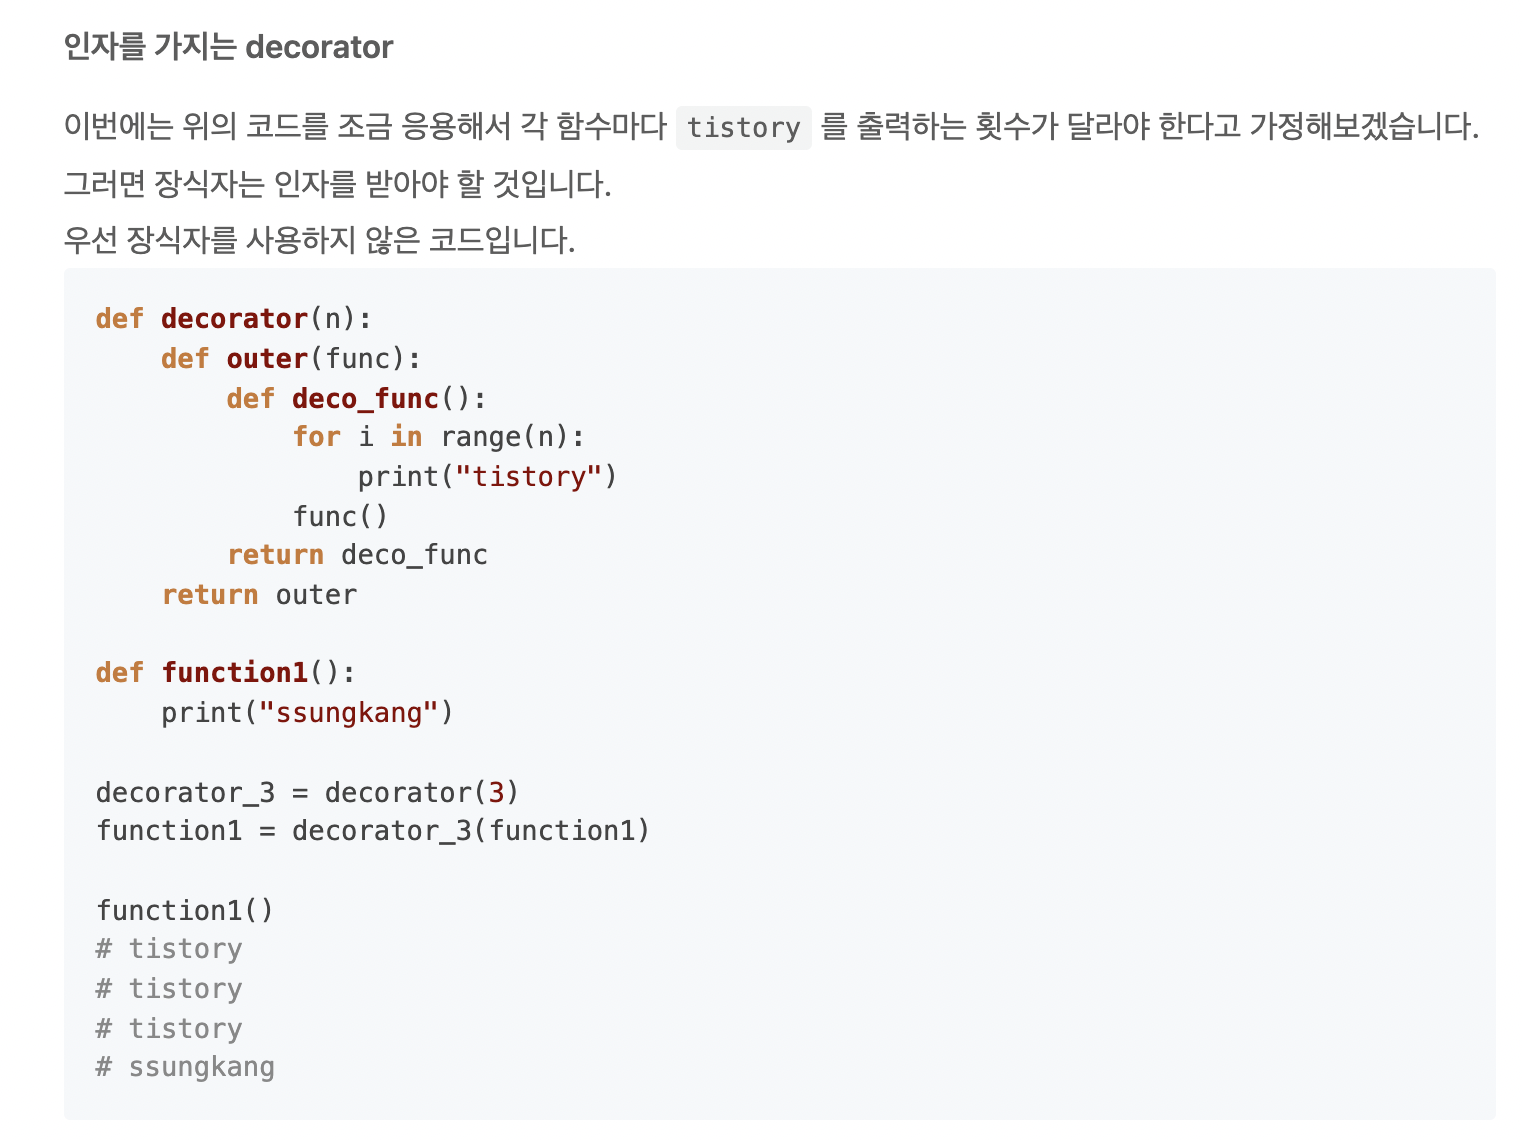
Decorate (장식자)
first-class object
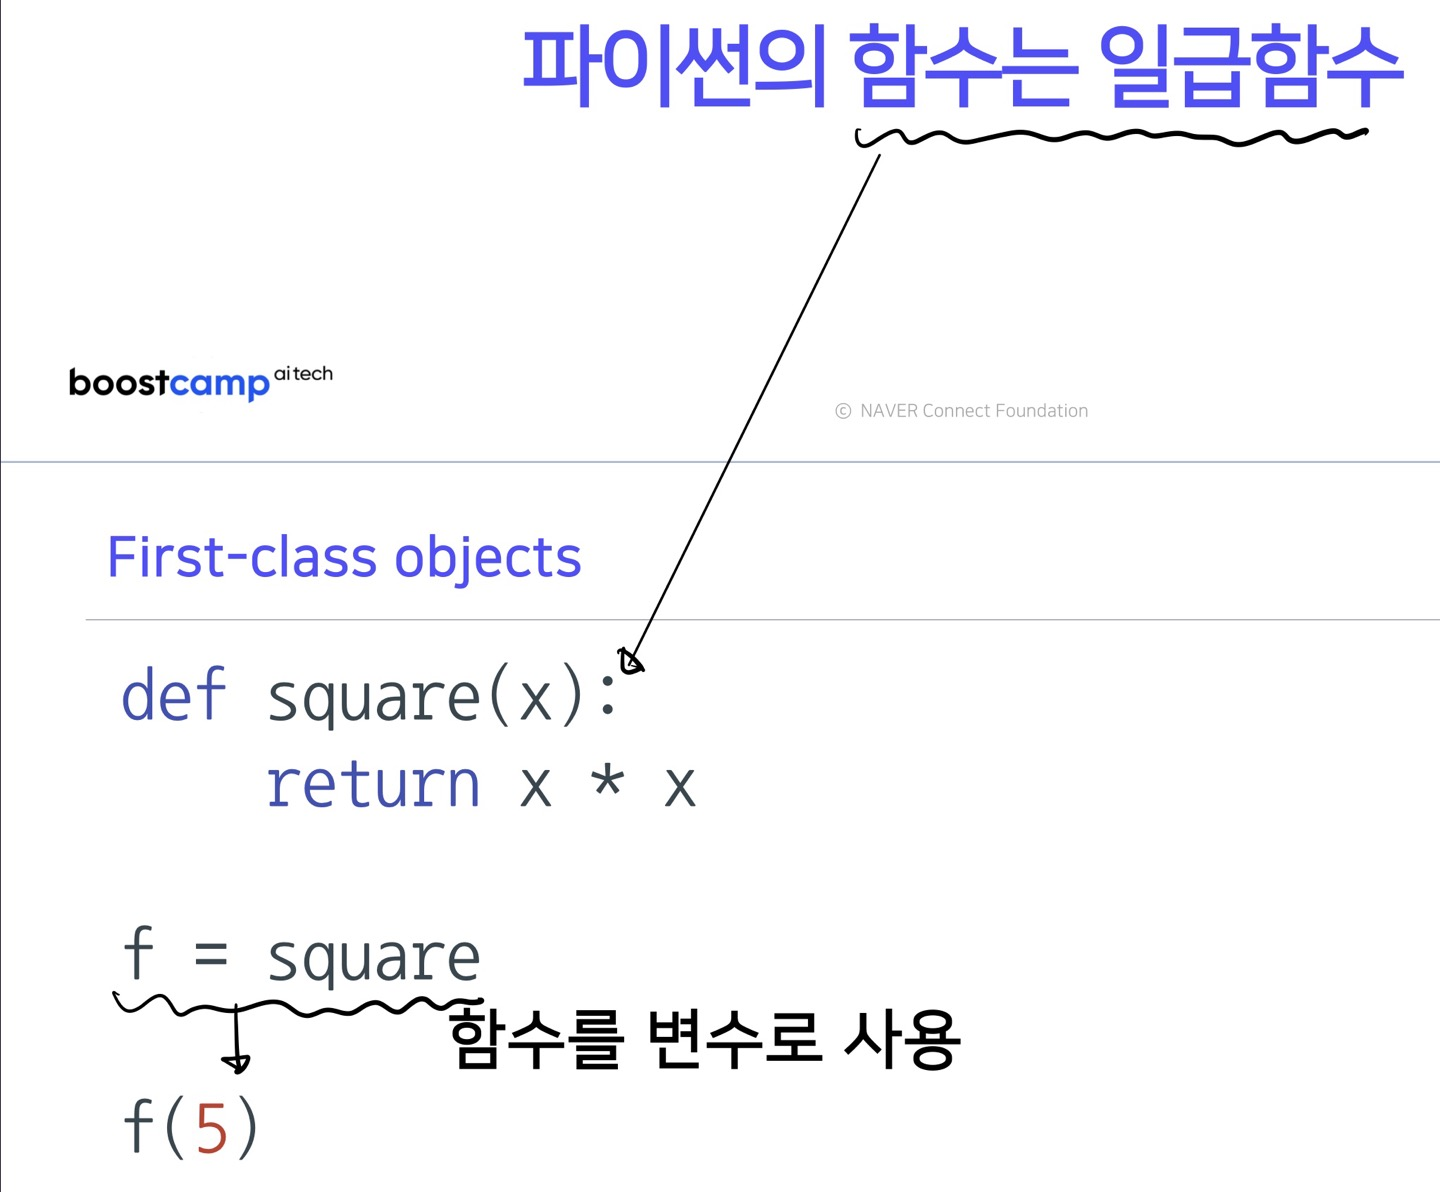
변수나 데이터에 할당이 가능한 객체, 피라미터로 사용하거나 리턴값으로 사용가능
closures
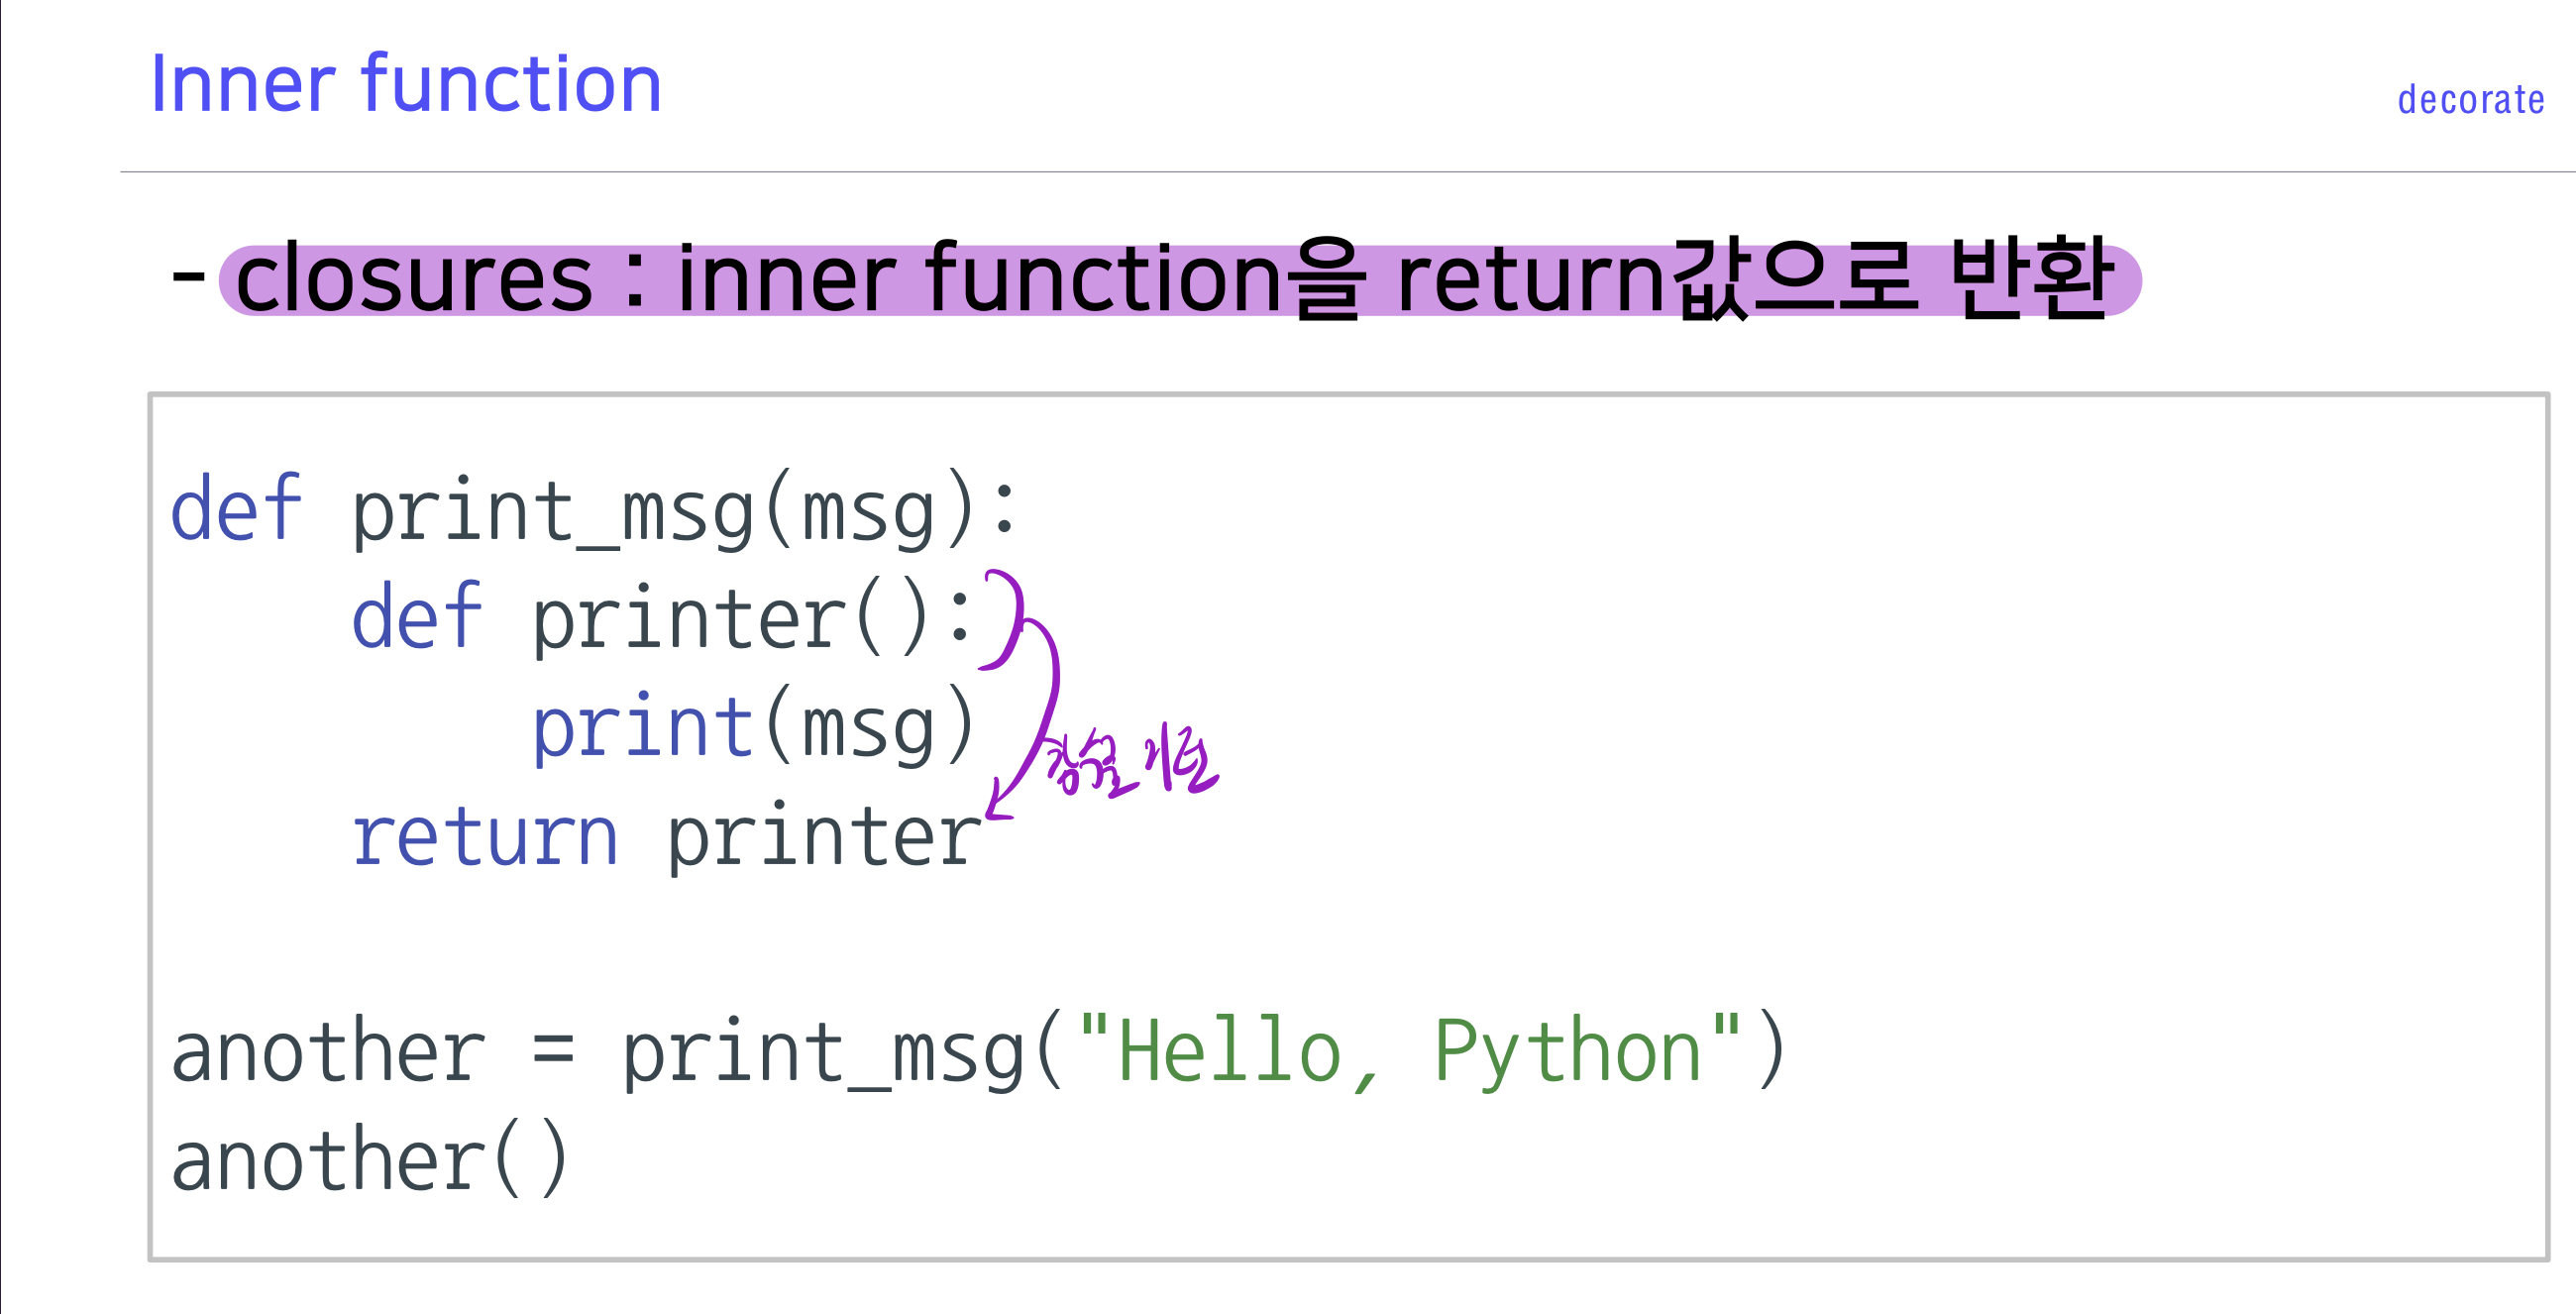
클로져 : 내부함수를 리턴 -> 내부함수는 외부함수의 피라미터를 사용할 수 있다.
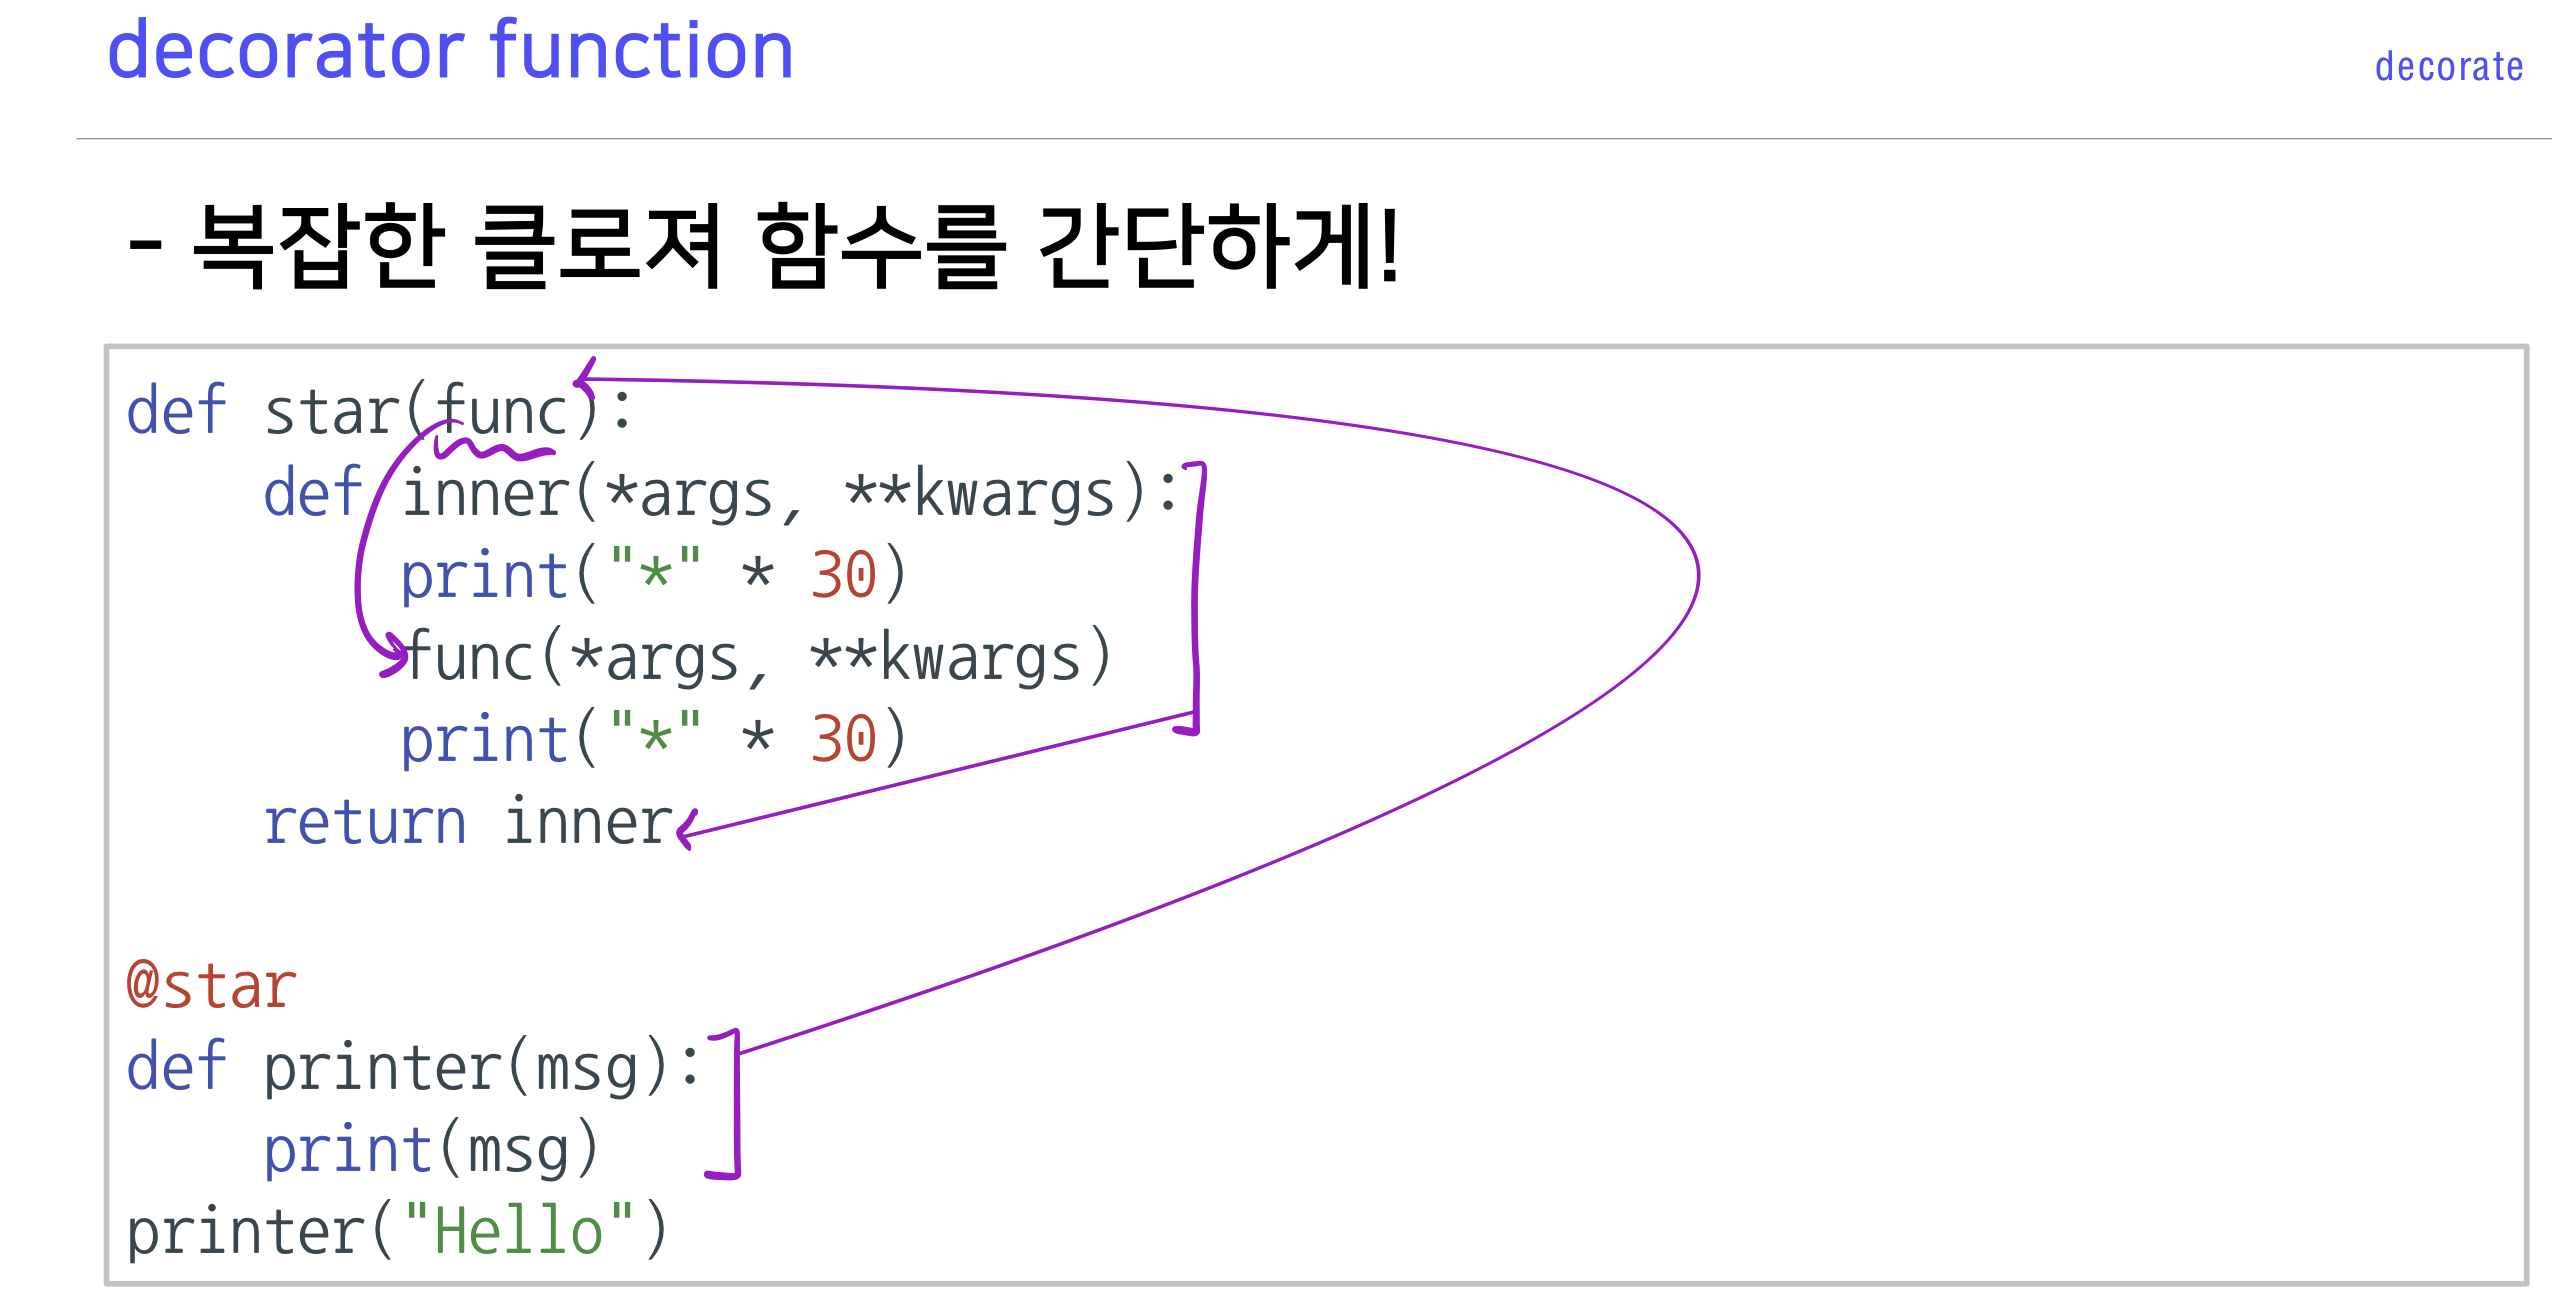
장식자는 @을 사용하여 함수 이름을 적으면 해당 함수에서 사용하고 있는 inner함수를 클로져를 사용하는것보다 쉽게 바꿀 수 있다.
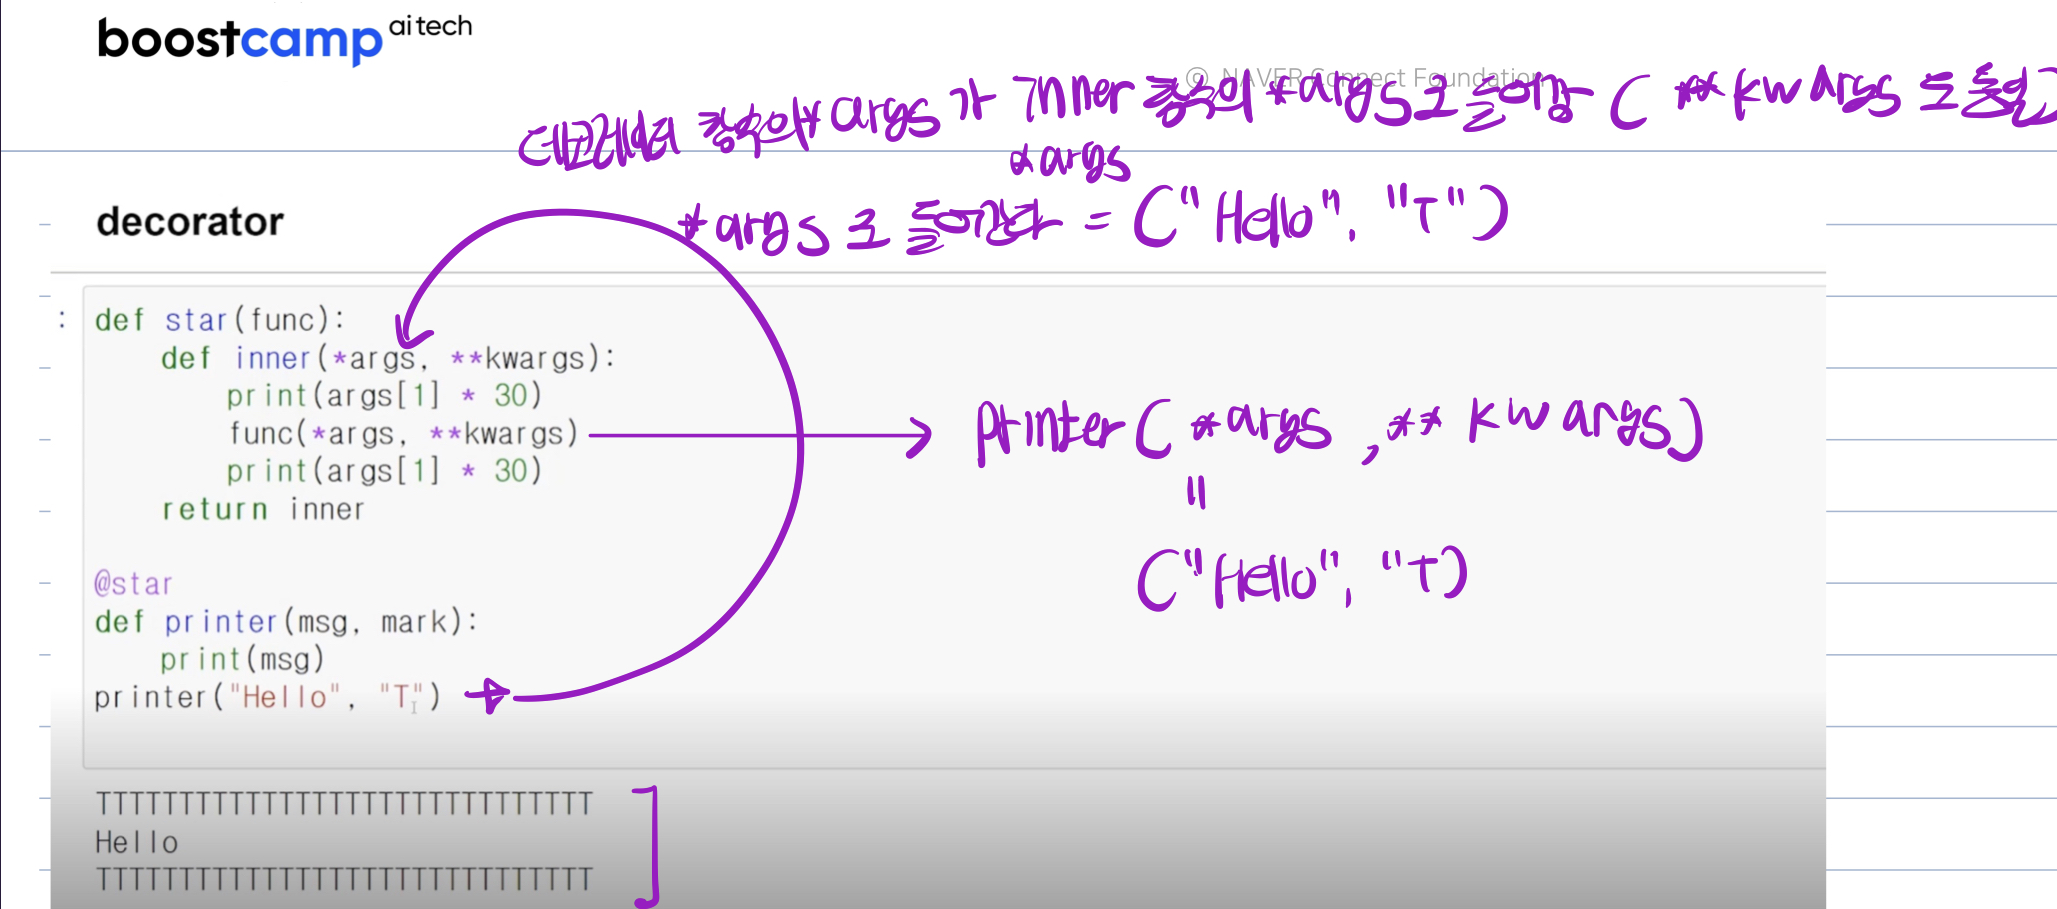
star 함수의 내부함수인 inner 안쪽에 사용되는 func를 장식자를 사용하여 쉽게 변경하는 부분이다. asterisk를 사용해 피라미터를 전달하였다.
장식자가 적용된 함수를 사용하면 장식자가 적용된 함수가 실행된다.
>>> def star(func):
...     def inner(*args):
...             print(args[1]*30)
...             func(*args)
...             print(args[1]*30)
...     return inner
...
#star에 장식자 적용->star는 func이라는 함수를 inner에서 사용중인데
#이것을 장식자를 사용해 쉽게 수정이 가능하다.
>>> @star
... def testfunc(arg0,arg1):
...     print(arg0)
...
>>>
#장식자를 적용한 함수(testfunc)를 사용하면 장식자가 적용된 함수(star)부터 실행된다.
>>> testfunc('hello','*')
******************************
hello
******************************
>>>
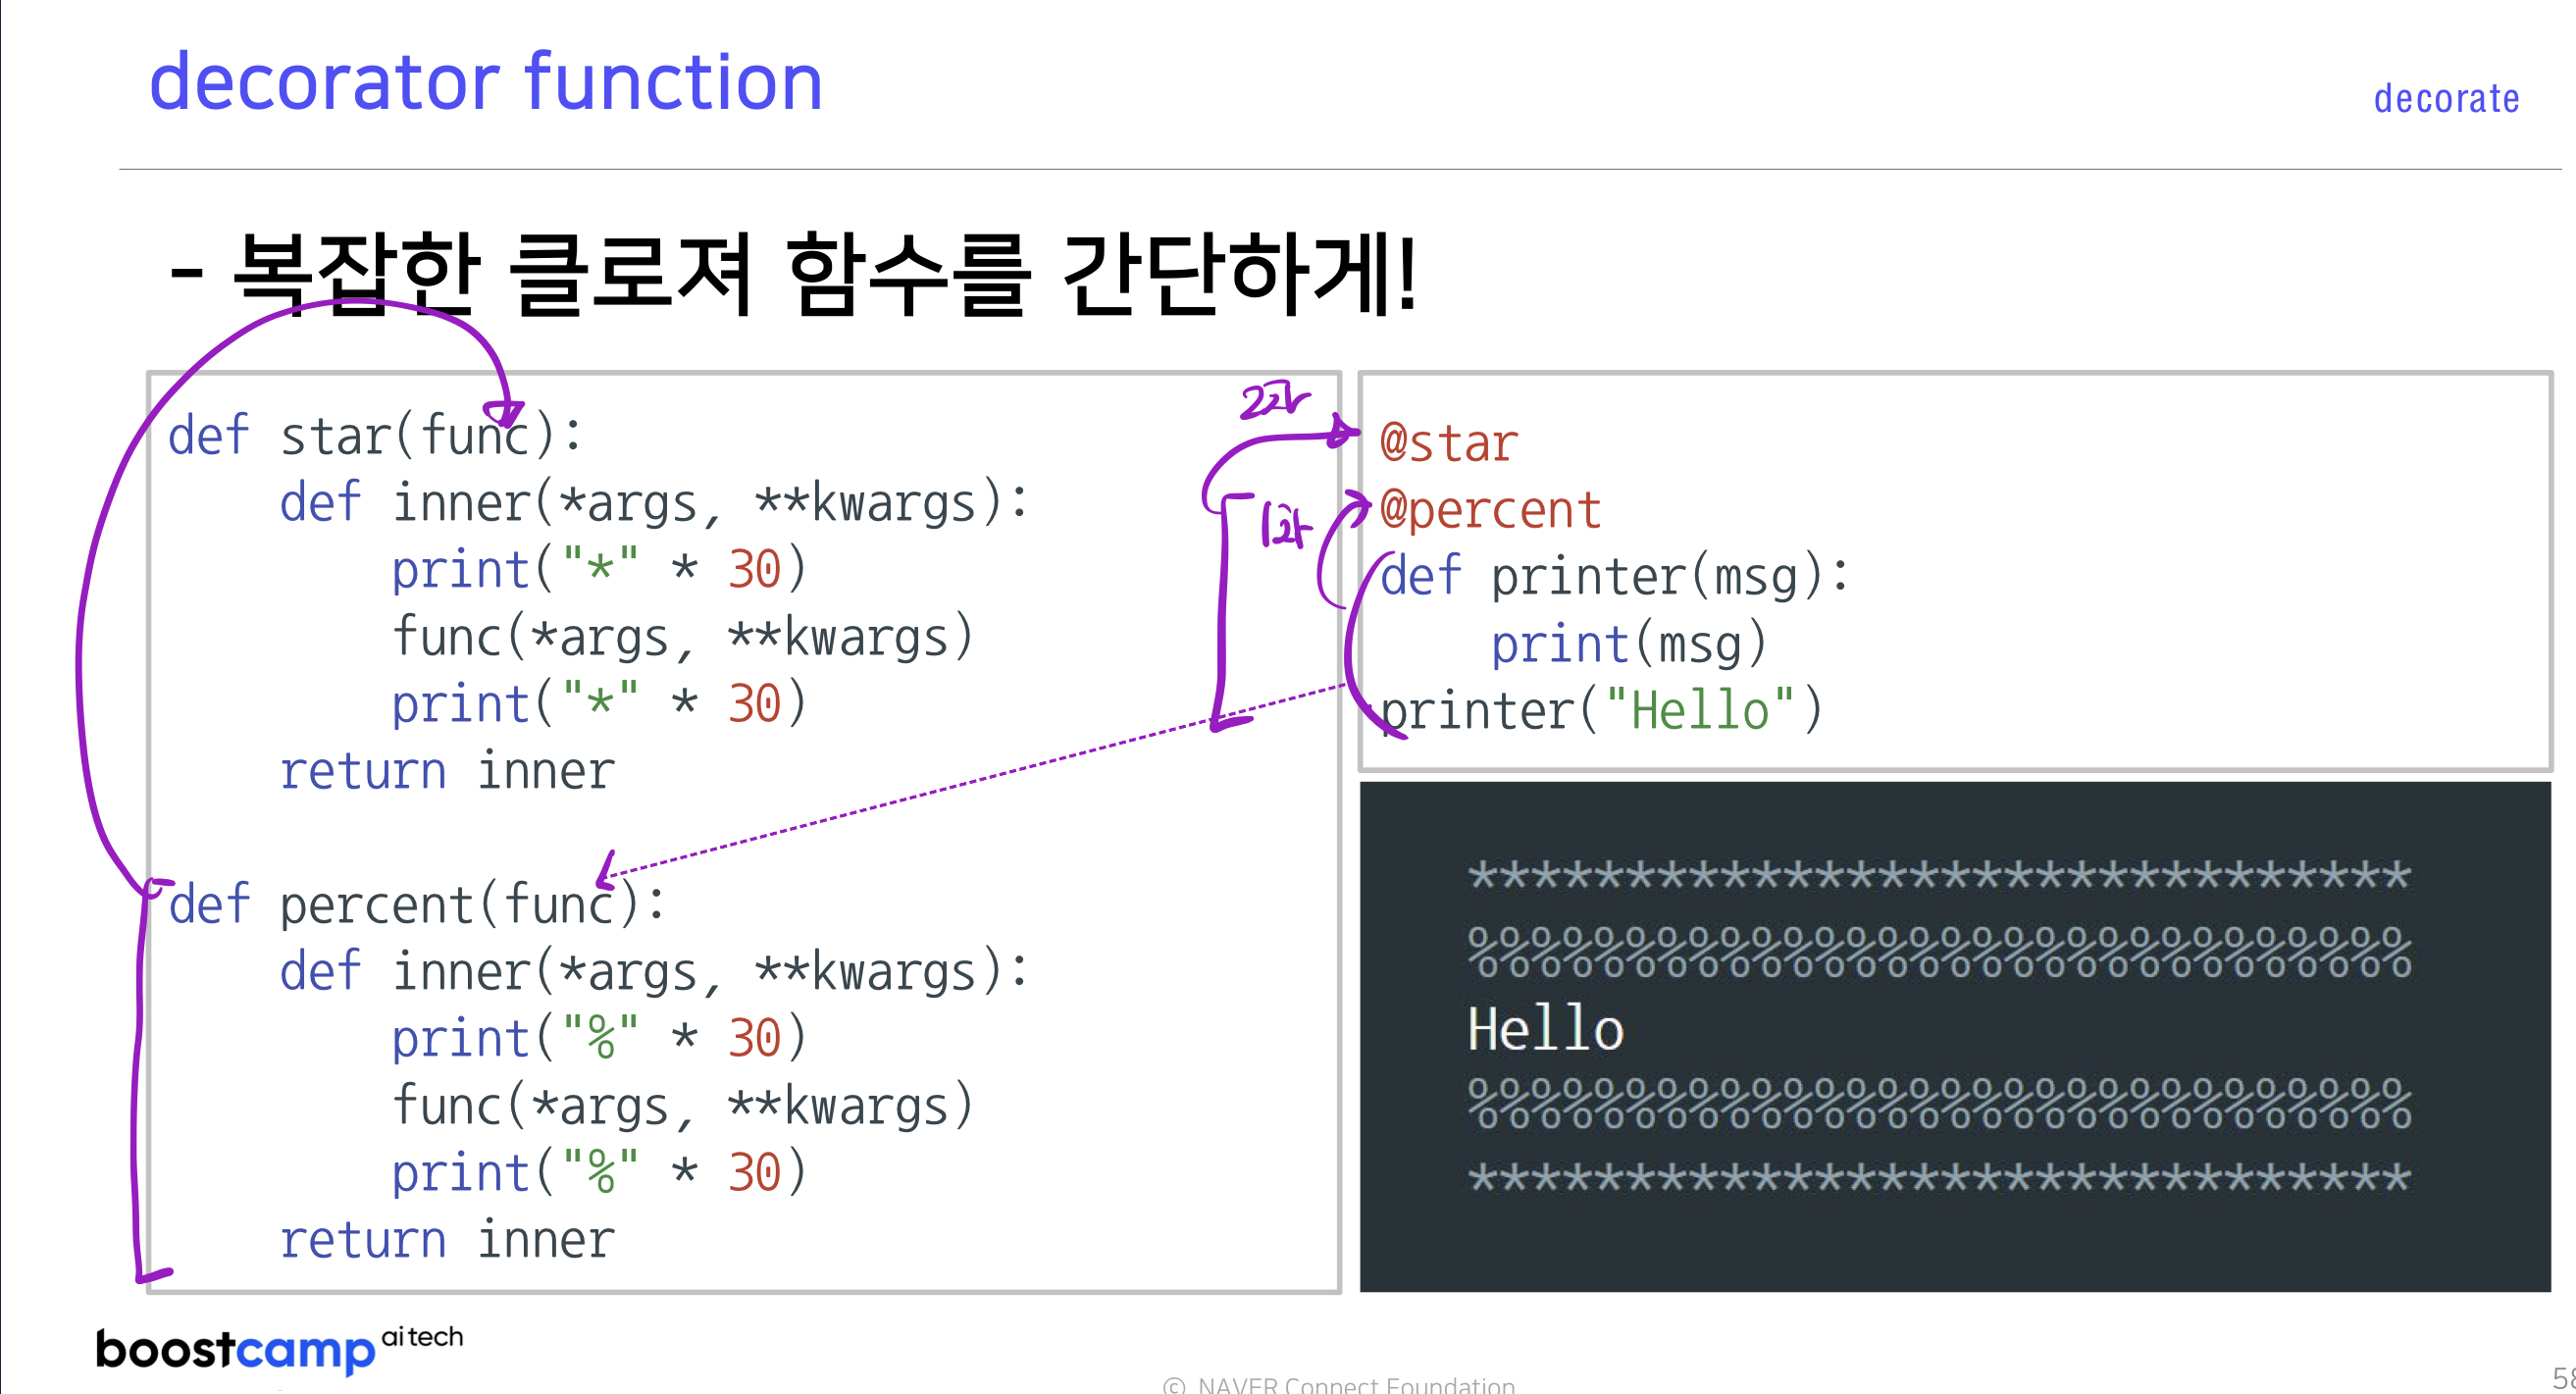
장식자를 사용한 함수를 다시 장식자에 사용할 수 있다.
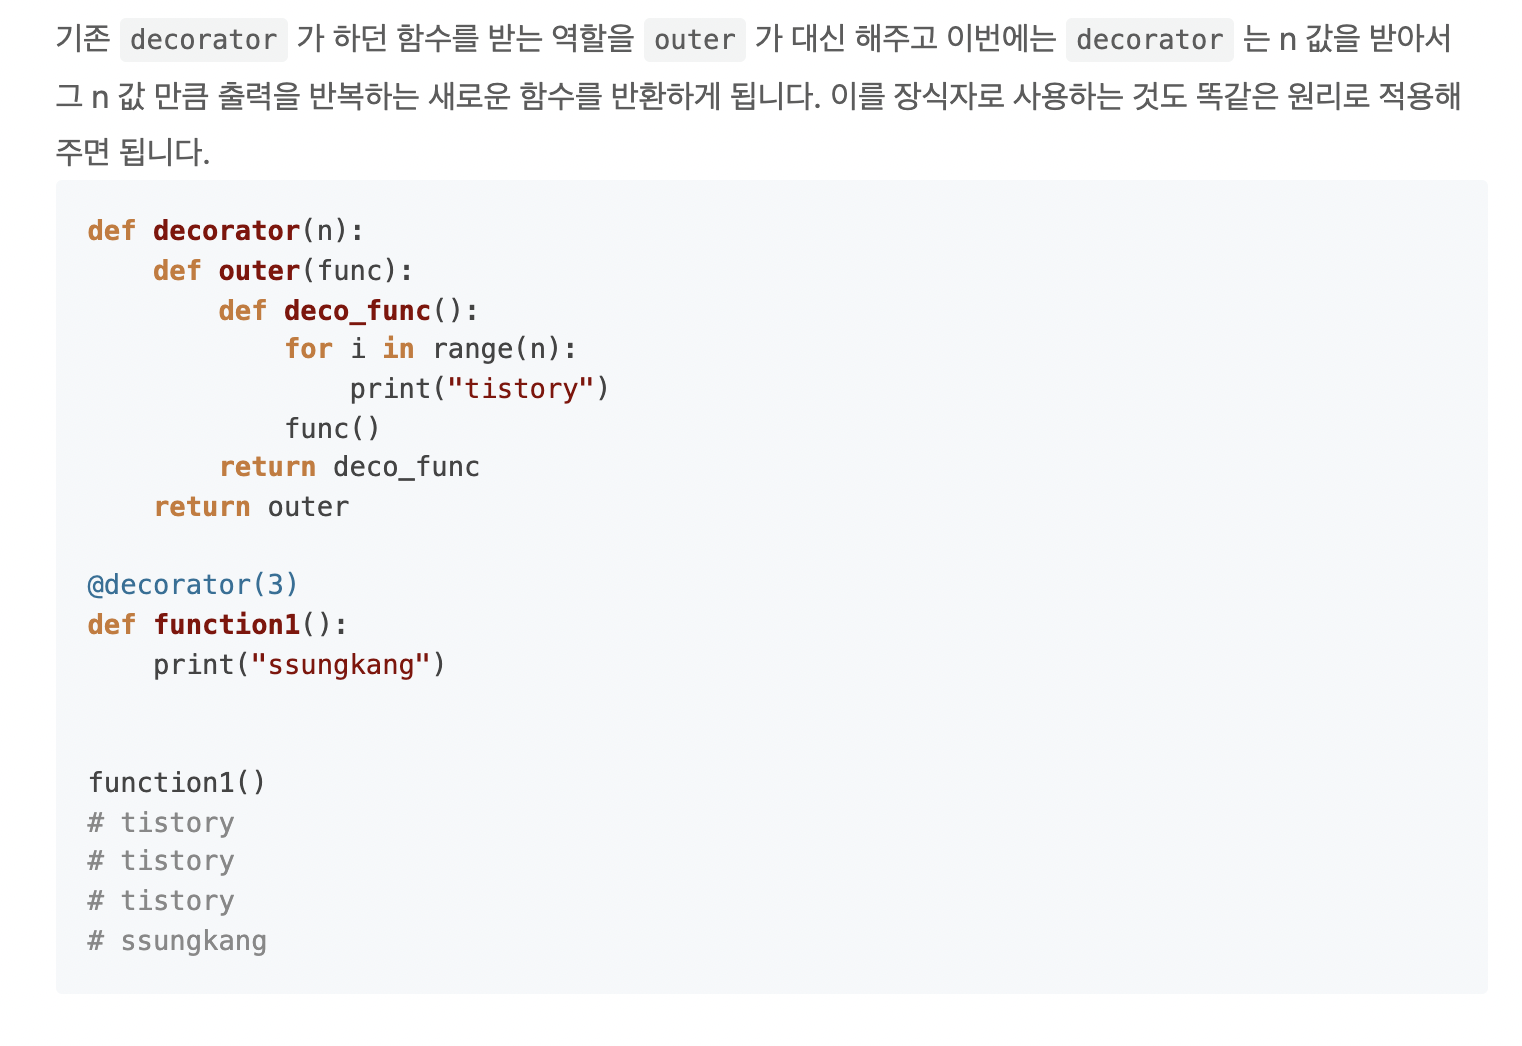
즉 장식자는 어떤 함수(outer)가 매개변수로 함수를 사용할 경우(클로저)
내부에서 작동하는 함수(클로저)를 보기 편하게 바꿔주는 역활을 한다.
Exception/File/Log Handling
Exception Handing
raise 구문
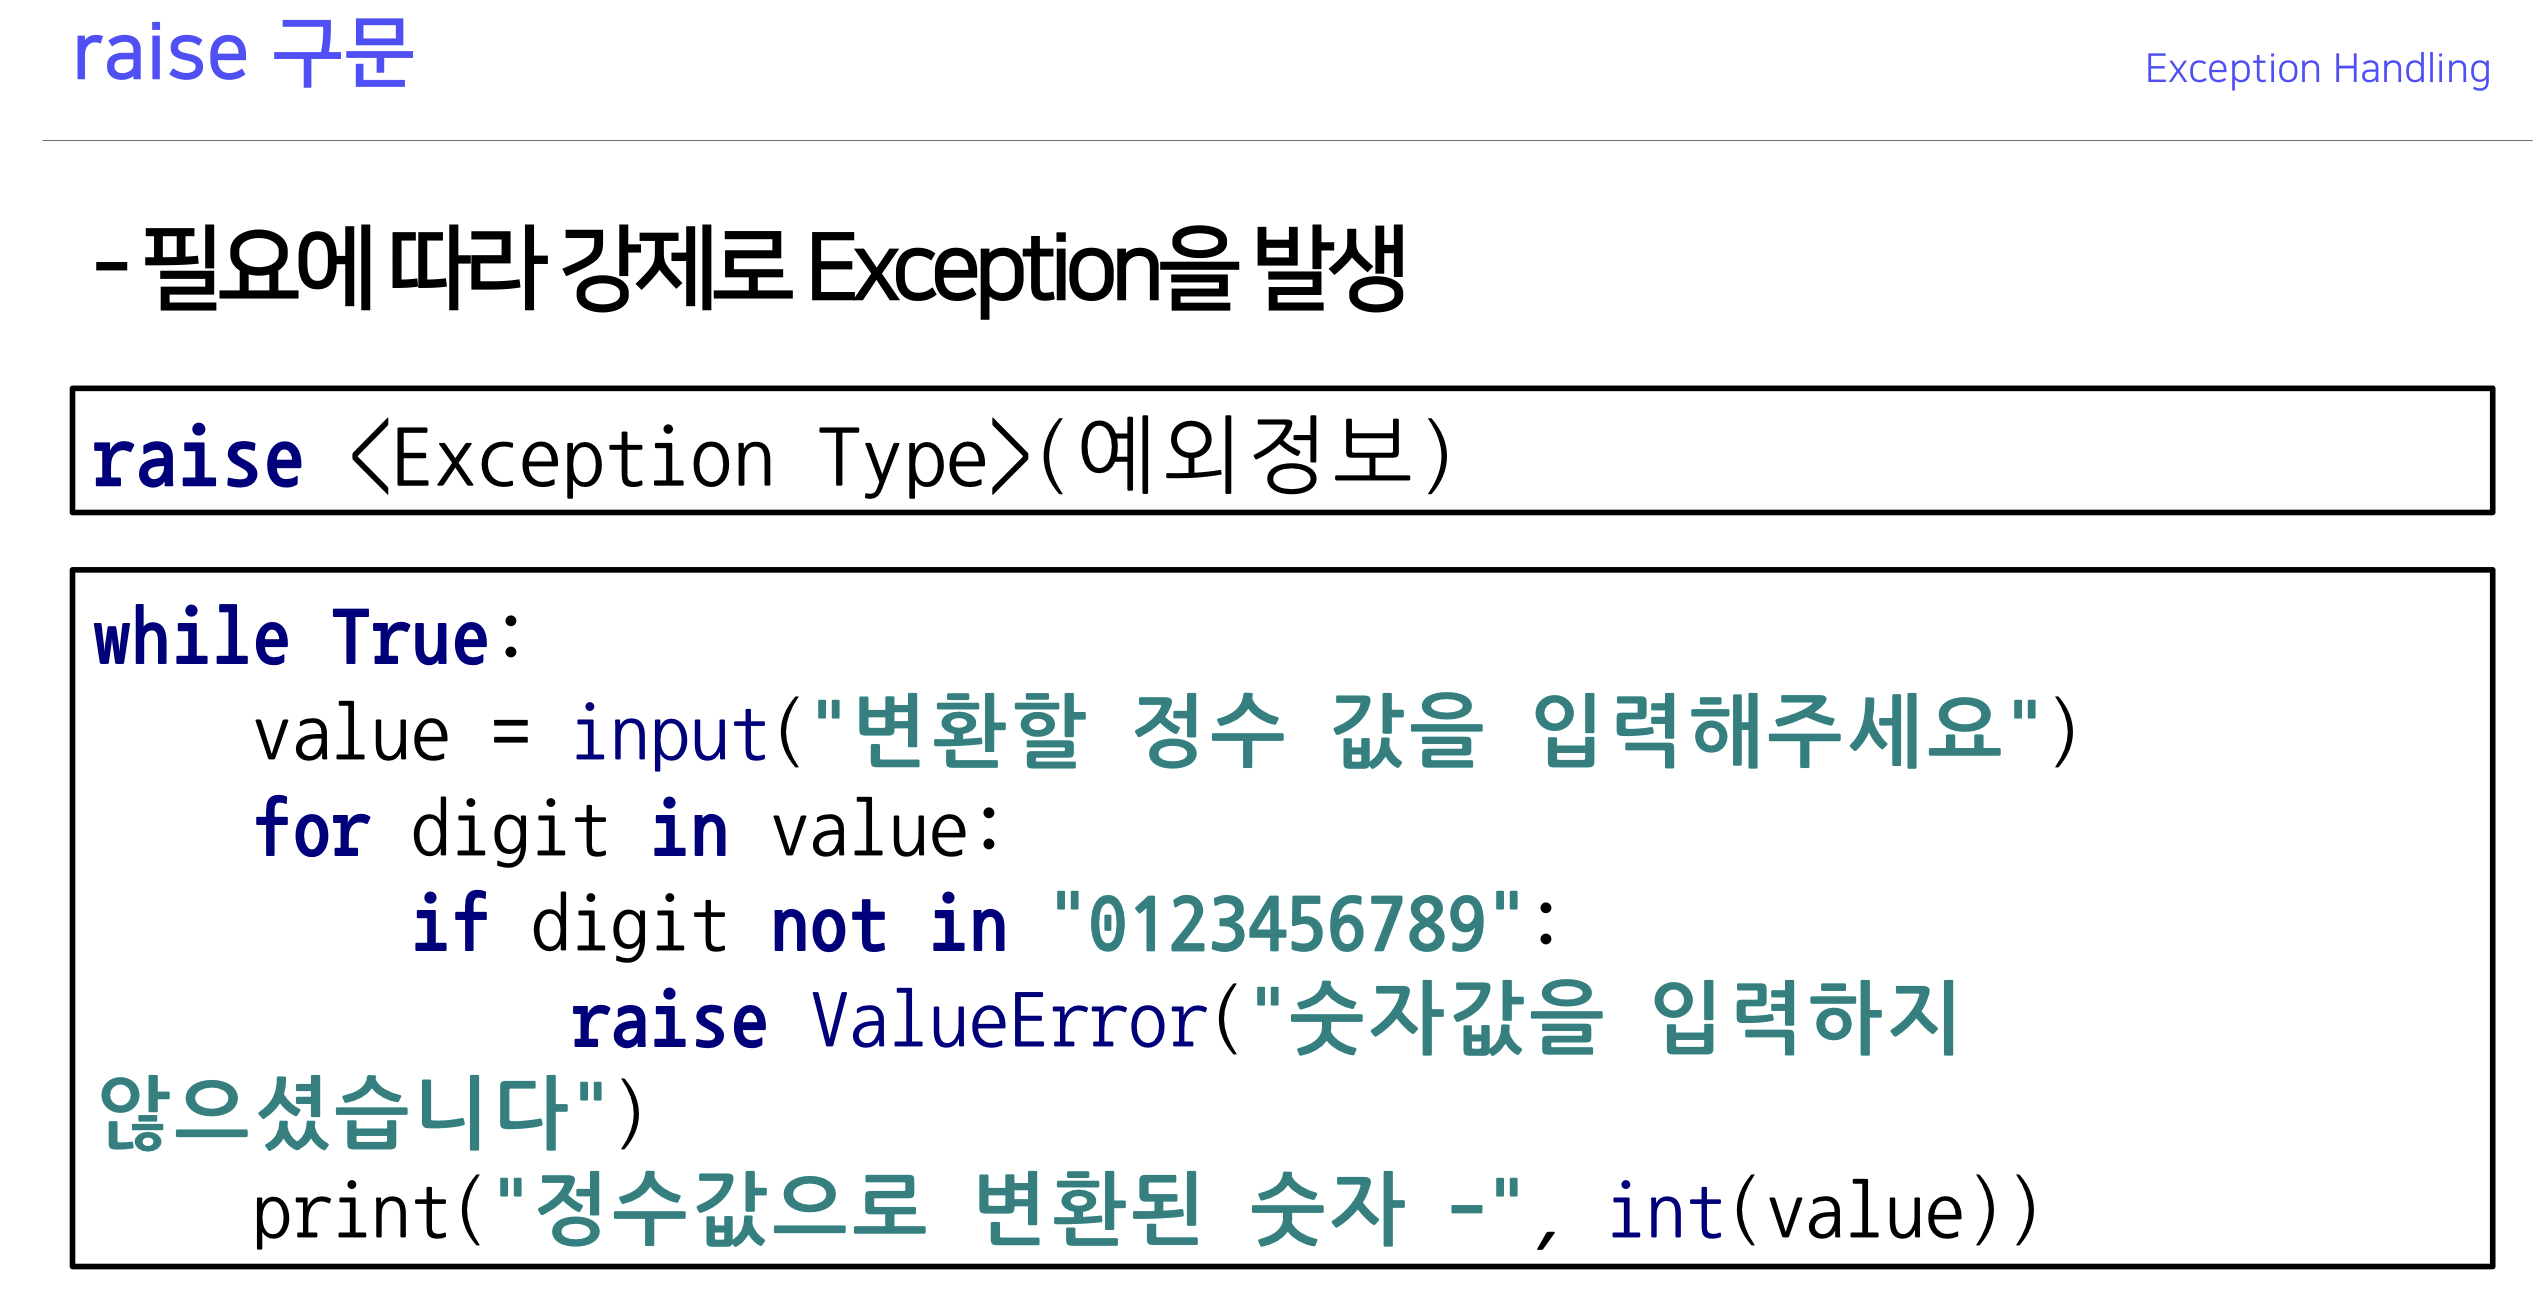
>>> for i in range(10):
...     if i==7:
...             raise ValueError("make error by raise")
...     print(i)
...
0
1
2
3
4
5
6
Traceback (most recent call last):
  File "<stdin>", line 3, in <module>
ValueError: make error by raise
>>>
필요에 따라 만들 수 있는 예외
assert 구문
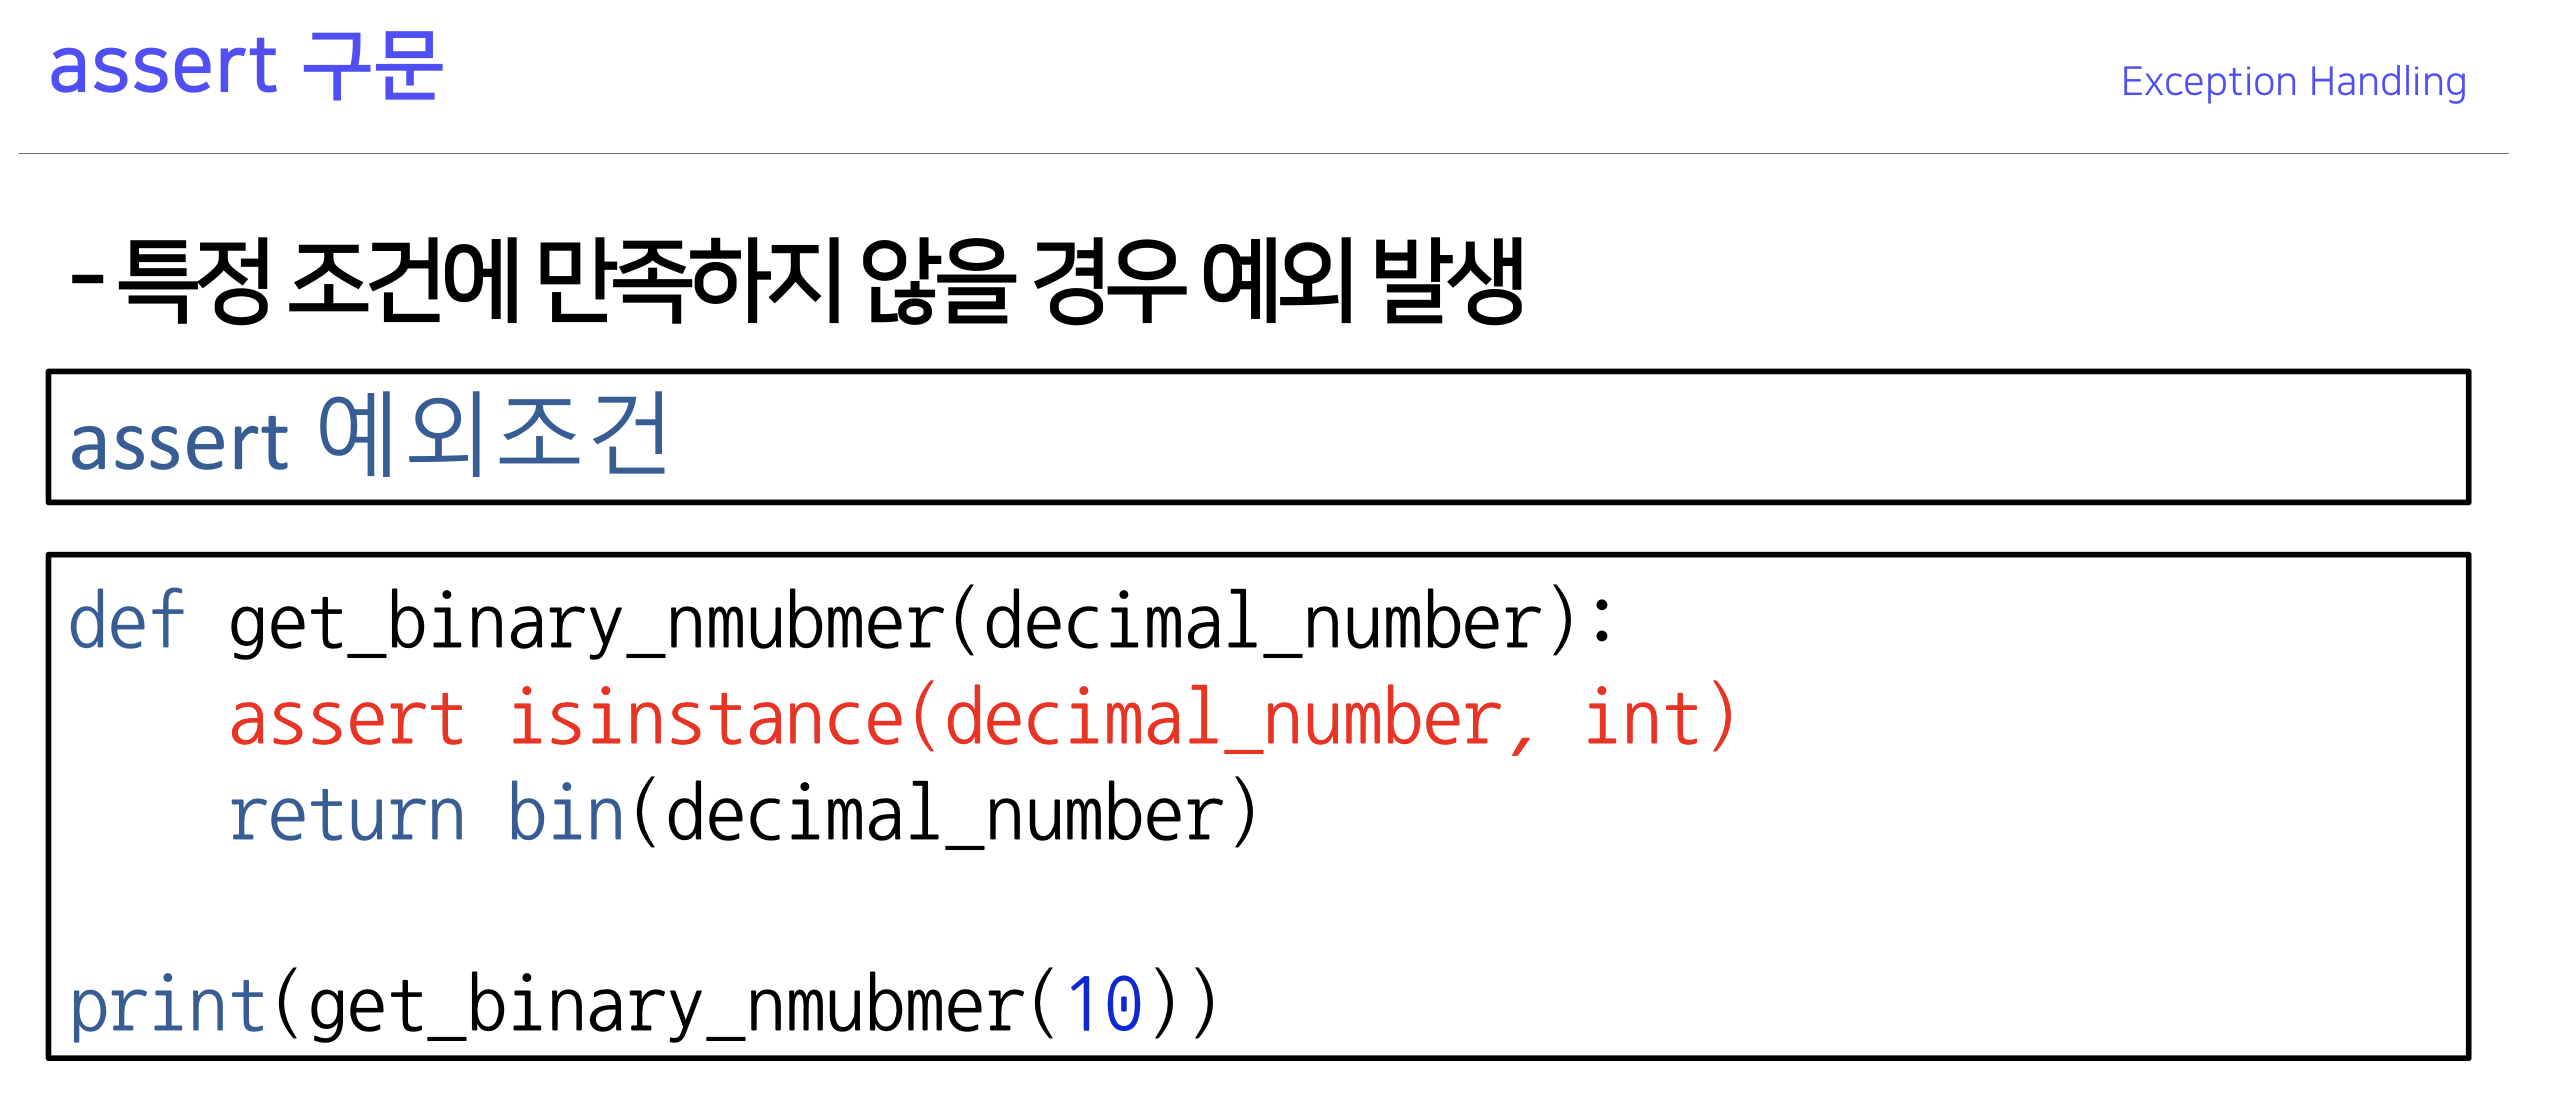
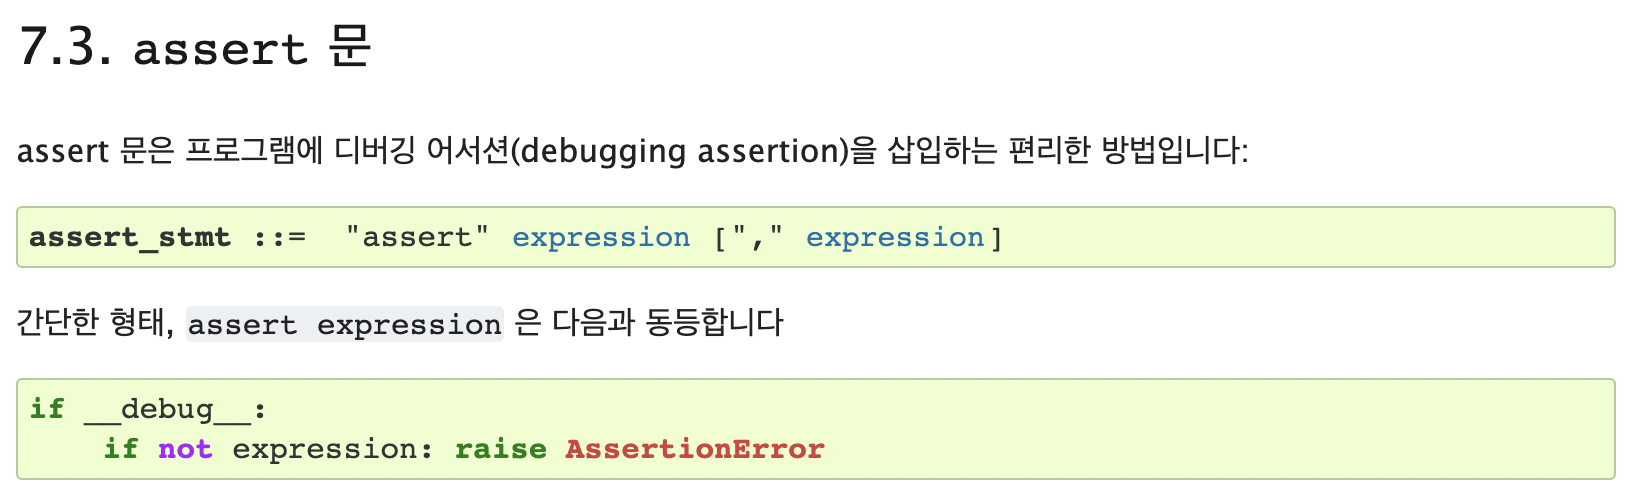
>>> for i in range(10):
...     assert (i!=7)
...     print(i)
...
0
1
2
3
4
5
6
Traceback (most recent call last):
  File "<stdin>", line 2, in <module>
AssertionError
>>>
조건문(expression)이 거짓일때 예외를 발생시킨다.
File Handling
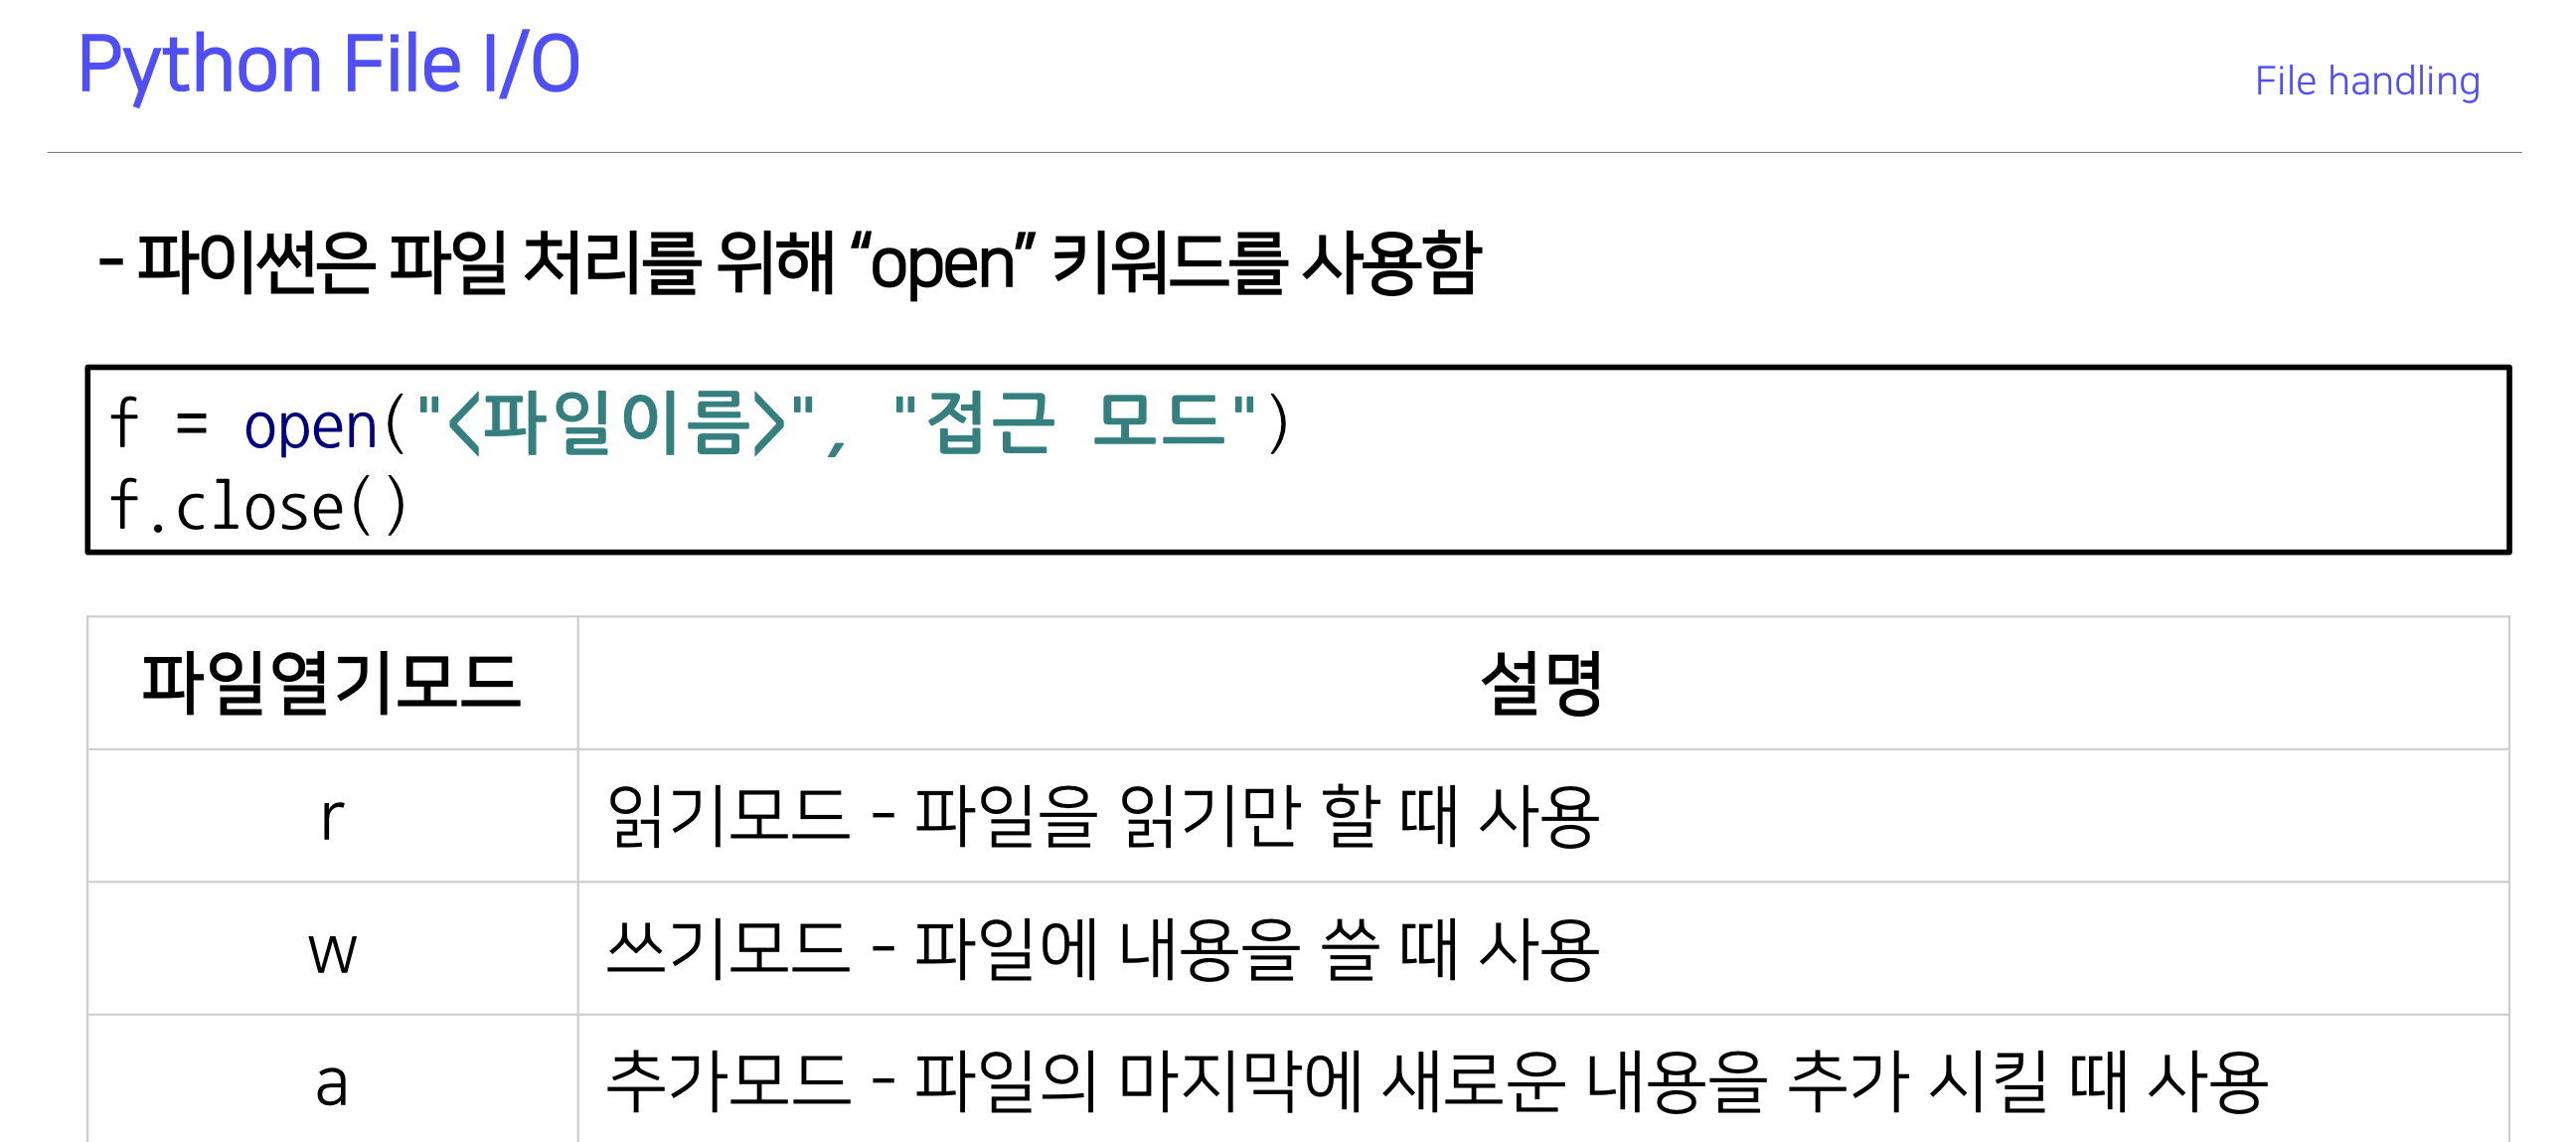
open 은 with 구문과 함깨 사용시 알아서 close까지 해주므로 편함
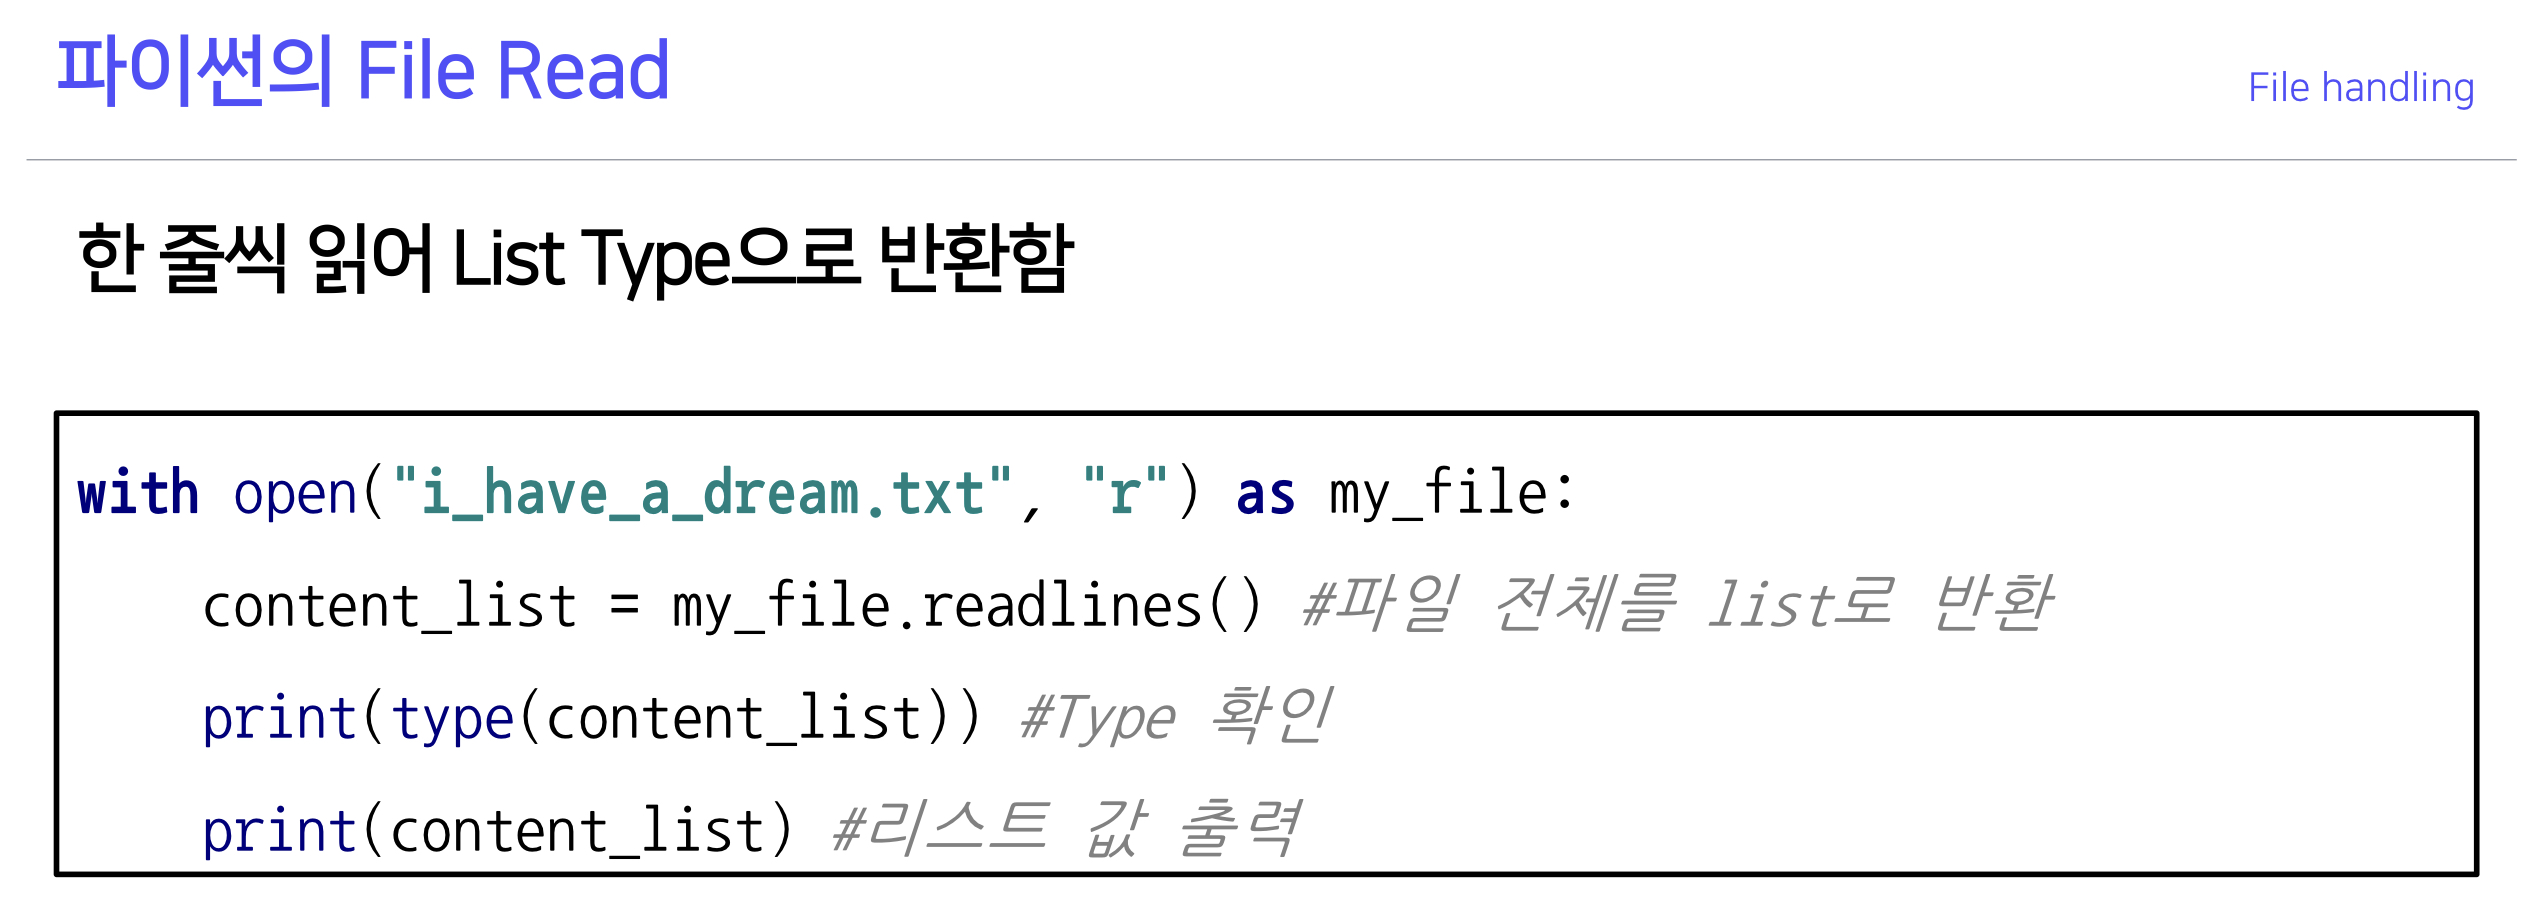
보통 readline으로 파일을 읽어서 처리
readlines는 파일 전체를 리스트로 만들어서 리턴
os 모듈로 디렉토리를 핸들링할 수 있다.
import os
#디렉토리 생성
os.mkdir('log')
#디렉토리 확인
if not os.path.isdir('log'):
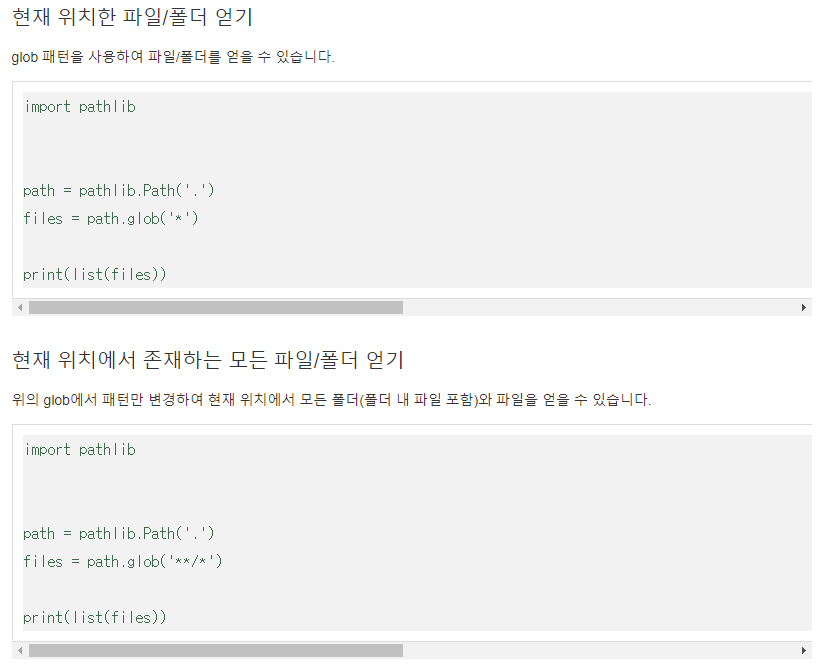
passpathlib
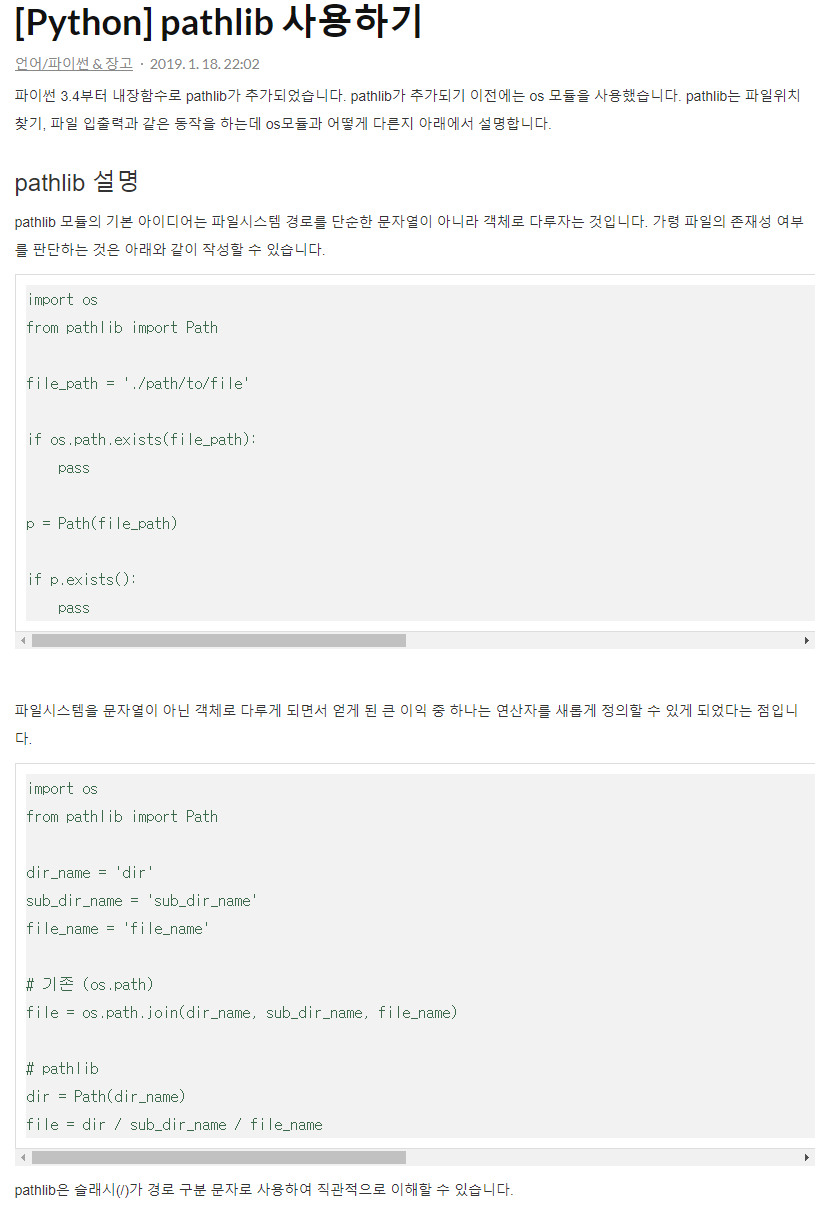
path를 객체처럼 다룰 수 있음
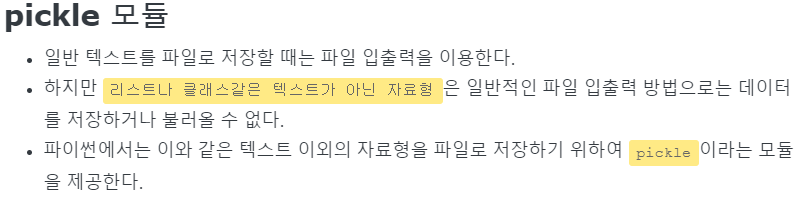
pickle
# 파일에 텍스트 입력하기
>>>text = "hello world"

>>> with open('hello.txt', 'w') as f:
        f.write(text)

>>> cat hello.txt
hello world

# 파일에 리스트 입력하기  > TypeError 발생
>>> list = ['a', 'b', 'c']
>>> with open('list.txt', 'w') as f:
...     f.write(list)
...
Traceback (most recent call last):
  File "<stdin>", line 2, in <module>
TypeError: write() argument must be str, not list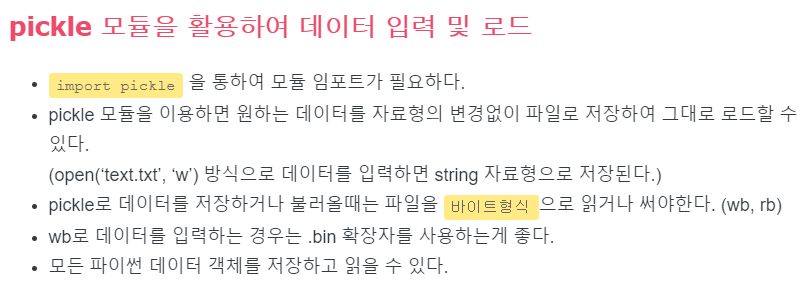
피클을 사용하여 자료형을 자유롭게 저장할 수 있다.
#저장
>>> import pickle
>>> list = ['a', 'b', 'c']
>>> with open('list.txt', 'wb') as f:
...     pickle.dump(list, f)
피클은 한줄씩 데이터를 읽어오고 읽을 테이터가 없으면 EOF를 발생시킨다.
#로드
>>> with open('list.txt', 'rb') as f:
...     data = pickle.load(f) # 단 한줄씩 읽어옴

>>> data
['a', 'b', 'c']
Logging Handling
logging 모듈
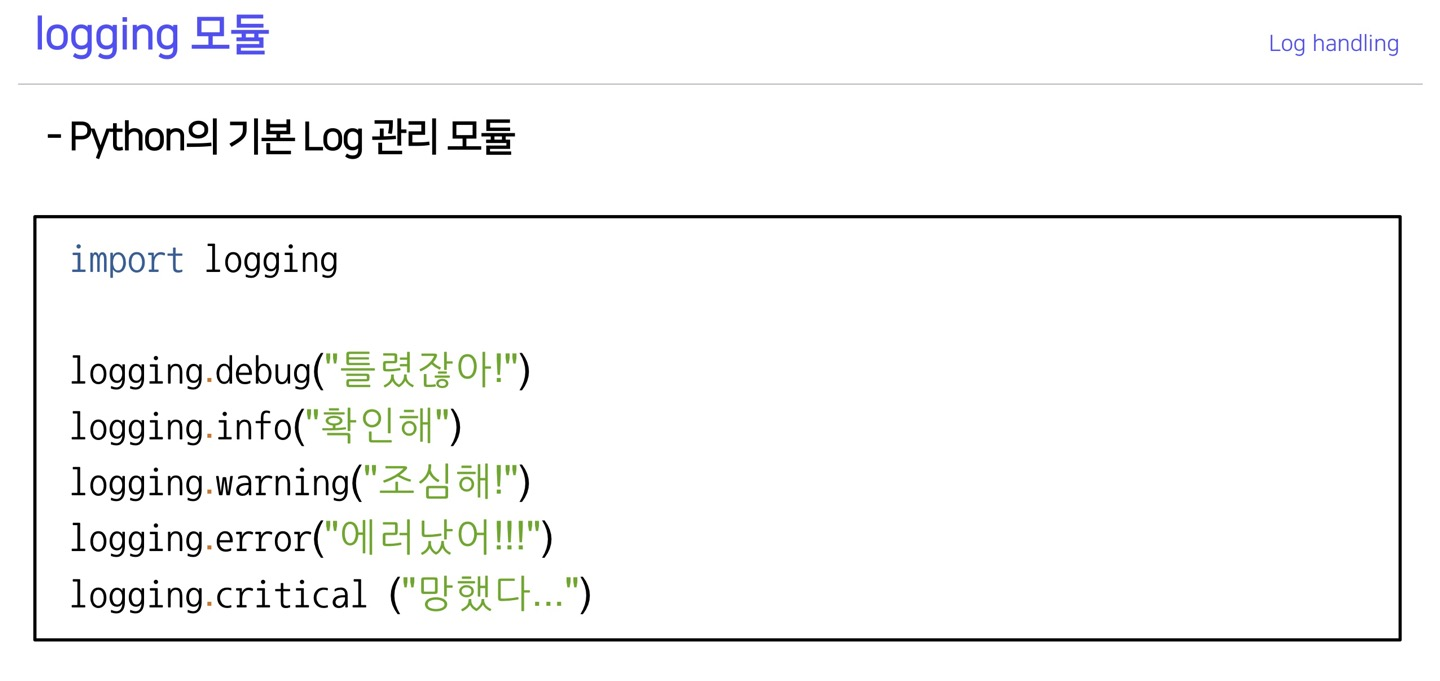
다양한 레벨의 log를 지원함
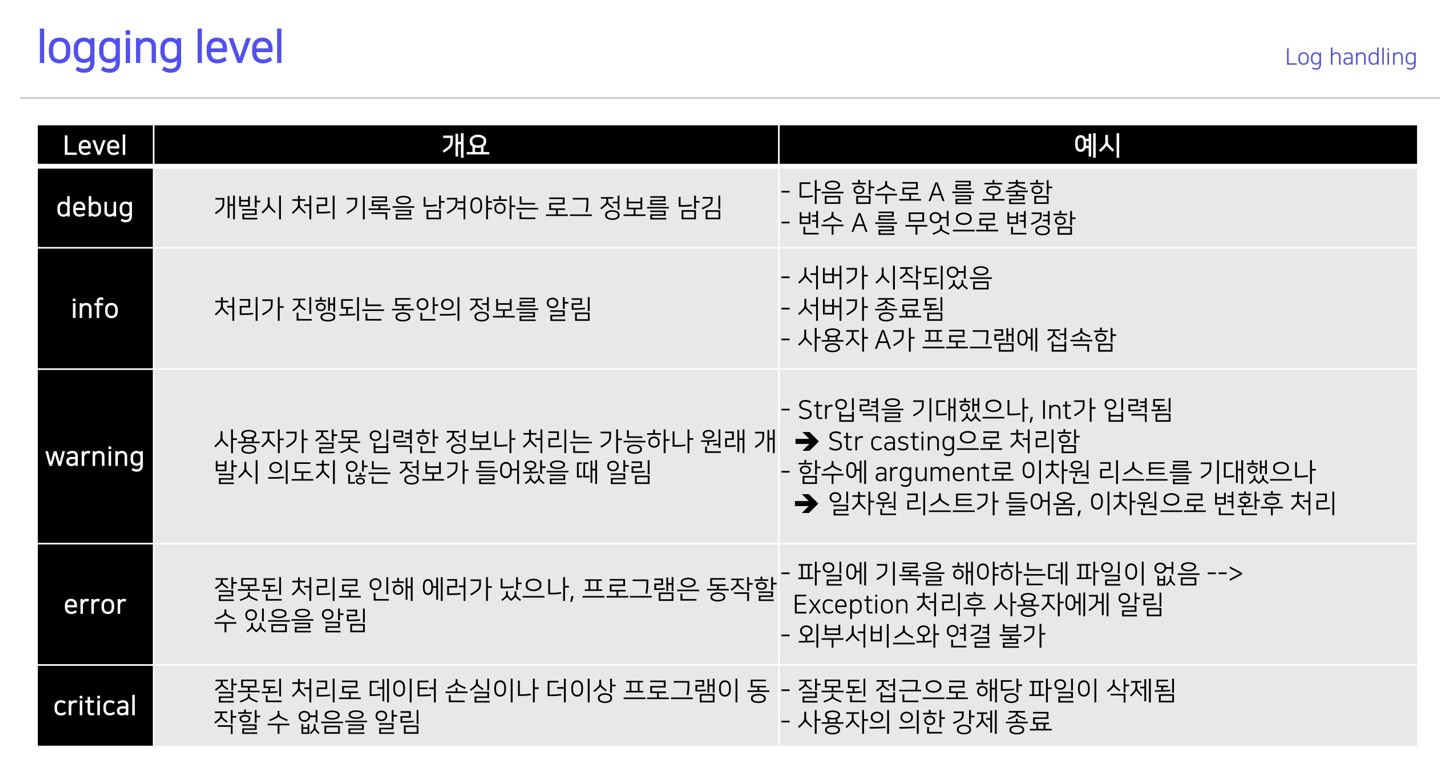
DEBUG>INFO>WARNING>ERROR>CRITICAL
로그 관련 추가적으로 정리할것 링크
https://hwangheek.github.io/2019/python-logging/
configparse
프로그램의 실행 설정을 파일로 저장(cfg,ini)
dict 형태로 호출
# config_file_create.py
from configparser import ConfigParser
config = ConfigParser()
config['settings'] = {
    'debug': 'true',
    'secret_key': 'abc123',
    'log_path': '/my_app/log'
}

config['db'] = {
    'db_name': 'myapp_dev',
    'db_host': 'localhost',
    'db_port': '8889'
}

config['files'] = {
    'use_cdn': 'false',
    'images_path': '/my_app/images'
}
with open('./dev.ini', 'w') as f:
      config.write(f)

"""
# dev.ini
[settings]
debug = true
secret_key = abc123
log_path = /my_app/log

[db]
db_name = myapp_dev
db_host = localhost
db_port = 8889

[files]
use_cdn = false
images_path = /my_app/images
"""
ini파일을 읽어오면
# config_file_read.py
from configparser import ConfigParser

parser = ConfigParser()
parser.read('dev.ini')
print(parser.sections())  # ['settings', 'db', 'files']
print(parser.get('settings', 'secret_key'))  # abc123
print(parser.options('settings'))  # ['debug', 'secret_key', 'log_path']
print('db' in parser)  # True
print(parser.get('db', 'db_port'), type(parser.get('db', 'db_port')))  # 8889 <class 'str'>
print(int(parser.get('db', 'db_port')))  # 8889 (as int)
print(parser.getint('db', 'db_default_port', fallback=3306))  # 3306
print(parser.getboolean('settings', 'debug', fallback=False))  # True
argparser
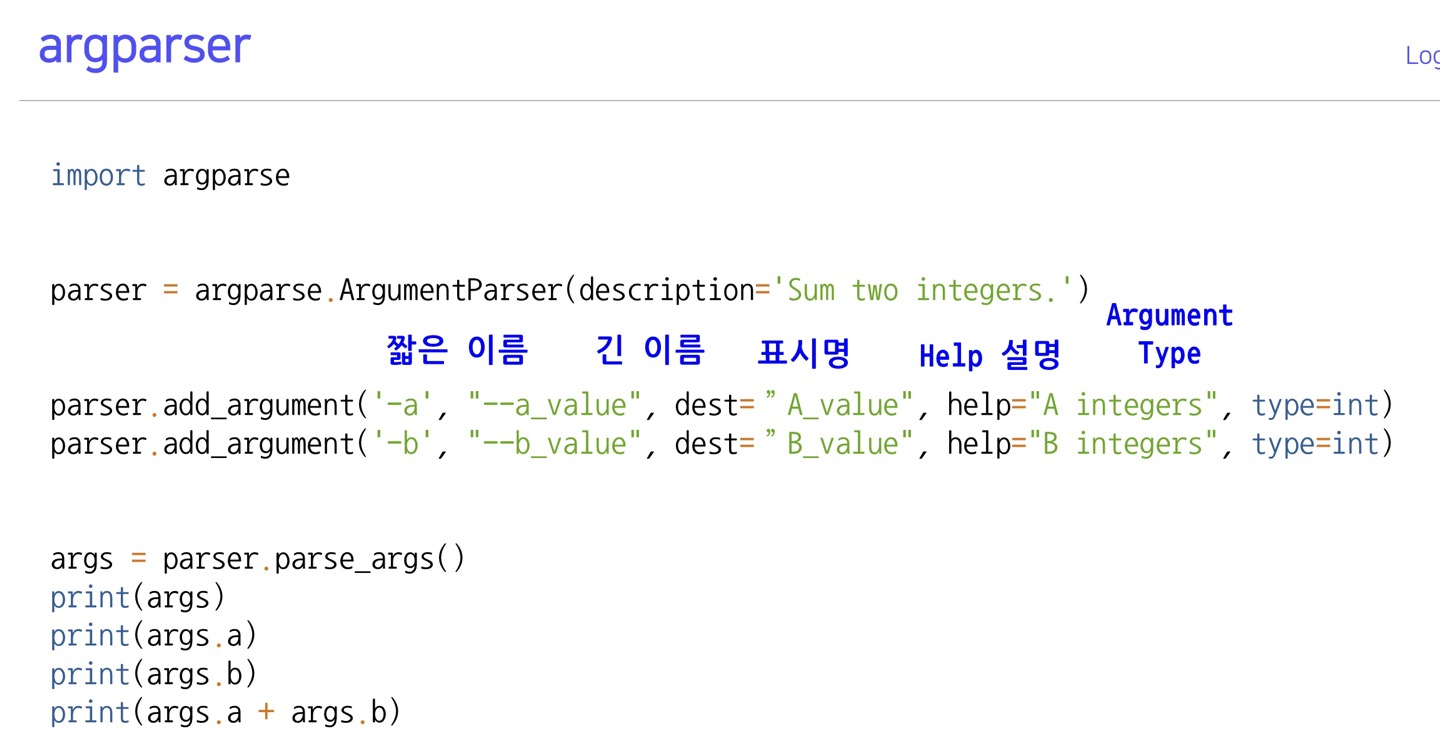
콘솔창에서 프로그램의 setting값을 설정