이번 KMP 프로젝트에는 Ktor를 이용한 서버 호출을 하는 방법을 알아보자.
Ktor란?
Ktor는 JetBrains가 개발한 코루틴 기반의 Kotlin 네트워크 프레임워크로, 클라이언트와 서버 애플리케이션을 모두 작성할 수 있도록 지원하는 비동기·멀티플랫폼 라이브러리다.
안드로이드에서는 주로 Retrofit과 비슷하게 네트워크 서버 호출을 할 때 사용했던 기억이 있다.
KMP Ktor 적용하기
먼저 해당 코드는 유튜브 영상을 참조하여 기본적인 기능을 배웠습니다.
1. 라이브러리 추가하기
Ktor 관련 라이브러리와 Serialization 의존성을 추가했다.
[versions]
ktor = "3.3.0"

[libraries]
ktor-client-core = { module = "io.ktor:ktor-client-core", version.ref = "ktor" }
ktor-client-okhttp = { module = "io.ktor:ktor-client-okhttp", version.ref = "ktor" }
ktor-client-darwin = { module = "io.ktor:ktor-client-darwin", version.ref = "ktor" }
ktor-client-content-negotiation = { module = "io.ktor:ktor-client-content-negotiation", version.ref = "ktor" }
ktor-client-logging = { module = "io.ktor:ktor-client-logging", version.ref = "ktor" }
ktor-serialization-kotlinx-json = { module = "io.ktor:ktor-serialization-kotlinx-json", version.ref = "ktor" }
ktor-client-auth = { module = "io.ktor:ktor-client-auth", version.ref = "ktor" }

[plugins]
kotlinMultiplatform = { id = "org.jetbrains.kotlin.multiplatform", version.ref = "kotlin" }
kotlin-serialization = { id = "org.jetbrains.kotlin.plugin.serialization", version.ref = "kotlin" }

[bundles]
ktor = [
    "ktor-client-core",
    "ktor-client-content-negotiation",
    "ktor-client-auth",
    "ktor-client-logging",
    "ktor-serialization-kotlinx-json",
]
프로젝트 root gradle.kts에 Serialization 플러그인 추가
plugins {
    //...
    alias(libs.plugins.kotlin.serialization) apply false
}
composeApp 모듈에 있는 build.gradle.kts에 의존성 추가
plugins {
    //Serialization
    alias(libs.plugins.kotlin.serialization)
}

	//...

    sourceSets {
        androidMain.dependencies {
            //안드로이드에서는 okhttp를 사용하기 때문에 해당 의존성 추가
            implementation(libs.ktor.client.okhttp)
        }
        commonMain.dependencies {

			//설정한 bundle ktor 의존성 추가
            implementation(libs.bundles.ktor)
        }
        commonTest.dependencies {
            implementation(libs.kotlin.test)
        }

        //nativeMain은 안드로이드 이외 플랫폼에 전체적인 의존성 추가작업 부분
        nativeMain.dependencies {
        	//다른 플랫폼은 darwin으로 Ktor를 설정하는 것 같다.
            implementation(libs.ktor.client.darwin)
        }
    }
}
commonMain 모듈 쪽에 createHttpClient.kt 생성
//createHttpClient 함서에 engine이라는 파라미터를 넣은 이유는
//아까 위에 의존성 주입처럼 안드로이드는 Okhttp를 다른 플랫폼은 darwin을 넣기 위함
fun createHttpClient(engine: HttpClientEngine): HttpClient = HttpClient(engine) {
	// 서버 요청/응답에 대한 로그 정보 관련
    install(Logging) {
        level =  LogLevel.ALL
        logger = Logger.DEFAULT
    }

    //Ktor에서 ContentNegotiation은 요청(request)/응답(response)의 콘텐츠 타입(Content-Type)을 자동으로 변환(직렬화/역직렬화) 해주는 플러그인
    install(ContentNegotiation) {
        json(
            json = Json {
                ignoreUnknownKeys = true
            }
        )
    }
}
DTO 클래스 및 서버 응답 기능 구현
class InsultCensorClient(
    private val httpClient: HttpClient
) {
	//해당 Result는 코틀린의 Result가 아닌 유튜브 강의 있는 커스텀 Result이다.
    //각각 성공했을 때 값과, 실패했을 때 값을 반환하는 것이다.
    //해당 Result 코드를 보고 싶은 분은 아래 링크를 통해 학습을 진행해보자
    //https://www.youtube.com/watch?v=Z1WoLYF-b14
    suspend fun censorWords(uncensored: String): Result<String, NetworkError> {
        val response = try {

            httpClient.get(
            	//이 URL은 텍스트가 욕설인지 판단하는 api이다. 예를 들어 fuck -> **** 로 변환
                urlString = "https://www.purgomalum.com/service/json"
            ) {
                parameter("text", uncensored)
                header("Content-Type", "application/json")
            }
        } catch (e: UnresolvedAddressException) {
            return Result.Error(NetworkError.NO_INTERNET)
        } catch (e: SerializationException) {
            return Result.Error(NetworkError.SERIALIZATION)
        }

        /*
        *   { "result" : "You ****"}
        * */
        return when (response.status.value) {
            in 200..299 -> {
                val censoredText = response.body<CensoredText>()
                Result.Success(censoredText.result)
            }
            401 -> Result.Error(NetworkError.UNAUTHORIZED)
            409 -> Result.Error(NetworkError.CONFLICT)
            408 -> Result.Error(NetworkError.REQUEST_TIMEOUT)
            413 -> Result.Error(NetworkError.PAYLOAD_TOO_LARGE)
            in 500..599 -> Result.Error(NetworkError.SERVER_ERROR)
            else -> Result.Error(NetworkError.UNKNOWN)
        }

    }
}

@Serializable
data class CensoredText(
    val result: String
)
UI 작성
참고로 이번 강의에는 Koin을 사용하지 않기 때문에 각각에 직접 주입하는 방식으로 구현 또한 ViewModel도 없고 바로 호출하는 방식이므로 참고하자.
@Composable
@Preview
fun App(
    client: InsultCensorClient
) {
    MaterialTheme {
        var censoredText by remember {
            mutableStateOf<String?>(null)
        }

        var uncensoredText by remember {
            mutableStateOf("")
        }

        var isLoading by remember {
            mutableStateOf(false)
        }

        var errorMessage by remember {
            mutableStateOf<NetworkError?>(null)
        }

        val scope = rememberCoroutineScope()

        Column(
            modifier = Modifier


                .fillMaxSize(),
            horizontalAlignment = Alignment.CenterHorizontally,
            verticalArrangement = Arrangement.spacedBy(16.dp, Alignment.CenterVertically)
        ) {
            TextField(
                value = uncensoredText,
                onValueChange = { uncensoredText = it },
                modifier = Modifier
                    .padding(horizontal = 16.dp)
                    .fillMaxWidth(),
                placeholder = {
                    Text("Uncensored Text")
                }
            )

			//버튼 클릭 시 해당 text가 비속어가 들어가 있는 것을 ** 로 변환는 서버 요청 짆애
            Button(onClick = {
                scope.launch {
                    isLoading = true
                    errorMessage = null

                    client.censorWords(uncensoredText)
                        .onSuccess {
                            censoredText = it
                            isLoading = false
                        }
                        .onError {
                            errorMessage = it
                            isLoading = false
                        }
                }
            }) {
                if (isLoading) {
                    CircularProgressIndicator(
                        modifier = Modifier.size(15.dp),
                        strokeWidth = 1.dp,
                        color = Color.White
                    )
                } else {
                    Text("Censor!")
                }
            }

            censoredText?.let {
                Text(it)
            }
            errorMessage?.let {
                Text(it.name)
            }
        }
    }
이제 각 모듈(Android와 IOS)에 App에 client: InsultCensorClient 의존성을 주입해야 한다.
먼저 Android를 보면
class MainActivity : ComponentActivity() {
    override fun onCreate(savedInstanceState: Bundle?) {
        enableEdgeToEdge()
        super.onCreate(savedInstanceState)

        setContent {
            App(
            	//Okttp.create()로 주입
                client = remember {
                    InsultCensorClient(createHttpClient(OkHttp.create()))
                }
            )
        }
    }
}
IOS를 보면
fun MainViewController() = ComposeUIViewController {
App(
//darwin 주입
client = remember {
InsultCensorClient(createHttpClient(Darwin.create()))
}
)
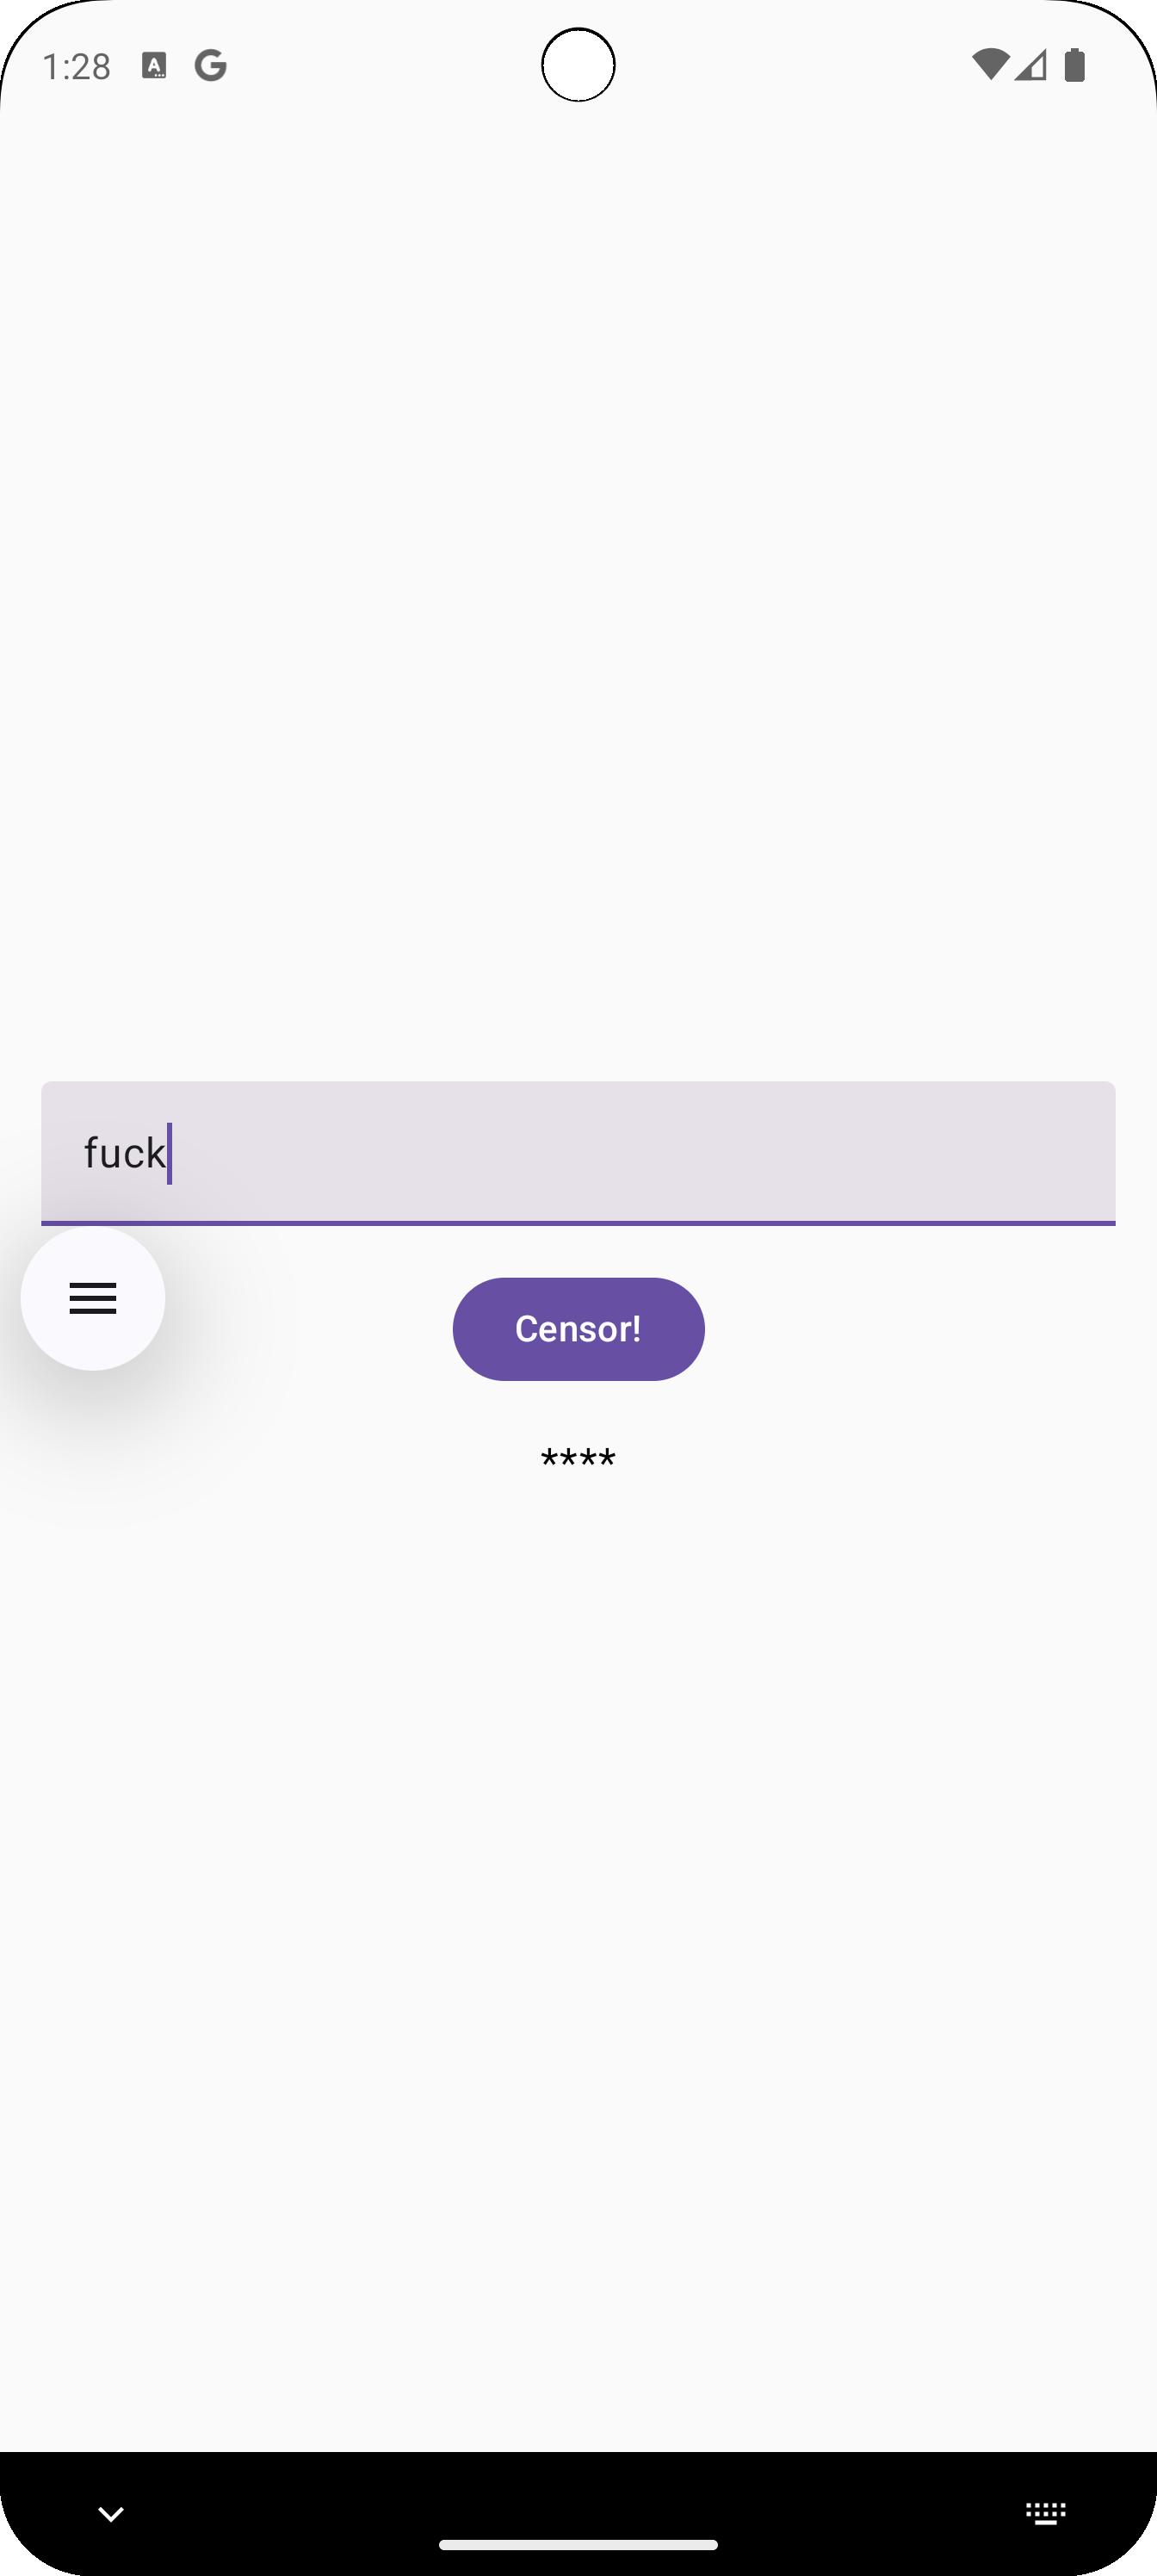
}실행 결과
-
Android
-
Ios
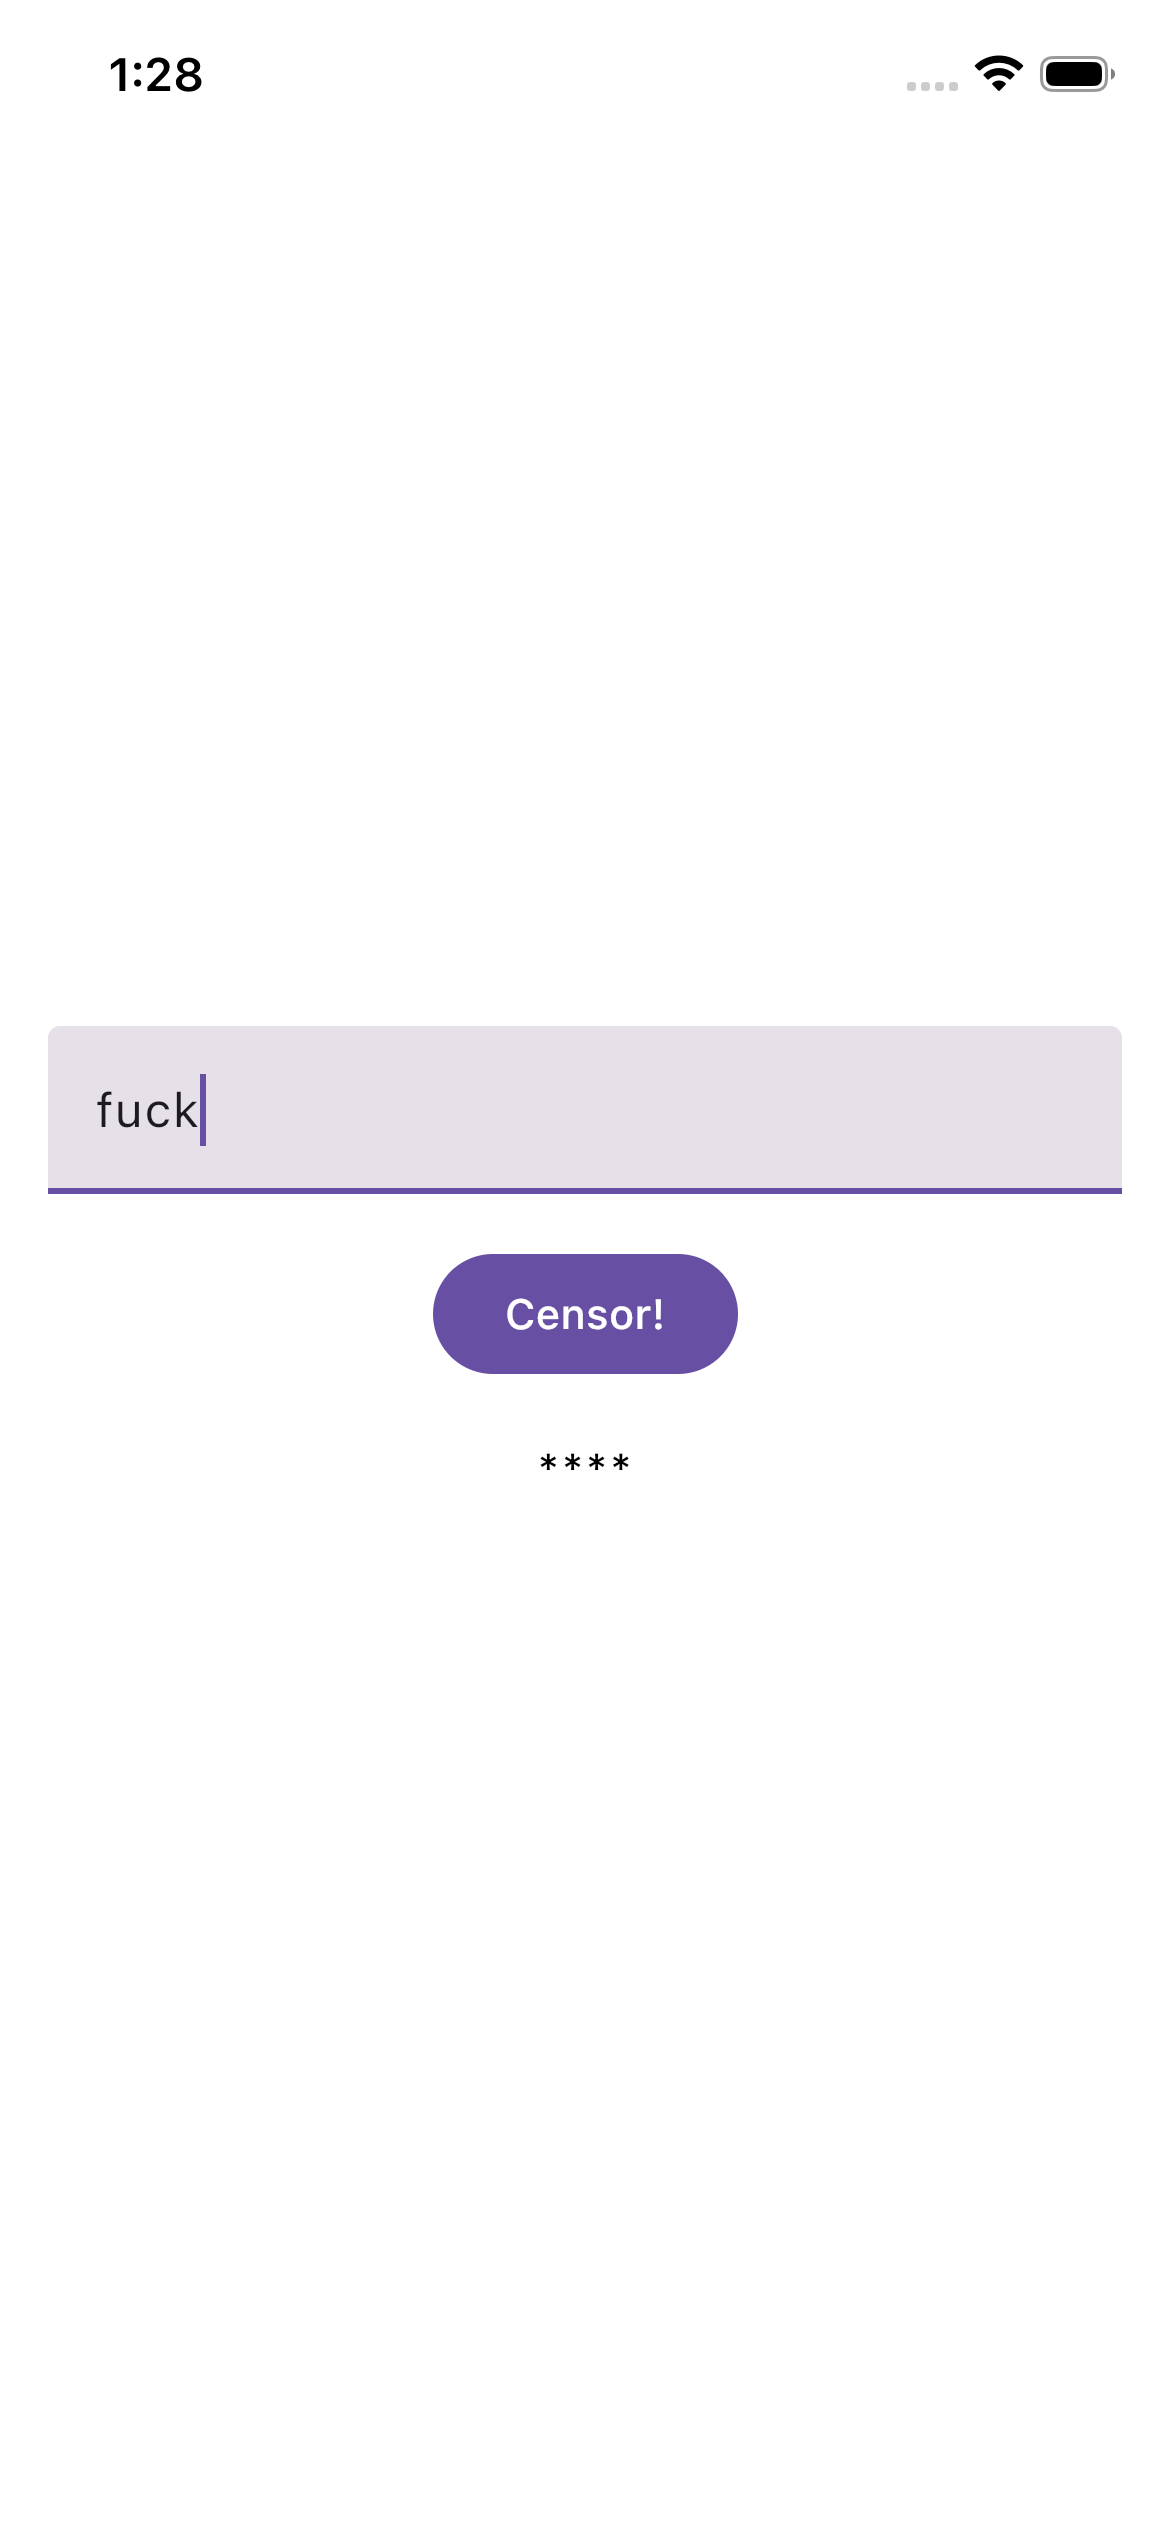
뭔가 IOS에 Material 디자인이 들어가 있는게 조금 웃기지만 둘 다 정상적으로 동작되는 것을 볼 수 있다.

좋은 개발자가 되기까지