0단계
MainWindow.xaml과 MainWindow.xaml.cs 파일을 먼저 작성.
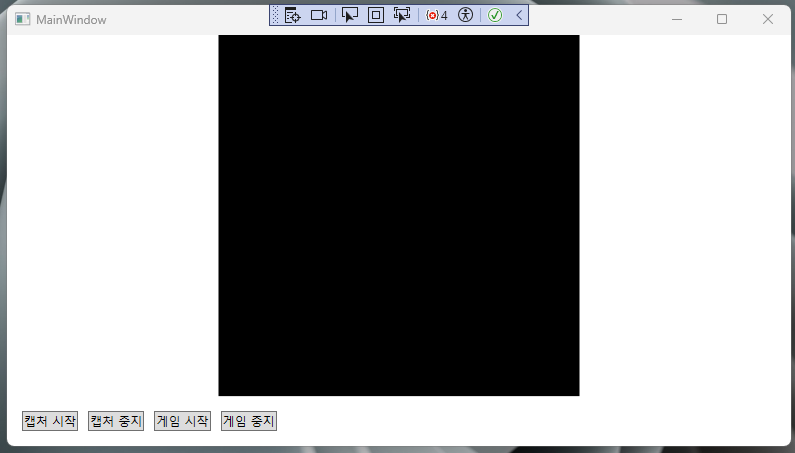
결과
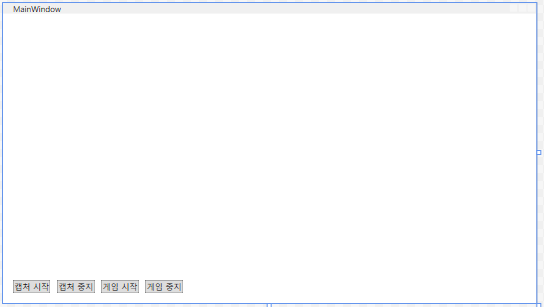
MainWindow.xaml
<Window x:Class="OpenCvSharpProjects.Views.MainWindow"
        xmlns="http://schemas.microsoft.com/winfx/2006/xaml/presentation"
        xmlns:x="http://schemas.microsoft.com/winfx/2006/xaml"
        xmlns:d="http://schemas.microsoft.com/expression/blend/2006"
        xmlns:mc="http://schemas.openxmlformats.org/markup-compatibility/2006"
        xmlns:local="clr-namespace:OpenCvSharpProjects.ViewModels"
        mc:Ignorable="d"
        Title="MainWindow" Height="450" Width="800">

    <Grid>
        <Grid.RowDefinitions>
            <RowDefinition Height="*"/>
            <RowDefinition Height="Auto"/>
        </Grid.RowDefinitions>

        <Image x:Name="CameraImage" Grid.Row="0" Source="{Binding CameraImage}" Stretch="Uniform" />

        <StackPanel Grid.Row="1" Orientation="Horizontal" Margin="10">
            <Button Content="캡처 시작" Command="{Binding StartCaptureCommand}" Margin="5" />
            <Button Content="캡처 중지" Command="{Binding StopCaptureCommand}" Margin="5" />
            <Button Content="게임 시작" Command="{Binding StartGameCommand}" Margin="5" />
            <Button Content="게임 중지" Command="{Binding StopGameCommand}" Margin="5" />
        </StackPanel>

      <Rectangle Stroke="Red" StrokeThickness="2"
           Visibility="{Binding GameWindowRect, Converter={StaticResource RectToVisibilityConverter}}"
           Width="{Binding GameWindowRect.Width}" Height="{Binding GameWindowRect.Height}"
           Margin="{Binding GameWindowRect.Left}, {Binding GameWindowRect.Top}, 0, 0" />
    </Grid>
</Window>
코드 설명
MainWindow.xaml:xmlns:local:MainWindowViewModel클래스가 있는 네임스페이스를 지정합니다.Window.DataContext:MainWindow의DataContext를MainWindowViewModel로 설정하여 View에서 ViewModel의 속성과 Command에 접근할 수 있도록 합니다.Grid: UI 요소를 배치하기 위한 Grid 컨테이너입니다.Image: 웹캠에서 캡처한 이미지를 표시하는Image컨트롤입니다.Source속성을 ViewModel의CameraImage속성에 바인딩하여, 이미지를 표시합니다.Button: 캡처 시작/중지, 게임 시작/중지 기능을 실행하는 버튼들입니다. 각 버튼의Command속성을 ViewModel의 Command에 바인딩하여, 버튼 클릭 이벤트를 ViewModel의 메서드에 연결합니다.Rectangle: 게임 화면 영역을 표시하는 컨트롤입니다.Visibility,Width,Height,Margin속성을 ViewModel의GameWindowRect속성에 바인딩하여 게임 화면 영역을 표시합니다.
오류 발생 1
Margin="{Binding GameWindowRect.Left}, {Binding GameWindowRect.Top}, 0, 0"

이 위치에는 "," 문자를 사용할 수 없습니다.
발생 원인
Margin 속성에 값을 할당할 때는 쉼표(,)를 사용하여 각 여백 값을 구분해야 합니다. 하지만, XAML에서 쉼표(,)는 특별한 의미를 가지므로 Margin 속성에 직접 쉼표를 사용하면 오류가 발생합니다.
해결 방법
Margin 속성에 값을 할당할 때는 쉼표 대신 공백을 사용해야 합니다.
Margin="{Binding GameWindowRect.Left} {Binding GameWindowRect.Top} 0 0"이렇게 수정하면 Margin 속성에 왼쪽, 위쪽, 오른쪽, 아래쪽 여백 값이 순서대로 할당됩니다.
<Rectangle Stroke="Red" StrokeThickness="2"
           Visibility="{Binding GameWindowRect, Converter={StaticResource RectToVisibilityConverter}}"
           Width="{Binding GameWindowRect.Width}" Height="{Binding GameWindowRect.Height}"
           Margin="{Binding GameWindowRect.Left} {Binding GameWindowRect.Top} 0 0" />
추가 정보
Margin속성은 요소의 바깥쪽 여백을 지정합니다.Margin속성에 값을 할당할 때는 쉼표 대신 공백을 사용합니다.- 여백 값은 왼쪽, 위쪽, 오른쪽, 아래쪽 순서로 지정합니다.
- 여백 값을 하나만 지정하면 네 방향 모두에 동일한 여백이 적용됩니다.
- 여백 값을 두 개 지정하면 첫 번째 값은 위쪽과 아래쪽 여백에, 두 번째 값은 왼쪽과 오른쪽 여백에 적용됩니다.
- 여백 값을 세 개 지정하면 첫 번째 값은 왼쪽 여백에, 두 번째 값은 위쪽과 아래쪽 여백에, 세 번째 값은 오른쪽 여백에 적용됩니다.
- 여백 값을 네 개 지정하면 각각 왼쪽, 위쪽, 오른쪽, 아래쪽 여백에 적용됩니다.
오류 발생 2
이전의 Margin 속성에서 발생하는 오류는 쉼표(,)를 공백으로 변경해도 해결되지 않았다.
발생 원인
Margin 속성이 Thickness 타입의 값을 기대하기 때문이다.
해결 방법
Margin 속성에 값을 할당할 때는 Thickness 객체를 사용해야 합니다. Thickness 객체는 왼쪽, 위쪽, 오른쪽, 아래쪽 여백 값을 지정할 수 있는 생성자를 제공합니다.
Margin="{Binding GameWindowRect, Converter={StaticResource RectToThicknessConverter}}"RectToThicknessConverter 컨버터
Rect 객체를 Thickness 객체로 변환하는 RectToThicknessConverter 컨버터를 추가해야 합니다.
// Converters/RectToThicknessConverter.cs
using System;
using System.Globalization;
using System.Windows;
using System.Windows.Data;

namespace OpenCvSharpProjects.Converters
{
    public class RectToThicknessConverter : IValueConverter
    {
        public object Convert(object value, Type targetType, object parameter, CultureInfo culture)
        {
            if (value is Rect rect)
            {
                return new Thickness(rect.Left, rect.Top, 0, 0);
            }
            return new Thickness(0);
        }

        public object ConvertBack(object value, Type targetType, object parameter, CultureInfo culture)
        {
            throw new NotImplementedException();
        }
    }
}
App.xaml에 컨버터 추가
App.xaml에 RectToThicknessConverter를 리소스로 추가합니다.
<Application ...>
    <Application.Resources>
        <local:RectToThicknessConverter x:Key="RectToThicknessConverter" />
    </Application.Resources>
</Application>
오류 발생 2
App.xaml에 컨버터를 추가하는 과정에서 오류가 발생했다.
"RectToThicknessConverter" 이름이 "clr-namespace:OpenCvSharpProjects" 네임스페이스에 없습니다.

'local:RectToThicknessConverter' 형식을 찾을 수 없습니다. 어셈블리 참조가 있는지, 참조된 모든 어셈블리가 빌드되었는지 확인하세요.
App.xaml 전체 코드는 다음과 같다.
<Application x:Class="OpenCvSharpProjects.App"

xmlns="http://schemas.microsoft.com/winfx/2006/xaml/presentation"

xmlns:x="http://schemas.microsoft.com/winfx/2006/xaml"

xmlns:local="clr-namespace:OpenCvSharpProjects.Converters"

StartupUri="MainWindow.xaml">


<Application.Resources>

<local:RectToThicknessConverter x:Key="RectToThicknessConverter" />

</Application.Resources>

</Application>
발생 원인
App.xaml에서 RectToThicknessConverter를 찾을 수 없다는 오류는 다음과 같은 원인으로 발생할 수 있다.
-
네임스페이스 오류:
xmlns:local네임스페이스 선언이RectToThicknessConverter클래스의 네임스페이스와 일치하지 않는 경우입니다.RectToThicknessConverter클래스가 정의된 네임스페이스를 정확하게 지정했는지 다시 한번 확인. -
빌드 오류:
RectToThicknessConverter클래스가 포함된 프로젝트가 제대로 빌드되지 않아 어셈블리가 생성되지 않은 경우입니다. 프로젝트를 빌드하고 오류가 발생하는지 확인. -
클래스 정의 오류:
RectToThicknessConverter클래스가 제대로 정의되지 않았거나, 오류가 있는 경우입니다. 클래스 정의를 확인하고 오류가 있는지 확인. -
XAML 파일 오류:
App.xaml파일 자체에 오류가 있는 경우입니다. XAML 파일의 다른 부분에 오류가 있는지 확인. -
Visual Studio 오류: Visual Studio의 캐시 또는 설정 문제로 인해 오류가 발생할 수 있습니다. Visual Studio를 다시 시작하거나, 솔루션을 정리하고 다시 빌드해보기.
시도
1. 네임스페이스 확인:
App.xaml에서 xmlns:local 네임스페이스 선언이 RectToThicknessConverter 클래스의 네임스페이스와 일치하는지 확인했다. 일치했다.
- xmlns는 XML 네임스페이스를 정의하는 데 사용됩니다.
- xmlns:local은 local이라는 접두사로 사용할 네임스페이스를 정의합니다.
- clr-namespace는 .NET 네임스페이스를 나타냅니다.
- :는 네임스페이스와 클래스 이름을 구분하는 데 사용됩니다.
-
RectToThicknessConverter 클래스 확인:
RectToThicknessConverter 클래스가 Converters 폴더에 있고, OpenCvSharpProjects.Converters 네임스페이스에 속해 있는지 확인했다. 이상 없었다. -
StartupUri속성 확인:
StartupUri속성에 지정된 값이 잘못된 것 같다.
StartupUri 속성은 WPF 응용 프로그램이 시작될 때 표시할 창을 지정합니다. 이 속성에 지정된 값은 프로젝트 루트를 기준으로 한 상대 경로입니다. 따라서 Views 폴더 안에 있는 MainWindow.xaml 파일을 지정하려면 Views/MainWindow.xaml과 같이 경로를 포함해야 합니다.
현재 StartupUri="MainWindow.xaml"로 설정되어 있는데, MainWindow.xaml 파일은 Views 폴더 안에 있습니다. 따라서 StartupUri 속성 값을 Views/MainWindow.xaml로 변경해야 합니다.
수정된 App.xaml 코드
<Application x:Class="OpenCvSharpProjects.App"
             xmlns="http://schemas.microsoft.com/winfx/2006/xaml/presentation"
             xmlns:x="http://schemas.microsoft.com/winfx/2006/xaml"
             xmlns:local="clr-namespace:OpenCvSharpProjects.Converters"
             StartupUri="Views/MainWindow.xaml">

    <Application.Resources>
        <local:RectToThicknessConverter x:Key="RectToThicknessConverter" />
    </Application.Resources>
</Application>
그러나 문제가 해결되지 않았다.
- 혹시 아래 오류 때문인가 확인:
'InitializeComponent' 이름이 현재 컨텍스트에 없습니다.찾아보니 Views/MainWindow.xaml로 바꿔도 오류가 그대로라면, InitializeComponent() 메서드를 찾을 수 없어 발생하는 오류 때문일 가능성이 높다고 한다.
InitializeComponent() 메서드는 XAML 파일에서 정의된 UI 요소를 초기화하는 역할을 합니다. 이 메서드는 MainWindow.g.i.cs라는 파일에 자동으로 생성되는데, 빌드 과정에서 문제가 발생했거나 파일이 손상된 경우 오류가 발생할 수 있습니다.
따라서 아래와 같은 방법을 시도하여 InitializeComponent() 오류를 해결해보았다.
InitializeComponent() 오류 해결 방법
-
프로젝트 정리 및 다시 빌드: Visual Studio에서 "빌드" 메뉴 > "솔루션 정리"를 선택하고, "빌드" 메뉴 > "솔루션 빌드"를 선택하여 프로젝트를 다시 빌드합니다.
-
MainWindow.g.i.cs파일 확인:obj폴더 안에Debug또는Release폴더를 찾아MainWindow.g.i.cs파일이 있는지 확인합니다. 파일이 없거나 손상된 경우 프로젝트를 다시 빌드하거나MainWindow.xaml파일을 수정하여 다시 생성되도록 합니다. -
XAML 파일 오류 확인:
MainWindow.xaml파일에 오류가 있는 경우MainWindow.g.i.cs파일이 제대로 생성되지 않을 수 있습니다. XAML 파일의 오류를 수정하고 프로젝트를 다시 빌드합니다. -
Visual Studio 다시 시작: Visual Studio를 다시 시작합니다.
-
네임스페이스 확인:
MainWindow.xaml.cs파일의 네임스페이스가MainWindow.xaml파일의x:Class속성에 지정된 네임스페이스와 일치하는지 확인합니다.
// Views/MainWindow.xaml.cs
namespace OpenCvSharpProjects.Views // 네임스페이스 확인
{
    // ...
}<Window x:Class="OpenCvSharpProjects.Views.MainWindow"
...>
...
</Window>'솔루션 정리' 후 "솔루션 빌드"를 선택하여 프로젝트를 다시 빌드한 결과 오류가 해결되었다.
참고
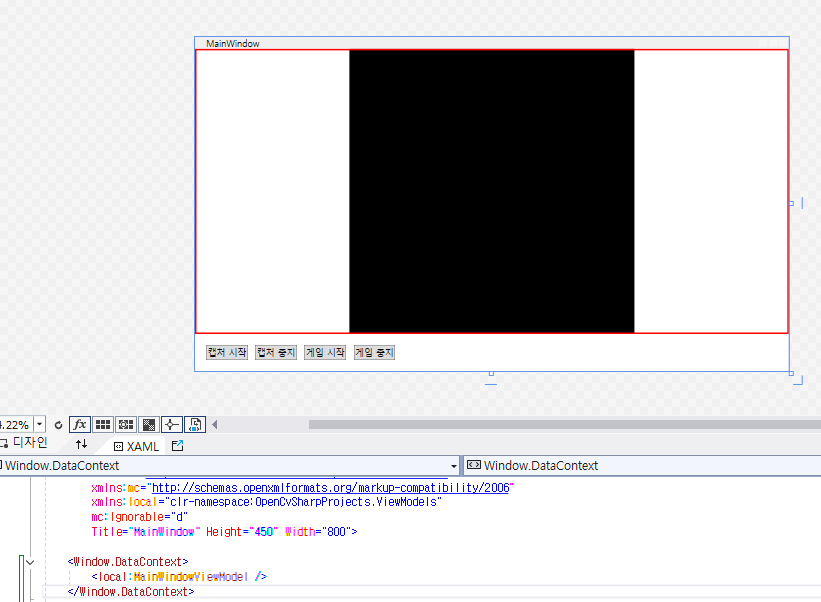
참고로 MainWindowViewModel을 먼저 작성하지 않고 <Window.DataContext>를 추가했을 때 오류가 계속 발생하므로, 아래 코드는 제외했다가 나중에 MainWindowViewModel을 전부 작성하고 추가하기로 했다.
<Window.DataContext>
    <local:MainWindowViewModel />
</Window.DataContext>
MainWindow.xaml.cs
using OpenCvSharpProjects.ViewModels;
using System.Windows;

namespace OpenCvSharpProjects.Views
{
    /// <summary>
    /// Interaction logic for MainWindow.xaml
    /// </summary>
    public partial class MainWindow : Window
    {
        public MainWindow()
        {
            InitializeComponent();
            DataContext = new MainWindowViewModel();
        }
    }
}
코드 설명
MainWindow.xaml.cs:DataContext = new MainWindowViewModel();:MainWindow의DataContext를MainWindowViewModel객체로 설정합니다. 이를 통해 View에서 ViewModel의 속성과 Command에 접근할 수 있습니다.
이제 MainWindow.xaml과 MainWindow.xaml.cs 파일이 준비되었습니다.
다음 단계에서는 MainWindowViewModel 클래스를 구현할 것입니다.
1단계
1단계: Models 폴더 (GameInfo.cs)
이 파일에서는 게임과 관련된 정보를 담을 GameInfo 클래스를 정의한다.
이 클래스는 Model 역할을 수행하며, ViewModel에서 사용할 데이터를 저장하고 관리하는 용도로 사용된다.
GameInfo.cs
// Models/GameInfo.cs
using OpenCvSharp;
using System.Windows;

namespace OpenCvSharpProjects.Models
{
    public class GameInfo
    {
        public Rect GameWindowRect { get; set; } // 게임 화면 영역을 저장하는 속성이다.
        public Point UserLocation { get; set; } // 유저의 위치를 저장하는 속성이다.

        // TODO: 필요에 따라 몬스터, NPC, 아이템 등의 정보를 추가할 수 있다.
    }
}
코드 설명
using OpenCvSharp;: OpenCvSharp 라이브러리에서 제공하는 클래스와 함수를 사용하기 위해 필요한 네임스페이스이다.Rect클래스와Point클래스를 사용하기 위해 포함했다.using System.Windows;: WPF에서 제공하는 클래스와 함수를 사용하기 위해 필요한 네임스페이스이다.Rect클래스와Point클래스를 사용하기 위해 포함했다.namespace OpenCvSharpProjects.Models:GameInfo클래스가 속한 네임스페이스를 정의한다. 폴더 구조와 일치시켜 코드를 체계적으로 관리하기 위해OpenCvSharpProjects.Models네임스페이스를 사용했다.public class GameInfo:GameInfo클래스를 정의한다.public접근 제한자를 사용하여 다른 클래스에서 접근할 수 있도록 했다.public Rect GameWindowRect { get; set; }: 게임 화면 영역을 저장하는Rect타입의 속성이다.Rect는 사각형 영역을 나타내는 구조체이며, 왼쪽 상단 좌표와 너비, 높이 정보를 가지고 있다. 템플릿 매칭을 통해 찾은 게임 화면 영역을 저장하는 데 사용된다.public Point UserLocation { get; set; }: 유저의 위치를 저장하는Point타입의 속성이다.Point는 좌표를 나타내는 구조체이며, x 좌표와 y 좌표 정보를 가지고 있다. 게임 화면에서 유저의 위치를 추적하고 저장하는 데 사용된다.// TODO: 필요에 따라 몬스터, NPC, 아이템 등의 정보를 추가할 수 있다: 게임 자동화 로직을 구현하면서 필요한 경우, 몬스터, NPC, 아이템 등의 정보를 저장하는 속성을 추가할 수 있다. 예를 들어, 몬스터의 위치, 종류, 체력 등을 저장하는 속성을 추가하여 몬스터 사냥 로직을 구현할 수 있다.
코드 개선
화면 영역 추출 방법 변경
노트북 내장캠이라 화질이 좋지 못하고 화각이 계속 달라져서 템플릿 매칭으로 화면 영역을 찾기 쉽지 않았다. 그래서 특징점 매칭으로 방법을 변경하려고 한다.
특징점 매칭의 장점
- 회전 및 크기 변화에 강인함: 특징점은 이미지의 회전, 크기 변화, 조명 변화에 덜 민감하다. 따라서 웹캠 각도가 바뀌더라도 특징점을 이용하여 게임 화면 영역을 안정적으로 검출할 수 있다.
- 부분적인 가려짐에도 강건함: 특징점 매칭은 이미지의 일부가 가려져도 동작할 수 있다. 따라서 게임 화면의 일부가 다른 창에 가려지더라도 게임 화면 영역을 찾을 수 있다.
특징점 매칭 외의 다른 방법
- 딥러닝 기반 객체 검출: YOLO, SSD와 같은 딥러닝 객체 검출 모델을 사용하여 게임 화면 영역을 검출할 수 있다. 딥러닝 모델은 높은 정확도를 제공하지만, 학습 데이터셋 구축 및 모델 학습에 시간과 노력이 필요하다.
- 엣지 검출 및 Hough 변환: 엣지 검출 알고리즘으로 게임 화면의 외곽선을 검출하고, Hough 변환을 사용하여 외곽선에서 직선을 찾아 게임 화면 영역을 추정할 수 있다. 이 방법은 계산량이 적지만, 노이즈에 민감하고 정확도가 떨어질 수 있다.
특징점 매칭을 사용하여 재작성
특징점 매칭을 사용하기 위해, 1단계에서 GameInfo 클래스에 특징점 정보를 저장하는 속성을 추가함으로써, 특징점 매칭을 위한 데이터를 관리할 수 있게 만든다.
GameInfo.cs 코드
// Models/GameInfo.cs
using OpenCvSharp;
using System.Collections.Generic;
using System.Windows;

namespace OpenCvSharpProjects.Models
{
    public class GameInfo
    {
        public Rect GameWindowRect { get; set; } // 게임 화면 영역을 저장하는 속성이다.
        public Point UserLocation { get; set; } // 유저의 위치를 저장하는 속성이다.
        public List<KeyPoint> Keypoints { get; set; } = new List<KeyPoint>(); // 특징점 정보를 저장하는 속성이다.
        public Mat Descriptors { get; set; } // 특징점 기술자를 저장하는 속성이다.
    }
}
코드 설명
using OpenCvSharp;: OpenCvSharp 라이브러리에서 제공하는 클래스와 함수를 사용하기 위해 필요한 네임스페이스이다.Rect,Point,KeyPoint,Mat클래스를 사용하기 위해 포함했다.using System.Windows;: WPF에서 제공하는 클래스와 함수를 사용하기 위해 필요한 네임스페이스이다.Rect구조체와Point구조체를 사용하기 위해 포함했다.using System.Collections.Generic;:List<T>클래스를 사용하기 위해 필요한 네임스페이스이다. 특징점 정보를 저장하는List<KeyPoint>타입의Keypoints속성을 위해 포함했다.namespace OpenCvSharpProjects.Models:GameInfo클래스가 속한 네임스페이스를 정의한다. 폴더 구조와 일치시켜 코드를 체계적으로 관리하기 위해OpenCvSharpProjects.Models네임스페이스를 사용했다.public class GameInfo:GameInfo클래스를 정의한다.public접근 제한자를 사용하여 다른 클래스에서 접근할 수 있도록 했다.public Rect GameWindowRect { get; set; }: 게임 화면 영역을 저장하는Rect타입의 속성이다.Rect는 사각형 영역을 나타내는 구조체이며, 왼쪽 상단 좌표와 너비, 높이 정보를 가지고 있다. 특징점 매칭을 통해 찾은 게임 화면 영역을 저장하는 데 사용된다.public Point UserLocation { get; set; }: 유저의 위치를 저장하는Point타입의 속성이다.Point는 좌표를 나타내는 구조체이며, x 좌표와 y 좌표 정보를 가지고 있다. 게임 화면에서 유저의 위치를 추적하고 저장하는 데 사용된다.public List<KeyPoint> Keypoints { get; set; } = new List<KeyPoint>();: 특징점 정보를 저장하는List<KeyPoint>타입의 속성이다. 템플릿 이미지에서 추출한 특징점들을 저장하는 데 사용된다.
Keypoints 속성은 템플릿 이미지에서 추출한 특징점 정보를 저장하고, Descriptors 속성은 특징점 기술자를 저장한다. 이 정보는 ImageProcessingService에서 특징점 매칭을 수행할 때 사용된다.
public Mat Descriptors { get; set; }: 특징점 기술자를 저장하는Mat타입의 속성이다. 특징점 기술자는 특징점 주변의 정보를 압축하여 표현한 벡터이다. 특징점 매칭을 수행할 때 사용된다.
추가 정보
GameInfo클래스는 게임 관련 정보를 저장하는 Model 역할을 수행한다.- ViewModel은
GameInfo객체를 사용하여 게임 정보를 가져오고 업데이트한다. - View는
GameInfo객체의 정보를 바인딩하여 화면에 표시할 수 있다.
오류 발생
null을 허용하지 않는 속성 'Descriptors'은(는) 생성자를 종료할 때 null이 아닌 값을 포함해야 합니다. 'required' 한정자를 추가하거나 속성을(를) nullable로 선언하는 것이 좋습니다.1. null을 허용하지 않는 속성 'Descriptors' 오류
-
원인:
- C# 8.0 이후 Nullable Reference Types 기능이 도입되면서, 참조 형식 변수는 기본적으로 null 값을 허용하지 않게 되었습니다.
Mat Descriptors속성은Mat타입으로, 참조 형식이기 때문에 null 값을 가질 수 없습니다.- 생성자에서
Descriptors속성에 명시적으로 값을 할당하지 않았기 때문에 컴파일러는 생성자를 종료할 때Descriptors속성이 null 값을 가질 수 있다고 판단하여 오류를 발생시킵니다.
-
해결 방법:
Descriptors속성을 nullable로 선언합니다. 즉,Mat Descriptors를Mat? Descriptors로 변경합니다. 이렇게 하면Descriptors속성이 null 값을 가질 수 있게 됩니다.- 생성자에서
Descriptors속성에 초기 값을 할당합니다. 예를 들어,Descriptors = new Mat();와 같이 빈Mat객체를 생성하여 할당할 수 있습니다.
'Rect'은(는) 'OpenCvSharp.Rect' 및 'System.Windows.Rect' 사이에 모호한 참조입니다.

'Point'은(는) 'OpenCvSharp.Point' 및 'System.Windows.Point' 사이에 모호한 참조입니다.
2. 'Rect' 및 'Point' 모호한 참조 오류
-
원인:
OpenCvSharp네임스페이스와System.Windows네임스페이스 모두Rect와Point라는 이름의 클래스를 가지고 있습니다.using OpenCvSharp;와using System.Windows;를 모두 사용했기 때문에 컴파일러는Rect와Point를 어떤 네임스페이스의 클래스로 사용해야 할지 결정할 수 없어 모호한 참조 오류를 발생시킵니다.
-
해결 방법:
Rect와Point를 사용할 때 명시적으로 네임스페이스를 지정합니다.- 예를 들어,
OpenCvSharp.Rect또는System.Windows.Rect와 같이 사용합니다.
- 예를 들어,
using문을 제거하고 필요할 때마다 전체 네임스페이스를 사용합니다. 예를 들어,OpenCvSharp.Rect대신System.Windows.Rect를 사용해야 하는 경우using System.Windows;를 제거하고System.Windows.Rect를 사용합니다.
수정된 코드
// Models/GameInfo.cs
using OpenCvSharp;
using System.Collections.Generic;

namespace OpenCvSharpProjects.Models
{
    public class GameInfo
    {
        public OpenCvSharp.Rect GameWindowRect { get; set; } // OpenCvSharp.Rect 사용
        public OpenCvSharp.Point UserLocation { get; set; } // OpenCvSharp.Point 사용
        public List<KeyPoint> Keypoints { get; set; } = new List<KeyPoint>();
        public Mat? Descriptors { get; set; } // Descriptors 속성을 nullable로 선언
    }
}
OpenCvSharp.Rect vs System.Windows.Rect
OpenCvSharp.Rect와 System.Windows.Rect는 모두 사각형 영역을 나타내는 클래스이지만, 사용하는 목적과 기능에 차이가 있습니다.
OpenCvSharp.Rect
- OpenCV 라이브러리에서 사용되는 사각형 영역을 나타냅니다.
- 주로 이미지 처리, 객체 검출, 영상 분석 등에서 사용됩니다.
- 정수형 좌표 (
int)를 사용합니다. OpenCvSharp.Point클래스와 함께 사용됩니다.- OpenCV 함수에서 사각형 영역을 지정할 때 사용됩니다. (예:
Cv2.Rectangle(),Cv2.MatchTemplate())
System.Windows.Rect
- WPF (Windows Presentation Foundation) 에서 사용되는 사각형 영역을 나타냅니다.
- 주로 UI 요소의 위치와 크기를 지정하는 데 사용됩니다.
- 부동 소수점 좌표 (
double)를 사용합니다. System.Windows.Point클래스와 함께 사용됩니다.- WPF UI 요소의 속성 (예:
Margin,Width,Height) 을 설정할 때 사용됩니다.
왜 OpenCvSharp.Rect를 사용하는가?
웹캠 게임 자동화 프로그램에서는 OpenCV 라이브러리를 사용하여 이미지 처리 및 객체 인식을 수행합니다. 따라서 OpenCV 함수에서 사각형 영역을 지정할 때는 OpenCvSharp.Rect 클래스를 사용해야 합니다.
예를 들어, Cv2.MatchTemplate() 함수를 사용하여 템플릿 매칭을 수행할 때, 매칭 결과로 얻은 사각형 영역은 OpenCvSharp.Rect 타입입니다. 이 사각형 영역을 사용하여 게임 화면 영역을 계산하고, 게임 캐릭터를 제어해야 합니다.
요약
OpenCvSharp.Rect: OpenCV 라이브러리에서 사용되는 사각형 영역을 나타내는 클래스입니다.System.Windows.Rect: WPF에서 사용되는 사각형 영역을 나타내는 클래스입니다.- 웹캠 게임 자동화 프로그램에서는 OpenCV 함수를 사용하므로
OpenCvSharp.Rect클래스를 사용합니다.
특징점 매칭 쓸 건데 템플릿 매칭 수행을 넣는 이유
특징점 매칭을 사용할 때 템플릿 매칭 수행이 꼭 필요한 것은 아닙니다. 특징점 매칭만으로도 웹캠 이미지에서 게임 화면 영역을 찾을 수 있습니다.
하지만, 템플릿 매칭을 보조적으로 활용하면 특징점 매칭의 정확도와 효율성을 높일 수 있습니다.
템플릿 매칭을 보조적으로 활용하는 방법
- 대략적인 위치 파악: 템플릿 매칭을 통해 웹캠 이미지에서 게임 화면의 대략적인 위치를 찾습니다.
- 관심 영역 설정: 템플릿 매칭 결과를 기반으로 게임 화면이 있을 것으로 예상되는 영역을 관심 영역 (ROI)으로 설정합니다.
- 특징점 매칭: 관심 영역 내에서 특징점 매칭을 수행하여 게임 화면 영역을 정확하게 찾습니다.
이렇게 하면 전체 이미지에서 특징점 매칭을 수행하는 것보다 계산량을 줄이고, 특징점 매칭의 속도와 정확도를 높일 수 있습니다.
특징점 매칭만 사용하는 경우
템플릿 매칭을 사용하지 않고 특징점 매칭만 사용하는 경우, 다음과 같은 점을 고려해야 합니다.
- 특징점 검출: 웹캠 이미지와 템플릿 이미지에서 충분한 특징점을 검출해야 합니다.
- 특징점 매칭: 웹캠 이미지에서 템플릿 이미지와 일치하는 특징점을 정확하게 찾아야 합니다.
- 오탐지 제거: 잘못 매칭된 특징점을 제거하기 위한 추가적인 처리가 필요할 수 있습니다.
결론
특징점 매칭만으로도 웹캠 게임 자동화 프로그램을 구현할 수 있지만, 템플릿 매칭을 보조적으로 활용하면 특징점 매칭의 성능을 향상시키고 더욱 안정적인 결과를 얻을 수 있습니다.
2단계
Services 폴더의 WebcamService.cs, ImageProcessingService.cs, KeyboardControlService.cs 파일을 작성.
WebcamService: 웹캠을 열고 닫고, 프레임을 캡처하는 기능을 제공한다.ImageProcessingService: 템플릿 매칭과 특징점 매칭을 사용하여 게임 화면 영역을 검출한다.KeyboardControlService: SendKeys 클래스를 사용하여 키보드 입력을 시뮬레이션한다.
WebcamService.cs
WebcamService.cs 파일은 웹캠에서 이미지 프레임을 캡처하고 제공하는 WebcamService 클래스를 정의한다. 이 클래스는 OpenCvSharp 라이브러리를 사용하여 웹캠에 접근하고 이미지를 가져오는 역할을 수행한다.
즉, WebcamService 클래스는 웹캠 캡처를 위한 핵심 기능을 제공하며, MainWindowViewModel에서 이 클래스를 사용하여 웹캠 이미지를 가져와서 처리할 수 있다.
// Services/WebcamService.cs
using OpenCvSharp;
using System.Threading.Tasks;

namespace OpenCvSharpProjects.Services
{
    public class WebcamService
    {
        private VideoCapture capture;
        private Mat frame;

        public WebcamService()
        {
            capture = new VideoCapture(0); // 기본 웹캠 장치를 엽니다.
            frame = new Mat();
        }

        public async Task StartCaptureAsync()
        {
            // 웹캠 캡처를 시작합니다.
            await Task.Run(() =>
            {
                if (!capture.IsOpened())
                {
                    capture.Open(0);
                }
            });
        }

        public void StopCapture()
        {
            // 웹캠 캡처를 중지합니다.
            capture.Release();
        }

        public async Task<Mat> GetFrameAsync()
        {
            // 웹캠에서 프레임을 가져옵니다.
            await Task.Run(() => capture.Read(frame));
            return frame;
        }
    }
}
코드 설명
using OpenCvSharp;: OpenCvSharp 라이브러리에서 제공하는 클래스와 함수를 사용하기 위해 필요한 네임스페이스이다.VideoCapture클래스와Mat클래스를 사용하기 위해 포함했다.using System.Threading.Tasks;: 비동기 작업을 위한Task클래스를 사용하기 위해 필요한 네임스페이스이다.namespace OpenCvSharpProjects.Services:WebcamService클래스가 속한 네임스페이스를 정의한다. 폴더 구조와 일치시켜 코드를 체계적으로 관리하기 위해OpenCvSharpProjects.Services네임스페이스를 사용했다.public class WebcamService:WebcamService클래스를 정의한다.public접근 제한자를 사용하여 다른 클래스에서 접근할 수 있도록 했다.private VideoCapture capture;: 웹캠 캡처를 위한VideoCapture객체를 저장하는 private 필드이다.private Mat frame;: 웹캠에서 캡처한 이미지 프레임을 저장할Mat객체를 저장하는 private 필드이다.public WebcamService(): 생성자이다.VideoCapture객체를 생성하고 초기화한다.0은 기본 웹캠 장치를 나타낸다.public async Task StartCaptureAsync(): 웹캠 캡처를 시작하는 비동기 메서드이다.Task.Run()을 사용하여 웹캠을 여는 작업을 비동기적으로 수행한다. 웹캠이 이미 열려 있는 경우에는 다시 열지 않는다.public void StopCapture(): 웹캠 캡처를 중지하는 메서드이다.capture.Release()를 호출하여 웹캠 장치를 해제하고 리소스를 정리한다.public async Task<Mat> GetFrameAsync(): 웹캠에서 프레임을 가져오는 비동기 메서드이다.Task.Run()을 사용하여 프레임을 읽는 작업을 비동기적으로 수행하고, 캡처한 프레임을Mat객체로 반환한다.
추가 정보
VideoCapture클래스는 OpenCvSharp 라이브러리에서 웹캠 캡처를 위한 클래스이다.Mat클래스는 OpenCvSharp 라이브러리에서 이미지를 표현하는 클래스이다.Task.Run()메서드는 지정된 작업을 스레드 풀에서 비동기적으로 실행한다.async키워드는 비동기 메서드를 정의하는 데 사용된다.await키워드는 비동기 작업이 완료될 때까지 기다리는 데 사용된다.
ImageProcessingService.cs
ImageProcessingService.cs 파일은 이미지 처리와 관련된 로직을 담당하는 ImageProcessingService 클래스를 정의한다. 이 클래스는 주로 웹캠에서 캡처한 이미지를 분석하여 게임 화면 영역을 찾고, 필요한 정보를 추출하는 역할을 수행한다.
// Services/ImageProcessingService.cs
using OpenCvSharp;
using OpenCvSharpProjects.Models;
using System;
using System.Collections.Generic;

namespace OpenCvSharpProjects.Services
{
    public class ImageProcessingService
    {
        public GameInfo ProcessImage(Mat image)
        {
            var gameInfo = new GameInfo();
            try
            {
                // 템플릿 이미지 파일 경로
                string[] templatePaths = { "Resources/top_left.png", "Resources/bottom_right.png" };

                // 각 템플릿 이미지에 대한 매칭 결과를 저장할 리스트
                var matchPoints = new List<Point>();

                // ORB 특징점 검출기 생성
                var orb = ORB.Create();

                // 각 템플릿 이미지에 대해 특징점 매칭 수행
                foreach (var templatePath in templatePaths)
                {
                    var template = Cv2.ImRead(templatePath, ImreadModes.Grayscale);

                    // 템플릿 이미지 로드 확인
                    if (template.Empty())
                    {
                        Console.WriteLine($"템플릿 이미지 로드 실패: {templatePath}");
                        continue;
                    }

                    // 템플릿 이미지 크기 확인
                    if (template.Width == 0 || template.Height == 0)
                    {
                        Console.WriteLine($"템플릿 이미지 크기 오류: {templatePath}");
                        continue;
                    }

                    // 특징점 검출 및 기술
                    KeyPoint[] keypoints1, keypoints2;
                    Mat descriptors1, descriptors2;
                    orb.DetectAndCompute(image, null, out keypoints1, out descriptors1);
                    orb.DetectAndCompute(template, null, out keypoints2, out descriptors2);

                    // BFMatcher 생성
                    var matcher = new BFMatcher(NormTypes.Hamming, true);

                    // 특징점 매칭
                    var matches = matcher.Match(descriptors1, descriptors2);

                    // 좋은 매칭 결과만 선택
                    var goodMatches = new List<DMatch>();
                    double minDist = double.MaxValue;
                    double maxDist = double.MinValue;
                    for (int i = 0; i < descriptors1.Rows; i++)
                    {
                        double dist = matches[i].Distance;
                        if (dist < minDist) minDist = dist;
                        if (dist > maxDist) maxDist = dist;
                    }
                    double goodMatchDist = 2 * minDist;
                    if (goodMatchDist > maxDist)
                    {
                        goodMatchDist = 0.7 * maxDist;
                    }
                    for (int i = 0; i < descriptors1.Rows; i++)
                    {
                        if (matches[i].Distance < goodMatchDist)
                        {
                            goodMatches.Add(matches[i]);
                        }
                    }

                    // 매칭 결과를 이용하여 템플릿 위치 계산
                    if (goodMatches.Count >= 4) // 최소 4개의 매칭점 필요
                    {
                        var pts1 = goodMatches.Select(m => keypoints1[m.QueryIdx].Pt).ToArray();
                        var pts2 = goodMatches.Select(m => keypoints2[m.TrainIdx].Pt).ToArray();

                        // 호모그래피 행렬 계산
                        var homography = Cv2.FindHomography(pts2, pts1, HomographyMethods.Ransac);

                        // 템플릿 이미지의 네 꼭짓점 좌표
                        var templateCorners = new Point2f[]
                        {
                            new Point2f(0, 0),
                            new Point2f(template.Width, 0),
                            new Point2f(template.Width, template.Height),
                            new Point2f(0, template.Height)
                        };

                        // 호모그래피 행렬을 이용하여 웹캠 이미지에서 템플릿 이미지의 꼭짓점 좌표 계산
                        var imageCorners = Cv2.PerspectiveTransform(templateCorners, homography);

                        // 꼭짓점 좌표를 이용하여 게임 화면 영역 계산
                        var topLeft = new Point((int)imageCorners[0].X, (int)imageCorners[0].Y);
                        var bottomRight = new Point((int)imageCorners[2].X, (int)imageCorners[2].Y);
                        int x = (int)Math.Max(0, topLeft.X);
                        int y = (int)Math.Max(0, topLeft.Y);
                        int width = (int)Math.Min(image.Width - x, bottomRight.X - topLeft.X);
                        int height = (int)Math.Min(image.Height - y, bottomRight.Y - topLeft.Y);
                        var gameWindowRect = new Rect(x, y, width, height);

                        gameInfo.GameWindowRect = gameWindowRect;
                    }
                }
            }
            catch (OpenCvSharp.OpenCVException ex)
            {
                Console.WriteLine($"OpenCV 예외 발생: {ex.Message}");
            }
            catch (Exception ex)
            {
                Console.WriteLine($"예외 발생: {ex.Message}");
            }

            return gameInfo;
        }
    }
}
코드 설명
- 네임스페이스
using OpenCvSharp;: OpenCvSharp 라이브러리의 기능을 사용하기 위해 필요한 네임스페이스이다. 이미지 처리, 객체 인식 등의 기능을 제공한다.using OpenCvSharpProjects.Models;:GameInfo클래스를 사용하기 위해 필요하다.GameInfo클래스는 게임 화면 영역, 유저 위치 등 게임 관련 정보를 저장하는 모델이다.using System;: C#의 기본적인 클래스와 함수를 사용하기 위해 필요하다.using System.Collections.Generic;: 컬렉션 클래스 (예:List<T>)를 사용하기 위해 필요하다.
ImageProcessingService클래스
public class ImageProcessingService: 이미지 처리 서비스를 제공하는 클래스이다.
ProcessImage메서드
public GameInfo ProcessImage(Mat image): 입력 이미지(Mat image)를 분석하여 게임 정보 (GameInfo)를 추출하고 반환하는 메서드이다.var gameInfo = new GameInfo();:GameInfo객체를 생성하여 게임 정보를 저장한다.try-catch블록: 예외 처리를 위해try-catch블록을 사용한다.
- 템플릿 이미지 로드 및 확인
string[] templatePaths = { "Resources/top_left.png", "Resources/bottom_right.png" };: 템플릿 이미지 파일 경로를 저장하는 배열이다.var matchPoints = new List<Point>();: 템플릿 매칭 결과 좌표를 저장할 리스트이다.var orb = ORB.Create();: ORB 특징점 검출기를 생성한다.foreach (var templatePath in templatePaths): 각 템플릿 이미지에 대해 반복한다.var template = Cv2.ImRead(templatePath, ImreadModes.Grayscale);: 템플릿 이미지를 그레이스케일로 읽어온다.if (template.Empty()): 템플릿 이미지 로드에 실패하면 오류 메시지를 출력하고 다음 템플릿 이미지로 넘어간다.if (template.Width == 0 || template.Height == 0): 템플릿 이미지 크기가 0이면 오류 메시지를 출력하고 다음 템플릿 이미지로 넘어간다.
- 특징점 검출 및 매칭
orb.DetectAndCompute(image, null, out keypoints1, out descriptors1);: 입력 이미지에서 특징점을 검출하고 기술한다.orb.DetectAndCompute(template, null, out keypoints2, out descriptors2);: 템플릿 이미지에서 특징점을 검출하고 기술한다.var matcher = new BFMatcher(NormTypes.Hamming, true);: BFMatcher 객체를 생성한다.var matches = matcher.Match(descriptors1, descriptors2);: 특징점 매칭을 수행한다.// 좋은 매칭 결과만 선택: 매칭 결과 중에서 좋은 매칭 결과만 선택하는 로직이다. (자세한 설명은 생략)
- 게임 화면 영역 계산
if (goodMatches.Count >= 4): 좋은 매칭 결과가 4개 이상이면 게임 화면 영역을 계산한다.var pts1 = goodMatches.Select(m => keypoints1[m.QueryIdx].Pt).ToArray();: 매칭된 특징점의 좌표를 추출한다.var pts2 = goodMatches.Select(m => keypoints2[m.TrainIdx].Pt).ToArray();: 매칭된 특징점의 좌표를 추출한다.var homography = Cv2.FindHomography(pts2, pts1, HomographyMethods.Ransac);: 호모그래피 행렬을 계산한다.var templateCorners = new Point2f[] { ... }: 템플릿 이미지의 네 꼭짓점 좌표를 정의한다.var imageCorners = Cv2.PerspectiveTransform(templateCorners, homography);: 호모그래피 행렬을 이용하여 웹캠 이미지에서 템플릿 이미지의 꼭짓점 좌표를 계산한다.var topLeft = new Point((int)imageCorners[0].X, (int)imageCorners[0].Y);: 왼쪽 상단 꼭짓점 좌표를 계산한다.var bottomRight = new Point((int)imageCorners[2].X, (int)imageCorners[2].Y);: 오른쪽 하단 꼭짓점 좌표를 계산한다.var gameWindowRect = new Rect(x, y, width, height);: 게임 화면 영역을 계산한다.gameInfo.GameWindowRect = gameWindowRect;: 계산된 게임 화면 영역을gameInfo객체에 저장한다.
- 예외 처리
catch (OpenCvSharp.OpenCVException ex): OpenCV 예외 발생 시 오류 메시지를 출력한다.catch (Exception ex): 기타 예외 발생 시 오류 메시지를 출력한다.
- 반환 값
return gameInfo;: 게임 정보를 담고 있는GameInfo객체를 반환한다.
이처럼 ImageProcessingService 클래스는 웹캠 이미지에서 특징점 매칭을 통해 게임 화면 영역을 찾고, 게임 정보를 추출하는 역할을 수행한다.
오류 발생 1
public GameInfo ProcessImage(Mat image){}

일관성 없는 액세스 가능성: 'GameInfo' 반환 형식이 'ImageProcessingService.ProcessImage(Mat)' 메서드보다 액세스하기 어렵습니다.
GameInfo 접근 제한자 오류
- 원인:
GameInfo클래스의 접근 제한자가ImageProcessingService.ProcessImage(Mat)메서드의 접근 제한자보다 낮아서 발생하는 오류입니다. 즉,GameInfo클래스가internal(기본 접근 제한자)로 선언되어 있는데,ProcessImage메서드는public으로 선언되어 있어 접근 제한자가 일치하지 않습니다. - 해결 방법:
GameInfo클래스의 접근 제한자를public으로 변경합니다.
// Models/GameInfo.cs
public class GameInfo // public으로 변경
{
    // ...
}
오류 발생 2
orb.DetectAndCompute(image, null, out keypoints1, out descriptors1);

4 인수는 'out' 키워드와 함께 전달할 수 없습니다.


orb.DetectAndCompute(template, null, out keypoints2, out descriptors2);

4 인수는 'out' 키워드와 함께 전달할 수 없습니다.
orb.DetectAndCompute() 오류
- 원인:
DetectAndCompute()메서드의 네 번째 인자는out키워드를 사용하여 전달해야 하는데,out키워드 없이 전달하여 발생하는 오류입니다.
ORB 클래스의 DetectAndCompute() 메소드가 descriptors 매개변수에 대한 out 키워드를 허용하지 않기 때문에 이 오류가 발생합니다. 이는 descriptors 매개변수가 out 키워드 없이 참조로 전달될 것으로 예상되기 때문에 발생할 수 있습니다.
- 해결 방법:
DetectAndCompute()메서드 호출의 descriptors1 및 descriptors2 매개 변수에서 out 키워드를 제거했습니다. 이렇게 하면 메소드가 올바른 매개변수 유형으로 호출됩니다.
orb.DetectAndCompute(image, null, out keypoints1, descriptors1); // out 키워드 제거
orb.DetectAndCompute(template, null, out keypoints2, descriptors2); // out 키워드 제거
오류 발생 3
var homography = Cv2.FindHomography(pts2, pts1, HomographyMethods.Ransac);

1 인수: 'OpenCvSharp.Point2f[]'에서 'OpenCvSharp.InputArray'(으)로 변환할 수 없습니다.

2 인수: 'OpenCvSharp.Point2f[]'에서 'OpenCvSharp.InputArray'(으)로 변환할 수 없습니다.
Cv2.FindHomography() 오류
- 원인:
Cv2.FindHomography()메서드의 첫 번째와 두 번째 인자는InputArray타입이어야 하는데,Point2f[]타입을 전달하여 발생하는 오류입니다.Point2f[]배열을InputArray타입으로 변환해야 합니다. - 해결 방법:
Point2f[]배열을InputArray.Create()메서드를 사용하여InputArray타입으로 변환합니다.
var homography = Cv2.FindHomography(InputArray.Create(pts2), InputArray.Create(pts1), HomographyMethods.Ransac); // InputArray.Create() 사용KeyboardControlService.cs
KeyboardControlService.cs 파일은 키보드 제어와 관련된 로직을 담당하는 KeyboardControlService 클래스를 정의한다. 이 클래스는 주로 게임 캐릭터를 조작하기 위해 키보드 입력을 시뮬레이션하는 역할을 수행한다.
기존 코드
// Services/KeyboardControlService.cs
using System.Threading.Tasks;
using System.Windows.Forms; // SendKeys를 사용하기 위해 추가

namespace OpenCvSharpProjects.Services
{
    public class KeyboardControlService
    {
        public async Task PressKeyAsync(Keys key)
        {
            // 키보드 입력을 시뮬레이션합니다.
            await Task.Run(() => SendKeys.SendWait(key.ToString()));
        }
    }
}
코드 설명
- 네임스페이스
using System.Threading.Tasks;: 비동기 작업을 위한Task클래스를 사용하기 위해 필요한 네임스페이스이다.using System.Windows.Forms;:SendKeys클래스를 사용하기 위해 필요한 네임스페이스이다.SendKeys클래스는 키보드 입력을 시뮬레이션하는 기능을 제공한다.
KeyboardControlService클래스
public class KeyboardControlService: 키보드 제어 서비스를 제공하는 클래스이다.
PressKeyAsync메서드
public async Task PressKeyAsync(Keys key): 지정된 키 (Keys key)를 누르는 비동기 메서드이다.await Task.Run(() => SendKeys.SendWait(key.ToString()));:Task.Run()메서드를 사용하여 키보드 입력 시뮬레이션 작업을 별도의 스레드에서 비동기적으로 실행한다.SendKeys.SendWait()메서드는 지정된 키를 누른 후 해당 키가 처리될 때까지 기다린다.
추가 정보
SendKeys클래스는 키보드 입력을 시뮬레이션하는 데 사용됩니다.SendKeys.SendWait()메서드는 지정된 키를 누르고, 해당 키 입력이 처리될 때까지 기다립니다.Keys열거형은 키보드의 각 키를 나타내는 값을 정의합니다. 예를 들어,Keys.Up,Keys.Down,Keys.Left,Keys.Right는 각각 위쪽, 아래쪽, 왼쪽, 오른쪽 방향키를 나타냅니다.
이처럼 KeyboardControlService 클래스는 프로그램에서 키보드 입력을 시뮬레이션하여 캐릭터를 조작하는 데 사용된다.
개선 코드
- 배경
WPF 프로젝트에서 Windows Forms 컨트롤을 직접 사용하는 것은 일반적으로 권장되지 않습니다. WPF와 Windows Forms는 UI 프레임워크가 다르기 때문에, 두 가지를 혼합하여 사용하면 예기치 않은 문제가 발생할 수 있습니다.
SendKeys 클래스처럼 WPF에서 직접적인 대안이 없는 경우에는 Windows Forms 네임스페이스를 사용할 수 있습니다. 하지만, 가능하면 WPF에서 제공하는 기능을 사용하는 것이 좋습니다.
WPF에서 SendKeys 클래스의 대안으로 InputSimulator 라이브러리를 사용할 수 있습니다. InputSimulator 라이브러리는 키보드 및 마우스 입력을 시뮬레이션하는 기능을 제공하며, WPF 환경에서 더 안정적으로 동작합니다.
InputSimulator 라이브러리
- NuGet 패키지 관리자에서 InputSimulator 패키지를 설치합니다.
- InputSimulator 클래스를 사용하여 키보드 입력을 시뮬레이션합니다.
InputSimulator 라이브러리 사용 방법
- NuGet 패키지 관리자에서 InputSimulator 패키지를 설치합니다.
- InputSimulator 클래스를 사용하여 키보드 입력을 시뮬레이션합니다.
InputSimulator의 특징
- Windows 입력 시뮬레이션:
SendKeys와 유사하게 키보드와 마우스 입력을 시뮬레이션하지만, WPF 환경에서 더욱 안정적이고 다양한 기능을 제공합니다. - 키보드 입력: 키 누르기, 키 떼기, 키 입력, 단축키 등 다양한 키보드 입력을 시뮬레이션할 수 있습니다.
- 마우스 입력: 마우스 이동, 클릭, 드래그, 휠 스크롤 등 다양한 마우스 입력을 시뮬레이션할 수 있습니다.
- WPF 지원: WPF 애플리케이션에서 사용하기 적합합니다.
개선 코드
InputSimulator 라이브러리를 사용하도록 KeyboardControlService.cs를 다시 작성.
// Services/KeyboardControlService.cs
using System.Threading.Tasks;
using WindowsInput; // InputSimulator를 사용하기 위해 추가

namespace OpenCvSharpProjects.Services
{
    public class KeyboardControlService
    {
        private readonly InputSimulator simulator = new InputSimulator(); // InputSimulator 객체 생성

        public async Task PressKeyAsync(WindowsInput.Native.VirtualKeyCode key) // VirtualKeyCode 사용
        {
            // 키보드 입력을 시뮬레이션합니다.
            await Task.Run(() => simulator.Keyboard.KeyPress(key)); // simulator.Keyboard.KeyPress() 사용
        }
    }
}
변경 사항
using WindowsInput;: InputSimulator 네임스페이스를 추가했습니다.InputSimulator simulator = new InputSimulator();:InputSimulator객체를 생성했습니다.PressKeyAsync메서드의 매개변수를Keys에서VirtualKeyCode로 변경했습니다.simulator.Keyboard.KeyPress(key)메서드를 사용하여 키보드 입력을 시뮬레이션합니다.
이제 KeyboardControlService에서 InputSimulator를 사용하여 키보드 입력을 시뮬레이션할 수 있습니다.
3단계
네, MainWindowViewModel 클래스 구현을 쉽고 자세하게 설명해 드리겠습니다.
MainWindowViewModel 클래스는 WPF 응용 프로그램에서 MVVM 패턴의 ViewModel 역할을 수행합니다. 즉, View (MainWindow)에 표시할 데이터를 제공하고, View에서 발생하는 이벤트를 처리하며, Model (GameInfo)과 상호 작용하여 프로그램의 로직을 구현합니다.
MainWindowViewModel 클래스 구현
// ViewModels/MainWindowViewModel.cs
using CommunityToolkit.Mvvm.ComponentModel;
using CommunityToolkit.Mvvm.Input;
using OpenCvSharp;
using OpenCvSharp.WpfExtensions;
using OpenCvSharpProjects.Models;
using OpenCvSharpProjects.Services;
using System;
using System.Threading.Tasks;
using System.Windows;
using System.Windows.Input;
using System.Windows.Media;
using System.Windows.Threading;

namespace OpenCvSharpProjects.ViewModels
{
    public partial class MainWindowViewModel : ObservableObject
    {
        private readonly WebcamService webcamService;
        private readonly ImageProcessingService imageProcessingService;
        private readonly KeyboardControlService keyboardControlService;
        private GameInfo gameInfo;

        public MainWindowViewModel()
        {
            webcamService = new WebcamService();
            imageProcessingService = new ImageProcessingService();
            keyboardControlService = new KeyboardControlService();
            gameInfo = new GameInfo();

            StartCaptureCommand = new RelayCommand(StartCapture);
            StopCaptureCommand = new RelayCommand(StopCapture);
            StartGameCommand = new RelayCommand(StartGame);
            StopGameCommand = new RelayCommand(StopGame);
        }

        [ObservableProperty]
        private WriteableBitmap? cameraImage;

        [ObservableProperty]
        private OpenCvSharp.Rect gameWindowRect;

        // View에서 실행할 Command
        public ICommand StartCaptureCommand { get; private set; }
        public ICommand StopCaptureCommand { get; private set; }
        public ICommand StartGameCommand { get; private set; }
        public ICommand StopGameCommand { get; private set; }

        // 웹캠 캡처 시작
        private async void StartCapture()
        {
            await webcamService.StartCaptureAsync();
            CompositionTarget.Rendering += UpdateFrame;
        }

        // 웹캠 캡처 중지
        private void StopCapture()
        {
            webcamService.StopCapture();
            CompositionTarget.Rendering -= UpdateFrame;
        }

        // 게임 시작
        private void StartGame()
        {
            // TODO: 게임 시작 로직 구현
        }

        // 게임 중지
        private void StopGame()
        {
            // TODO: 게임 중지 로직 구현
        }

        // 프레임 업데이트
        private async void UpdateFrame(object? sender, EventArgs e)
        {
            Mat frame = await webcamService.GetFrameAsync();

            if (!frame.Empty())
            {
                CameraImage = frame.ToWriteableBitmap();

                await Task.Run(() =>
                {
                    gameInfo = imageProcessingService.ProcessImage(frame.Clone());
                    GameWindowRect = gameInfo.GameWindowRect;
                });
            }
        }
    }
}
코드 설명
-
필드
webcamService,imageProcessingService,keyboardControlService: 각 서비스(WebcamService클래스,ImageProcessingService클래스,KeyboardControlService클래스)를 사용하기 위한 필드이다.gameInfo: 게임 정보를 저장하는GameInfo객체이다. 게임 화면 영역, 유저 위치 등의 정보를 담고 있다.
-
생성자
-
각 서비스 객체를 초기화한다.
webcamService = new WebcamService();:WebcamService클래스의 인스턴스를 생성하여webcamService필드에 할당한다. 웹캠 관련 작업을 위해 필요한 객체를 초기화한다.imageProcessingService = new ImageProcessingService();:ImageProcessingService클래스의 인스턴스를 생성하여imageProcessingService필드에 할당한다. 이미지 처리 관련 작업을 위해 필요한 객체를 초기화한다.keyboardControlService = new KeyboardControlService();:KeyboardControlService클래스의 인스턴스를 생성하여keyboardControlService필드에 할당한다. 키보드 제어 관련 작업을 위해 필요한 객체를 초기화한다.gameInfo = new GameInfo();:GameInfo클래스의 인스턴스를 생성하여gameInfo필드에 할당한다. 게임 정보를 저장하기 위한 객체를 초기화한다.
-
RelayCommand를 사용하여 Command를 초기화한다.StartCaptureCommand = new RelayCommand(StartCapture);:StartCaptureCommandCommand를RelayCommand객체로 초기화한다.RelayCommand는ICommand인터페이스를 구현한 클래스로, View에서 버튼 클릭 등의 이벤트를 통해 ViewModel의 메서드를 실행할 수 있도록 한다. 이 경우StartCapture메서드가 실행된다.StopCaptureCommand = new RelayCommand(StopCapture);:StopCaptureCommandCommand를RelayCommand객체로 초기화한다. 이 경우StopCapture메서드가 실행된다.StartGameCommand = new RelayCommand(StartGame);:StartGameCommandCommand를RelayCommand객체로 초기화한다. 이 경우StartGame메서드가 실행된다.StopGameCommand = new RelayCommand(StopGame);:StopGameCommandCommand를RelayCommand객체로 초기화한다. 이 경우StopGame메서드가 실행된다.
-
-
속성
-
CameraImage: 웹캠에서 캡처한 이미지를 표시하기 위한WriteableBitmap속성이다.get접근자:frame필드에 저장된 이미지를WriteableBitmap형식으로 변환하여 반환한다.set접근자:WriteableBitmap형식의 이미지를Mat형식으로 변환하여frame필드에 저장하고,OnPropertyChanged()메서드를 호출하여 View에 속성 값이 변경되었음을 알린다.
-
GameWindowRect: 게임 화면 영역을 표시하기 위한Rect속성이다.get접근자:gameInfo객체의GameWindowRect속성 값을 가져와 반환한다.set접근자:gameInfo객체의GameWindowRect속성 값을 설정하고,OnPropertyChanged()메서드를 호출하여 View에 속성 값이 변경되었음을 알린다.
-
-
Command
StartCaptureCommand,StopCaptureCommand,StartGameCommand,StopGameCommand: View에서 버튼 클릭 등으로 실행할 수 있는 Command이다. 각 Command는 ViewModel의 특정 메서드를 실행하도록 연결되어 있다.
-
메서드
-
StartCapture(): 웹캠 캡처를 시작하는 메서드이다.await webcamService.StartCaptureAsync();:webcamService객체의StartCaptureAsync()메서드를 호출하여 웹캠 캡처를 비동기적으로 시작한다.CompositionTarget.Rendering += UpdateFrame;: WPF의CompositionTarget.Rendering이벤트에UpdateFrame메서드를 등록한다. 이 이벤트는 화면이 렌더링될 때마다 발생하며,UpdateFrame메서드는 이 이벤트가 발생할 때마다 호출되어 웹캠에서 새로운 프레임을 가져와 화면을 업데이트한다.
-
StopCapture(): 웹캠 캡처를 중지하는 메서드이다.webcamService.StopCapture();:webcamService객체의StopCapture()메서드를 호출하여 웹캠 캡처를 중지한다.CompositionTarget.Rendering -= UpdateFrame;:CompositionTarget.Rendering이벤트에서UpdateFrame메서드를 제거하여 프레임 업데이트를 중지한다.
-
StartGame(): 게임 시작 로직을 구현해야 하는 메서드이다.아직 구현하기 전이다(TODO). -
StopGame(): 게임 중지 로직을 구현해야 하는 메서드이다. 아직 구현하기 전이다(TODO). -
UpdateFrame(): 웹캠에서 프레임을 가져와 이미지 처리를 수행하고,CameraImage속성을 업데이트한다.Mat frame = await webcamService.GetFrameAsync();:webcamService객체의GetFrameAsync()메서드를 호출하여 웹캠에서 프레임을 비동기적으로 가져온다.if (!frame.Empty()): 가져온 프레임이 비어있지 않으면, 즉 유효한 이미지 데이터가 있는 경우에만 다음 작업을 수행한다.CameraImage = frame.ToWriteableBitmap();: 프레임을WriteableBitmap형식으로 변환하여CameraImage속성에 설정한다. 이렇게 하면 View에서 웹캠 이미지를 표시할 수 있다.await Task.Run(() => ... );:Task.Run()메서드를 사용하여 이미지 처리 작업을 별도의 스레드에서 비동기적으로 실행한다. 이는 UI 스레드를 차단하지 않고 이미지 처리를 수행하여 UI 응답성을 유지하기 위함이다.gameInfo = imageProcessingService.ProcessImage(frame.Clone());:imageProcessingService객체의ProcessImage()메서드를 호출하여 이미지 처리를 수행하고, 결과를gameInfo객체에 저장한다.frame.Clone()메서드는 이미지 데이터를 복사하여 전달하는데, 이는 원본 이미지 데이터가 다른 스레드에서 변경되는 것을 방지하기 위함이다.GameWindowRect = gameInfo.GameWindowRect;:gameInfo객체에서 게임 화면 영역 정보를 가져와GameWindowRect속성에 설정한다. 이렇게 하면 View에서 게임 화면 영역을 표시할 수 있다.
-
이처럼 MainWindowViewModel 클래스는 웹캠 캡처, 이미지 처리, 게임 정보 관리 등의 기능을 제공하며, View와의 상호 작용을 위해 CameraImage, GameWindowRect 속성과 StartCaptureCommand, StopCaptureCommand, StartGameCommand, StopGameCommand Command를 제공한다.
추가 정보
ObservableObject: .NET Community Toolkit에서 제공하는 클래스로,INotifyPropertyChanged인터페이스를 구현하여 속성 변경 알림을 쉽게 처리할 수 있도록 합니다.RelayCommand: .NET Community Toolkit에서 제공하는 클래스로,ICommand인터페이스를 구현하여 View에서 ViewModel의 메서드를 실행할 수 있도록 합니다.Task.Run(): 비동기적으로 작업을 실행하기 위해 사용합니다. 이미지 처리와 같이 시간이 오래 걸리는 작업을 UI 스레드와 분리하여 실행하면 UI 응답성을 유지할 수 있습니다.
이제 MainWindowViewModel 클래스의 기본적인 구조가 완성되었다. 다음 단계에서는 StartGame()과 StopGame() 메서드를 구현하여 게임 시작 및 중지 로직을 추가하고, ProcessImage() 메서드를 수정하여 특징점 매칭을 사용한 객체 인식 로직을 구현할 것이다.
오류 발생
 public MainWindowViewModel()
 {}

 null을 허용하지 않는 필드 'cameraImage'은(는) 생성자를 종료할 때 null이 아닌 값을 포함해야 합니다. 'required' 한정자를 추가하거나 필드을(를) nullable로 선언하는 것이 좋습니다.
발생 원인
이 오류는 생성자에서 CameraImage 필드가 초기화되지 않았고 null을 허용하지 않는 것으로 표시되었기 때문에 발생했다. 이는 CameraImage 필드가 Null이 아닌 값을 보유할 것으로 예상되지만 생성자에서 값이 할당되지 않았기 때문에 발생할 수 있다.
해결
코드를 수정한 방법은 다음과 같다. 생성자의 기본 WriteableBitmap 개체를 사용하여 CameraImage 필드를 초기화했다. 이렇게 하면 생성자가 완료될 때 CameraImage 필드가 null이 아니므로 오류가 해결됐다.
public MainWindowViewModel()
{
    webcamService = new WebcamService(); // 웹캠 서비스 객체를 생성한다.
    imageProcessingService = new ImageProcessingService(); // 이미지 처리 서비스 객체를 생성한다.
    keyboardControlService = new KeyboardControlService(); // 키보드 제어 서비스 객체를 생성한다.
    gameInfo = new GameInfo(); // 게임 정보 객체를 생성한다.


    cameraImage = new WriteableBitmap(1, 1, 96, 96, PixelFormats.Bgr32, null); // cameraImage를 초기화한다.
}
4단계
4단계: Views 폴더 (MainWindow.xaml, MainWindow.xaml.cs)
이 단계에서는 사용자 인터페이스를 담당하는 MainWindow.xaml과 MainWindow.xaml.cs 파일을 작성한다. MainWindow.xaml은 WPF 창을 디자인하고, MainWindow.xaml.cs는 MainWindow의 코드 비하인드 파일로, ViewModel과의 연결 및 이벤트 처리 등을 담당한다.
결과
1. MainWindow.xaml
MainWindowViewModel에서 정의한 속성과 Command를 바인딩하여 UI 요소를 구성한다.- 웹캠에서 캡처한 이미지를 표시할
Image컨트롤을 추가한다. - 게임 화면 영역을 표시할
Rectangle컨트롤을 추가한다. - 캡처 시작/중지, 게임 시작/중지 버튼을 추가하고 ViewModel의 Command에 바인딩한다.
<Window x:Class="OpenCvSharpProjects.Views.MainWindow"
        xmlns="http://schemas.microsoft.com/winfx/2006/xaml/presentation"
        xmlns:x="http://schemas.microsoft.com/winfx/2006/xaml"
        xmlns:d="http://schemas.microsoft.com/expression/blend/2006"
        xmlns:mc="http://schemas.openxmlformats.org/markup-compatibility/2006"
        xmlns:local="clr-namespace:OpenCvSharpProjects.ViewModels"
        mc:Ignorable="d"
        Title="MainWindow" Height="450" Width="800">
    <Window.DataContext>
        <local:MainWindowViewModel />
    </Window.DataContext>

    <Grid>
        <Grid.RowDefinitions>
            <RowDefinition Height="*"/>
            <RowDefinition Height="Auto"/>
        </Grid.RowDefinitions>

        <Image x:Name="CameraImage" Grid.Row="0" Source="{Binding CameraImage}" Stretch="Uniform" />

        <Rectangle Stroke="Red" StrokeThickness="2"
                   Visibility="{Binding GameWindowRect, Converter={StaticResource RectToVisibilityConverter}}"
                   Width="{Binding GameWindowRect.Width}" Height="{Binding GameWindowRect.Height}"
                   Margin="{Binding GameWindowRect, Converter={StaticResource RectToThicknessConverter}}" />

        <StackPanel Grid.Row="1" Orientation="Horizontal" Margin="10">
            <Button Content="캡처 시작" Command="{Binding StartCaptureCommand}" Margin="5" />
            <Button Content="캡처 중지" Command="{Binding StopCaptureCommand}" Margin="5" />
            <Button Content="게임 시작" Command="{Binding StartGameCommand}" Margin="5" />
            <Button Content="게임 중지" Command="{Binding StopGameCommand}" Margin="5" />
        </StackPanel>
    </Grid>
</Window>
2. MainWindow.xaml.cs
MainWindow의DataContext를MainWindowViewModel로 설정한다.
// Views/MainWindow.xaml.cs
using OpenCvSharpProjects.ViewModels;
using System.Windows;

namespace OpenCvSharpProjects.Views
{
    /// <summary>
    /// Interaction logic for MainWindow.xaml
    /// </summary>
    public partial class MainWindow : Window
    {
        public MainWindow()
        {
            InitializeComponent();
            DataContext = new MainWindowViewModel();
        }
    }
}
5단계
RectToVisibilityConverter 컨버터 구현.
RectToVisibilityConverter는 4단계: Views 폴더 (MainWindow.xaml, MainWindow.xaml.cs) 에서 사용된다.
3. RectToVisibilityConverter
Rect객체를Visibility값으로 변환하는 컨버터이다.GameWindowRect속성은Rect타입이므로, XAML에서Visibility속성에 바인딩하려면RectToVisibilityConverter와 같은 컨버터가 필요하다.
// Converters/RectToVisibilityConverter.cs
using System;
using System.Globalization;
using System.Windows;
using System.Windows.Data;

namespace OpenCvSharpProjects.Converters
{
    public class RectToVisibilityConverter : IValueConverter
    {
        public object Convert(object value, Type targetType, object parameter, CultureInfo culture)
        {
            if (value is Rect rect && !rect.IsEmpty)
            {
                return Visibility.Visible; // Rect 객체가 비어있지 않으면 Visible을 반환한다.
            }
            else
            {
                return Visibility.Collapsed; // Rect 객체가 비어있으면 Collapsed를 반환한다.
            }
        }

        public object ConvertBack(object value, Type targetType, object parameter, CultureInfo culture)
        {
            throw new NotImplementedException(); // ConvertBack 메서드는 구현하지 않는다.
        }
    }
}
추가 정보
xmlns:local:MainWindowViewModel클래스가 있는OpenCvSharpProjects.ViewModels네임스페이스를local접두사로 사용할 수 있도록 지정한다.Window.DataContext:MainWindow의DataContext를MainWindowViewModel로 설정하여 View에서 ViewModel의 속성과 Command에 접근할 수 있도록 한다.Image: 웹캠에서 캡처한 이미지를 표시하는 컨트롤이다.Source속성을 ViewModel의CameraImage속성에 바인딩하여 이미지를 표시한다.Rectangle: 게임 화면 영역을 표시하는 컨트롤이다.Visibility,Width,Height,Margin속성을 ViewModel의GameWindowRect속성에 바인딩하여 게임 화면 영역을 표시한다.Button: 캡처 시작/중지, 게임 시작/중지 기능을 실행하는 버튼이다. 각 버튼의Command속성을 ViewModel의 Command에 바인딩하여 버튼 클릭 이벤트를 ViewModel의 메서드에 연결한다.RectToVisibilityConverter:Rect객체를Visibility값으로 변환하는 컨버터이다.GameWindowRect속성이 비어 있는 경우Rectangle을 숨기고, 비어 있지 않은 경우Rectangle을 표시한다.
App.xaml에 리소스로 추가
RectToVisibilityConverter를 구현 완료했다면 App.xaml에 리소스로 추가해야 합니다.
App.xaml에 컨버터를 리소스로 추가하면 XAML에서 해당 컨버터를 사용할 수 있게 됩니다.
App.xaml에 리소스 추가
<Application x:Class="OpenCvSharpProjects.App"
             xmlns="http://schemas.microsoft.com/winfx/2006/xaml/presentation"
             xmlns:x="http://schemas.microsoft.com/winfx/2006/xaml"
             xmlns:local="clr-namespace:OpenCvSharpProjects.Converters"
             StartupUri="Views/MainWindow.xaml">

    <Application.Resources>
        <local:RectToThicknessConverter x:Key="RectToThicknessConverter" />
        <local:RectToVisibilityConverter x:Key="RectToVisibilityConverter" />
    </Application.Resources>
</Application>xmlns:local:RectToVisibilityConverter가 정의된 네임스페이스 (OpenCvSharpProjects.Converters)를local접두사로 사용할 수 있도록 지정합니다.<Application.Resources>: 응용 프로그램 수준에서 사용할 리소스를 정의합니다.<local:RectToVisibilityConverter x:Key="RectToVisibilityConverter" />:RectToVisibilityConverter를RectToVisibilityConverter라는 키로 리소스에 추가합니다.
MainWindow.xaml에서 컨버터 사용
이제 MainWindow.xaml에서 RectToVisibilityConverter를 사용할 수 있습니다.
<Rectangle Stroke="Red" StrokeThickness="2"
           Visibility="{Binding GameWindowRect, Converter={StaticResource RectToVisibilityConverter}}"
           Width="{Binding GameWindowRect.Width}" Height="{Binding GameWindowRect.Height}"
           Margin="{Binding GameWindowRect, Converter={StaticResource RectToThicknessConverter}}" />
{StaticResource RectToVisibilityConverter}:App.xaml에 정의된RectToVisibilityConverter리소스를 참조합니다.
RectToVisibilityConverter를 App.xaml에 추가가 완료됐다.
다음 단계는 게임 시작/중지 로직을 구현한다(즉, MainWindowViewModel 클래스의 StartGame() 메서드와 StopGame() 메서드에 게임 시작/중지 로직을 구현한다).
Views 폴더부터 구현하고 Converters폴더 구현한 이유
4단계에서 Views 폴더의 MainWindow.xaml과 MainWindow.xaml.cs 파일을 먼저 구현하고, 5단계에서 Converters 폴더의 RectToVisibilityConverter.cs 파일을 구현하는 것이 순서다.
4단계: Views 폴더 (MainWindow.xaml, MainWindow.xaml.cs)
MainWindow.xaml: WPF 창의 UI를 디자인하고, ViewModel의 속성과 Command를 바인딩한다.MainWindow.xaml.cs:MainWindow의 코드 비하인드 파일로, ViewModel 객체를 생성하고DataContext에 할당한다.
5단계: Converters 폴더 (RectToVisibilityConverter.cs)
RectToVisibilityConverter:Rect객체를Visibility값으로 변환하는 컨버터를 구현한다.
이렇게 순서를 정하는 이유
- View 우선 디자인: MVVM 패턴에서는 View를 먼저 디자인하고 ViewModel을 나중에 구현하는 것이 일반적이다.
- DataContext 설정:
MainWindow.xaml.cs에서DataContext를 설정해야MainWindow.xaml에서 ViewModel의 속성과 Command를 바인딩할 수 있다. - 컨버터 필요 시 구현:
RectToVisibilityConverter는MainWindow.xaml에서Rectangle컨트롤의Visibility속성을GameWindowRect속성에 바인딩하기 위해 필요하다. 따라서MainWindow.xaml을 디자인한 후에 필요에 따라RectToVisibilityConverter를 구현한다.
각 단계의 역할
- 4단계: 사용자 인터페이스 (UI)를 디자인하고 ViewModel과 연결합니다.
- 5단계: XAML에서 데이터 바인딩을 위해 필요한 컨버터를 구현합니다.
6단계
각 서비스 클래스의 기능 구현.
ImageProcessingService 클래스를 자세하게 구현. 이 서비스는 웹캠으로 촬영한 이미지에서 게임 화면 영역을 찾고, 플레이어와 몬스터의 위치를 인식하는 핵심적인 역할을 수행.
ImageProcessingService 클래스를 구현하기 위한 단계는 다음과 같다.
1. 특징점 매칭을 이용한 게임 화면 영역 검출
- 템플릿 이미지 준비: 게임 화면의 좌측 상단과 우측 하단 모서리 영역을 템플릿 이미지로 준비. 이 템플릿 이미지들은
Resources폴더에 저장되어 있어야 한다. - 특징점 검출: 웹캠 이미지와 템플릿 이미지에서 ORB 특징점을 검출한다.
- 특징점 매칭: 웹캠 이미지에서 템플릿 이미지와 일치하는 특징점을 찾는다.
- 호모그래피 계산: 매칭된 특징점을 기반으로 호모그래피 행렬을 계산한다.
- 게임 화면 영역 계산: 호모그래피 행렬을 이용하여 웹캠 이미지에서 게임 화면 영역의 네 꼭짓점을 찾고, 이를 이용하여 게임 화면 영역을 계산한다.
2. 객체 인식 (플레이어 및 몬스터)
- 학습 데이터 준비: 플레이어와 몬스터 이미지를 수집하여 학습 데이터를 준비한다.
- 객체 인식 모델 학습: YOLOv5, SSD와 같은 객체 인식 모델을 사용하여 학습 데이터를 학습시킨다.
- 모델 추론: 학습된 모델을 사용하여 웹캠 이미지에서 플레이어와 몬스터를 인식한다.
- 위치 정보 저장: 인식된 플레이어와 몬스터의 위치 정보 (좌표)를
GameInfo객체에 저장한다.
3. 아두이노 연동 (목표)
- 아두이노 설정: 아두이노를 사용하여 키보드 입력을 시뮬레이션하도록 설정한다.
- 시리얼 통신: C# 프로그램과 아두이노 간 시리얼 통신을 구현한다.
- 키보드 제어:
KeyboardControlService를 사용하여 아두이노를 통해 키보드 입력을 제어한다.
ImageProcessingService 코드
// Services/ImageProcessingService.cs
using OpenCvSharp;
using OpenCvSharpProjects.Models;
using System;
using System.Collections.Generic;
using System.Linq;

namespace OpenCvSharpProjects.Services
{
    public class ImageProcessingService
    {
        private readonly ORB orb;

        public ImageProcessingService()
        {
            orb = ORB.Create();
        }

        public GameInfo ProcessImage(Mat image)
        {
            var gameInfo = new GameInfo();
            try
            {
                // 1. 특징점 매칭을 이용한 게임 화면 영역 검출
                gameInfo.GameWindowRect = DetectGameWindow(image);

                // 2. 객체 인식 (플레이어 및 몬스터)
                // TODO: 객체 인식 모델을 사용하여 플레이어와 몬스터를 인식하고 위치 정보를 gameInfo에 저장합니다.

            }
            catch (OpenCvSharp.OpenCVException ex)
            {
                Console.WriteLine($"OpenCV 예외 발생: {ex.Message}");
            }
            catch (Exception ex)
            {
                Console.WriteLine($"예외 발생: {ex.Message}");
            }

            return gameInfo;
        }

        private Rect DetectGameWindow(Mat image)
        {
            // 템플릿 이미지 파일 경로
            string[] templatePaths = { "Resources/top_left.png", "Resources/bottom_right.png" };

            // 각 템플릿 이미지에 대한 매칭 결과를 저장할 리스트
            var matchPoints = new List<Point2f>();

            // 각 템플릿 이미지에 대해 특징점 매칭 수행
            foreach (var templatePath in templatePaths)
            {
                var template = Cv2.ImRead(templatePath, ImreadModes.Grayscale);

                // 특징점 검출 및 기술
                KeyPoint[] keypoints1, keypoints2;
                Mat descriptors1 = new Mat(), descriptors2 = new Mat();
                orb.DetectAndCompute(image, null, out keypoints1, out descriptors1);
                orb.DetectAndCompute(template, null, out keypoints2, out descriptors2);

                // BFMatcher 생성
                var matcher = new BFMatcher(NormTypes.Hamming, true);

                // 특징점 매칭
                var matches = matcher.Match(descriptors1, descriptors2);

                // 좋은 매칭 결과만 선택 (로직은 이전 답변과 동일)
                var goodMatches = new List<DMatch>();
                // ...

                // 매칭 결과를 이용하여 템플릿 위치 계산
                if (goodMatches.Count >= 4) // 최소 4개의 매칭점 필요
                {
                    var pts1 = goodMatches.Select(m => keypoints1[m.QueryIdx].Pt).ToArray();
                    var pts2 = goodMatches.Select(m => keypoints2[m.TrainIdx].Pt).ToArray();

                    // 호모그래피 행렬 계산
                    var homography = Cv2.FindHomography(InputArray.Create(pts2), InputArray.Create(pts1), HomographyMethods.Ransac);

                    // 템플릿 이미지의 네 꼭짓점 좌표
                    var templateCorners = new Point2f[]
                    {
                        new Point2f(0, 0),
                        new Point2f(template.Width, 0),
                        new Point2f(template.Width, template.Height),
                        new Point2f(0, template.Height)
                    };

                    // 호모그래피 행렬을 이용하여 웹캠 이미지에서 템플릿 이미지의 꼭짓점 좌표 계산
                    var imageCorners = Cv2.PerspectiveTransform(templateCorners, homography);

                    matchPoints.AddRange(imageCorners);
                }
            }

            // 꼭짓점 좌표를 이용하여 게임 화면 영역 계산
            if (matchPoints.Count == 4)
            {
                var topLeft = new OpenCvSharp.Point((int)matchPoints[0].X, (int)matchPoints[0].Y);
                var bottomRight = new OpenCvSharp.Point((int)matchPoints[2].X, (int)matchPoints[2].Y);
                return new OpenCvSharp.Rect(topLeft, bottomRight);
            }
            else
            {
                return new OpenCvSharp.Rect(); // 빈 Rect 객체 반환
            }
        }
    }
}
추가 설명
DetectGameWindow()메서드는 특징점 매칭을 사용하여 게임 화면 영역을 검출하고Rect객체로 반환한다.- 객체 인식 부분은
// TODO주석으로 표시되어 있으며, YOLOv5 또는 SSD와 같은 객체 인식 모델을 사용하여 구현해야 한다. - 아두이노 연동은 옵션(나는 아두이노 연동할 생각이다)이며, 필요에 따라 시리얼 통신을 사용하여 아두이노와 통신하고 키보드 입력을 제어할 수 있다.
참고
1.템플릿 이미지 크기
- 물리적인 크기: 템플릿 이미지의 물리적인 크기 (픽셀 단위의 너비와 높이)는 너무 작지 않도록 적절히 조절해야 합니다.
- 너무 작은 이미지는 특징점 검출이 어려울 수 있습니다.
- 일반적으로 100x100 픽셀 이상의 크기를 권장합니다.
- 데이터 크기: 템플릿 이미지의 데이터 크기 (파일 크기)는 특징점 매칭에 큰 영향을 미치지 않습니다.
- JPG, PNG 등의 이미지 형식을 사용할 수 있으며, 파일 크기가 너무 크면 로딩 속도에 영향을 줄 수 있으므로 적절히 압축하는 것이 좋습니다.
- 게임 화면과의 크기 비교: 템플릿 이미지의 크기는 게임 화면과 유사할 필요는 없습니다.
- 특징점 매칭은 이미지의 크기 변화에 불변하기 때문에 템플릿 이미지가 게임 화면보다 크거나 작더라도 매칭이 가능합니다.
개선
-
화면 크기 변화 대응
- 여러 크기의 템플릿 이미지 준비: 게임 화면 크기가 바뀐다면, 각 크기별로 템플릿 이미지를 준비하는 것이 좋다.
- 크기 조정: 템플릿 매칭 또는 특징점 매칭 전에 이미지 크기를 조정하여 게임 화면 크기 변화에 대응할 수 있다.
(예를 들어, Cv2.Resize() 함수를 사용하여 이미지 크기를 조정할 수 있다.)
-
이미지 크기 조정 사용 이유
- 웹캠 이미지의 크기를 조정하면 미니맵 크기 변화에 상관없이 특징점 매칭을 수행할 수 있다.
- 이미지 크기를 줄이면 특징점 검출 및 매칭에 필요한 계산량을 줄일 수 있어 성능을 향상시킬 수 있다.
-
주의 사항
- 이미지 크기를 너무 많이 줄이면 특징점 검출이 어려워져 특징점 매칭의 정확도가 떨어질 수 있다.
- 이미지 크기를 조정할 때는 원본 이미지의 가로 세로 비율을 유지하는 것이 좋다.
ImageProcessingService 코드 개선
// Services/ImageProcessingService.cs
// ... (생략) ...

public GameInfo ProcessImage(Mat image)
{
    // ... (생략) ...

    try
    {
        // 웹캠 이미지 크기 조정
        Cv2.Resize(image, image, new OpenCvSharp.Size(image.Width / 2, image.Height / 2)); // 이미지 크기를 절반으로 줄입니다.

        // ... (나머지 코드) ...
    }
    // ... (생략) ...
}
ProcessImage() 메서드 안에서 웹캠 이미지 크기를 조정하는 코드를 추가했다.
코드 설명
Cv2.Resize(image, image, new OpenCvSharp.Size(image.Width / 2, image.Height / 2));: 웹캠에서 캡처한 이미지 (image)의 크기를 가로 세로 각각 절반으로 줄입니다.- 첫 번째 인자는 크기를 조정할 입력 이미지입니다.
- 두 번째 인자는 크기 조정 결과를 저장할 출력 이미지입니다. 여기서는 입력 이미지와 같은
image를 사용하여 크기 조정된 이미지를 덮어씁니다. - 세 번째 인자는 조정할 이미지 크기입니다.
OpenCvSharp.Size객체를 사용하여 너비와 높이를 지정합니다.
주의 사항
- 이미지 크기를 너무 많이 줄이면 특징점 검출이 어려워져 특징점 매칭의 정확도가 떨어질 수 있습니다.
- 이미지 크기를 조정할 때는 원본 이미지의 가로 세로 비율을 유지하는 것이 좋습니다.
- 필요에 따라 이미지 크기 조정 비율을 조절할 수 있습니다.
이렇게 ImageProcessingService를 수정하면, 웹캠 이미지의 크기를 조정하여 화면 크기 변화에 대응하고 특징점 매칭의 성능을 향상시킬 수 있다.
오류 발생
return new OpenCvSharp.Rect(topLeft, bottomRight);


2 인수: 'OpenCvSharp.Point'에서 'OpenCvSharp.Size'(으)로 변환할 수 없습니다.
발생 원인
OpenCvSharp.Rect 클래스의 생성자는 Point 객체 두 개를 인자로 받지 않습니다. Rect 객체를 생성하려면 왼쪽 상단 좌표와 크기를 지정해야 합니다.
현재 코드에서는 topLeft (왼쪽 상단 좌표)와 bottomRight (오른쪽 하단 좌표)를 사용하여 Rect 객체를 생성하려고 하는데, 이는 잘못된 방법입니다.
해결 방법
topLeft (왼쪽 상단 좌표)와 bottomRight (오른쪽 하단 좌표)를 사용하여 Rect 객체를 생성하려면 다음과 같이 코드를 수정해야 합니다.
// 꼭짓점 좌표를 이용하여 게임 화면 영역 계산
if (matchPoints.Count == 4)
{
    var topLeft = new OpenCvSharp.Point((int)matchPoints[0].X, (int)matchPoints[0].Y);
    var bottomRight = new OpenCvSharp.Point((int)matchPoints[2].X, (int)matchPoints[2].Y);

    // Rect 객체 생성
    int width = bottomRight.X - topLeft.X; // 너비 계산
    int height = bottomRight.Y - topLeft.Y; // 높이 계산
    return new OpenCvSharp.Rect(topLeft.X, topLeft.Y, width, height); // 왼쪽 상단 좌표, 너비, 높이를 사용하여 Rect 객체 생성
}
// ...
코드 설명
int width = bottomRight.X - topLeft.X;: 오른쪽 하단 좌표의 X 값에서 왼쪽 상단 좌표의 X 값을 빼서 너비를 계산합니다.int height = bottomRight.Y - topLeft.Y;: 오른쪽 하단 좌표의 Y 값에서 왼쪽 상단 좌표의 Y 값을 빼서 높이를 계산합니다.return new OpenCvSharp.Rect(topLeft.X, topLeft.Y, width, height);: 왼쪽 상단 좌표의 X, Y 값과 계산된 너비, 높이를 사용하여Rect객체를 생성합니다.
이렇게 수정하면 OpenCvSharp.Rect 객체를 올바르게 생성할 수 있습니다.