
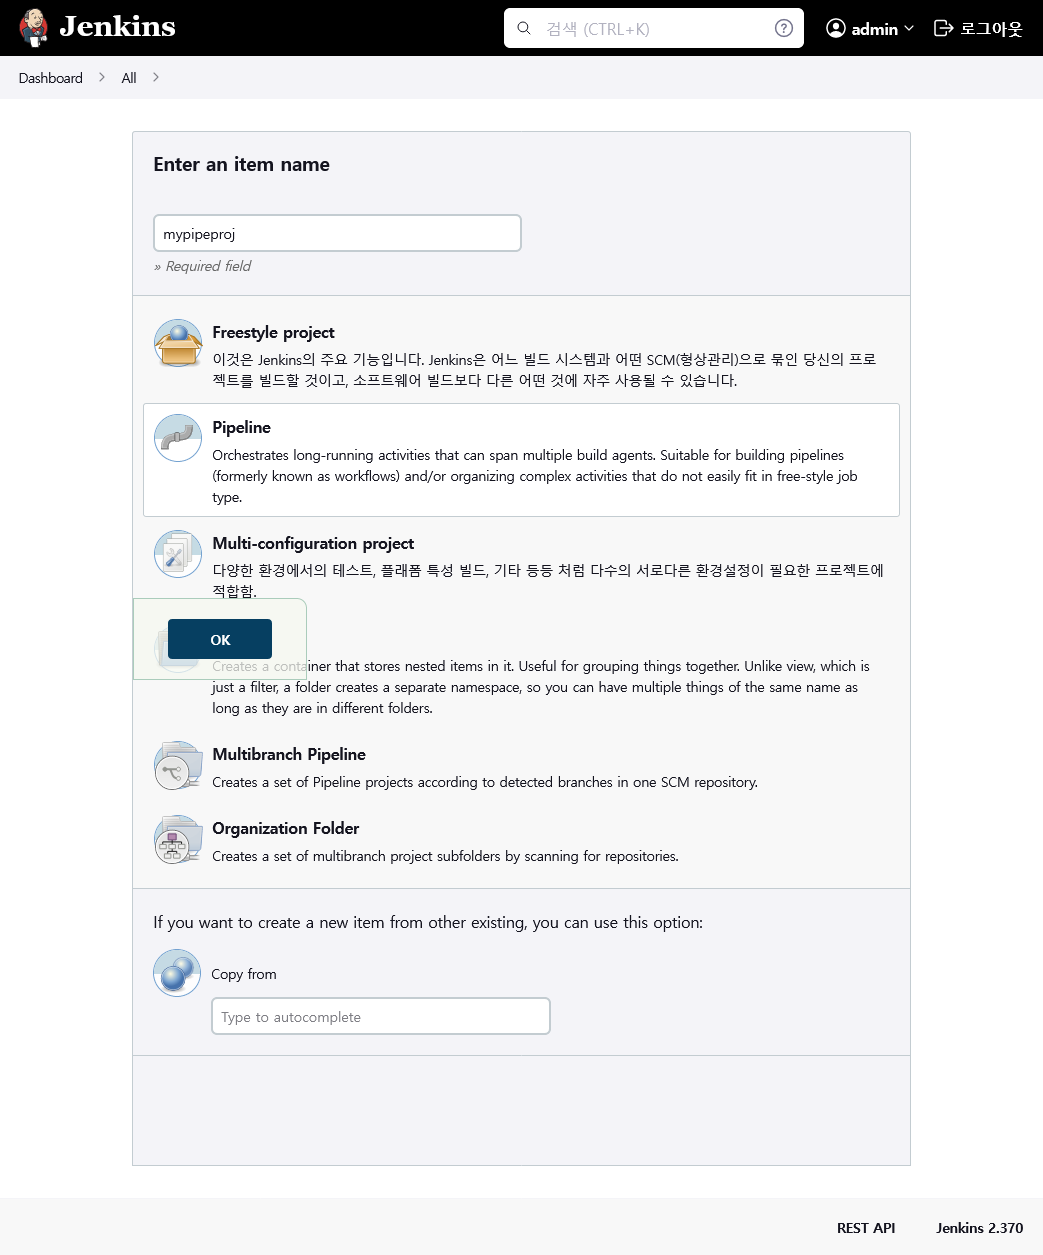
1. Jenkins Pipeline 프로젝트 생성
프로젝트 생성
NewItem-> 프로젝트명 입력, Pipeline 선택 ->OK클릭
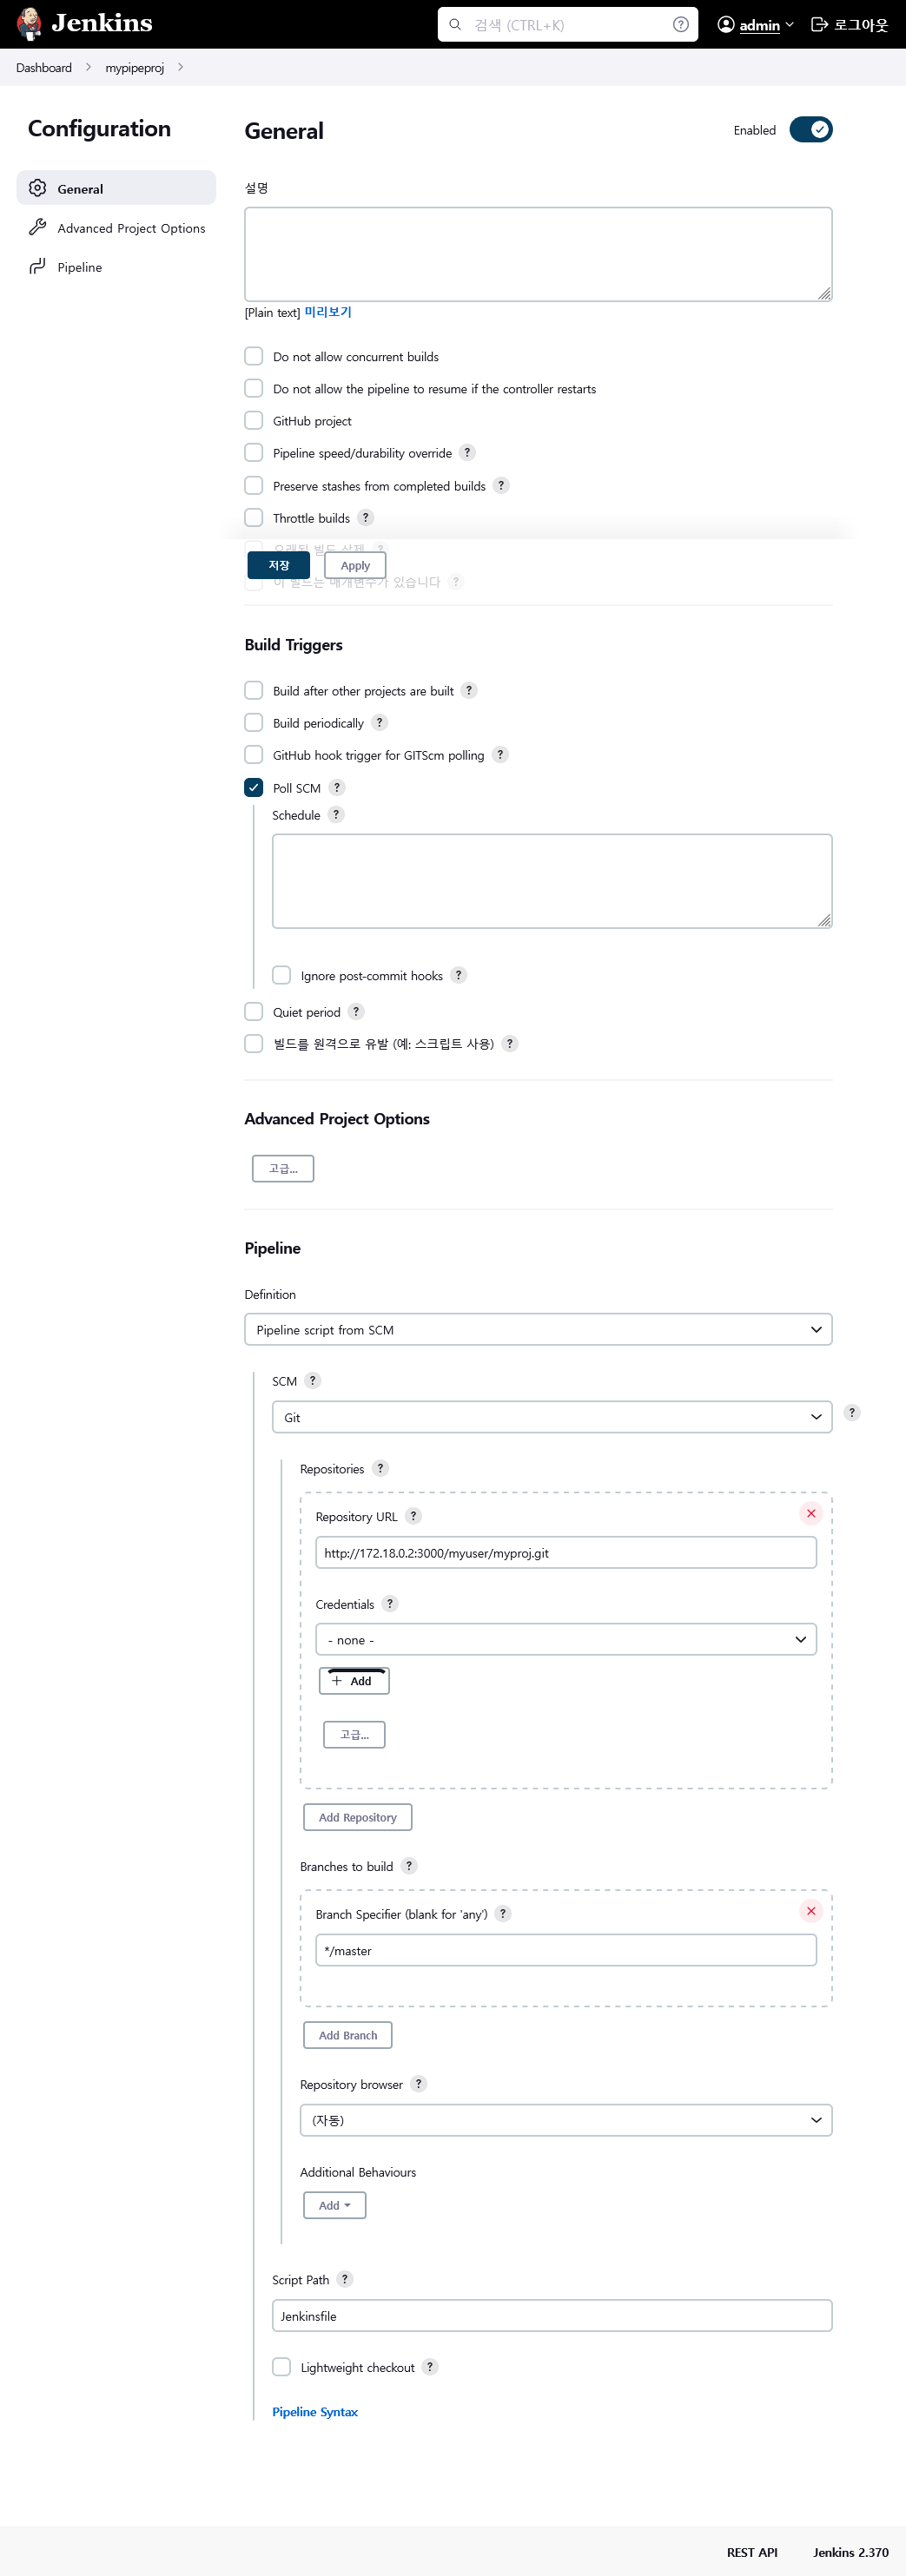
프로젝트 설정
-
Build Triggers
- Poll SCM 클릭
-
Pipeline
- Definition
- Pipeline script from SCM 선택
- SCM: Git 선택, Gitea URL 입력, Gitea 토큰 등록
- Script Path 에
Jenkinsfile입력 - Lightweight checkout 체크 해제
- Definition
2. Jenkinsfile 작성
개발 컨테이너 접속 및 Jenkinsfile 작성
-
개발 컨테이너 접속
$ docker exec -it myproj /bin/bash root@myproj:/# cd myproj/ root@myproj:/myproj# -
Jenkinsfile 작성
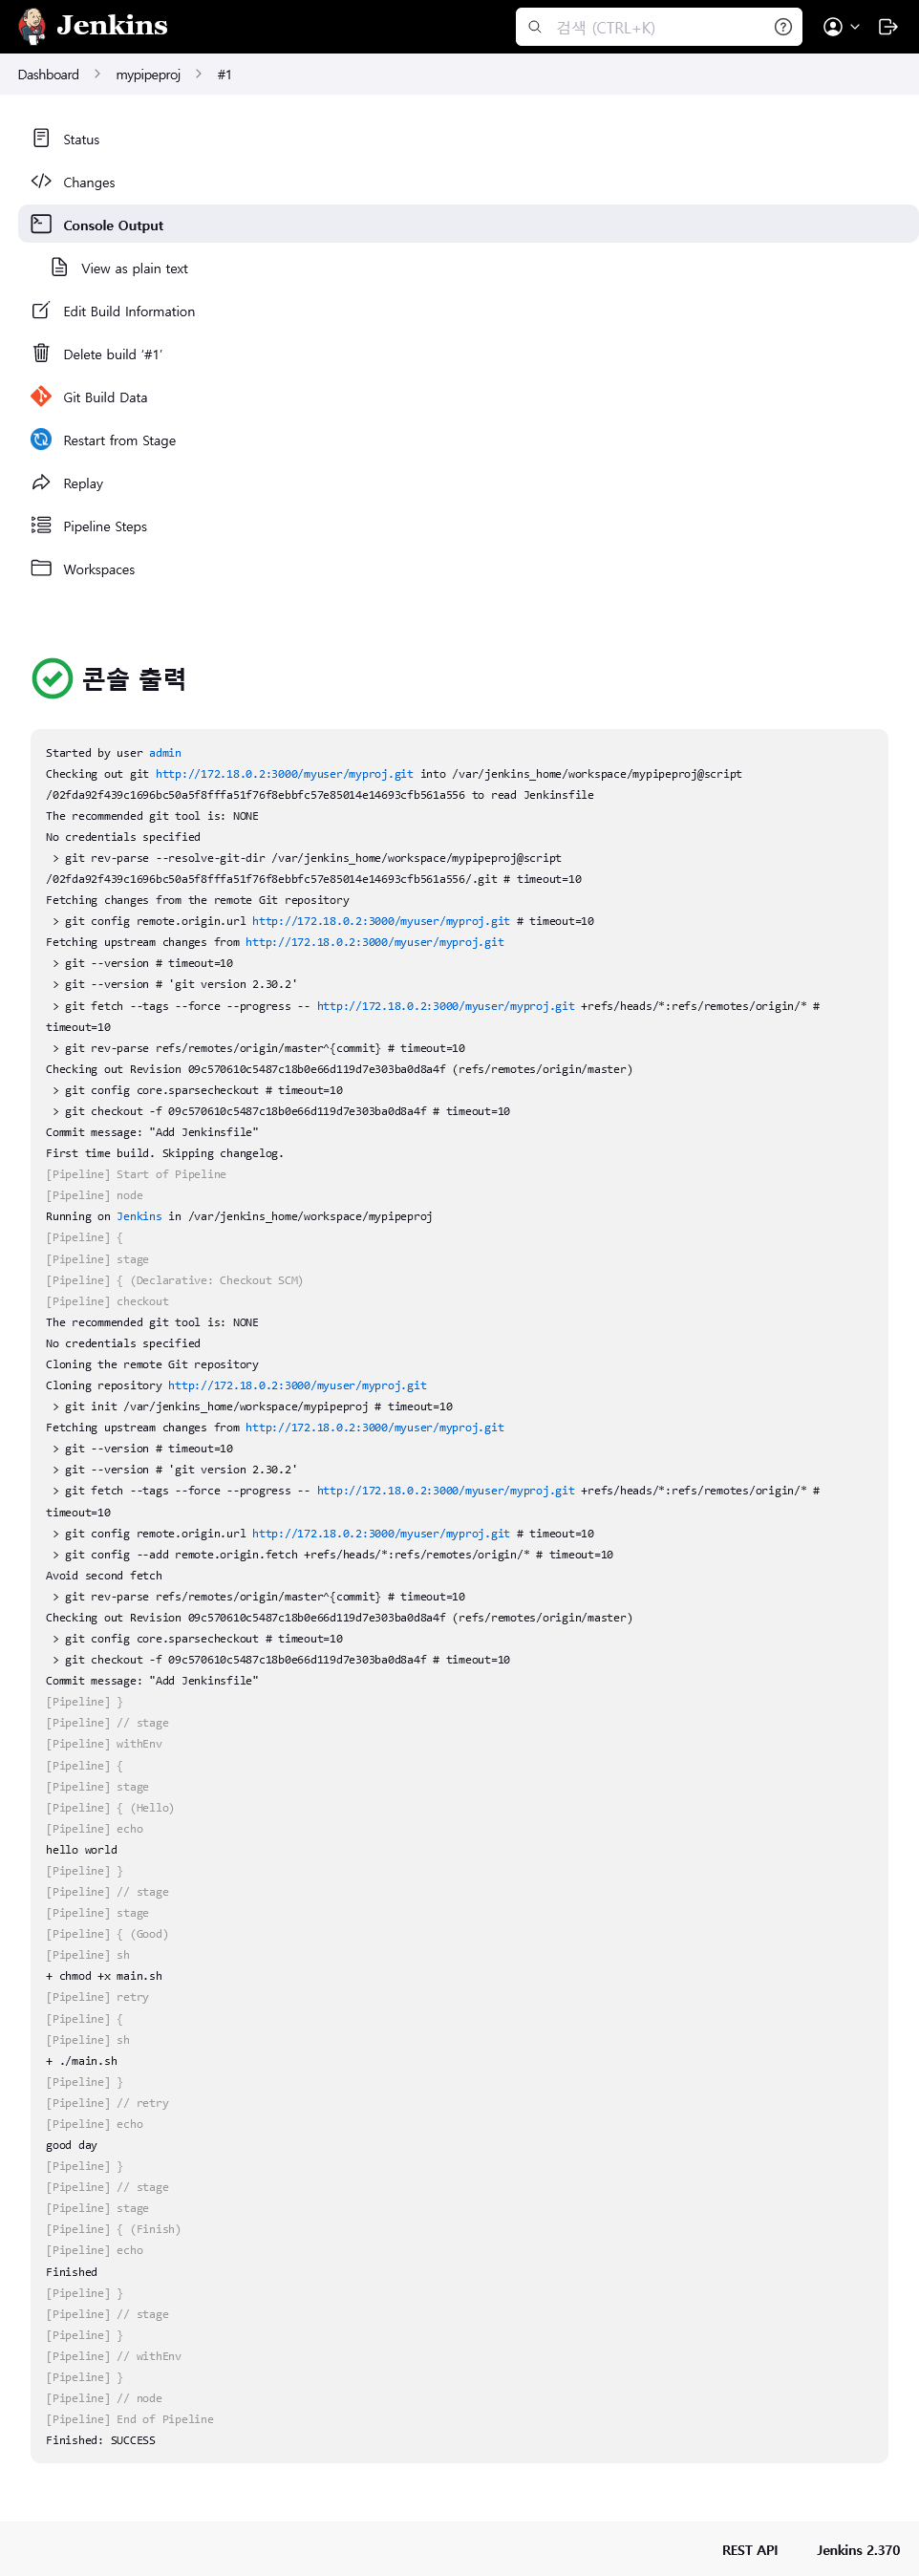
$ vi Jenkinsfilepipeline { agent any stages { stage('Hello') { steps { echo "hello world" } } stage('Good') { steps { sh "chmod +x main.sh" retry(3) { sh "./main.sh" } echo "good day" } } stage('Finish') { steps { echo "Finished" } } } }
3. 원격 저장소 내용 반영 및 결과 확인
원격 저장소 내용 반영
-
원격 저장소 내용 반영
root@myproj:/myproj# git add Jenkinsfileroot@myproj:/myproj# git commit -m "Add Jenkins"root@myproj:/myproj# git push origin master
Jenkins UI 접속
-
최초 연동 시 수동으로 빌드해야 함
- JenkinsUI 프로젝트 페이지에서
지금 빌드클릭
- JenkinsUI 프로젝트 페이지에서
-
프로젝트 페이지에서 Stage View 확인 가능
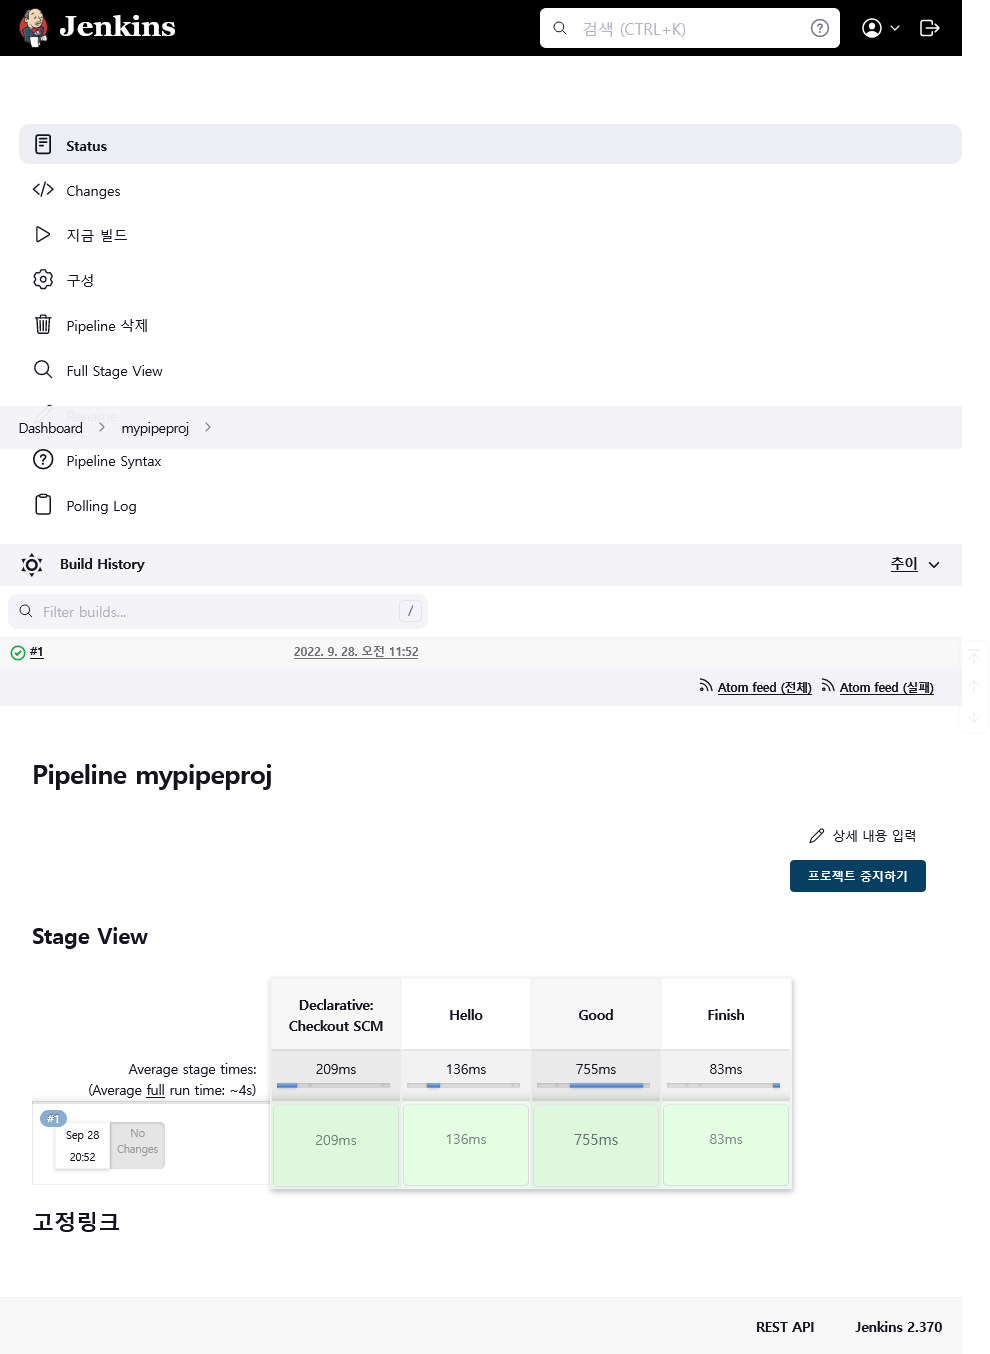
- 빌드 페이지에서 콘솔 출력결과 확인 가능

시간이 만든 코드