feat. AsyncStorage
My environment
MacBook Air M1
RAM: 16GB
SSD: 500GB
Phone: Samsung Z flip 3, Samsung Note 10
If you don’t know how to build Expo project? See this first
Make your Project in Google Cloud Platform
-
Move to Console
-
Create your project and move to your project
-
Set OAuth consent screen
-
Move to Credentials and create Credentials
-
Select Web Application(Expo Client ID)
-
Create and copy your Client ID (should not show your Client ID to others
-
Add “https://auth.expo.io” to **Authorized JavaScript origins**
-
Add "http://auth.expo.io/@your-expo-userId/projectname" to Redirect URL
-
-
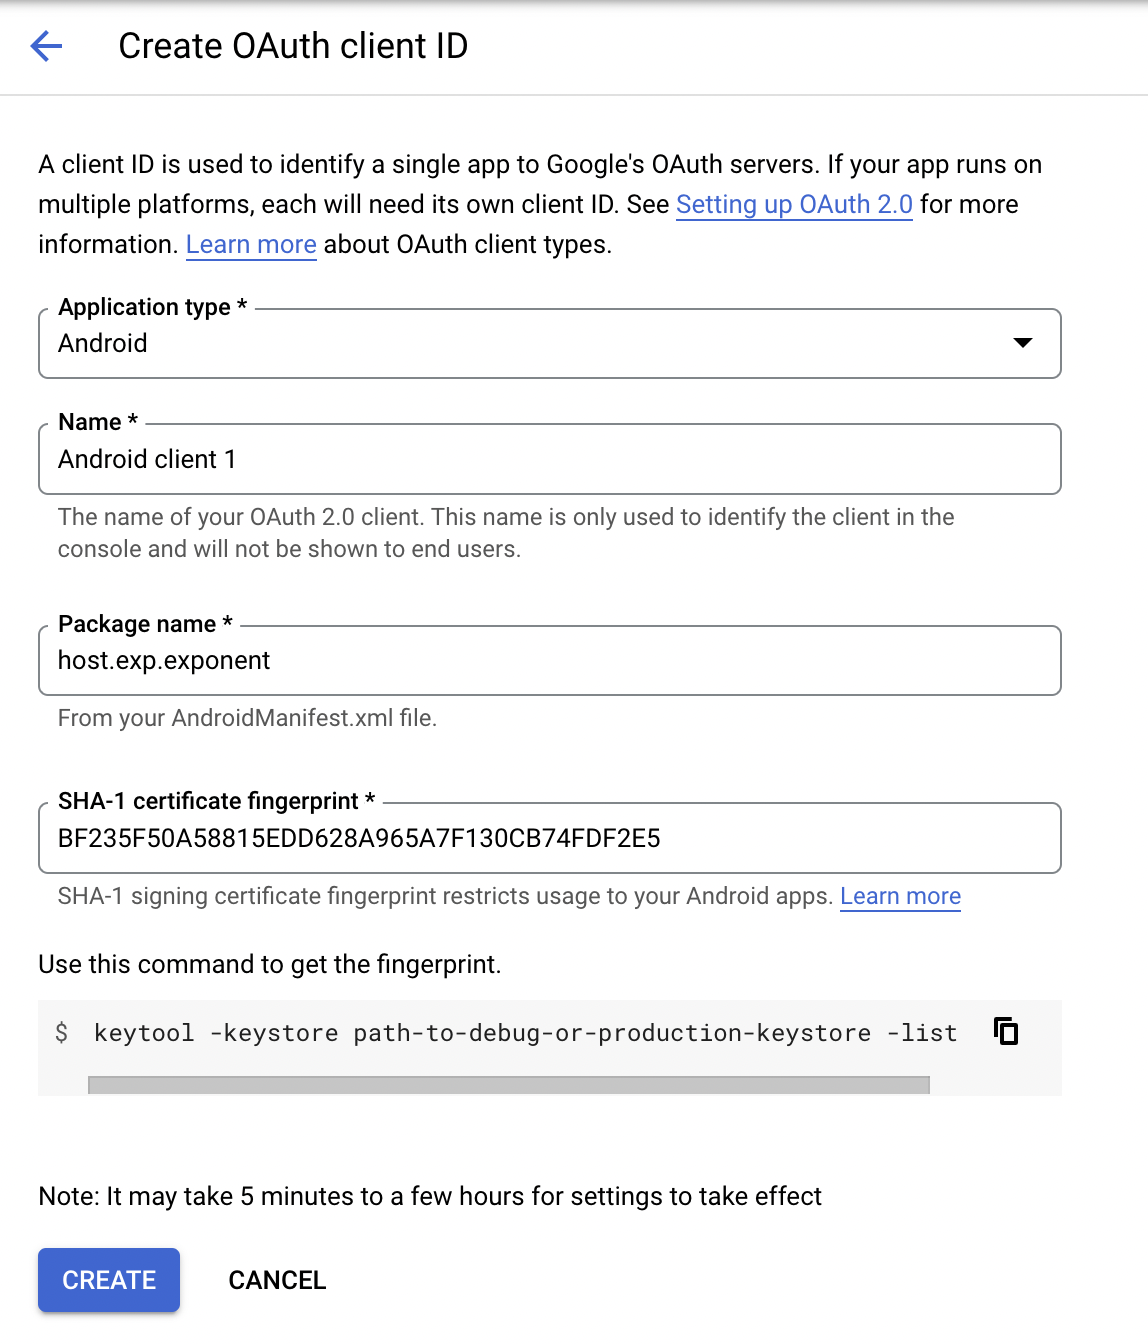
Select Android
-
Set package name to “host.exp.exponent”
-
Get SHA-1 key from terminal
expo fetch:android:hashes -
Create
-
-
Select Ios
- set Bundle Id to “host.exp.exponent”
- create
-
Select Web Application
- Add “https://localhost:19006” to **Authorized JavaScript origins** and **Redirect URL**
-
-
Move to your project folder open on VS code
-
Open terminal on your project location
-
Install expo-auth-session
Reference: AuthSession
expo install expo-auth-session expo-random※ Caution ※
There are some issues on Auth library.
expo-auth-session is work well before standalone your application, but after standalone this doesn’t work well.
So, forum said use use expo-google-sign-in after your app standalone.
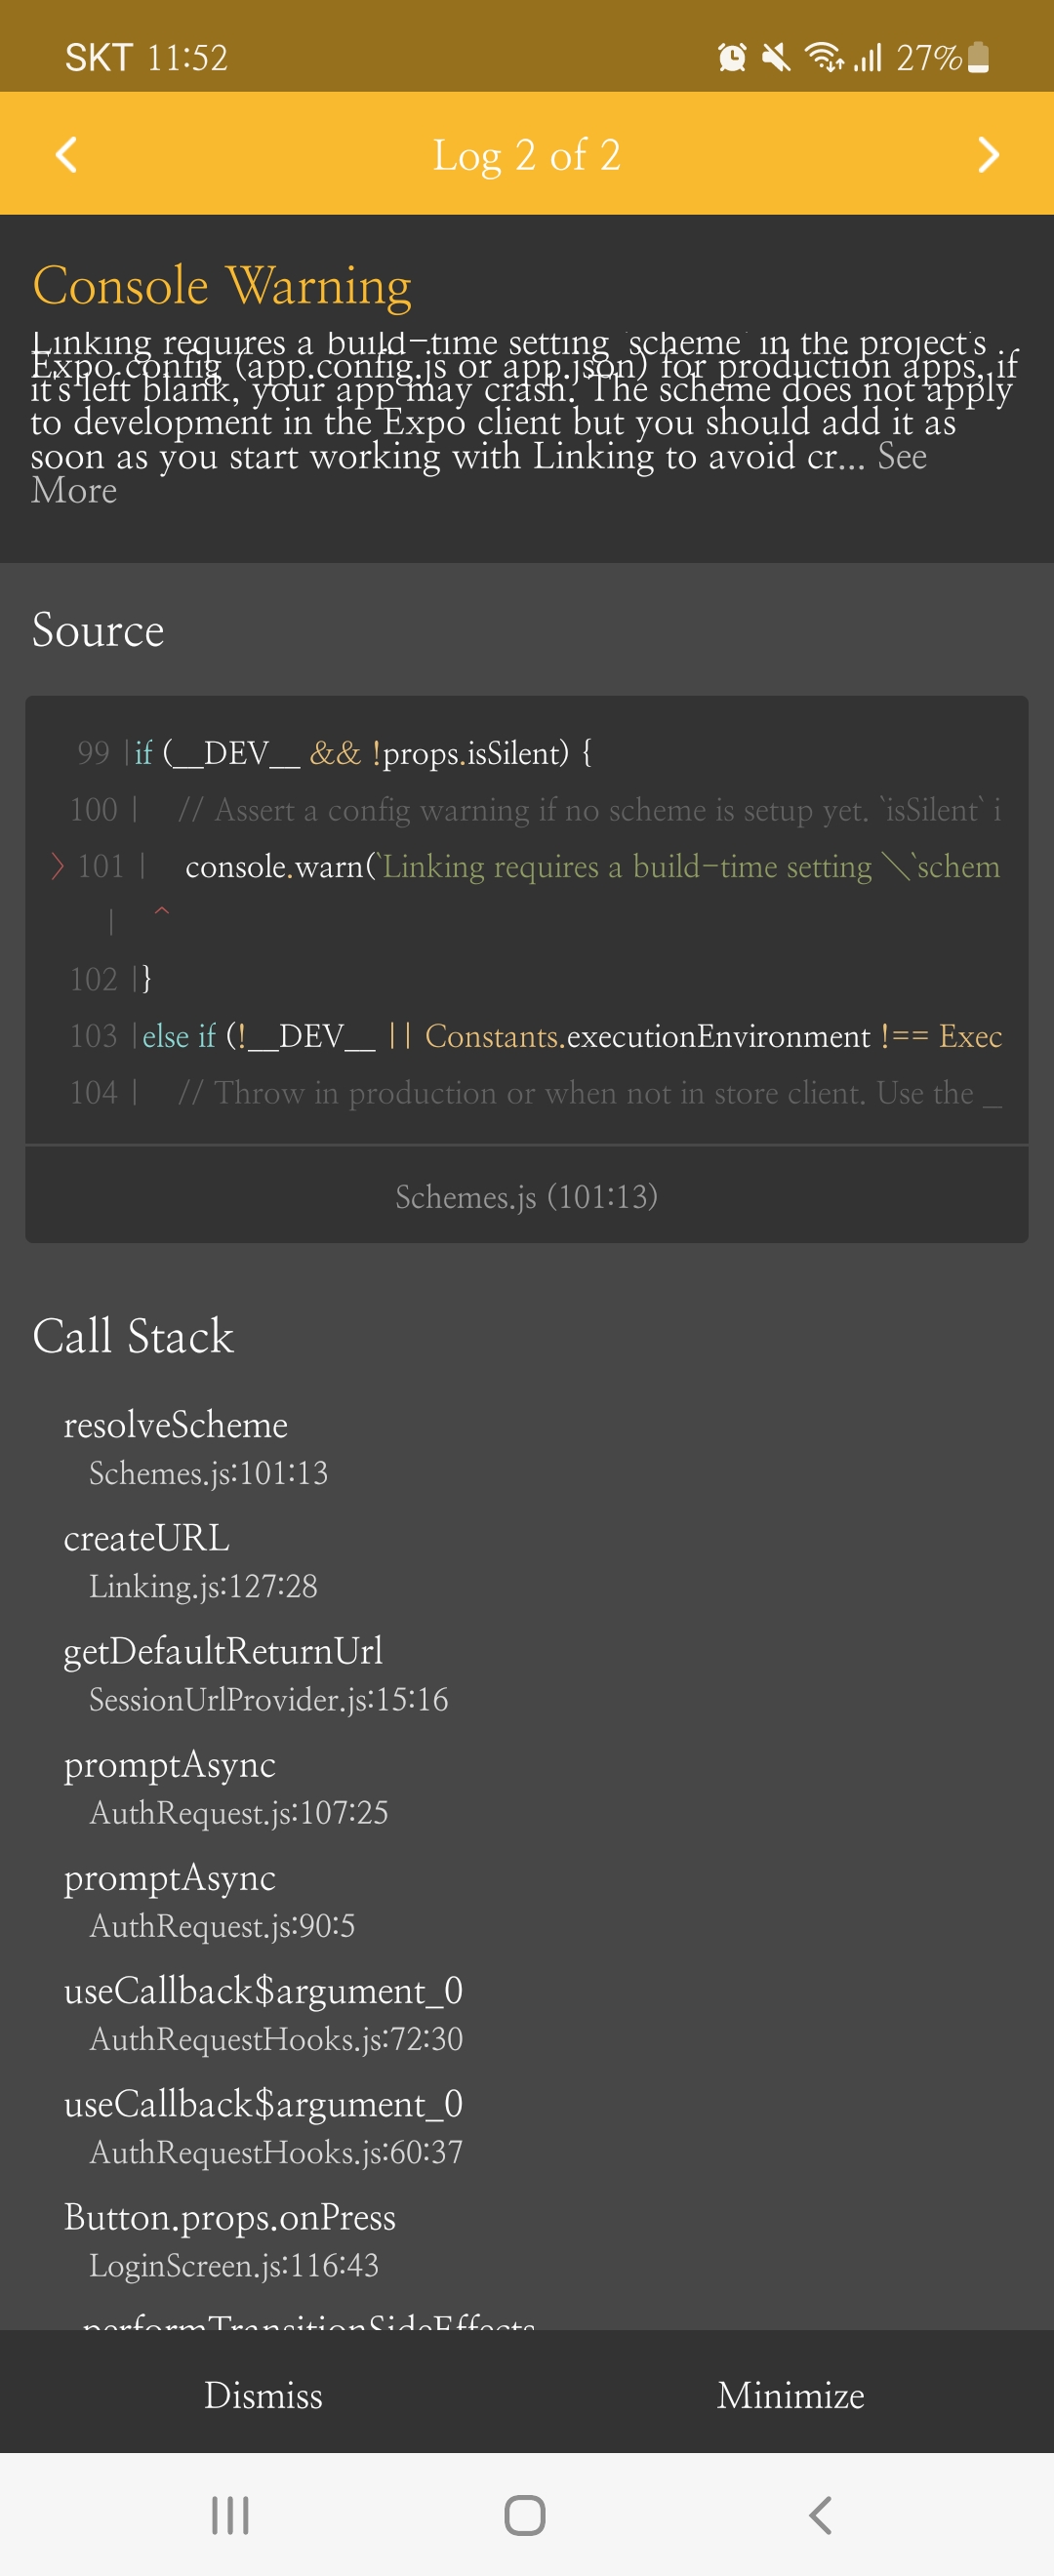
- Open app.json file and add code below
{
  "expo": {
    "scheme": "your_project_name"
  }
}
→ This will remove Linking warning
Login
- Open App.js file or other screen file where you want to use login function and copy paste code below
- This code includes uses of AsyncStorage(save data on your local DB)
- Try clone a new project from your Github when AsyncStorage doesn’t work
- This code includes uses of AsyncStorage(save data on your local DB)
import * as React from 'react';
import * as WebBrowser from 'expo-web-browser';
import * as Google from 'expo-auth-session/providers/google';
import { Button } from 'react-native';
import AsyncStorage from '@react-native-async-storage/async-storage';

WebBrowser.maybeCompleteAuthSession();   //This will close your web browser after login

//paste ClientId which you copy from above
export default function App() {
	const [gUser, setGUser] = useState('');
  const [reqError, setReqError] = useState('');
  const [isLoding,setIsLoding]=useState(false);

  const [request, response, promptAsync] = Google.useAuthRequest({
    expoClientId: 'GOOGLE_GUID.apps.googleusercontent.com',
    iosClientId: 'GOOGLE_GUID.apps.googleusercontent.com',
    androidClientId: 'GOOGLE_GUID.apps.googleusercontent.com',
    webClientId: 'GOOGLE_GUID.apps.googleusercontent.com',
		scopes: ['profile', 'email'],
  });

  useEffect(() => {
        if (response?.type === 'success') {
            const { authentication } = response;

            getGoogleUser(authentication.accessToken)
            giveGoogleUser(authentication.accessToken)

        }
    }, [response]);

    //Request user information to Google API
    const getGoogleUser = async (accessToken) => {
        try{
            let gUserReq =await axios.get('https://www.googleapis.com/oauth2/v2/userinfo',
                {
                    headers: {
                        Authorization: `Bearer ${accessToken}`
                    }
                }
            )

            console.log(gUserReq.data);
            setGUser(gUserReq.data);

        }
        catch(error){
            console.log('GoogleUserReq error: ', error.response.data);
            setReqError(error.response.data);
        }

    }


const giveGoogleUser = async (accessToken) => {
        const giveUser = await axios.post('your-backDB-apiURL', {
					//you can edit Data sturcture
          "accessToken": accessToken,
          "userInfo": {
            "id": JSON.stringify(gUser.id),
            "email": JSON.stringify(gUser.email),
            "verified_email": JSON.stringify(gUser.verified_email),
            "name": JSON.stringify(gUser.name),
            "given_name": JSON.stringify(gUser.given_name),
            "family_name": JSON.stringify(gUser.family_name),
            "picture": JSON.stringify(gUser.picture),
            "locale": JSON.stringify(gUser.locale),
            "hd": JSON.stringify(gUser.hd)
          }
        }).then(response=>{
              console.log(response.status); //To check
              storageData(); //storageData to local DB
            }
          )
        .catch(console.error)
        .finally(()=>setIsLoding(false));
    }

storageData=async()=>{
      await AsyncStorage.setItem(
        'User',
        JSON.stringify({
          id: gUser.id,
          email: gUser.email,
          picture: gUser.picture,
        }),
        () => {
          console.log('User Info Saved!');
        })
    }

  return (
    <Button
      disabled={!request}
      title="Login"
      onPress={() => {
        promptAsync();
        }}
    />
  );
}