글에 사용된 모든 그림과 내용은 직접 작성한 것입니다.
[유튜브 영상]
[깃허브 보러가기]
https://github.com/Chang-Jin-Lee/D3D11-AliceTutorial
[풀리퀘 보러가기]
https://github.com/Chang-Jin-Lee/D3D11-AliceTutorial/pull/22
글의 목적
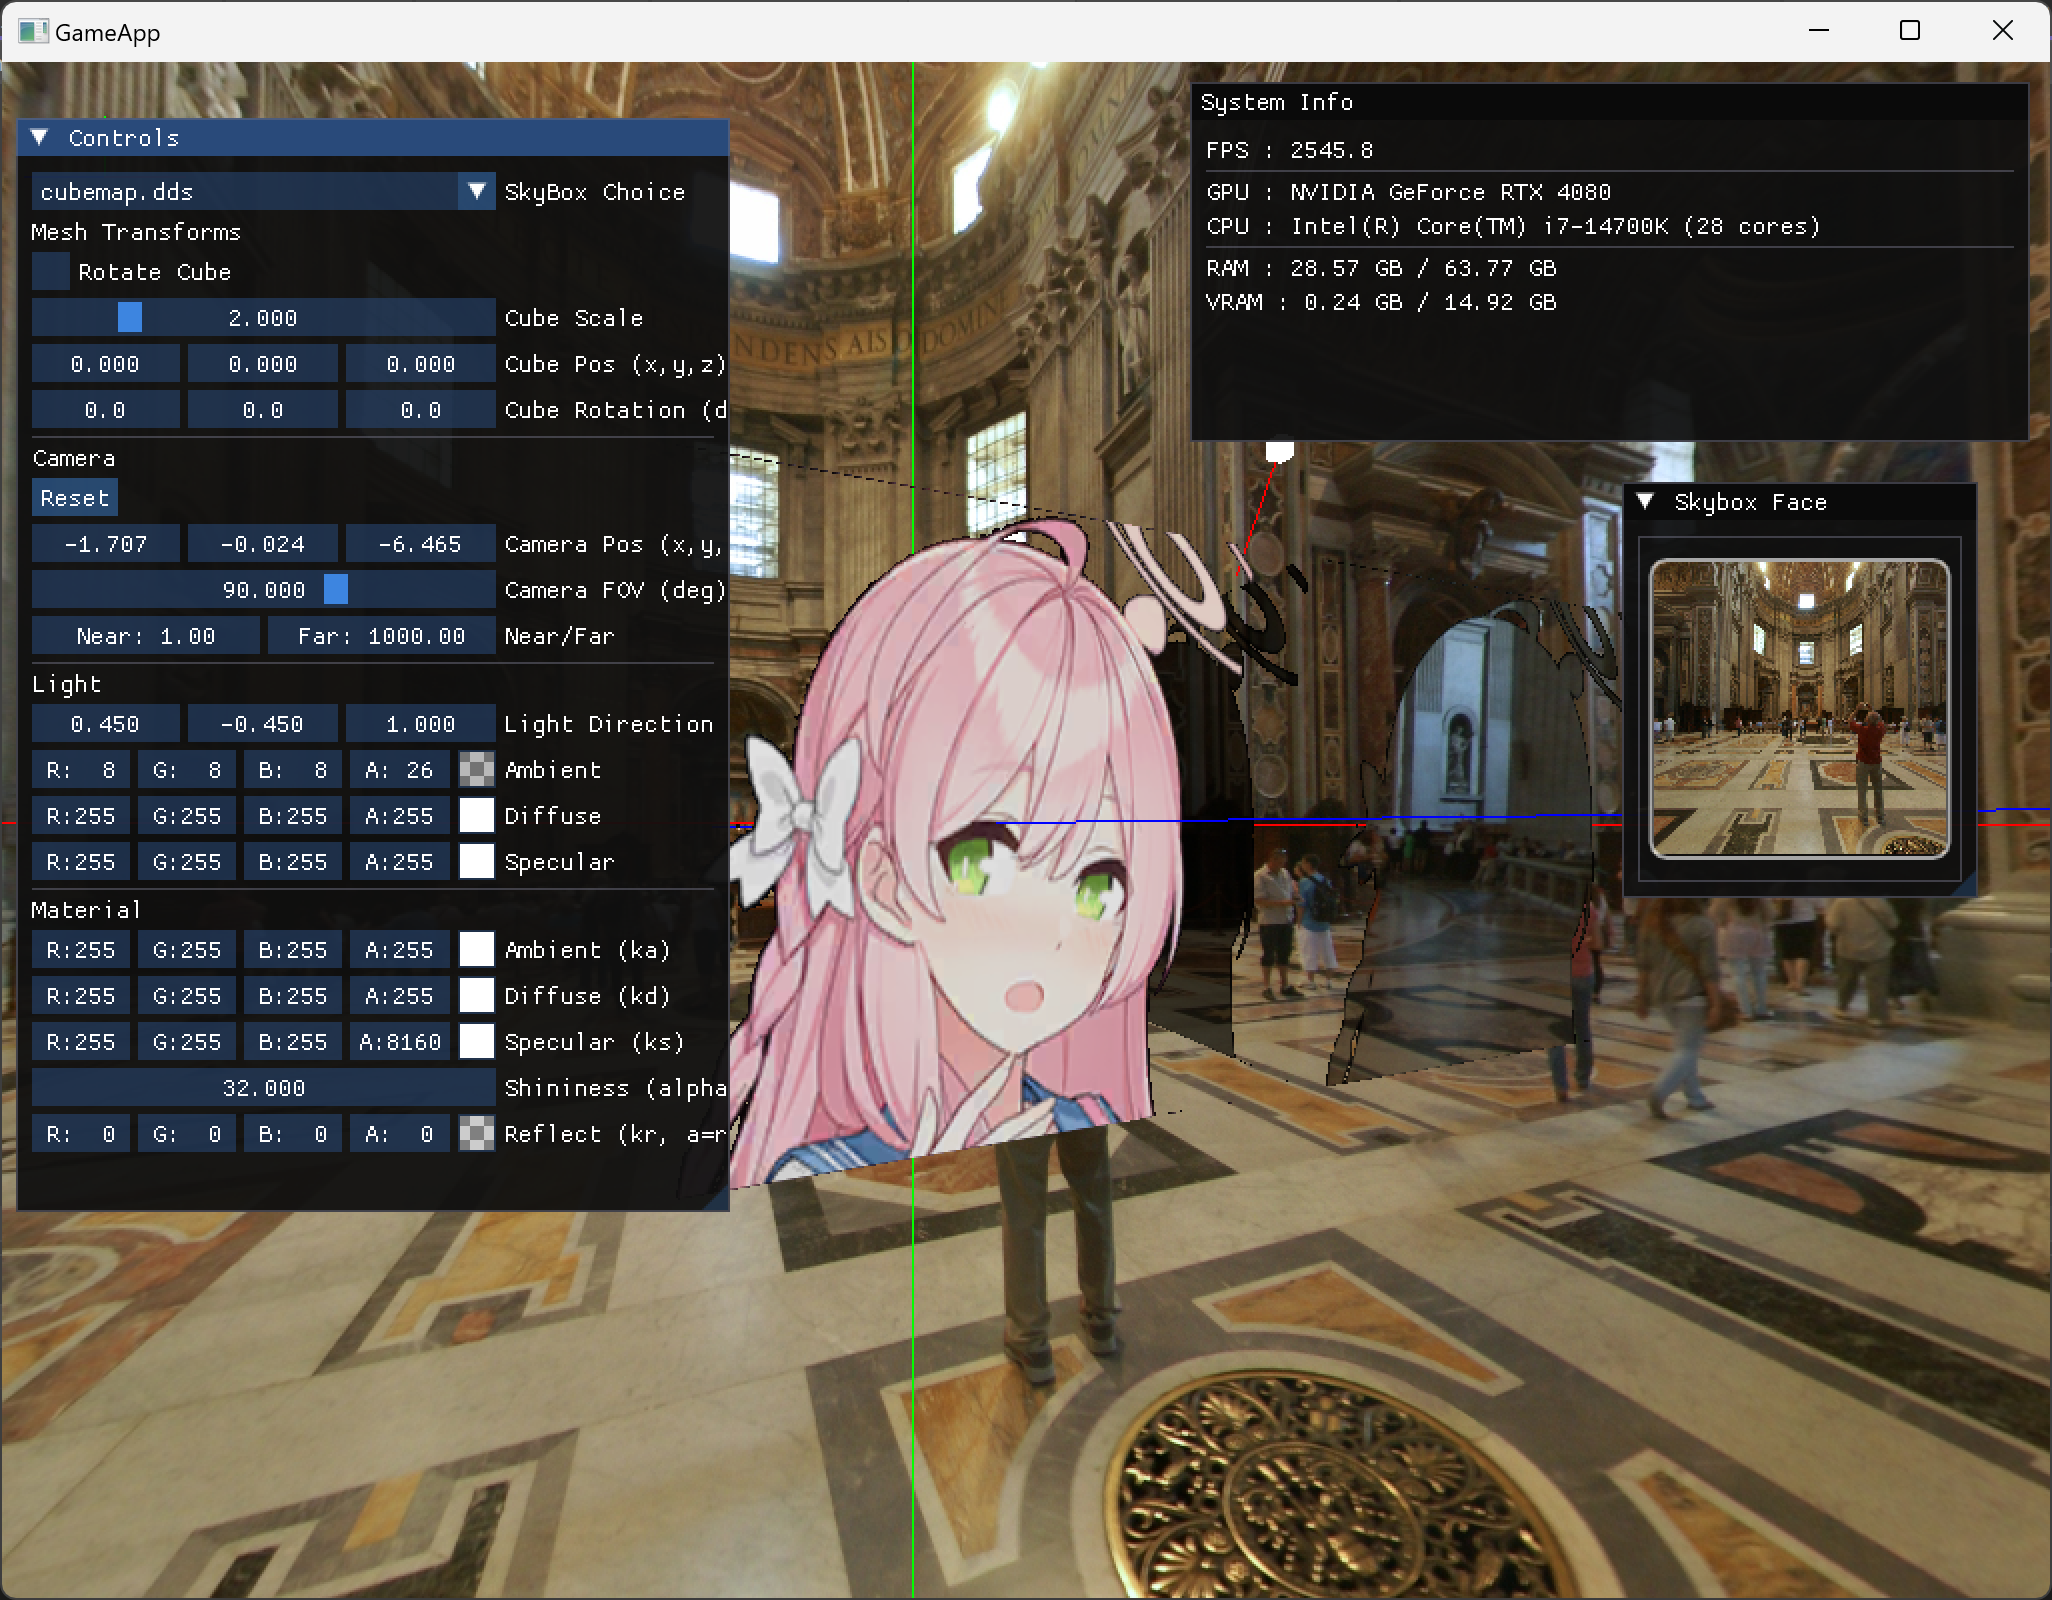
D3D11에서 Phong 쉐이더의 구현과 생긴 문제점, 해결방법을 정리하고 알파 블렌딩을 간단하게 만든 예제의 설명을 위해서 작성했습니다.
요약
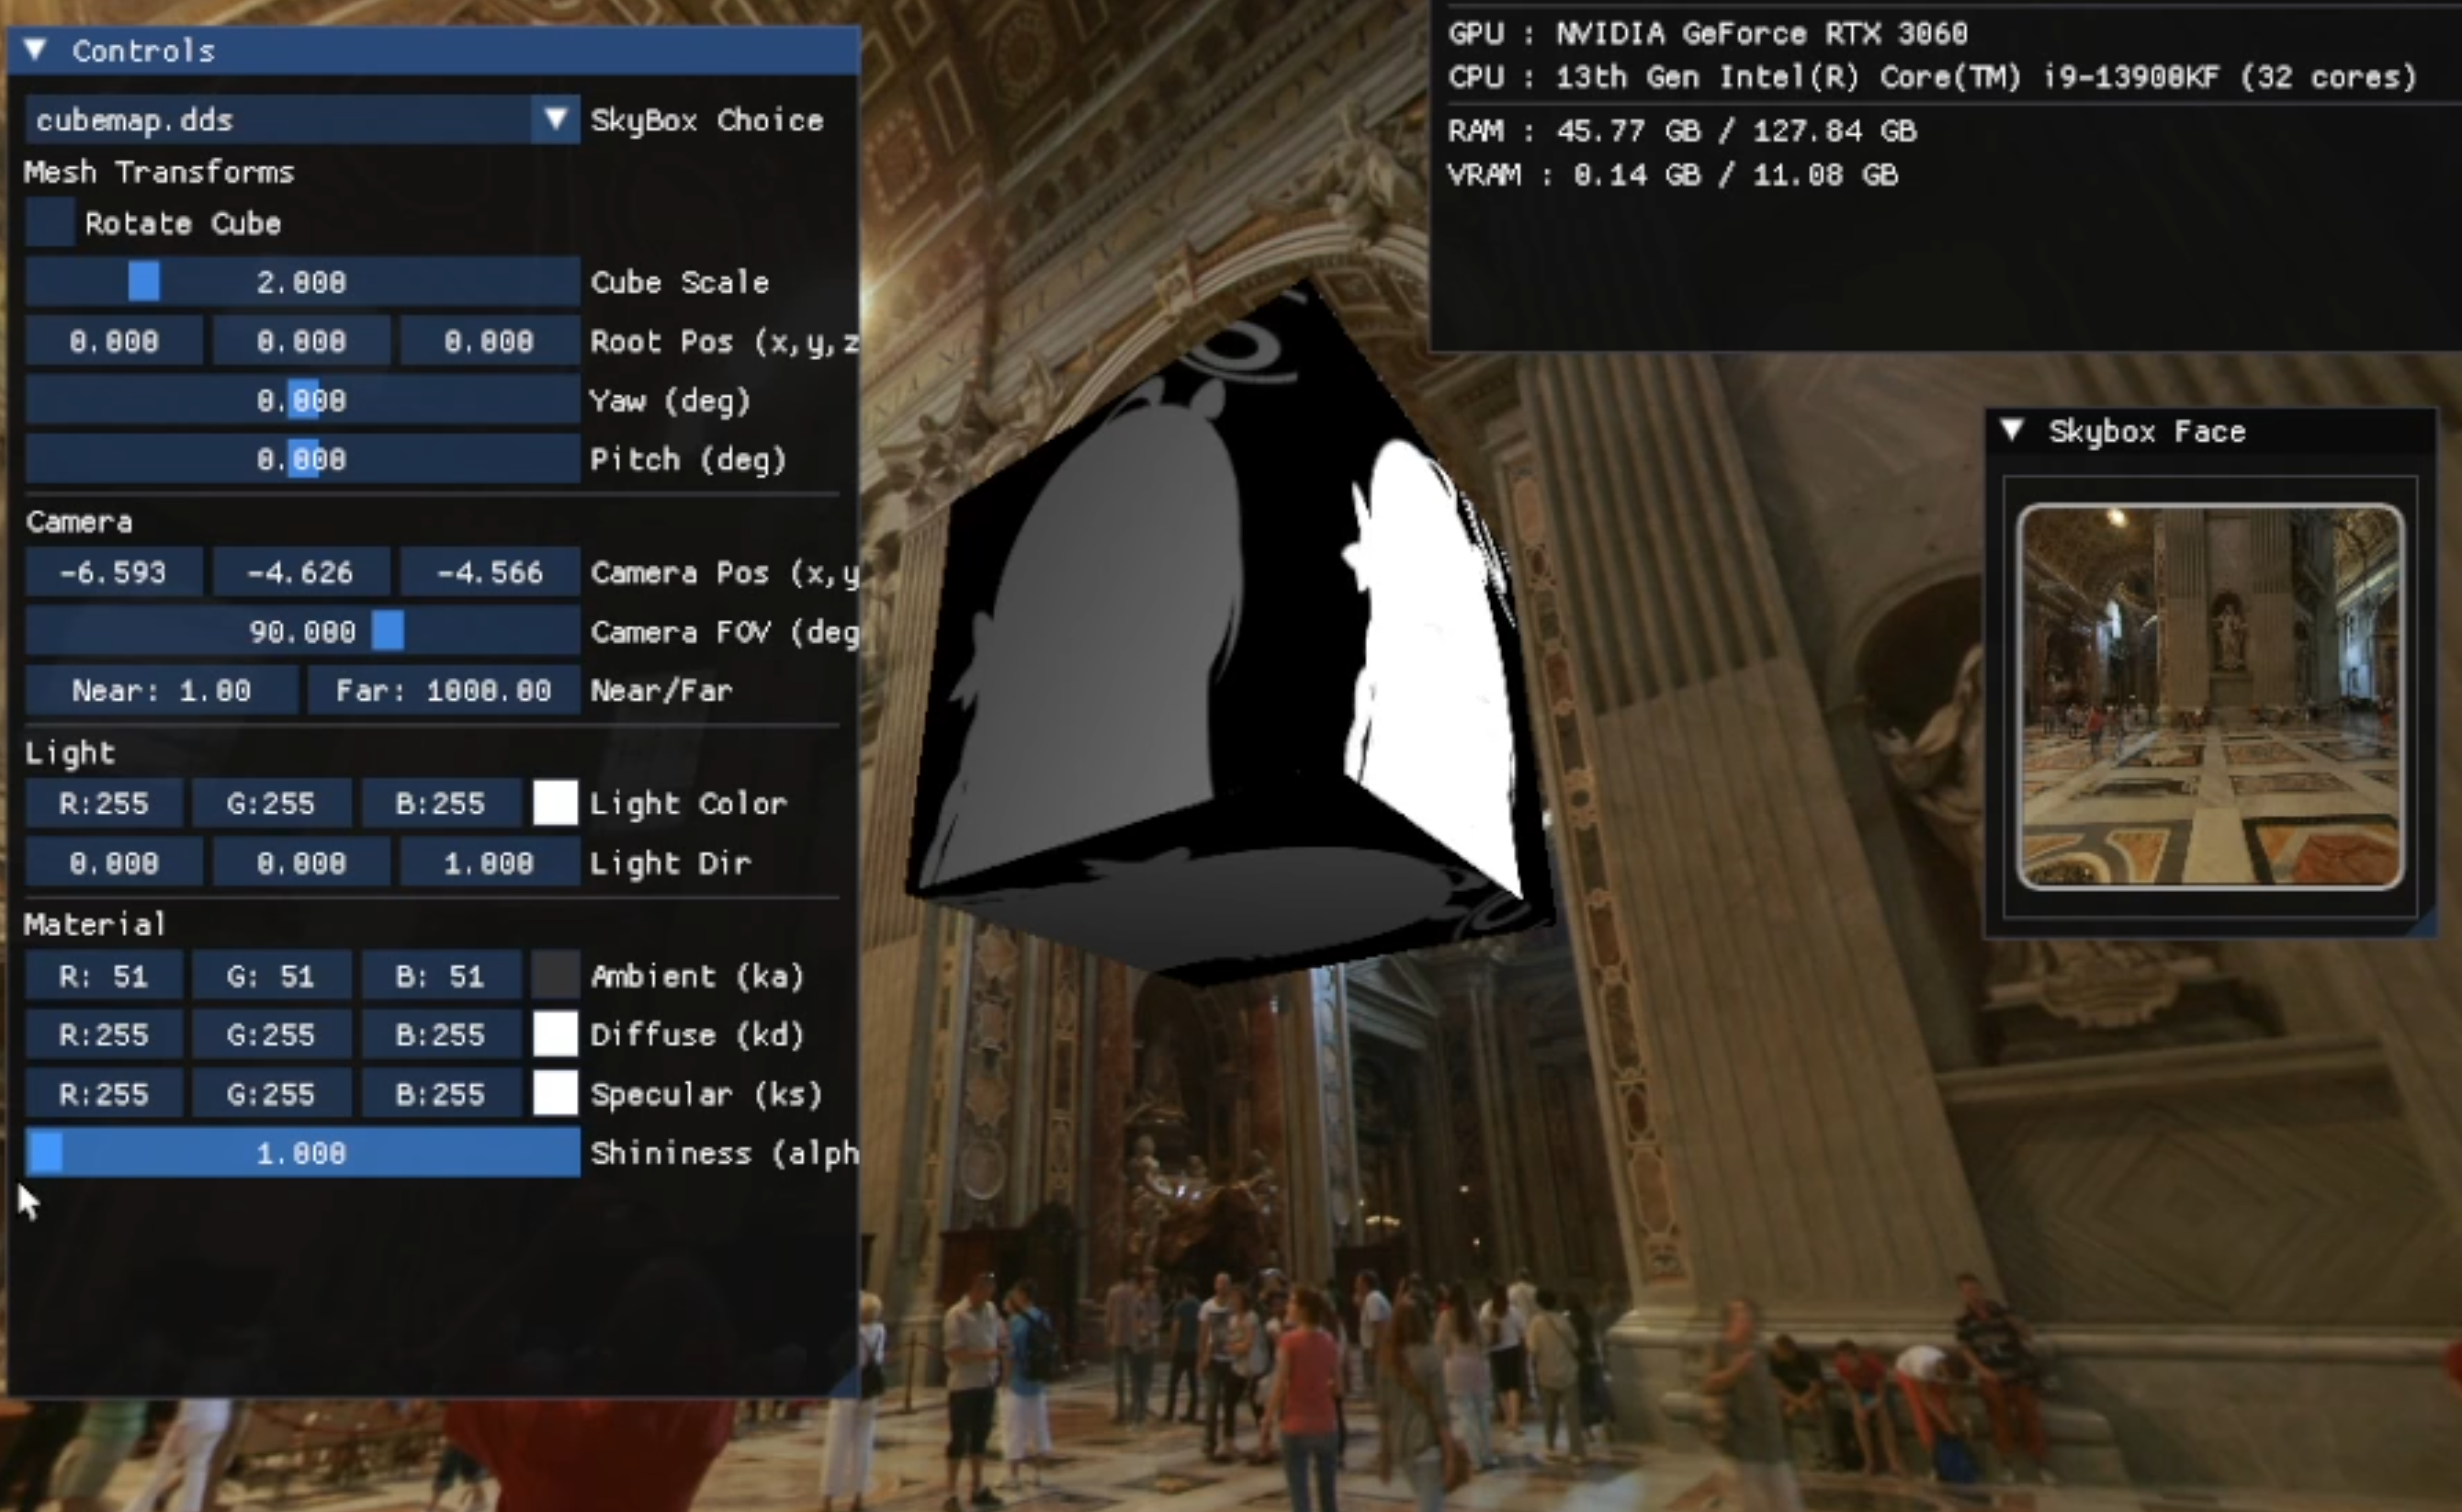
- Phong 쉐이더에서 Specular를 반사벡터 기반으로 구현하고, 텍스처 알파 투명처리(깊이를 미기록해서 사용 DepthBuffer로 구현), Ambient에 러프니스(roughness)를 도입해 블러 반사를 만듭니다. 빛 반대 방향에서 생기던 Specular lobe 꼬리 문제를 N·L, N·V Gating으로 해결했습니다. 메탈릭 거울 큐브 예시를 추가(위치/회전/스케일과 재질을 헤더에서 노출).
들어가기 전에 주의할 점
- 큐브맵은
t1에 바인딩합니다. Diffuse 텍스처는t0. - 알파 투명처리 (알파 블렌딩)은
clip(alpha - threshold)로 이루어지며, 컷된 픽셀은 깊이/컬러 미기록이라 뒤 배경(스카이박스)이 보입니다. - 러프니스는
reflect.a(머티리얼의 reflect 알파)를 사용합니다.
알게 된 점
- 낮은 Shininess에서 Specular가 뒤/엣지에서 새는 문제는 N·L, N·V 게이팅으로 구조적으로 차단 가능합니다.
- Ambient도 조명 게이팅(theta = saturate(N·L))을 곱해 빛 없는 면 반사를 억제하면 “거울처럼 뒤에서 보임”이 사라집니다.
- 러프니스는 prefiltered env + LOD가 표준. 이번엔 간결화를 위해
SampleBias+ roughness^2 → mipBias 매핑으로 구현했습니다- 알파 컷아웃(알파 블렌딩)은 “Depth 픽셀 깊이 미기록”이라 반사/스카이박스가 자연스레 보입니다
무엇을 시도했고, 왜 어려웠으며, 어떻게 해결했는가
1. 낮은 Shininess에서 Specular가 뒤/엣지에서 새는 문제
- 초기에는
pow(dot(R,V), shininess)만 사용하여, shininess 값이 낮을 때 스펙큘러 롭이 넓어지며 빛의 반대편에서도 번들거림이 나타났습니다. - 뷰·조명 기하 조건을 만족할 때만 스펙큘러가 생성되도록 게이팅을 적용했습니다. 즉,
N·L > 0과N·V > 0일 때에만 스펙큘러를 허용하여 구조적으로 차단하였습니다.float theta = saturate(dot(N, L)); float specGate = step(0.0f, theta) * step(0.0f, dot(N, V)); float spec = pow(max(dot(reflect(-L, N), V), 0.0f), shininess) * specGate;
2. Ambient가 어두운 면에서도 보이는 문제
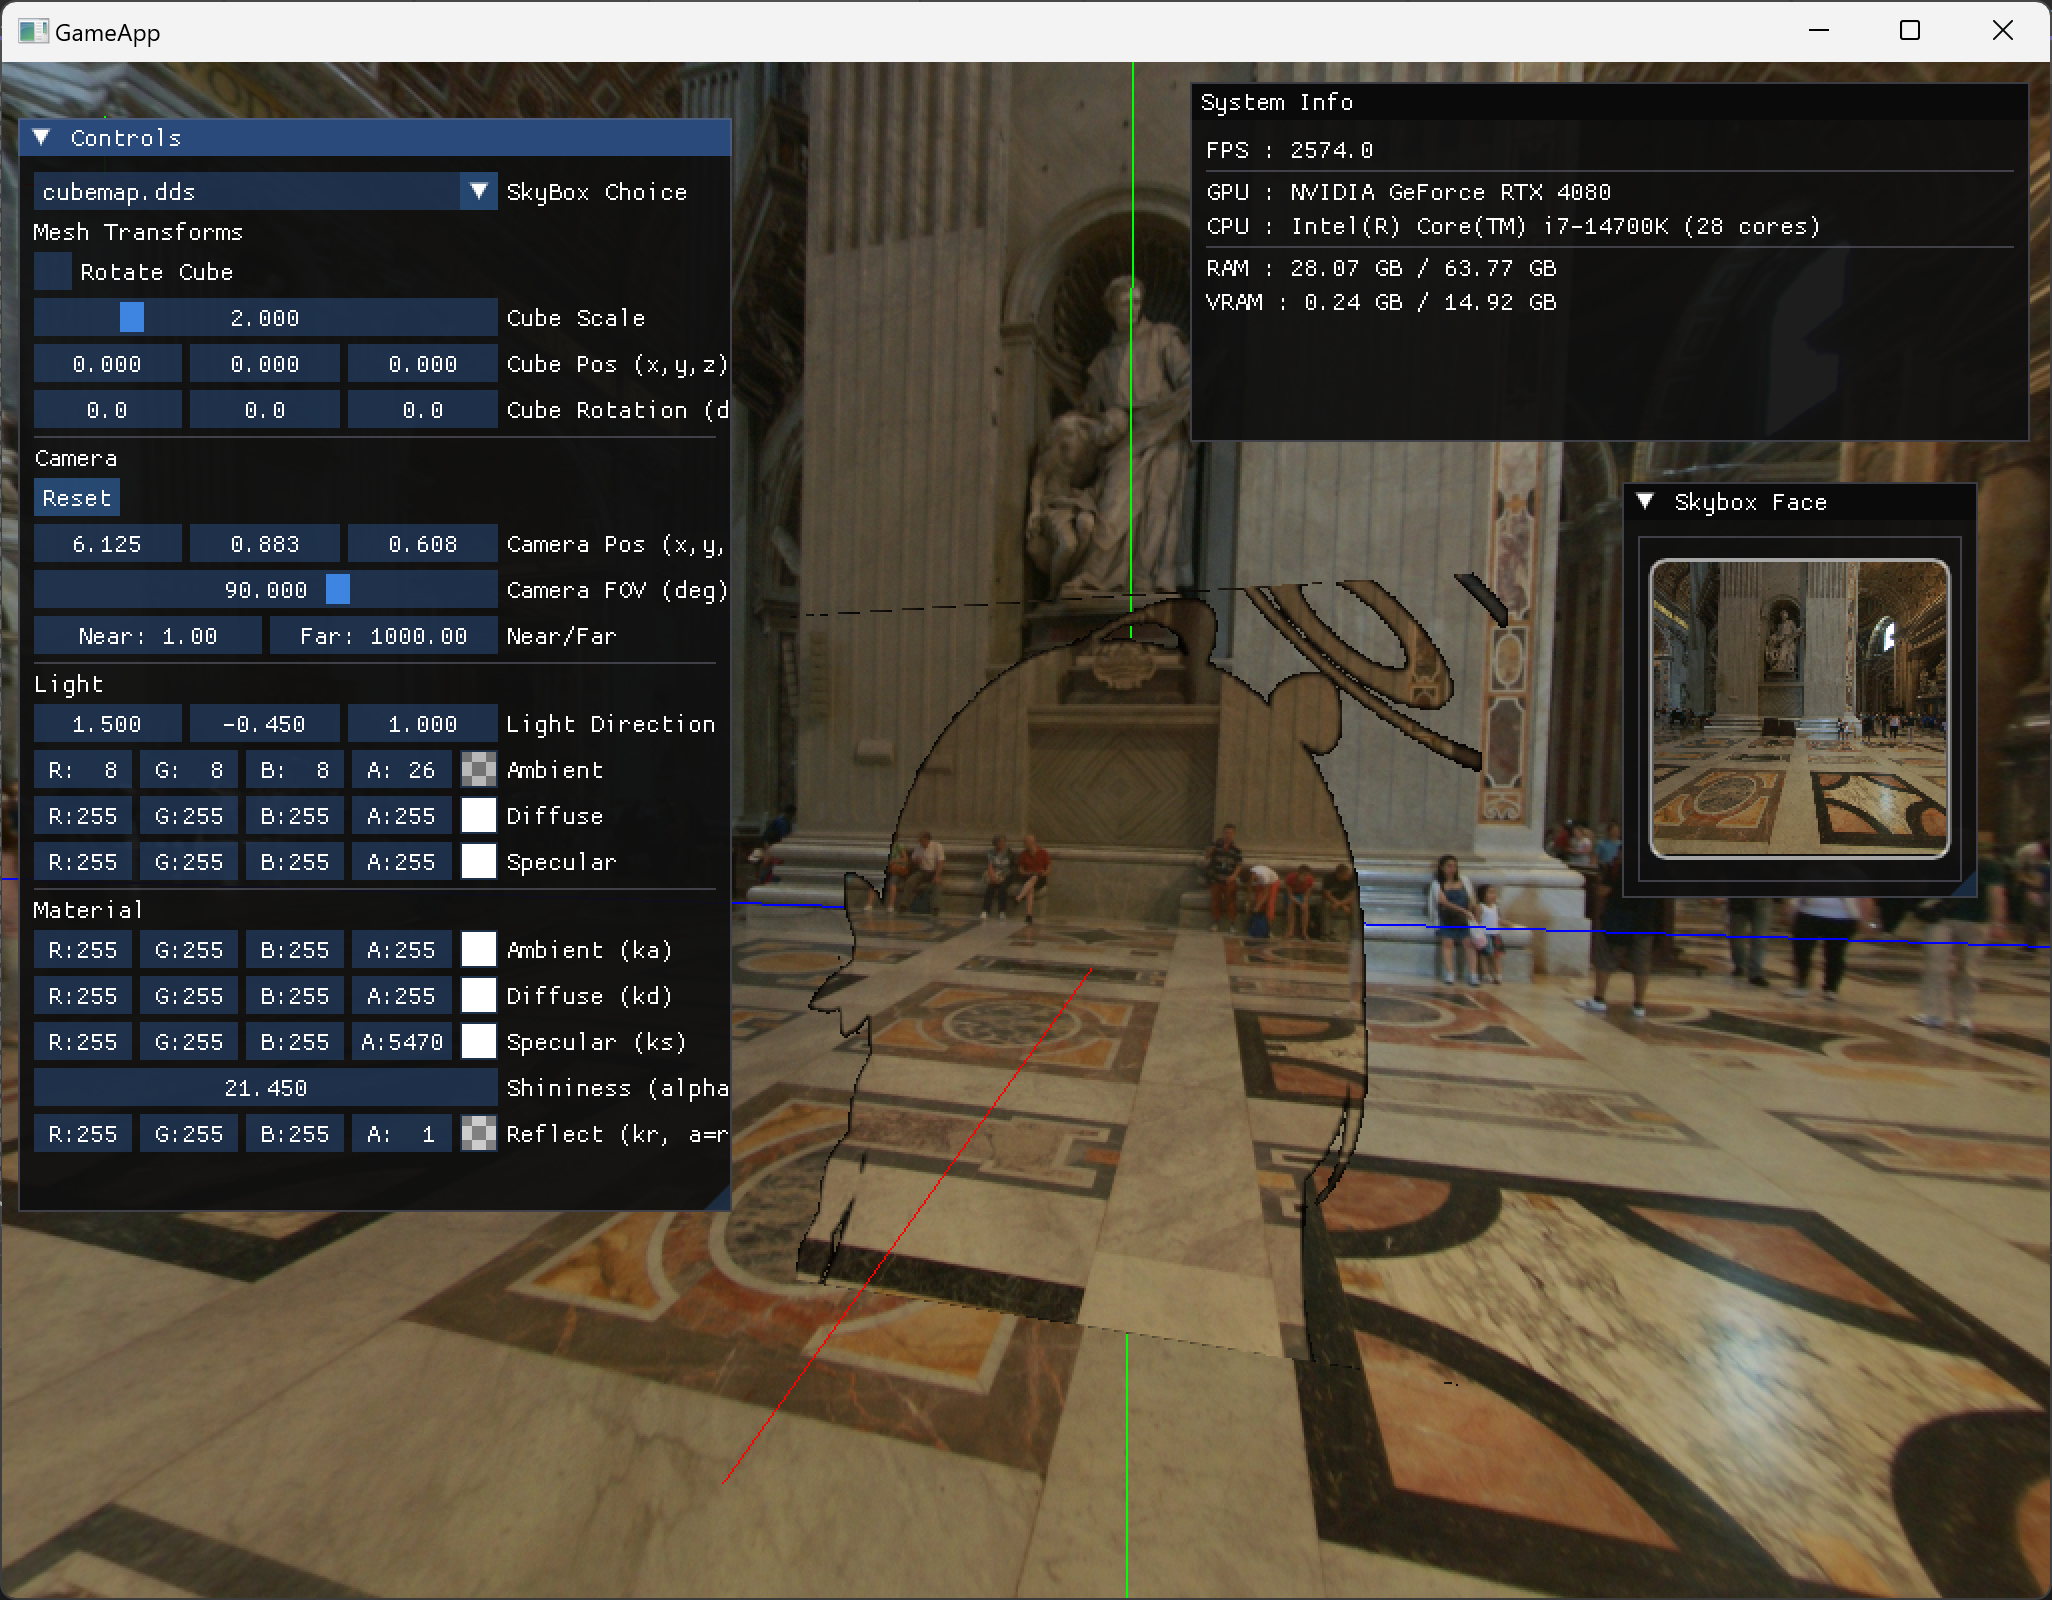
- 처음에는 환경 반사를 조명과 무관하게 항상 더해, 라이트 반대편에서도 거울처럼 보이는 현상이 있었습니다.
- 스펙큘러와 동일하게 조명 게이팅(
theta = saturate(N·L))을 반사 가중치에 곱해, 빛이 없는 면의 반사를 억제했습니다.float reflectGate = theta; // 또는 pow(theta, 2) litColor += (material.reflect * reflectGate) * reflectionColor;
러프니스 반사를 멀티탭 블러로 구현했더니 코드가 복잡하고 비용이 큰 문제
- 주변 방향으로 5-탭 샘플을 사용하는 방식은 동작은 했으나, HLSL 코드가 길고 유지보수가 불편했습니다.
float roughness = saturate(g_Material.reflect.a);
float3 rdir = reflect(-eye, normal);
float3 up = (abs(rdir.y) < 0.999f) ? float3(0.0f, 1.0f, 0.0f) : float3(1.0f, 0.0f, 0.0f);
float3 t1 = normalize(cross(up, rdir));
float3 t2 = normalize(cross(rdir, t1));
float spread = lerp(0.0f, 0.25f, roughness);
float3 d0 = rdir, d1 = normalize(rdir + spread * t1), d2 = normalize(rdir - spread * t1);
float3 d3 = normalize(rdir + spread * t2), d4 = normalize(rdir - spread * t2);
float4 rc0 = g_TexCube.Sample(g_Sam, d0);
float4 rc1 = g_TexCube.Sample(g_Sam, d1);
float4 rc2 = g_TexCube.Sample(g_Sam, d2);
float4 rc3 = g_TexCube.Sample(g_Sam, d3);
float4 rc4 = g_TexCube.Sample(g_Sam, d4);
float4 reflectionColor = (rc0 + rc1 + rc2 + rc3 + rc4) * (1.0f / 5.0f);
litColor += g_Material.reflect * reflectionColor;
litColor.a = alphaTex;- 상용 엔진에서 사용하는 “prefiltered env + LOD” 모델을 간소화하여
SampleBias한 번으로 러프니스를 mip 바이어스로 대응했습니다. 그리고roughness^2매핑으로 조금이나마 잘 보이도록 개선했습니다.float roughness = saturate(material.reflect.a); float mipBias = roughness * roughness * kMaxMip; float3 rdir = reflect(-V, N); float4 reflectionColor = g_TexCube.SampleBias(g_Sam, rdir, mipBias);
텍스처 알파 투명 처리 시 깊이/소실 문제 가능성
- 깊이 상태를 조정하면 부작용이 생길 수 있었습니다.
- 컷아웃(
clip(alpha - threshold))으로 구멍 픽셀만 제거하여 깊이/색을 미기록하게 했고, 나머지 픽셀은 일반 알파 블렌딩을 사용했습니다. 이로써 뒤쪽 스카이박스가 자연스럽게 보이도록 했습니다.float alphaTex = textureColor.a * material.diffuse.a; clip(alphaTex - 0.1f); litColor.a = alphaTex; // 블렌딩: SrcAlpha / InvSrcAlpha
코드
셰이더
- 텍스처 알파 컷아웃 (알파 블렌딩): 텍스처 알파×머티리얼 알파로 컷아웃(깊이/색 미기록)
float4 textureColor = g_DiffuseMap.Sample(g_Sam, pIn.tex);
// 알파 값을 반영합니다.
// 텍스처 알파가 낮으면 픽셀을 제거해서 투명하게 만듭니다
// 깊이를 미기록해서 뒤 배경/스카이박스가 보이도록 합니다
float alphaTex = textureColor.a * g_Material.diffuse.a;
clip(alphaTex - 0.1f);- Phong 스펙큘러(반사벡터 기반) + N·L, N·V 게이팅
float NdotL = dot(normal, light);
float NdotV = dot(normal, eye);
float theta = saturate(NdotL);
float specGate = saturate(sign(theta)) * saturate(sign(NdotV));
float specularScalar = pow(max(dot(reflectDir, eye), 0.0f), g_Material.specular.w) * specGate;- 환경 반사 + 러프니스(roughness^2 → mipBias) + 조명 게이팅
float roughness = saturate(g_Material.reflect.a);
float3 rdir = reflect(-eye, normal);
const float kMaxMip = 8.0f;                 // 필요 시 큐브맵 mip 수에 맞춰 조정해야합니다
float mipBias = roughness * roughness * kMaxMip; // perceptual mapping
float4 reflectionColor = g_TexCube.SampleBias(g_Sam, rdir, mipBias);
/*
    @details :
        반사 게이팅: 조명 없는 면(N·L==0)에서는 반사도 0 → 거울처럼 뒤에서 보이는 현상 억제
*/
float reflectGate = theta;                  // 필요시 pow(theta,2) 등으로 부드러운 롤오프
litColor += (g_Material.reflect * reflectGate) * reflectionColor;
// 마지막 색상에서의 알파 값은 텍스처 알파 값으로 덮어 씁니다
litColor.a = alphaTex;
파이프라인 바인딩/렌더 순서
- 큐브맵
t1바인딩
m_pDeviceContext->VSSetConstantBuffers(0, 1, &m_pConstantBuffer);
m_pDeviceContext->PSSetConstantBuffers(0, 1, &m_pConstantBuffer);
m_pDeviceContext->PSSetSamplers(0, 1, &m_pSamplerState);
// 큐브맵을 t1 슬롯에 바인딩 (픽셀 셰이더에서 g_TexCube : t1)
if (m_pTextureSRV)
{
    ID3D11ShaderResourceView* texCube = m_pTextureSRV;
    m_pDeviceContext->PSSetShaderResources(1, 1, &texCube);
}- 큐브 드로우는 알파 블렌딩 ON으로 진행(컷아웃된 가장자리가 자연스럽게 보이도록)
FLOAT blendFactor[4] = { 0,0,0,0 };
UINT sampleMask = 0xFFFFFFFF;
m_pDeviceContext->OMSetBlendState(m_pAlphaBlendState, blendFactor, sampleMask);
for (int face = 0; face < 6; ++face)
{
    ID3D11ShaderResourceView* srv = m_pCubeTextureSRVs[face];
    m_pDeviceContext->PSSetShaderResources(0, 1, &srv);
    m_pDeviceContext->DrawIndexed(6, face * 6, 0);
}
m_pDeviceContext->OMSetBlendState(nullptr, nullptr, 0xFFFFFFFF);
거울 큐브(메탈릭) 추가
- 헤더에 트랜스폼/재질 노출
DirectX::XMFLOAT3 m_mirrorCubePos = { 5.5f, 0.0f, 0.0f };   // 거울 큐브 위치
DirectX::XMFLOAT3 m_mirrorCubeRotation = { 0.0f, 0.0f, 0.0f };
float m_MirrorCubeScale = 2.0f;
// Mirror Cube Material (메탈릭 거울 느낌)
Material m_mirrorCubeMaterial = {
    /*ambient*/  { 0.0f, 0.0f, 0.0f, 1.0f },
    /*diffuse*/  { 0.0f, 0.0f, 0.0f, 1.0f },
    /*specular*/ { 0.0f, 0.0f, 0.0f, 32.0f },
    /*reflect*/  { 1.0f, 1.0f, 1.0f, 0.02f } // a=roughness
};- 렌더 경로에서 헤더 값을 사용해 월드/재질 설정 후 드로우
// Mirror Cube: x + ~8 위치에 메탈릭 거울처럼 반사만 보이는 큐브 렌더
{
    ConstantBuffer mirrorCB = m_ConstantBuffer;
    // 월드: 헤더 공개된 mirrorCube 트랜스폼 사용(스케일*회전*이동)
    XMMATRIX rotYaw   = XMMatrixRotationY(XMConvertToRadians(m_mirrorCubeRotation.y));
    XMMATRIX rotPitch = XMMatrixRotationX(XMConvertToRadians(m_mirrorCubeRotation.x));
    XMMATRIX rotRoll  = XMMatrixRotationZ(XMConvertToRadians(m_mirrorCubeRotation.z));
    XMMATRIX Sm = XMMatrixScaling(m_MirrorCubeScale, m_MirrorCubeScale, m_MirrorCubeScale);
    XMMATRIX Tm = XMMatrixTranslation(m_mirrorCubePos.x, m_mirrorCubePos.y, m_mirrorCubePos.z);
    Tm = Sm * rotPitch * rotYaw * rotRoll * Tm;
    mirrorCB.world = XMMatrixTranspose(Tm);
    mirrorCB.worldInvTranspose = XMMatrixTranspose(XMMatrixInverse(nullptr, XMMatrixTranspose(Tm)));
    // 재질: 헤더에 공개한 m_mirrorCubeMaterial 사용
    mirrorCB.material = m_mirrorCubeMaterial;

    D3D11_MAPPED_SUBRESOURCE mapped;
    HR_T(m_pDeviceContext->Map(m_pConstantBuffer, 0, D3D11_MAP_WRITE_DISCARD, 0, &mapped));
    memcpy_s(mapped.pData, sizeof(ConstantBuffer), &mirrorCB, sizeof(ConstantBuffer));
    m_pDeviceContext->Unmap(m_pConstantBuffer, 0);
    m_pDeviceContext->VSSetConstantBuffers(0, 1, &m_pConstantBuffer);
    m_pDeviceContext->PSSetConstantBuffers(0, 1, &m_pConstantBuffer);

    // 블렌딩 ON으로 반사에도 부드러운 에지 허용
    FLOAT blendFactor2[4] = {0,0,0,0};
    m_pDeviceContext->OMSetBlendState(m_pAlphaBlendState, blendFactor2, 0xFFFFFFFF);

    // t0에 임의의 불투명 텍스처 바인딩(컷아웃 통과용). 여기서는 face0 재사용
    ID3D11ShaderResourceView* srvFace0 = m_pCubeTextureSRVs[0];
    m_pDeviceContext->PSSetShaderResources(0, 1, &srvFace0);
    // 드로우
    for (int face = 0; face < 6; ++face)
    {
        m_pDeviceContext->DrawIndexed(6, face * 6, 0);
    }
    m_pDeviceContext->OMSetBlendState(nullptr, nullptr, 0xFFFFFFFF);
    // pad 복원은 이후 프레임에서 상수버퍼 갱신으로 덮임
}
결론
-
Phong Specular는 반사벡터 기반으로 구현하고, 낮은 shininess에서 발생하던 꼬리 문제는
N·L,N·V게이팅으로 구조적으로 차단하였습니다. -
Ambient는 러프니스(=reflect.a)를
roughness^2 → mipBias로 변환하여SampleBias단일 샘플로 구현하고, 조명 게이팅을 함께 적용하여 어두운 면에서는 반사가 보이지 않도록 하였습니다. -
텍스처 알파는 컷아웃 방식으로 처리하여 “구멍 픽셀은 깊이 미기록”되도록 했으며, 일반 알파 블렌딩으로 가장자리를 부드럽게 표현하였습니다.
-
거울 큐브는 반사 재질을 강하게 하고 러프니스를 낮춰 샤프한 거울 효과를 만들었습니다.
-
찾아보니 BSDF 쉐이더로 많은 부분이 개선될 수 있다고 합니다. 그리고 더 나아가 PBR까지 연결된다고 합니다.

게임 프로그래머