01.CSS module & SASS module
App.js
import logo from "./logo.svg"
import styles from "./App.module.css"
console.log(styles)
// styles객체
// {
// App: "App_App__04Alj"
// App-link: "App_App-link__jGcae"
// App-logo-spin: "App_App-logo-spin__U9ijN"
// header: "App_header__L0wrl"
// logo: "App_logo__OOR8z"
// }

function App() {
  return (
    <div className={styles["App"]}>
      <header className={style["header"]}>
        <img src={logo} className={styles["logo"]} alt="logo" />
        <p>
          Edit <code>src/App.js</code> and save to reload.
        </p>
        <a
          className={styles["link"]}
          href="https://reactjs.org"
          target="_blank"
          rel="noopener noreferrer"
       >
          Learn React
        </a>
      </header>
    </div>
  )
}

export default App
App.module.css
.App {
  text-align: center;
}

.logo {
  height: 40vmin;
  pointer-events: none;
}

@media (prefers-reduced-motion: no-preference) {
  .logo {
    animation: App-logo-spin infinite 20s linear;
  }
}

.header {
  background-color: #282c34;
  min-height: 100vh;
  display: flex;
  flex-direction: column;
  align-items: center;
  justify-content: center;
  font-size: calc(10px + 2vmin);
  color: white;
}

.App-link {
  color: #61dafb;
}

@keyframes App-logo-spin {
  from {
    transform: rotate(0deg);
  }
  to {
    transform: rotate(360deg);
  }
}
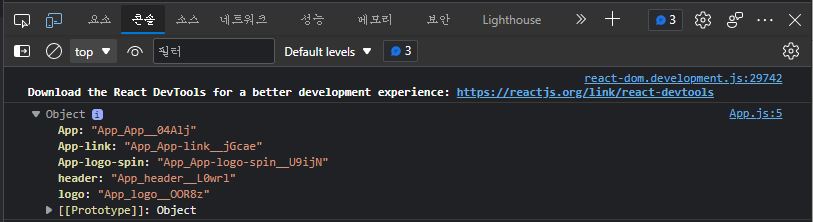
styles객체 출력 결과
App: "App_App_04Aij"=>App: FileName ClassName HashApp-link: "App_App-link_jGcae"=>App: FileName ClassName HashApp-logo-spin: "App_App-logo-spin__U9ijN"=>App: FileName ClassName Hashheader: "App_header__L0wrl"=>App: FileName ClassName Hashlogo: "App_logo__OOR8z"=>App: FileName ClassName Hash
Button.jsx & Button.module.css 파일 생성
src폴더안에components폴더 생성후Button.jsx & Button.module.css파일 생성
Button.jsx
import styles from "./Button.module.css"

const Button = (props) => <button className={styles["button"]} {...props} />

export default Button
Button.module.css
.button {
  background: transparent;
  border-radius: 3px;
  border: 2px solid palevioletred;
  color: palevioletred;
  margin: 0 lem;
  padding: 0.25em 1em;
  font-size: 20px;
}
App.js
import logo from "./logo.svg"
import styles from "./App.module.css"
import Button from "./components/Button"

function App() {
  return (
    <div className={styles["App"]}>
      <header className={styles["header"]}>
        <img src={logo} className={styles["logo"]} alt="logo" />
        <p>
          Edit <code>src/App.js</code> and save to reload.
        </p>
        <Button>Button</Button>
      </header>
    </div>
  )
}

export default App
import Button from "./components/Button"추가<a>태그 삭제 후<Button>컴포넌트 추가
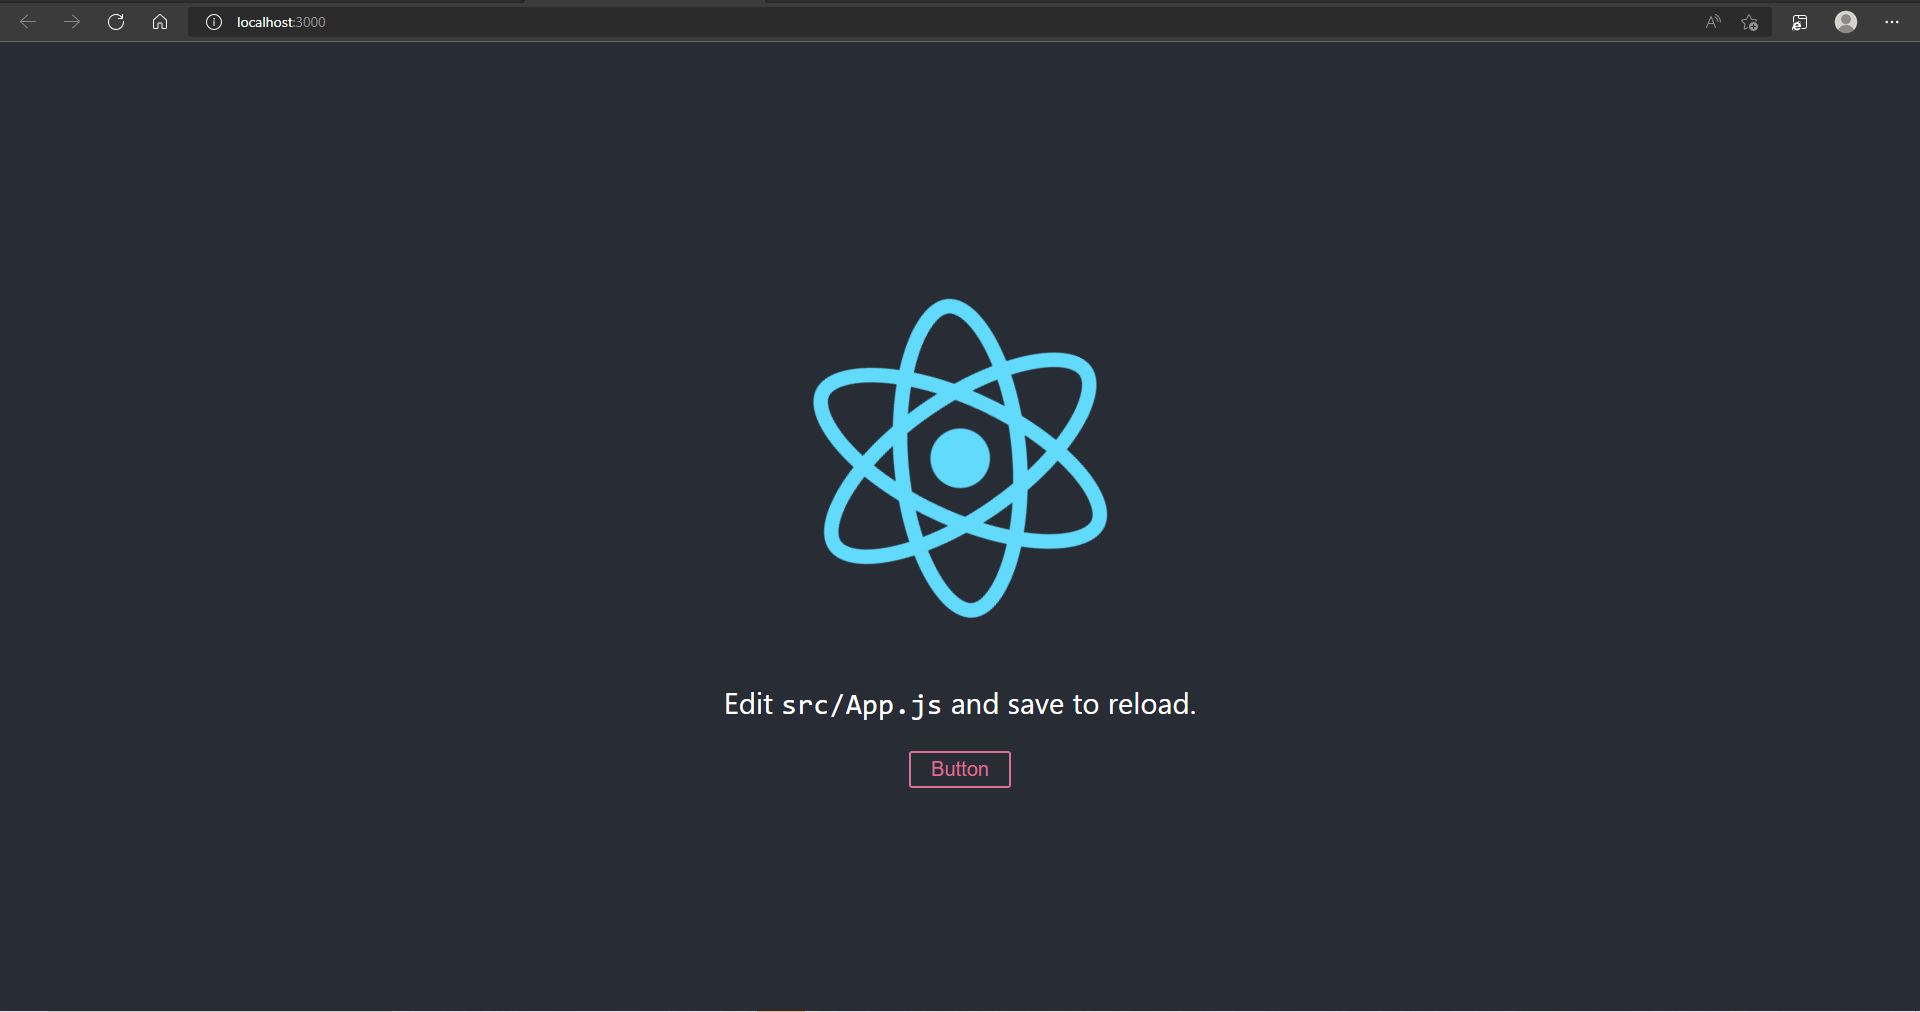
실행 결과
http://localhost:3000
02.버튼클릭 후 로딩 상황시 로딩 스타일에 맞는 조건부 스타일 주기
Buttom.module.css
.button {
  background: transparent;
  border-radius: 3px;
  border: 2px solid palevioletred;
  color: palevioletred;
  margin: 0 lem;
  padding: 0.25em 1em;
  font-size: 20px;
}

.loading {
  border: 2px solid gray;
  color: gray;
}
Buttom.module.css파일에.loading클래스 추가
Button.jsx
import React from "react"
import styles from "./Button.module.css"

class Button extends React.Component {
  state = {
    loading: false // 초기값
  };

  render() {
    return (
      <button
      onClick={this.startLoading}
      className={
        this.state.loading
         ? `${styles["button"]} ${styles["loading"]}`
         : styles["button"]
      }
      {...this.props}
    />
    )
  }

  startLoading = () => {
    this.setState({
      loading: true
    });
    setTimeout(() => {
      this.setState({
        loading: false
      })
    }, 1000);
  }
}

export default Button
Button.jsx파일의Buttonfunction컴포넌트를Class컴포넌트로 변경- 이처럼 삼항연산자로
ClassName을 사용하는 것은 코드가 많이 복잡해 보일수 있는데 특히ClassName이 여러개 일때는 많이 가독성이 많이 떨어진다.
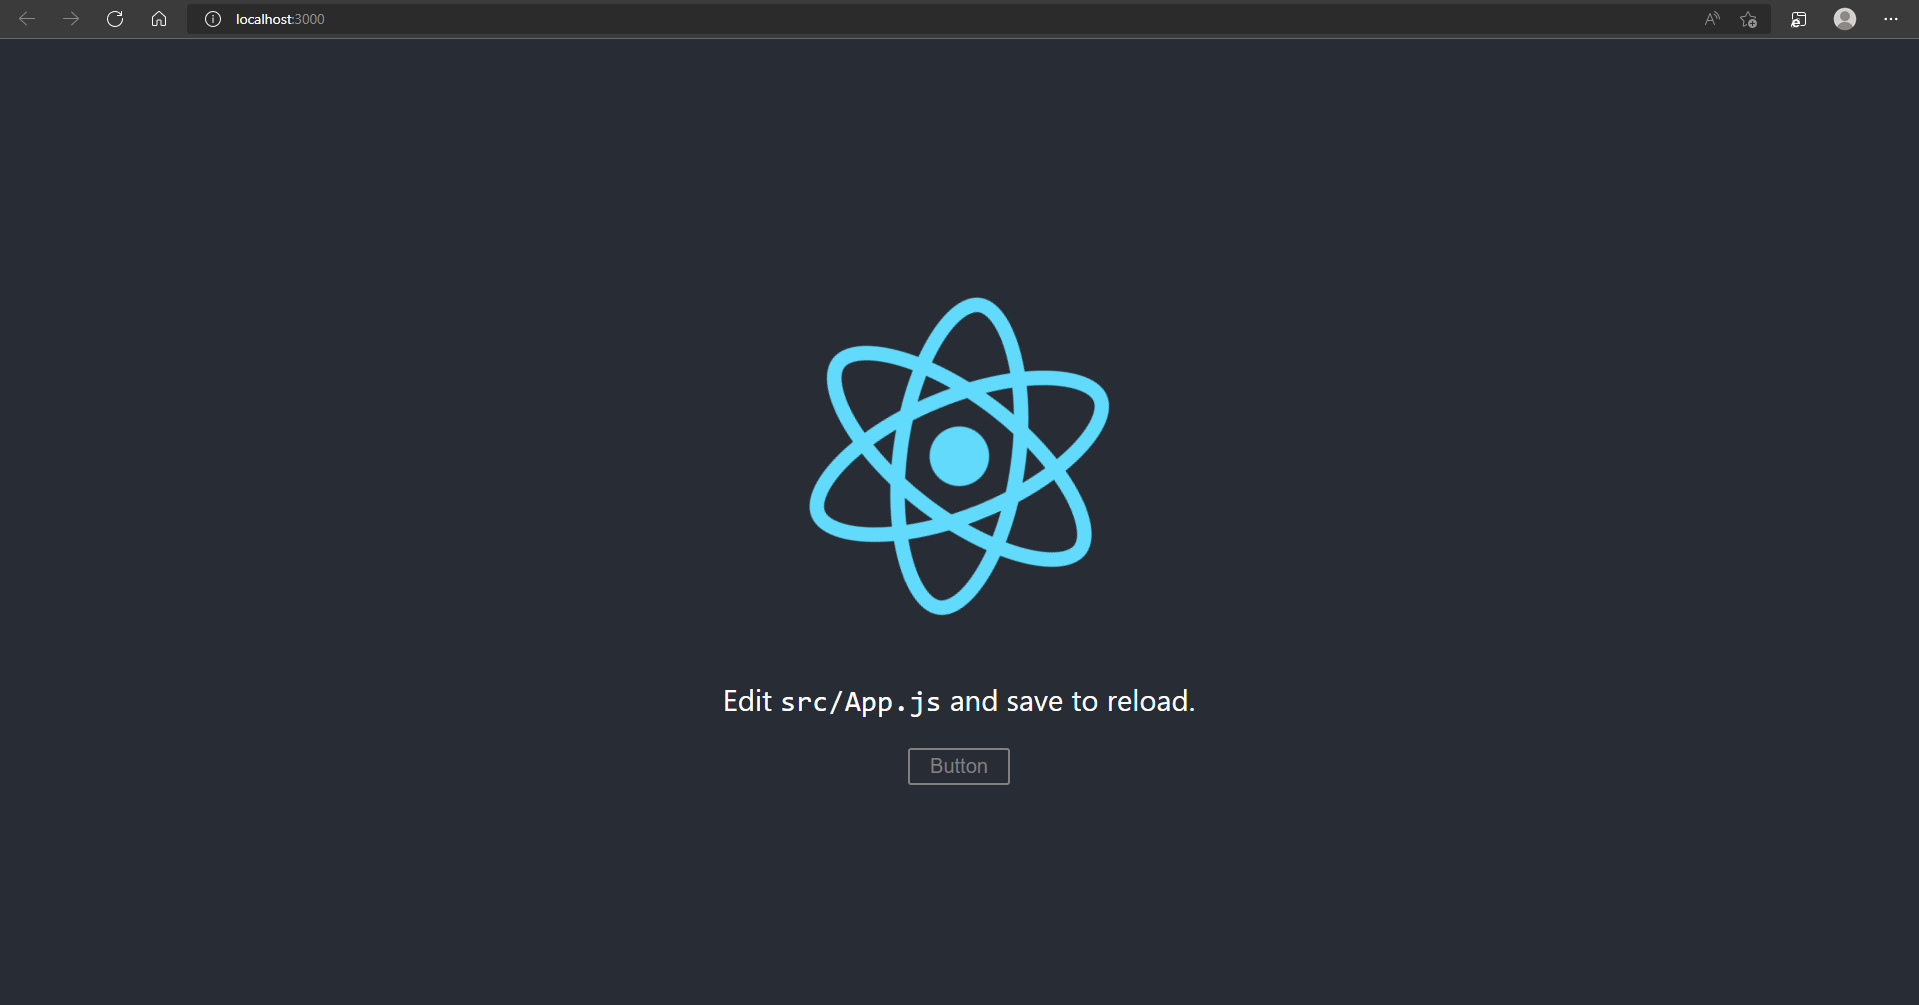
실행결과
http://localhost:3000- 버튼 클릭 전
- 버튼 클릭 후
- 1초 뒤
- 버튼을 클릭하면
css파일에.loading에서 설정한 것과 같이 1초동안 회색으로 바뀌었다가 다시 원래색으로 되돌아오는 것을 볼 수 있습니다.
03.ClassNames 라이브러리 사용하여 ClassName 사용 간편화하기
classNames 라이브러리 연습
Button.jsximport React from "react" import styles from "./Button.module.css" import classNames from "classnames"; class Button extends React.Component { render() { console.log(classNames("foo", "bar")) console.log(classNames("foot", "bar", "baz")) console.log(classNames({foo: true}, {bar: false})) console.log(classNames(null, false, "bar", undefined, 0, 1, {baz: null}, "")) console.log(classNames(styles["button"], styles["loading"])) return () } } export default Button
true값만 출력되고false값은 출력되지 않는다.- 출력되는 값은 모두 한칸씩 띄어서 출력된다.
button과loading은 실제 클레스 값이 출력된다.

04.classnames/bind 사용해서 코드 가독성 높이기
Button.jsx
import React from "react"
import styles from "./Button.module.css"
import classNames from "classnames/bind";

const cx = classNames.bind(styles)

console.log(cx("button", "loading"))

class Button extends React.Component {
  state = {
    loading: false // 초기값
  };

  render() {
    const { loading } = this.state
    return (
      <button
      onClick={this.startLoading}
      className={cx("button", { loading })}
       {...this.props}
    />
    )
  }

  startLoading = () => {
    this.setState({
      loading: true
    });
    setTimeout(() => {
      this.setState({
        loading: false
      })
    }, 1000);
  }
}

export default Button
- 이처럼
ClassName을 삼항연산자로 사용하지 않고classnames/bind로 사용하면 코드가 복잡해지지 않아서 가독성이 더욱 더 좋아진다.실행결과
http://localhost:3000- 버튼 클릭 전
- 버튼 클릭 후
- 1초 뒤
- 버튼을 클릭하면
css파일에.loading에서 설정한 것과 같이 1초동안 회색으로 바뀌었다가 다시 원래색으로 되돌아오는 것을 볼 수 있습니다.

일취월장(日就月將) - 「날마다 달마다 성장하고 발전한다.」