
프로젝트 하다가 로그인을 구현해야 할 일이 생겼다. 로그인을 어떻게 구현할까 하다가 firebase에서 간단한 회원가입과 로그인은 구현할 수 있게 되어있어서 firebase Authentication으로 구현을했다.
로그인 방법
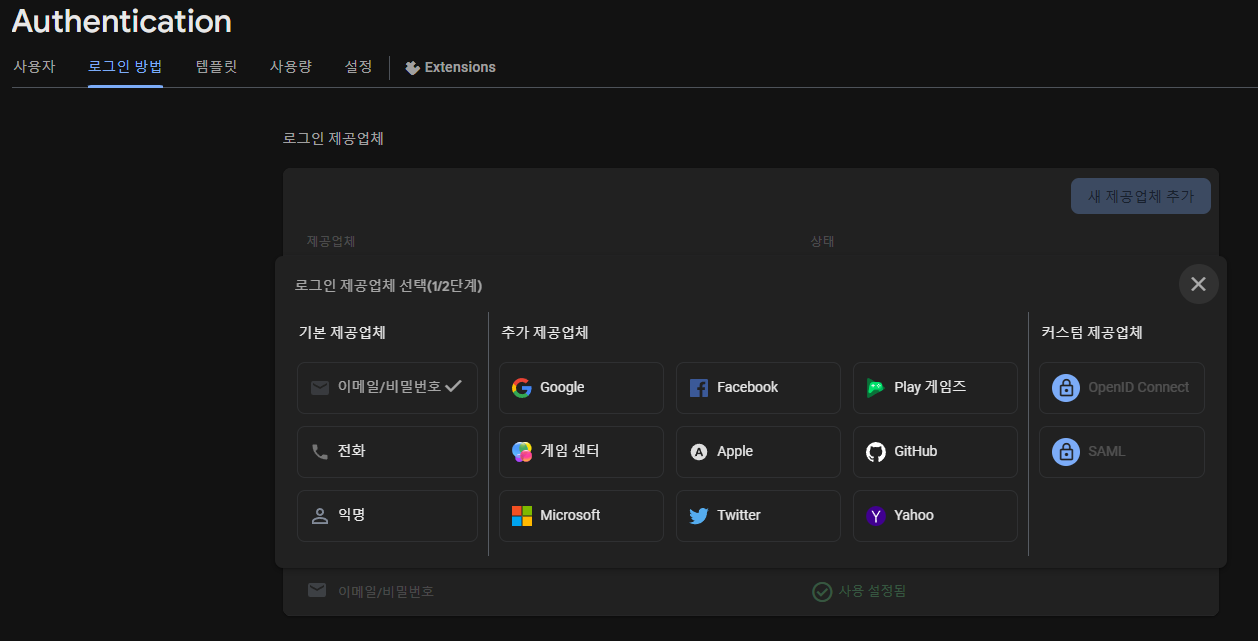
firebase Authentication에 가보면 로그인 방법부분에 어떠한 방법으로 로그인을 할 건지 나온다. 우리는 간단하게 이메일과 비밀번호로 할 수 있도록 설정했다.
회원가입
firebase Authentication 공식문서를 참고하여 제작하였다.
비밀번호 기반 계정 만들기
import { getAuth, createUserWithEmailAndPassword } from "firebase/auth";

const auth = getAuth();
createUserWithEmailAndPassword(auth, email, password)
  .then((userCredential) => {
    // Signed up
    const user = userCredential.user;
    // ...
  })
  .catch((error) => {
    const errorCode = error.code;
    const errorMessage = error.message;
    // ..
  });
구현 코드
const memberForm = document.getElementById('member__form');

memberForm.addEventListener('submit', async function (e) {
    e.preventDefault();

    const formData = new FormData(memberForm);

    const userId = formData.get('userId');
    const userPw = formData.get('userPw');

    createUserWithEmailAndPassword(auth, userId, userPw)
        .then((userCredential) => {
            const user = userCredential.user;
        })
        .catch((error) => {
            const errorMessage = error.message;
            console.error('회원가입 오류:', errorMessage);
            alert('회원가입 실패');
        });
});
멤버 폼이라는 폼에서 받은 값을 userId와 userPW에 넣어 Authentication에 저장을 합니다. 오류가 뜨면 알림창이 뜨면서 회원가입 실패를 알립니다.
로그인
로그인도 공식문서를 참고하여 구현했습니다.
이메일 주소와 비밀번호로 사용자 로그인
로그인 버튼을 눌렀을 때 로그인이 되도록 구현하였습니다.
구현코드
document.getElementById('loginBtn').addEventListener('click', (e) => {
        e.preventDefault();
        const loginId = document.getElementById('loginId').value;
        const loginPassword = document.getElementById('loginPassword').value;
        const auth = getAuth();
        signInWithEmailAndPassword(auth, loginId, loginPassword)
            .then((userCredential) => {
                console.log('로그인 완료');
                const user = userCredential.user;
                // 로컬 스토리지에 사용자 이메일 저장
                localStorage.setItem('userEmail', user.uid);
                alert('환영합니다.');
                location.reload(true);
            })
            .catch((error) => {
                const errorCode = error.code;
                const errorMessage = error.message;
                if (errorCode === 'auth/invalid-email') {
                    document.getElementById('alert').innerText = '이메일을 입력해주세요!';
                    document.getElementById('loginId').focus();
                }
                if (errorCode === 'auth/missing-password') {
                    document.getElementById('alert').innerText = '비밀번호를 입력해주세요!';
                    document.getElementById('loginPassword').focus();
                }
                if (errorCode === 'auth/invalid-login-credentials') {
                    document.getElementById('alert').innerText =
                        'ID 혹은 비밀번호를 잘못 입력하셨거나 등록되지 않았습니다.';
                }
            });
    });
입력한 email과 PW를 입력받아 저장하고 로컬스토리지에도 저장을 했습니다.
그 다음 이제 에러가 나면 그 에러값에 따라 안내 문구를 내주는 방식으로 작성했습니다.
후기
간단한 미니 프로젝트에 로그인 기능을 사용하려면 firebase의 기능을 이용하는 것도 괜찮은 방법이라 생각한다. 생각보다 사용하기 편하고 비밀번호 규칙도 정할 수 있다. 회원가입, 로그인 어떻게 구현하지 생각했는데 의외로 간단하게 해결하였다.

프론트엔드 잘하고 싶다