Full Sail University에서 Final Project로 진행한 복분자막걸리(Raspberry Rice Wine, RRW) 개발 과정에서 작성한 글입니다.
Although I have planned to work on project-level file import/export, I changed my plan to do the image insertion first as I thought it should be done first because of its usefulness. Therefore I have worked on it, and while there were some difficulties, I got it working well. Let's dive into it!
At first, I have tried to implement the feature by creating a 'background image' layer component. However, I realized that it's impossible to make such a thing in the current system because of the following facts:
- Layer components can only change the style(CSS) of the layer.
background-image: url(...)doesn't accept base64-encoded data URLs.file://style URL isn't available because of Electron's security policy.
The most important fact that limited the current situation is the first one: layer components can only change the style of the layer. In order to implement image insertion by creating a layer component, a rewrite was needed to make the component system allow components to also change HTML. However, I found that it will make all the systems to be very messy, especially because of the child insertion inside nested node trees. Therefore I changed my mind to solve this problem in a different way: creating a new type of layer.
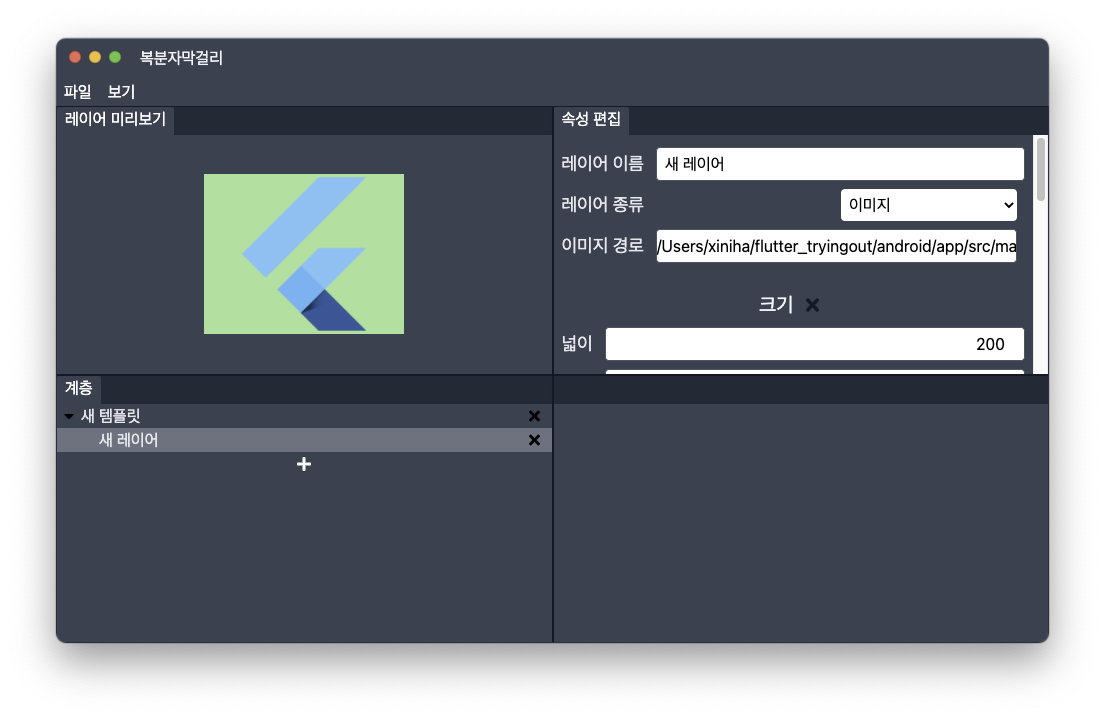
Before this change, I only had two types of layers: normal layers and textboxes. Actually, it wasn't a term 'type', but a boolean that indicates the layer is a textbox or not. I modified this part to make layers have different types: normal layers, text boxes, and images. Each of them gets treated differently by the layer renderer and will have different kind of properties specific to each type. For example, image layers have a path of the image file and base64-encoded data URL as their type-specific properties.
Reading image files and converting them into base64 data URLs wasn't that hard. It's simply done by communicating between the main process and the renderer process. Rendering images was also pretty easy: just checking the layer type before rendering and emitting different types of HTML elements were enough to make everything working. While I have also added the sizing layer component to control the size of the image, it was also very easy to implement and took 2-3 minutes to complete.
Although only one feature was implemented this week, image insertion is the most powerful feature that can improve template creation: any kind of shape can be added into the app, even it's not possible using layer components! Therefore I'm very happy with this week's progress. However, since it's only one week left until the end of the project, I'll try to work hard next week to round many rough edges present in the application, with project-level file import/export implemented.