혼공학습단 10기 공부 기록
[ 목차 ]
-
미션 체크 & 인증
-
공부 내용
- (필수미션) 고양이 이미지 출력하기 1
- (필수미션) 고양이 이미지 출력하기 2
- (선택미션) 할 일 목록 만들기
1. 미션 체크 리스트
| 성공여부 | 미션 내용 |
|---|---|
| done | p. 315의 <직접 해보는 손코딩>을 실행한 후 출력되는 고양이 이미지 캡쳐하기 |
| done | p.352 누적 예제를 활용하여 본인의 할 일 목록을 만들어 캡쳐하기 |
필수 미션
2. 공부 내용
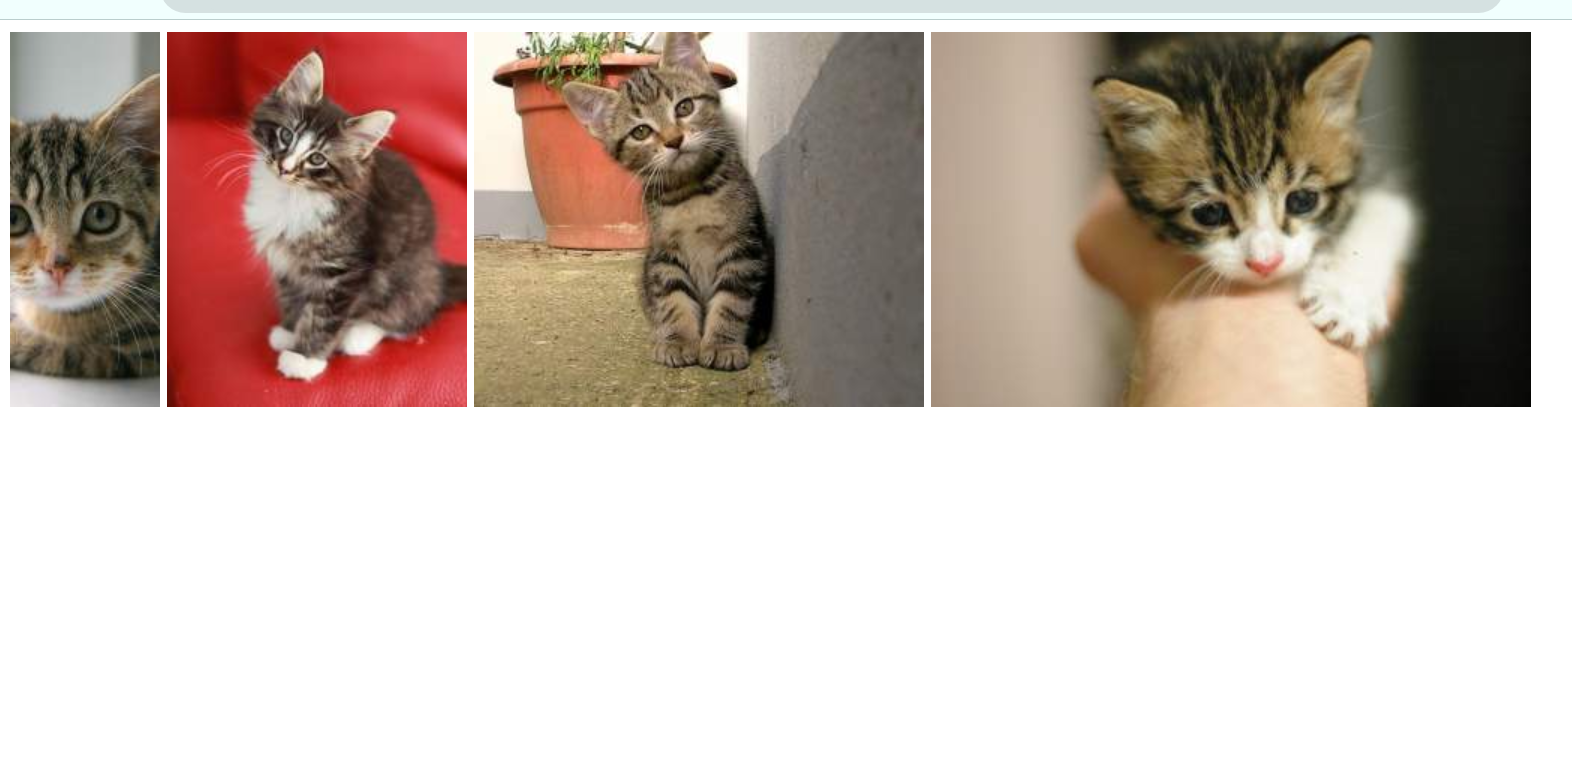
📍 고양이 이미지 출력하기
📚 결과물
<script>
        document.addEventListener('DOMContentLoaded',()=>{
            const rects = document.querySelectorAll('.rect')

            rects.forEach((rect, index) => {
                const width = (index + 1) * 100
                const src = `http://placekitten.com/${width}/250`
                rect.setAttribute('src', src)
            })
        })
    </script>
</head>
<body>
    <img class ="rect">
    <img class ="rect">
    <img class ="rect">
    <img class ="rect">
</body>
📍 고양이 이미지 출력하기 ( 코드 부연 설명 )
<script>
	const width = (index + 1) * 100
	const src = `http://placekitten.com/${width}/250`
	rect.setAttribute('src', src)
</script>
index 첫 번쨰 값 : 0
즉, width는 '100'이 된다. src는 http://placekitten.com/100/250이 된다.
해당 src의 사진이 맨처음 영역에 출력된다.
index 두 번쨰 값 : 1
즉, width는 '200'이 된다. src는 http://placekitten.com/200/250이 된다.
해당 src의 사진이 그다음 영역에 출력된다.
index 세 번쨰 값 : 2
즉, width는 '300'이 된다. src는 http://placekitten.com/300/250이 된다.
해당 src의 사진이 그다음 영역에 출력된다.
index 네 번쨰 값 : 3
즉, width는 '400'이 된다. src는 http://placekitten.com/400/250이 된다.
해당 src의 사진이 그다음 영역에 출력된다.
선택 미션
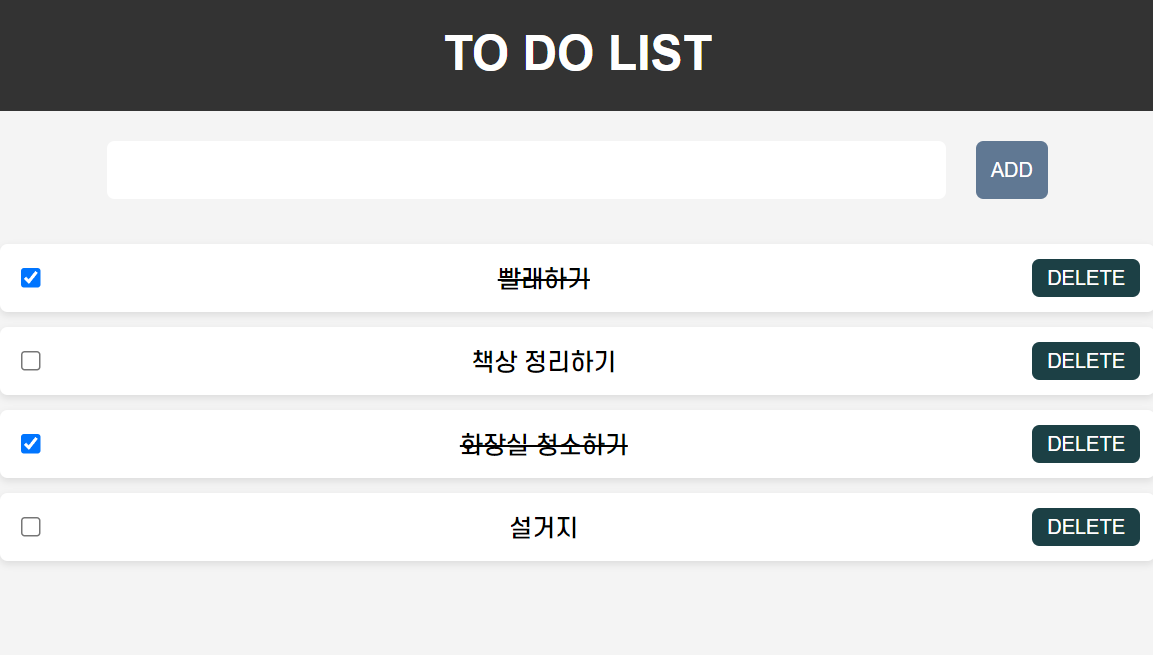
📍 할일 목록 만들기
📚 결과물
CSS
        body {
            font-family: 'Arial', sans-serif;
            background-color: #f4f4f4;
            margin: 0;
            padding: 0;
        }

        h1 {
            text-align: center;
            padding: 20px 0;
            background-color: #333;
            color: #fff;
            margin: 0;
        }

        #box{
            display: flex;
            justify-content: center;

        }
        /* 입력 및 버튼 스타일 */
        #todo, #add-button {
            margin: 20px 10px;
            padding: 10px;
            border: none;
            border-radius: 5px;
            outline: none;
            transition: all 0.3s ease;
        }

        #todo {
            width: 70%;
            font-size: 16px;
        }

        #add-button {
            background-color: #607893;
            color: #fff;
            cursor: pointer;
        }

        #add-button:hover {
            background-color: #81a6d0;
        }

        #todo-list div {
            background-color: #fff;
            padding: 10px;
            margin: 10px 0;
            border-radius: 5px;
            display: flex;
            align-items: center;
            justify-content: space-between;
            box-shadow: 0 2px 5px rgba(0, 0, 0, 0.1);
        }

        #todo-list input[type="checkbox"] {
            margin-right: 10px;
        }

        #todo-list button {
            background-color: #1c4045;
            color: #fff;
            padding: 5px 10px;
            border: none;
            border-radius: 5px;
            cursor: pointer;
            transition: background-color 0.3s ease;
        }

        #todo-list button:hover {
            background-color: #0f2629;
        }
CODE
<body>
    <h1> TO DO LIST </h1>
    <div id = "box">
    <input id = "todo">
    <button id ="add-button">ADD</button>
    </div>
    <div id="todo-list"></div>

</body>
<script>
    document.addEventListener('DOMContentLoaded', ()=>{
        const input =document.querySelector('#todo')
        const todoList =document.querySelector('#todo-list')
        const addButton =document.querySelector('#add-button')

        let keyCount = 0

        const addTodo = () => {
            if (input.value.trim() === ''){
                alert('할 일을 입력해주세요!')
                return
            }


        const item = document.createElement('div')
        const checkbox = document.createElement('input')
        const text = document.createElement('span')
        const button = document.createElement('button')

        const key = keyCount
        keyCount += 1

        item.setAttribute('data-key', key)
        item.appendChild(checkbox)
        item.appendChild(text)
        item.appendChild(button)
        todoList.appendChild(item)

        checkbox.type = 'checkbox'
        checkbox.addEventListener('change', (event) => {
            text.style.textDecoration= event.target.checked ? 'line-through':'';
        })

        text.textContent = input.value

        button.textContent = 'DELETE'
        button.addEventListener('click',()=>{
            removeTodo(key)
        })

        input.value=''
        }

        const removeTodo = (key) => {
            const item = document.querySelector(`[data-key="${key}"]`)
            todoList.removeChild(item)
        }

        addButton.addEventListener('click', addTodo)
        input.addEventListener('keyup', (event)=> {
            const ENTER = 13
            if(event.keyCode === ENTER){
                addTodo()
            }
        })
    })
</script>
style 추가안하면 너무 별로라서 조금 추가해봤다..