PUT vs PATCH
- PUT : 리소스의 모든 것을 업데이트 한다.
- PATCH : 리소스의 일부를 업데이트 한다.
1. 상품 수정 - PUT
- ID를 이용해 등록된 상품의 이름과 가격을 수정할 수 있다.
- ProductController
@PutMapping ("api/products/{id}")
    public String update(@PathVariable Long id,@RequestBody com.example.springboot.entity.Product product) {
        productService.update(id,product);
        return "수정되었습니다.";
}- ProductService
public com.example.springboot.entity.Product update(Long id, com.example.springboot.entity.Product product) {
        com.example.springboot.entity.Product product1 = productJpaRepository.findById(id)
                .orElseThrow(() -> new IllegalArgumentException("해당 상품이 없습니다. id=" + id));
        product1.setName(product.getName());
        product1.setPrice(product.getPrice());
        return productJpaRepository.save(product1);
    }
2. 상품 수정 - PATCH
- ID를 이용해 상품의 이름만 수정해보았다.
- ProductController
@PatchMapping("api/products/{id}")
    public String patchUpdate(@PathVariable Long id,@RequestBody com.example.springboot.entity.Product product) {
        productService.patchUpdate(id, product);
        return "일부 수정되었습니다.";
}- ProductService
public com.example.springboot.entity.Product patchUpdate(Long id, com.example.springboot.entity.Product product) {
        com.example.springboot.entity.Product product2 = productJpaRepository.findById(id)
                .orElseThrow(() -> new IllegalArgumentException("해당 상품이 없습니다. id=" + id));
        List<com.example.springboot.entity.Product>list = new ArrayList<>();
        list.add(product);
        for (int i=0;i< list.size();i++) {
            if (list.get(i).getName() != null) product2.setName(list.get(i).getName());
            if (list.get(i).getPrice() != null) product2.setPrice(list.get(i).getPrice());
        }
        return productJpaRepository.save(product2);
    }
4. Postman으로 확인
1. PUT
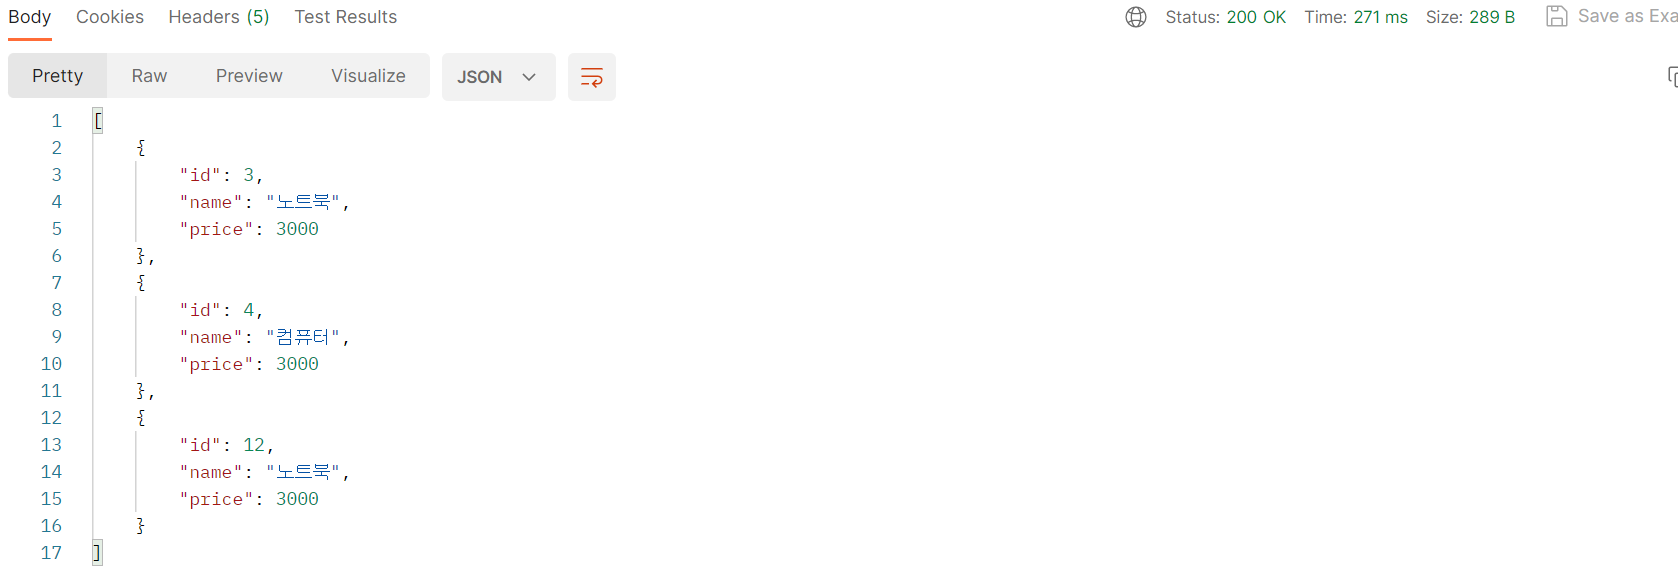
- 수정하기 전 상품 현황
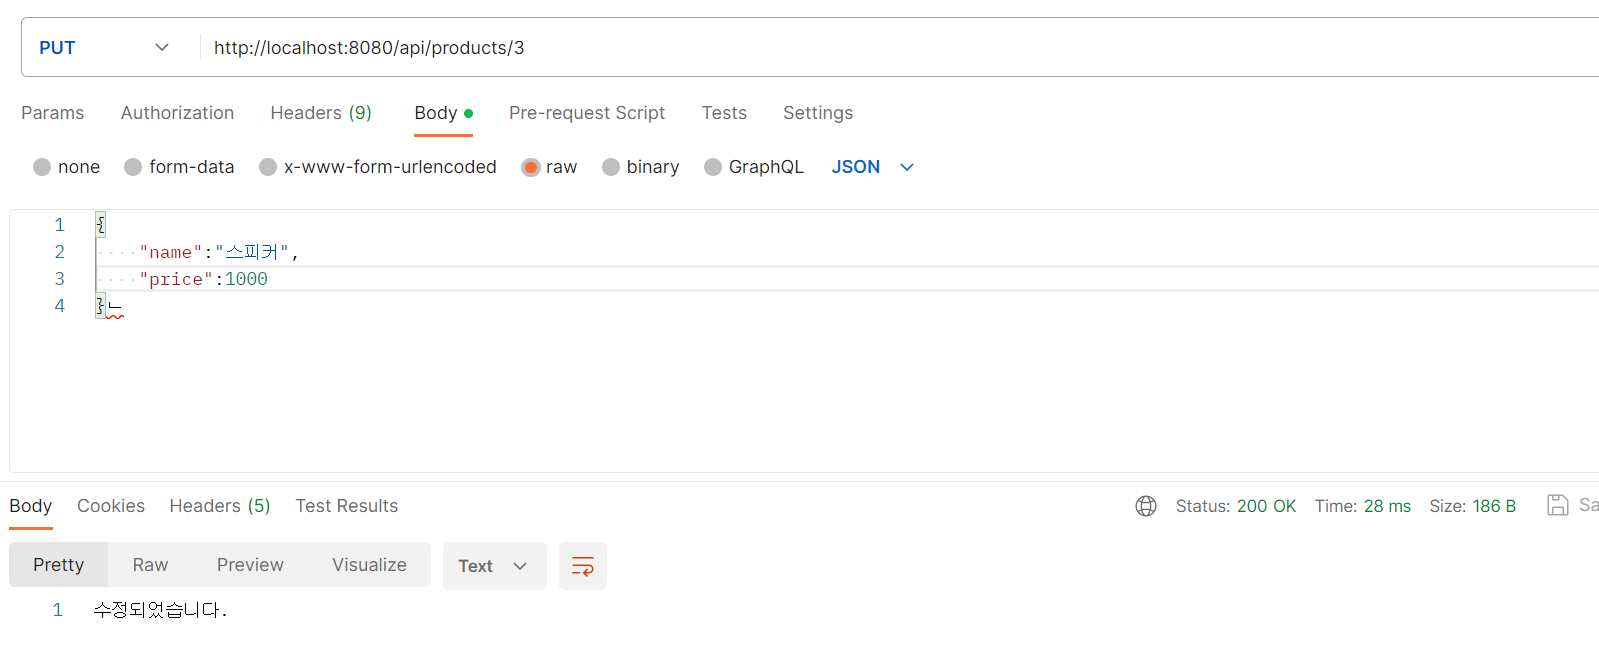
- PUT >
http://localhost:8080/api/products/3> Body : name, price 변경 > Send
수정되었습니다.성공 !
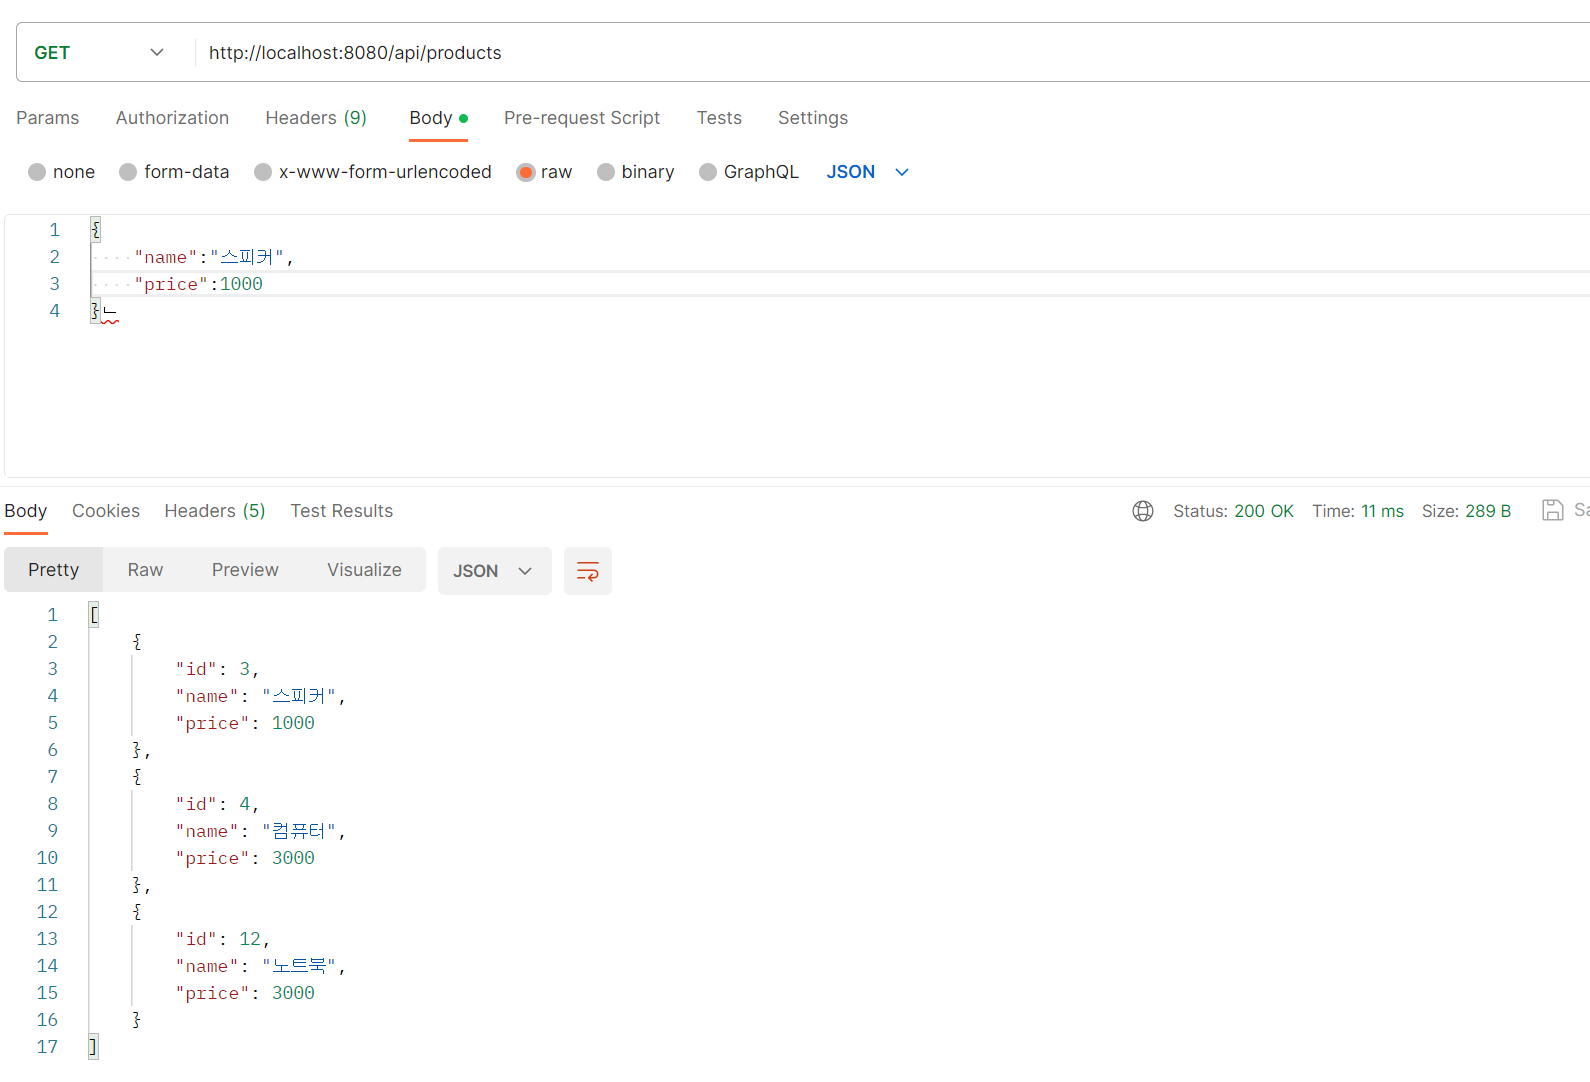
- GET >
http://localhost:8080/api/products> Send
- id가 3인 상품이 수정된 것을 확인할 수 있다.
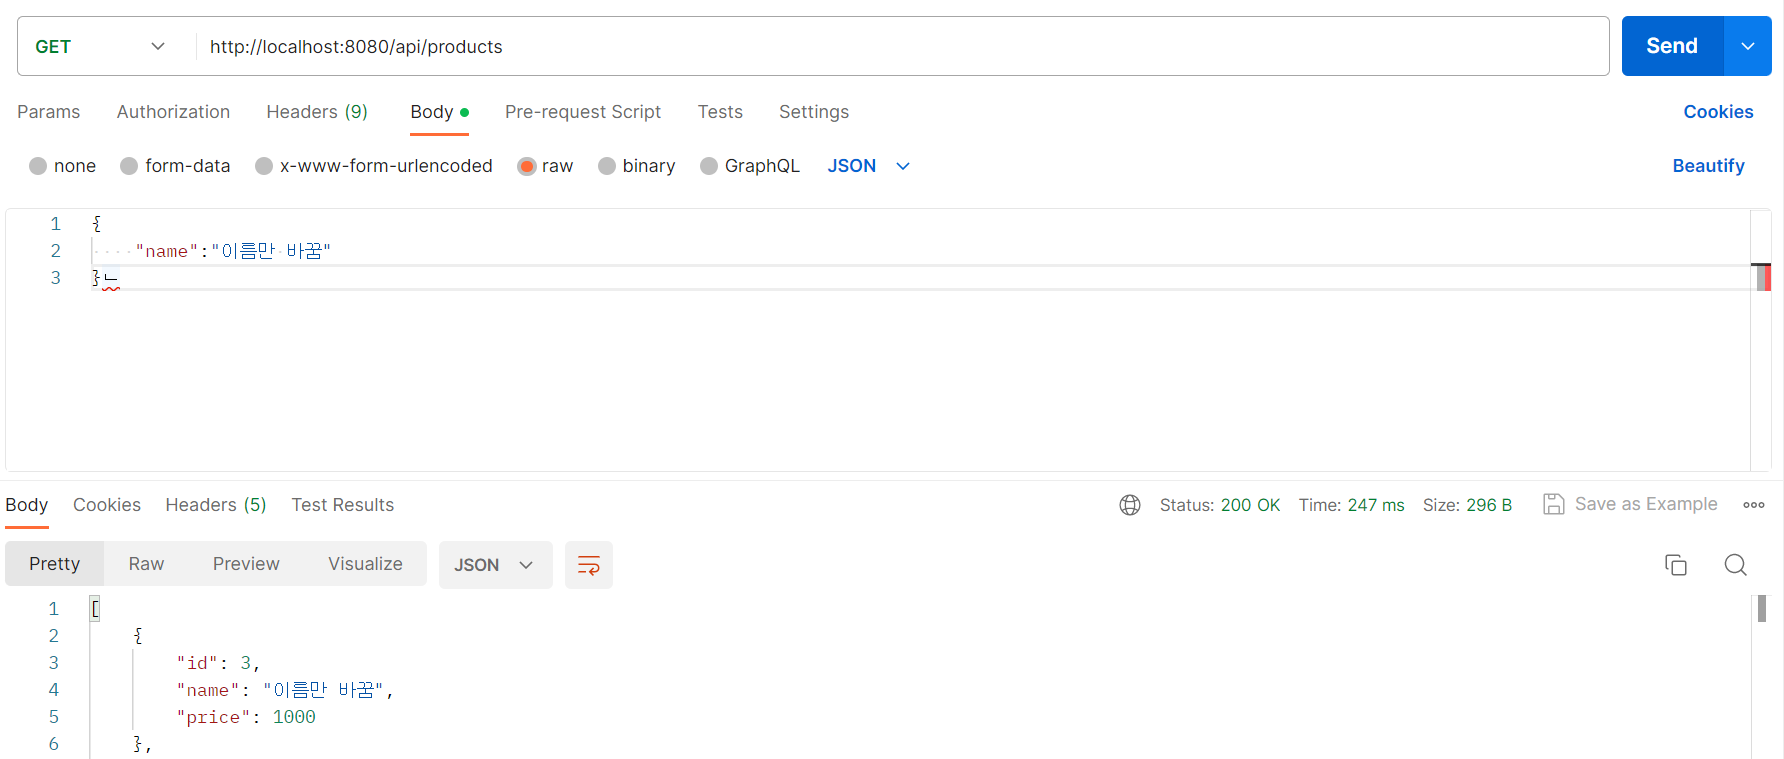
2. PATCH
- PATCH >
http://localhost:8080/api/products/3> Body : name 수정
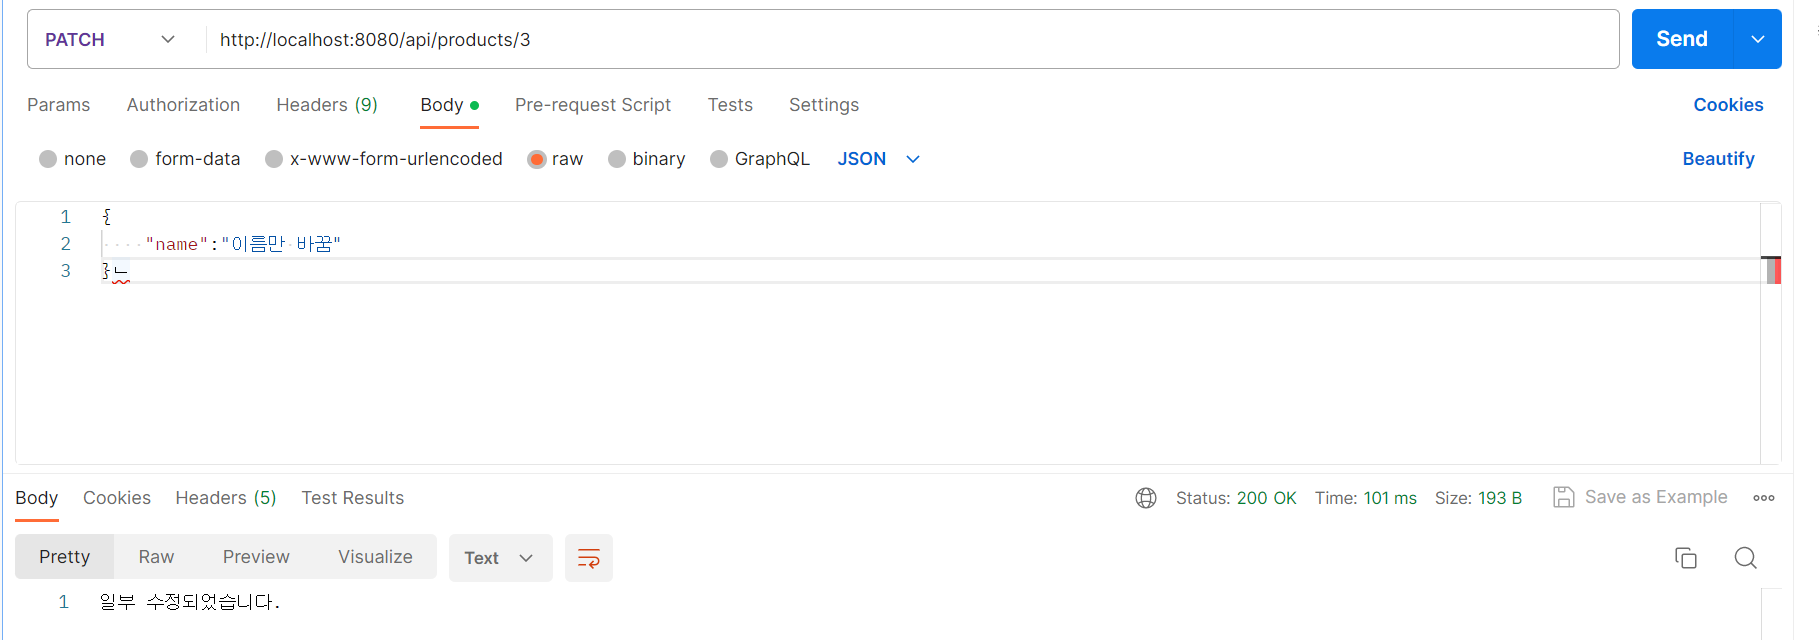
- id가 3인 상품이 이름만 수정된 것을 확인할 수 있다.
5. MySQL Workbench 로 확인
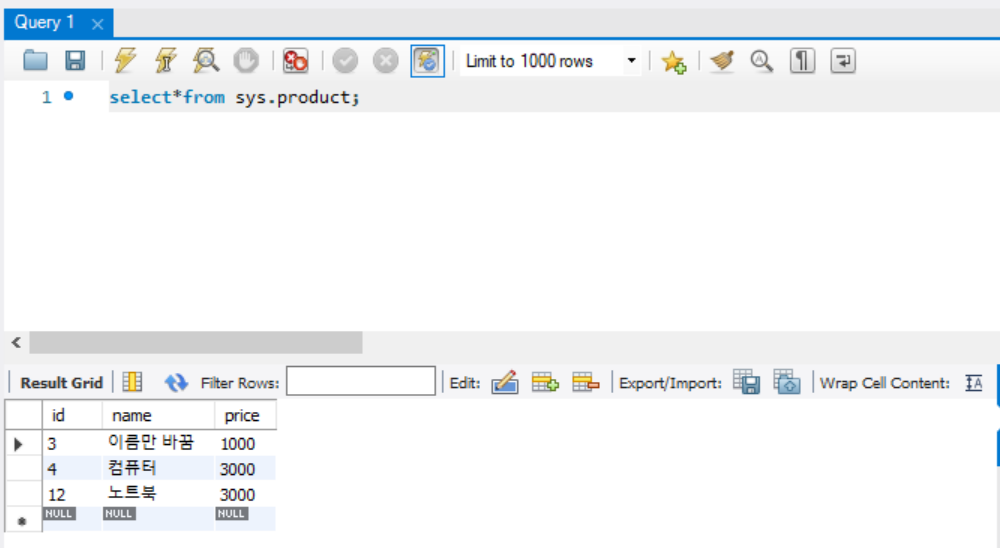
1. PUT
- id가 3인 상품이 수정된 것을 확인할 수 있다.
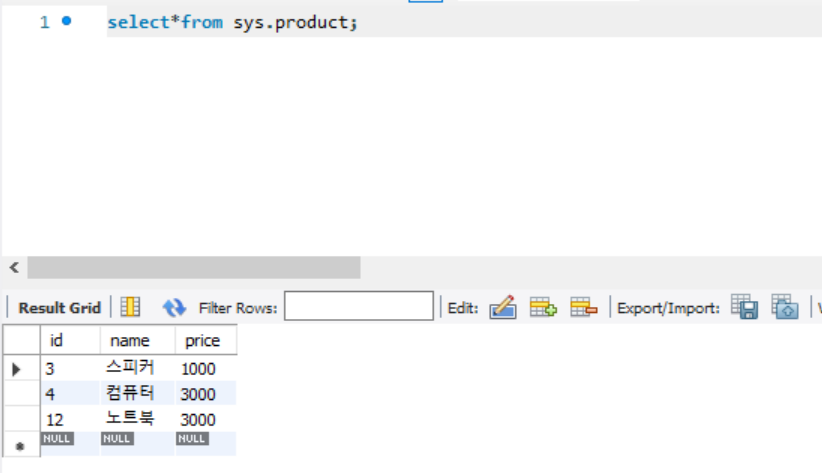
2. PATCH
- id가 3인 상품의 이름이 수정된 것을 확인할 수 있다.
6. 해당되는 id가 없는 경우
해당 상품이 없습니다 . id = '요청한 id'


소뎡