GitLab
- GitLab은 협업 소프트웨어 개발 및 관리 플랫폼 중 하나로, 코드 저장소 호스팅, 협업 도구, 지속적인 통합 및 배포 (CI/CD), 이슈 트래킹, 웹 기반 코드 에디터 등의 다양한 기능을 제공한다.
- GitLab은 Git 저장소를 호스팅하고 관리하는 기능뿐만 아니라 프로젝트의 전체 개발 라이프사이클을 관리하기 위한 도구를 통합적으로 제공하여 개발자들이 효율적으로 협업할 수 있도록 돕는다.
- GitLab은 GitHub과 유사한 기능을 제공하지만, 코드 호스팅 이외에도 CI/CD, 이슈 트래킹, 코드 검토, 웹 기반 IDE, 보안 및 협업 도구 등을 하나의 통합된 플랫폼에서 제공하는 것이 특징이다.
- GitLab에는 두 가지 고유한 제품이 있다.
GitLab Community Edition(CE) – 무료 사용가능 하며, Community Edition 기능만 포함된 간단한 패키지이다.
GitLab Enterprise Edition(EE) – 모든 Community Edition 기능과 Enterprise Edition 기능을 포함하는 전체 GitLab 패키지이다.
GitLab Runner
- GitLab Runner는 GitLab에서 지속적인 통합 (CI) 및 배포 (CD) 작업을 실행하기 위한 도구이다.
- GitLab Runner는 CI/CD 파이프라인을 자동화하고 다양한 프로젝트를 빌드, 테스트 및 배포할 수 있도록 도와주며, GitLab에서 호스팅되는 Git 저장소와 연결되어 작업을 수행하는 에이전트로 작동한다.
GitLab Runner는 여러 플랫폼에서 실행될 수 있으며, 프로젝트의 CI/CD 작업을 수행하는데 필요한 환경을 설정할 수 있으며, 해당 작업은 빌드, 테스트, 정적 분석, 컨테이너 빌드 및 배포 등 다양한 것일 수 있다.
GitLab Runner는 GitLab CI/CD 구성 파일에 따라 작동하며, 이를 통해 프로젝트의 소스 코드를 자동으로 빌드하고 테스트하며 배포할 수 있다.
GitLab CE 설치
OS : CentOS8
- 알림 이메일을 보내기 위해 Postfix를 설치
$ sudo yum install postfix

# Postfix 서비스를 시작 및 활성화
$ sudo systemctl enable postfix
$ sudo systemctl start postfix
- GitLab CE 패키지 저장소 추가
$ curl -s https://packages.gitlab.com/install/repositories/gitlab/gitlab-ce/script.rpm.sh | sudo bash
- GitLab CE 패키지를 설치
# sudo EXTERNAL_URL="https://gitlab.example.com" yum install -y gitlab-ce
$ sudo EXTERNAL_URL="192.168.60.239:8082" yum install -y gitlab-ce

## 위 방식으로 EXTERNAL_URL 적용시 GitLab의 기본 구성 파일인 /etc/gitlab/gitlab.rb의 external_url 'http://192.168.60.239:8082'로 적용되어 있다.
# sudo yum install -y gitlab-e
## 위 방식으로 EXTERNAL_URL 명시하지 않고 설치시 /etc/gitlab/gitlab.rb 파일의 external_url를 직접 변경해주어야 한다.
- 방화벽 적용
 $ firewall-cmd --permanent --zone=public --add-port=8082/tcp
 $ firewall-cmd --reload
 $ firewall-cmd --permanent --list-all
- GitLab 재구성 스크립트를 실행
$ sudo gitlab-ctl reconfigure

# 참고
$ sudo gitlab-ctl start   # 서비스 시작
$ sudo gitalb-ctl stop    # 서비스 중지
$ sudo gitlab-ctl restart # 서비스 재시작
$ sudo gitlab-ctl status  # 서비스 상태 확인
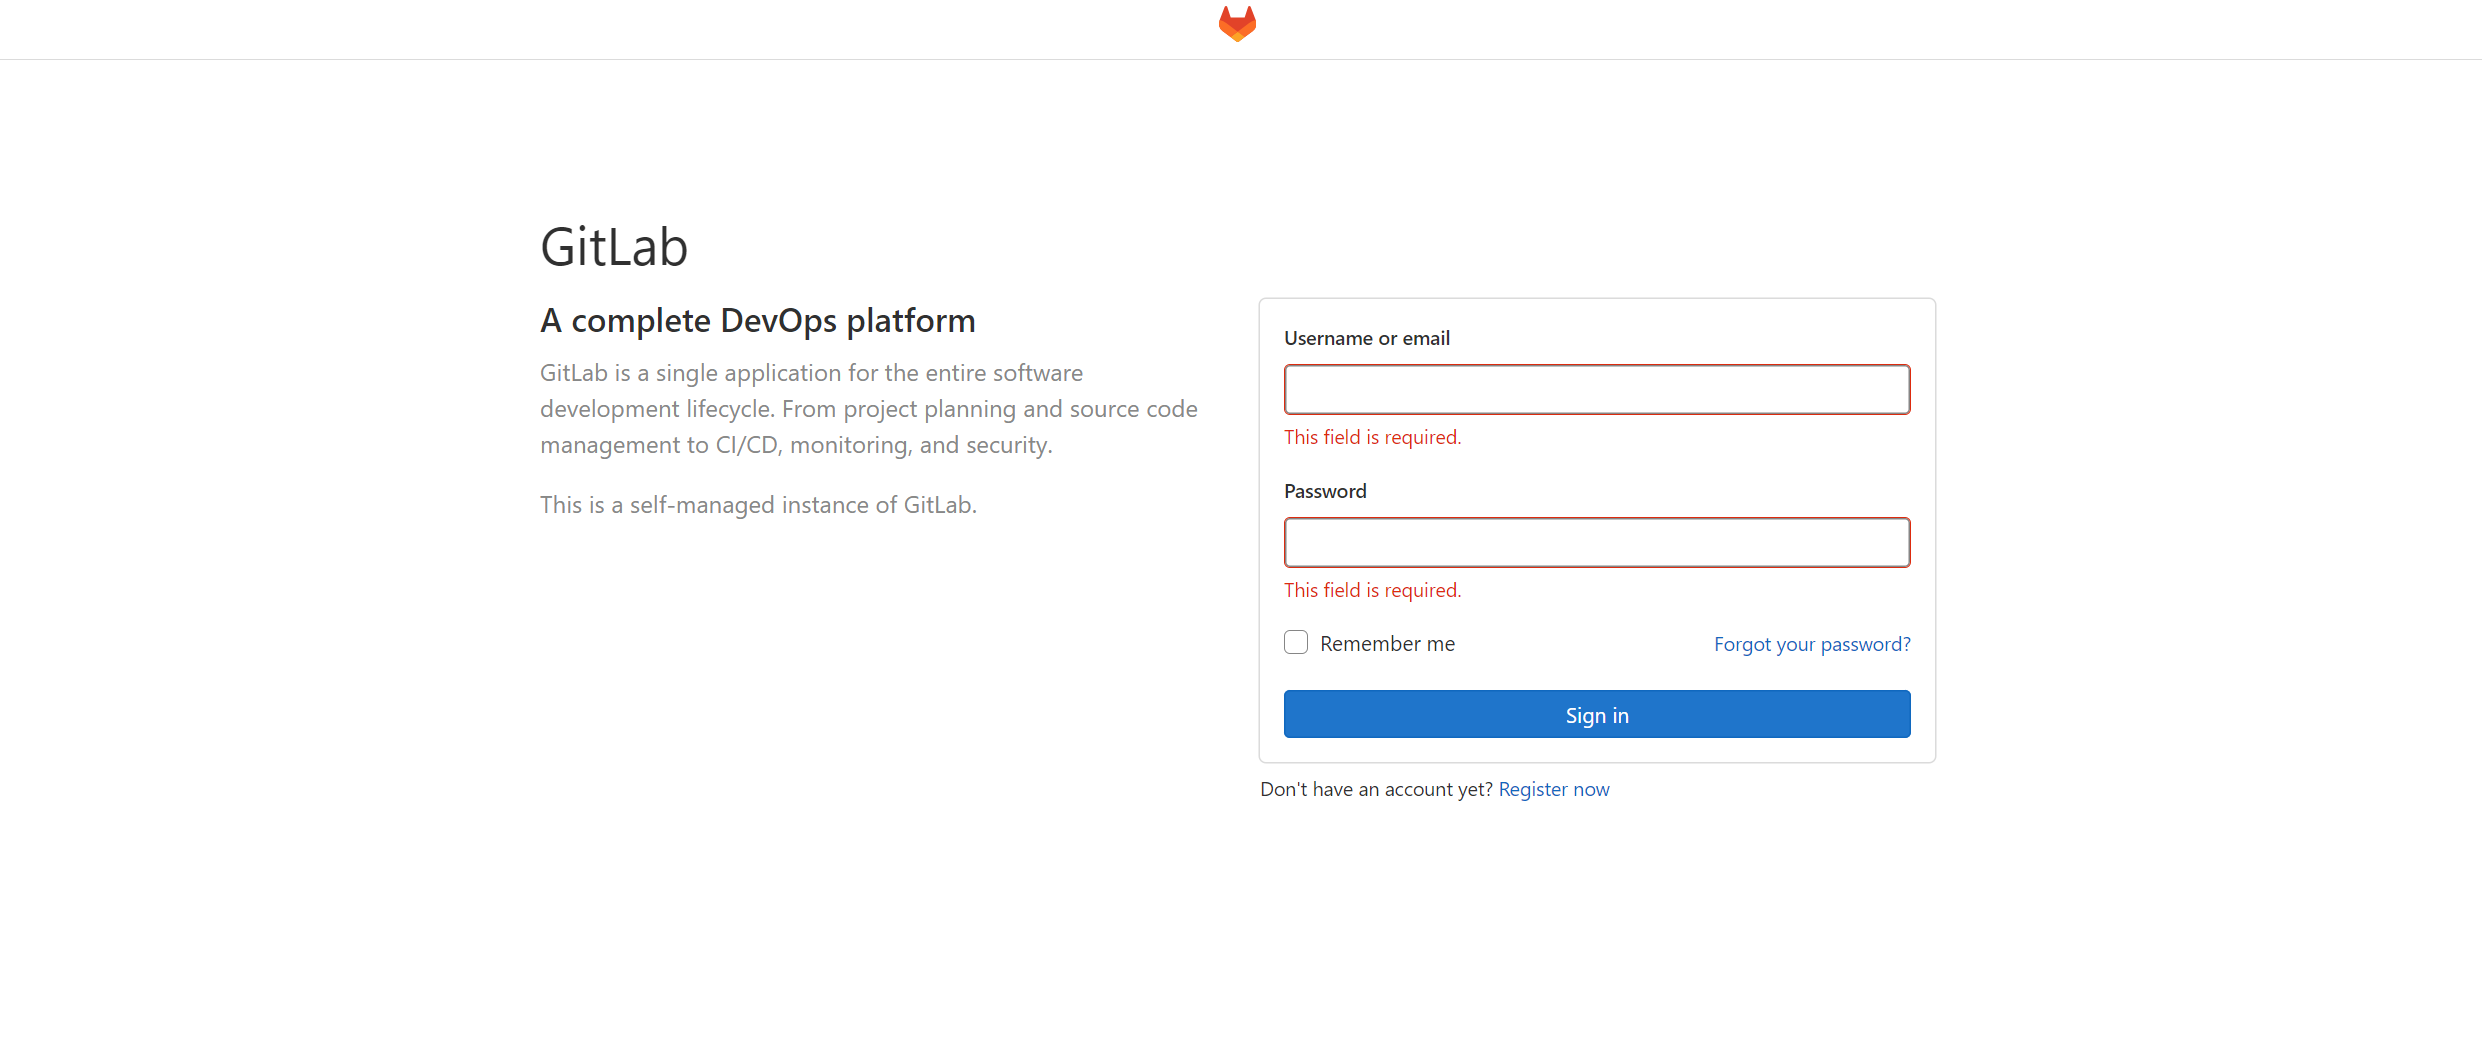
- 이후 1~2분 대기 후 접속
- ID & 초기 Password
# ID - root

# Password - 초기 패스워드
$ sudo cat /etc/gitlab/initial_root_password
- password 변경
GitLab SSL 적용
- vi /etc/gitlab/gitlab.rb 파라미터 변경
$ vi /etc/gitlab/gitlab.rb

     32 external_url 'http://192.168.60.239:8082'
   1607 ################################################################################
   1608 ## GitLab NGINX
   1609 ##! Docs: https://docs.gitlab.com/omnibus/settings/nginx.html
   1610 ################################################################################
   1611
   1612 # nginx['enable'] = true
   1613 # nginx['client_max_body_size'] = '250m'
   1614 # nginx['redirect_http_to_https'] = false
   1615 # nginx['redirect_http_to_https_port'] = 80
   1616
   1617 ##! Most root CA's are included by default
   1618 # nginx['ssl_client_certificate'] = "/etc/gitlab/ssl/ca.crt"
   1619
   1620 ##! enable/disable 2-way SSL client authentication
   1621 # nginx['ssl_verify_client'] = "off"
   1622
   1623 ##! if ssl_verify_client on, verification depth in the client certificates chain
   1624 # nginx['ssl_verify_depth'] = "1"
   1625
   1626 # nginx['ssl_certificate'] = "/etc/gitlab/ssl/#{node['fqdn']}.crt"
   1627 # nginx['ssl_certificate_key'] = "/etc/gitlab/ssl/#{node['fqdn']}.key"

  # 위 내용을 아래 내용처럼 변경
     32 external_url 'https://192.168.60.239:445'


   1607 ################################################################################
   1608 ## GitLab NGINX
   1609 ##! Docs: https://docs.gitlab.com/omnibus/settings/nginx.html
   1610 ################################################################################
   1611
   1612 nginx['enable'] = true
   1613 nginx['client_max_body_size'] = '250m'
   1614 nginx['redirect_http_to_https'] = true
   1615 nginx['redirect_http_to_https_port'] = 8082


   1617 ##! Most root CA's are included by default
   1618 nginx['ssl_client_certificate'] = "/etc/gitlab/ssl/ca.crt"


   1625
   1626 nginx['ssl_certificate'] = "/etc/gitlab/ssl/server.crt"
   1627 nginx['ssl_certificate_key'] = "/etc/gitlab/ssl/server.key"
- GitLab 재구성 스크립트를 실행
$ sudo gitlab-ctl reconfigure

# 참고
$ sudo gitlab-ctl start   # 서비스 시작
$ sudo gitalb-ctl stop    # 서비스 중지
$ sudo gitlab-ctl restart # 서비스 재시작
$ sudo gitlab-ctl status  # 서비스 상태 확인
- 1~2분 대기 후 접속
- ssl 인증서만 업데이트 할 경우
# SSL 인증서가 업데이트되었지만 구성이 변경되지 않은 경우, GitLab의 /etc/gitlab/gitlab.rb을 재구성해도 NGINX에는 영향을 미치지 않는다. 대신 NGINX가 기존 구성과 새 인증서를 정상적으로 다시 로드하도록 해야 한다.
$ sudo gitlab-ctl hup nginx
$ sudo gitlab-ctl hup registry
GitLab Runner 설치
- 공식 GitLab 저장소를 추가
# 데비안/우분투/민트의 경우
# curl -L "https://packages.gitlab.com/install/repositories/runner/gitlab-runner/script.deb.sh" | sudo bash

#RHEL/CentOS/Fedora의 경우
$ curl -L "https://packages.gitlab.com/install/repositories/runner/gitlab-runner/script.rpm.sh" | sudo bash
- 최신 버전의 GitLab Runner를 설치 혹은 특정 버전을 설치
# 최신 버전
$ sudo yum install gitlab-runner

# 특정 버전
$ yum list gitlab-runner --showduplicates | sort -r
sudo yum install gitlab-runner-16.5.0-1
The system services of GitLab Runner
- GitLab Runner 가 설치 되면 서비스 파일이 자동으로 생성된다.
systemd : /etc/systemd/system/gitlab-runner.service$ systemctl daemon-reload $ systemctl restart gitlab-runner.service
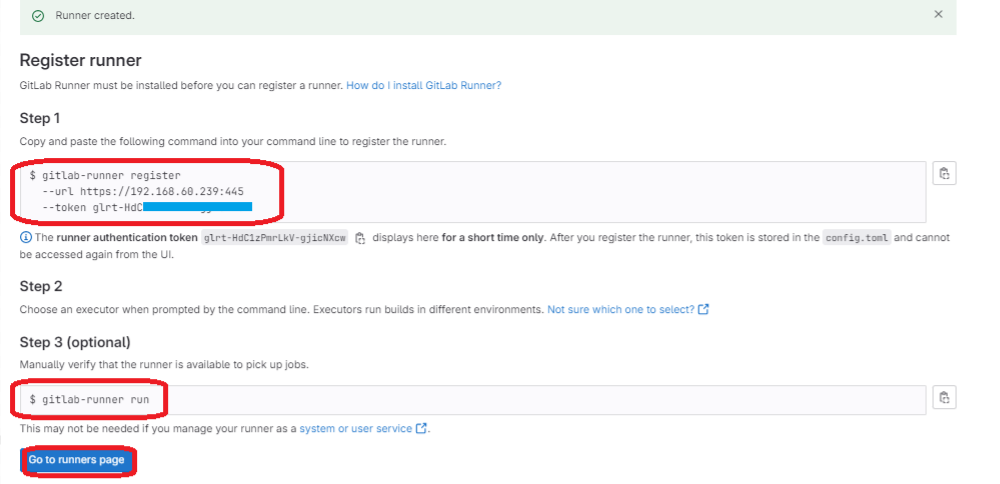
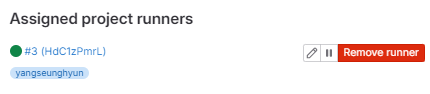
GitLab Runner 등록
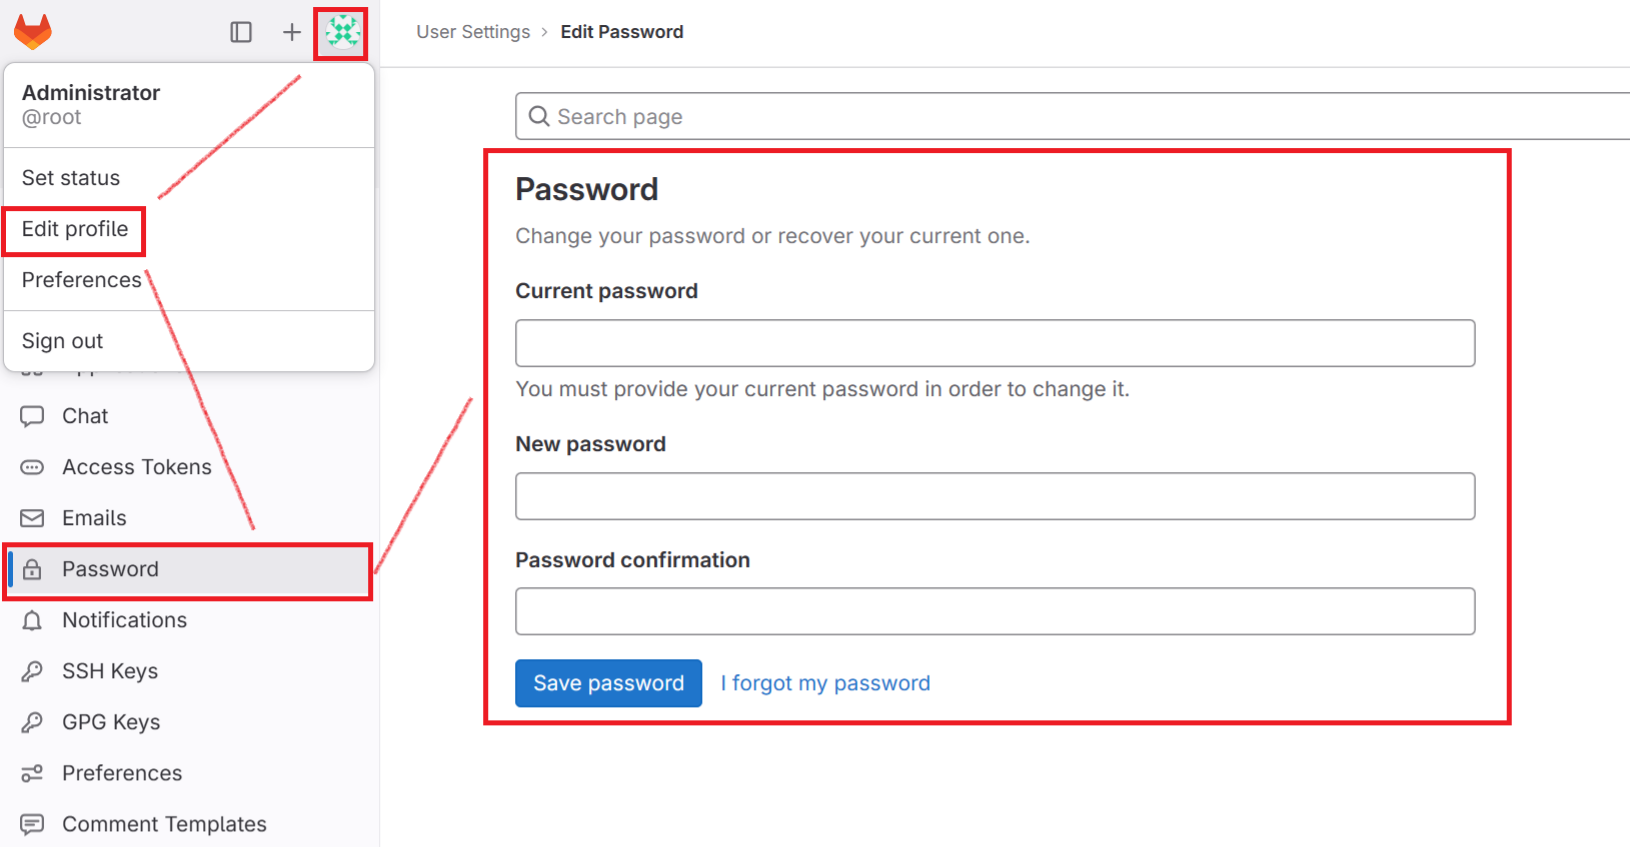
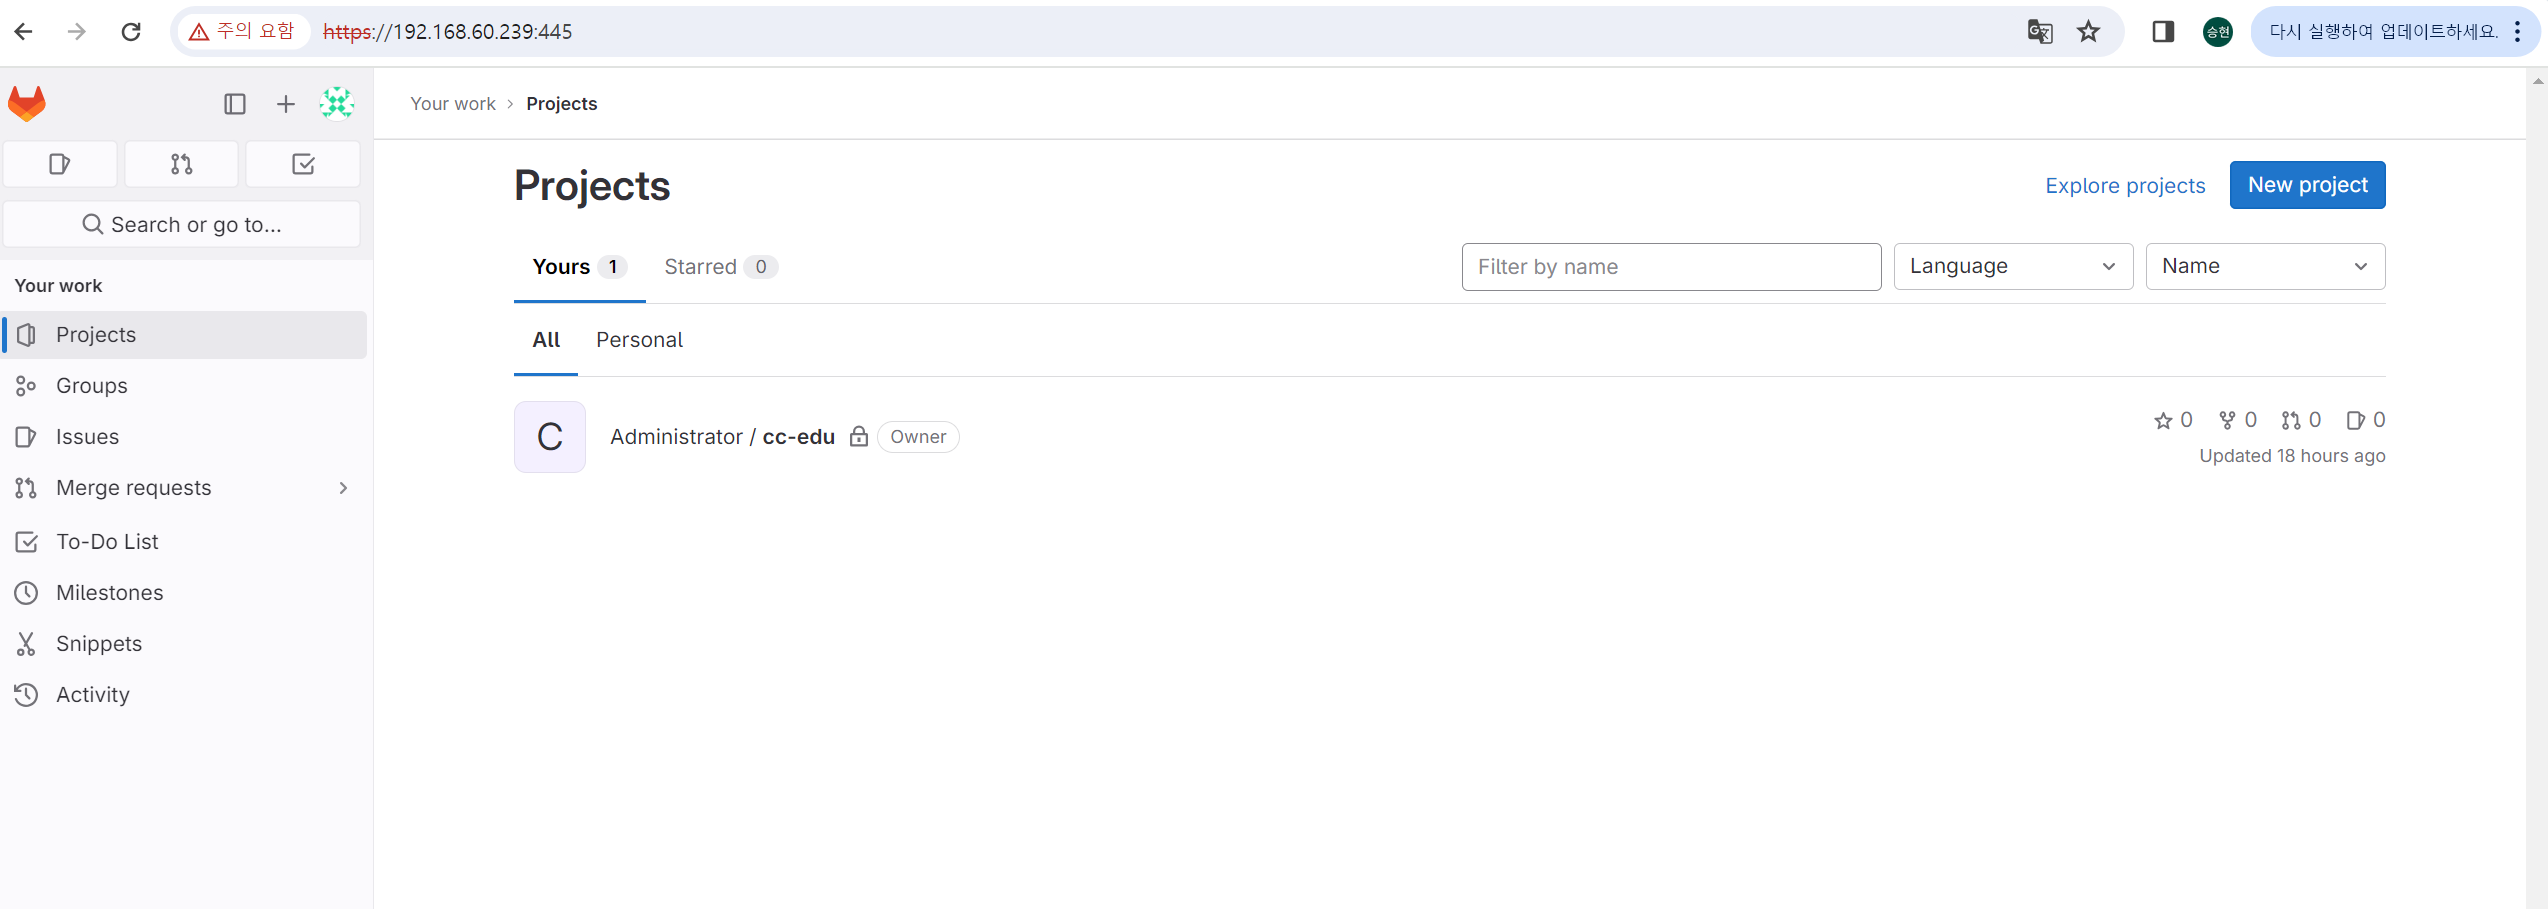
- New project 생성
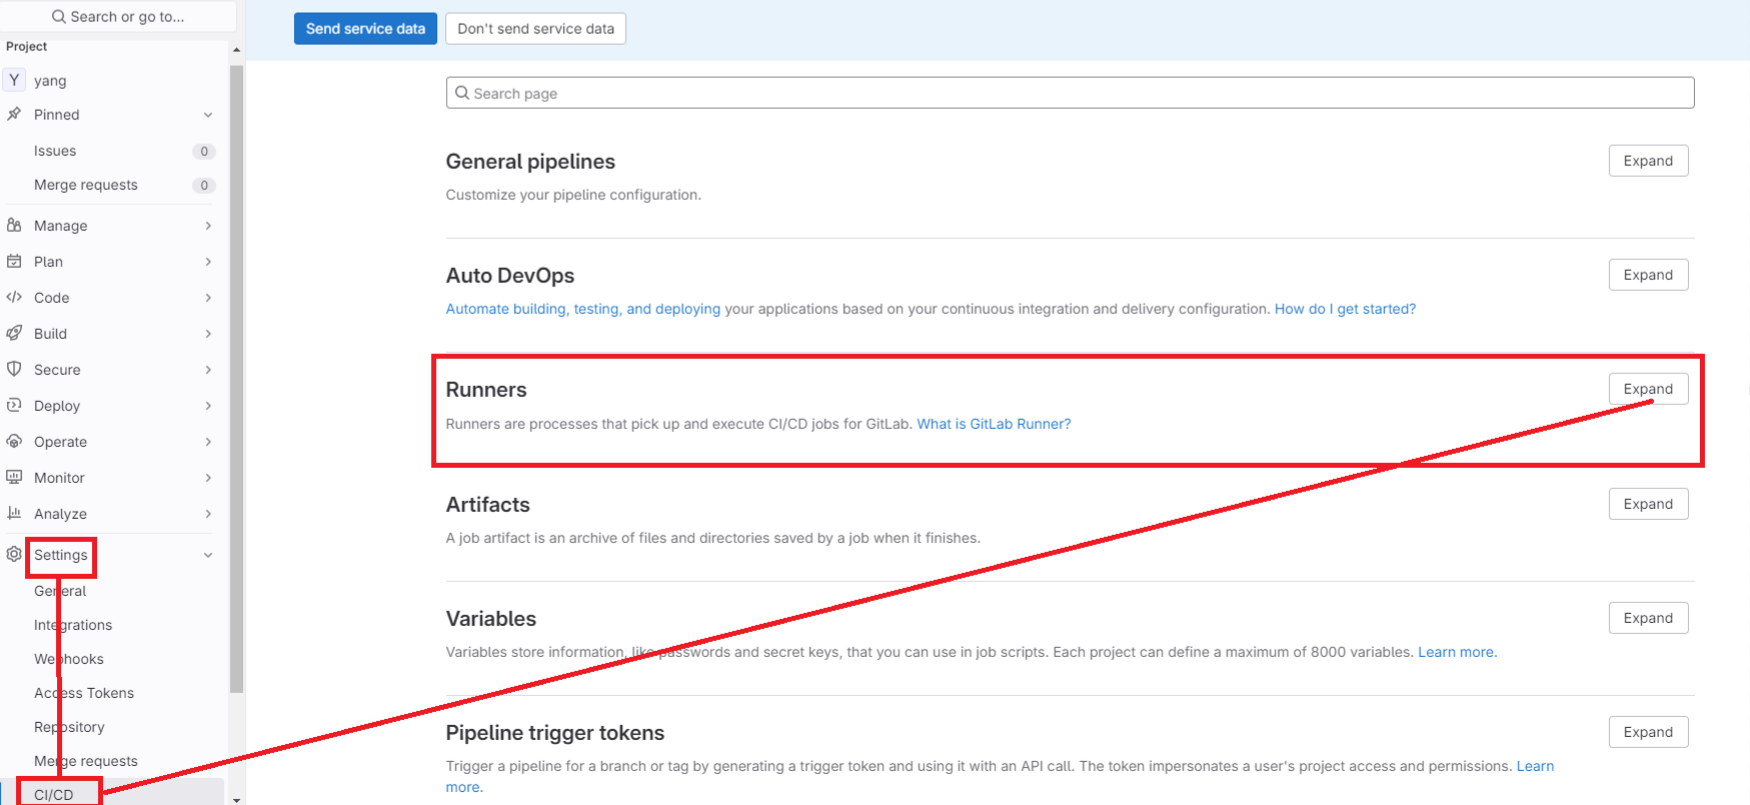
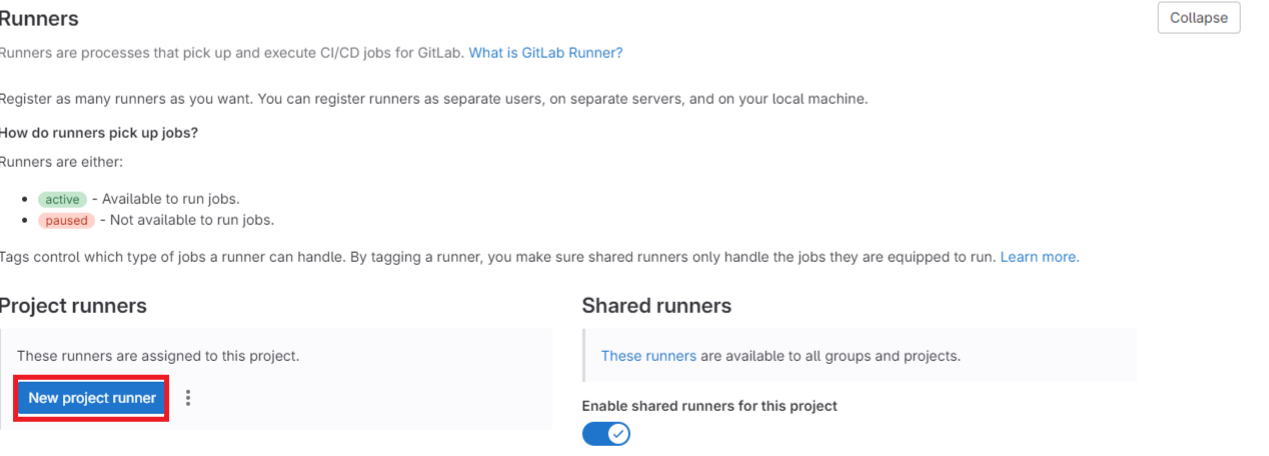
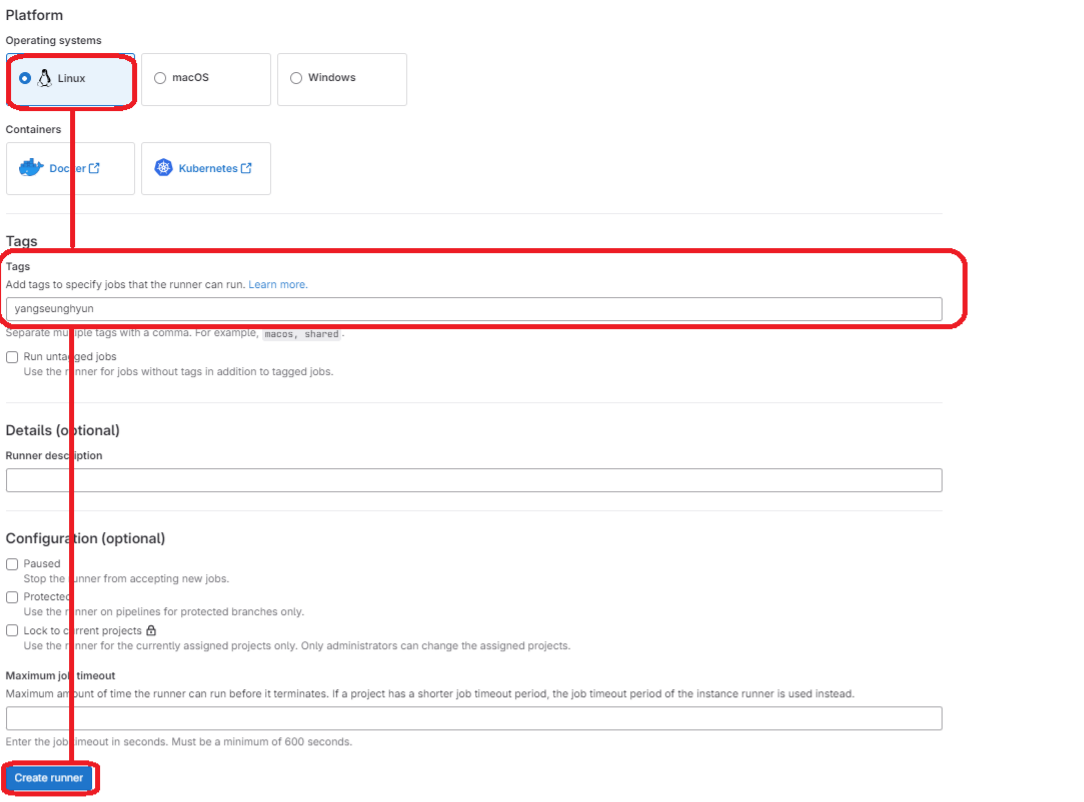
- gitlab runner CICD 등록
- 러너 인증 토큰은 하기 이미지 페이지에서만 최초 확인 가능하며, 등록 후에는 /home/yang/.gitlab-runner/config.toml에서 확인 가능하다.
$ gitlab-runner register   --url https://192.168.60.239:445   --token 토큰-값 --tls-ca-file /etc/gitlab/ssl/ca.crt
Runtime platform                                    arch=amd64 os=linux pid=2777802 revision=f5da3c5a version=16.6.1
WARNING: Running in user-mode.
WARNING: The user-mode requires you to manually start builds processing:
WARNING: $ gitlab-runner run
WARNING: Use sudo for system-mode:
WARNING: $ sudo gitlab-runner...

There might be a problem with your config based on jsonschema annotations in common/config.go (experimental feature):
jsonschema: '/runners/0/kubernetes/pull_policy' does not validate with https://gitlab.com/gitlab-org/gitlab-runner/common/config#/$ref/properties/runners/items/$ref/properties/kubernetes/$ref/properties/pull_policy/$ref/type: expected array, but got null

Enter the GitLab instance URL (for example, https://gitlab.com/):
[https://192.168.60.239:445]:
Verifying runner... is valid                        runner=HdC1zPmrL
Enter a name for the runner. This is stored only in the local config.toml file:
[sh-yang]: yangseunghyun

Enter an executor: virtualbox, docker-autoscaler, docker+machine, docker, parallels, ssh, instance, kubernetes, custom, docker-windows, shell:
docker
Enter the default Docker image (for example, ruby:2.7):
nginx:latest
Runner registered successfully. Feel free to start it, but if it's running already the config should be automatically reloaded!

Configuration (with the authentication token) was saved in "/home/yang/.gitlab-runner/config.toml"

$ $ gitlab-runner start
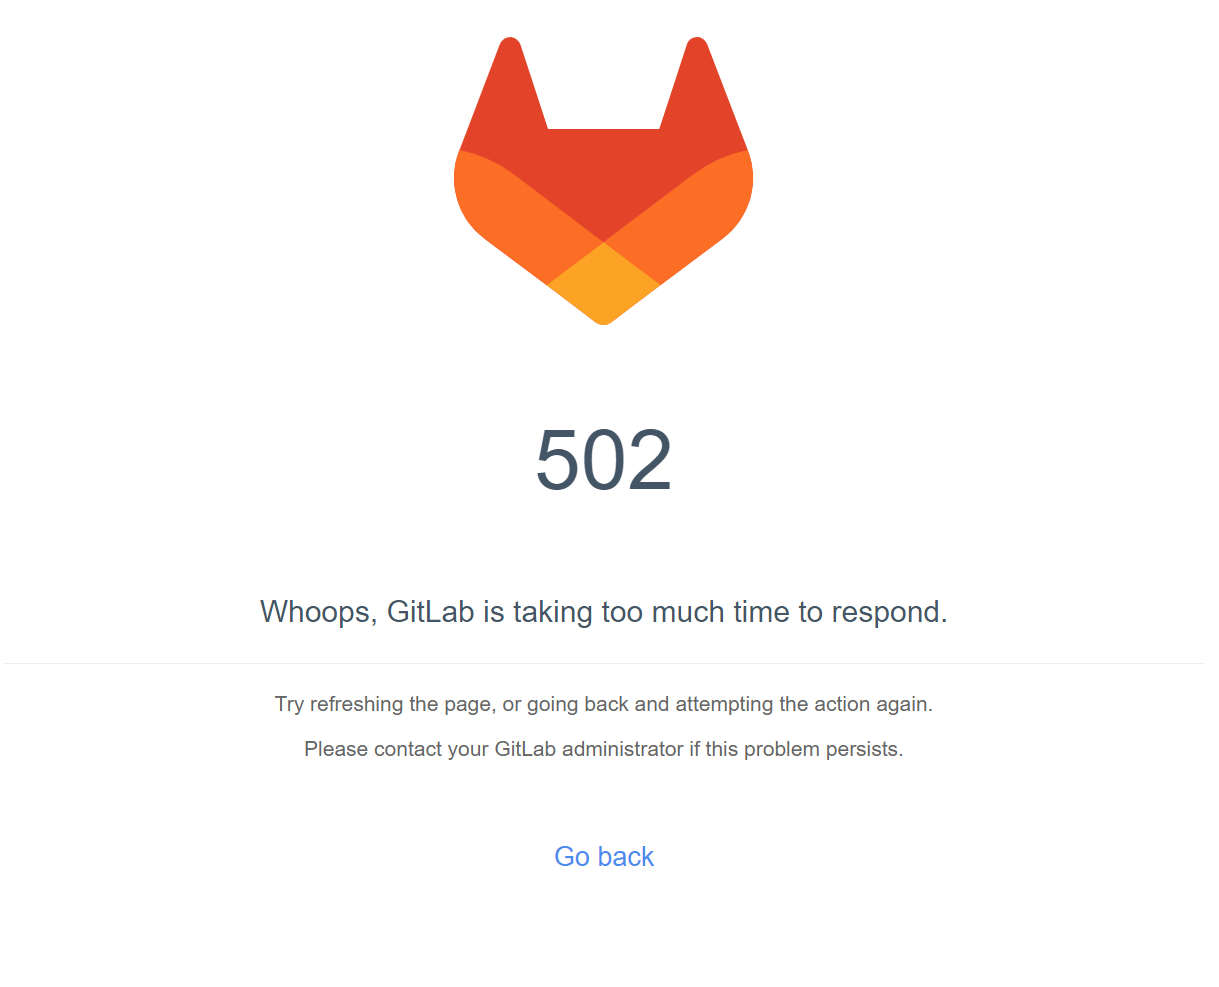
트러블 슈팅
$ sudo cat /var/log/gitlab/gitlab-workhorse/current{"correlation_id":"","duration_ms":0,"error":"badgateway: failed to receive response: dial unix /var/opt/gitlab/gitlab-rails/sockets/gitlab.socket: connect: connection refused","level":"error","method":"GET","msg":"","time":"2024-03-27T13:43:43+09:00","uri":""} ==> /var/log/gitlab/gitlab-workhorse/current <== {"correlation_id":"","duration_ms":0,"error":"badgateway: failed to receive response: dial unix /vaar/opt/gitlab/gitlab-rails/sockets/gitlab.socket: connect: connection refused","level":"error","method":"GET","msg":"","time":"2024-03-27T13:39:33+09:00","uri":""}
- Puma 8080 포트가 아닌 다른 포트에서 수신하도록 변경
$ gitlab-ctl tail pumabundler: failed to load command: puma (/opt/gitlab/embedded/bin/puma)$ sudo vi /etc/gitlab/gitlab.rb
    992 ### Advanced settings
    993 # puma['listen'] = '127.0.0.1'
    994 puma['port'] = 8080 ------------> # 8080 port가 이미 사용중이기 때문에 9005 port로 수정
    995 # puma['socket'] = '/var/opt/gitlab/gitlab-rails/sockets/gitlab.socket'
    996 # puma['somaxconn'] = 1024
$ sudo gitlab-ctl reconfigur
- 정상 동작 확인