function App() {
  const [loading, setLoading] = useState(true);
  const [coins, setCoins] = useState([]);
  const [movies, setMovies] = useState([]);
  const getMovies = async () => {
    const json = await (
      await fetch(
        `https://yts.mx/api/v2/list_movies.json?minimum_rating=8.8&sort_by=year`
      )
    ).json();
    setMovies(json.data.movies);
    setLoading(false);
  };
  useEffect(() => {
    fetch("https://api.coinpaprika.com/v1/tickers")
      .then((response) => response.json())
      .then((json) => {
        setCoins(json);
        setLoading(false);
      });
    getMovies();
  }, []);
  return (
    <div>
      <h1>The Coins! {loading ? "" : `(${coins.length})`}</h1>
      {loading ? (
        <strong>Loading...</strong>
        <h1>Loading...</h1>
      ) : (
        <select>
          {coins.map((coin) => (
            <option>
              {coin.name} ({coin.symbol}): ${coin.quotes.USD.price} USD
            </option>
        <div>
          {movies.map((movie) => (
            <div key={movie.id}>
              <img src={movie.medium_cover_image} />
              <h2>{movie.title}</h2>
              <p>{movie.summary}</p>
              <ul>
                {movie.genres.map((g) => (
                  <li key={g}>{g}</li>
                ))}
              </ul>
            </div>
          ))}
        </select>
        </div>
      )}
    </div>
  );
then 보다는 async-awatit 를 더 많이 사용한다. await를 감싸는 await를 만들 수 있다.
isLoading state로 데이터가 fetch 되는 것을 기다린다.
map을 이용해 movies 내부의 데이터에 대한 jsx태그를 만들어준다.
import { useEffect, useState } from "react";
import Movie from "../components/Movie";

function Home() {
  const [loading, setLoading] = useState(true);
  const [movies, setMovies] = useState([]);
  const getMovies = async () => {
    const json = await (
      await fetch(
        `https://yts.mx/api/v2/list_movies.json?minimum_rating=8.8&sort_by=year`
      )
    ).json();
    setMovies(json.data.movies);
    setLoading(false);
  };
  useEffect(() => {
    getMovies();
  }, []);
  return (
    <div>
      {loading ? (
        <h1>Loading...</h1>
      ) : (
        <div>
          {movies.map((movie) => (
            <Movie
              key={movie.id}
              coverImg={movie.medium_cover_image}
              title={movie.title}
              summary={movie.summary}
              genres={movie.genres}
            />
          ))}
        </div>
      )}
    </div>
  );
}
export default Home;
import PropTypes from "prop-types";
function Movie({ coverImg, title, summary, genres }) {
return (
<div>
<img src={coverImg} alt={title} />
<h2>{title}</h2>
<p>{summary}</p>
<ul>
{genres.map((g) => (
<li key={g}>{g}</li>
))}
</ul>
</div>
);
}
Movie.propTypes = {
coverImg: PropTypes.string.isRequired,
title: PropTypes.string.isRequired,
summary: PropTypes.string.isRequired,
genres: PropTypes.arrayOf(PropTypes.string).isRequired,
};
export default Movie;페이지 별로 각각 별도의 라우트로 생각해야한다.
import { BrowserRouter as Router, Switch, Route } from "react-router-dom";
import Detail from "./routes/Detail";
import Home from "./routes/Home";
function App() {
  return null;
  return (
    <Router>
      <Switch>
        <Route path="/hello">
          <h1>Hello</h1>
        </Route>
        <Route path="/movie">
          <Detail />
        </Route>
        <Route path="/">
          <Home />
        </Route>
      </Switch>
    </Router>
  );
}
Route> 이렇게 > 를 붙여줘야 한다.
버전이 달라 버전 6 이상에서는 Switch를 쓰지 않고 그 역할을 Routes가 대신한다.
import { useEffect } from "react";
import { useParams } from "react-router-dom";
function Detail() {
  const { id } = useParams();
  const getMovie = async () => {
    const json = await (
      await fetch(`https://yts.mx/api/v2/movie_details.json?movie_id=${id}`)
    ).json();
    console.log(json);
  };
  useEffect(() => {
    getMovie();
  }, []);
  return <h1>Detail</h1>;
}
export default Detail;
Home에서 했던 loading을 detail에 해준다.
화면이 다시 loading되지 않는다면 ReactStrictMode를 삭제하고 하면 잘 작동한다.
에러가 뜨면 Route path={${process.env.PUBLIC_URL}/} element={Home} 로 수정후 다시 deploy한다.
7.0 To Do List part one
from은 submit이벤트를 가지고 있다. event.preventDefalt();로 전송을 막을 수 있다.
setToDo는 toDo값을 수정하는 함수고 toDo값은 input과 연결되어있다. 따라서 toDo값을 변경하면 input값도 변경된다.
toDo를 받을 Array를 만든다. 기본적으로 비어있는 array가 되도록 한다.
우리는 States를 직접적으로 수정하지 않는다. 대신 함수를 사용하고 그 함수는 toDo를 수정하는 역할을 한다.
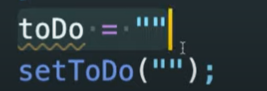
사진의 첫번째 코드로는 절대 하지 않고 두번째처럼 한다.
array를 직접적으로 수정하지 않으면서 setToDos로 array에 element를 추가하는 방법은 setToDos() 함수를 만들고 첫번째 argument로 현재의 state를 받아온다. (currentArray를 받아오는 함수로 만든다.) 그리고 새로운 array를 return한다. 새로운 array는 State에 있는 toDo와 이전의 toDo를 가지게 된다.

어플리케이션이 시작될 때는 비어있는 array를 가지게 된다. 우리가 첫번째 to-do를 작성할 때 위 사진의 코드에서 비어있는 currentArray를 받아오는데 이건 결국 새로운 toDos가 input을 통해 작성한 toDo와 아무것도 들어있지 않은 비어있는 array의 element가 더해진것이 된다는 것이다.

콘솔에 나오는 결과로 처음에 hello입력하고 Add To Do누르고 두번째로 bye bye누르고 Add To Do 누르고 세번째로 another one해서 추가되었음을 볼 수 있다.
7.1 To Do List part Two
데이터.map(item => 원하는 것으로): 하나의 배열에 있는 item을 원하는 것으로 바꾸고 새로운 배열로 return한다.
첫번째 argument로 현재의 item을 가져올 수 있다.
우리가 reeturn하는 어떤 값이든 그 값이 새로운 array에 들어가게 된다.
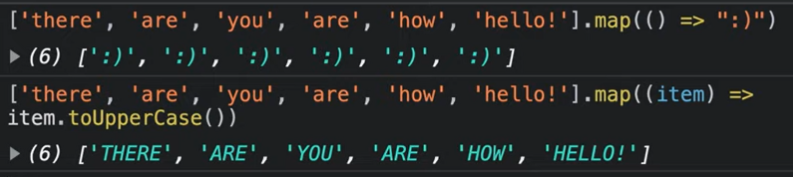
위 사진처럼 자기 자신 item을 return할 수 있다. 그렇게 대문자가 된 item들이 보여지고 있다.
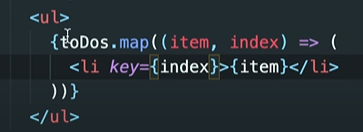
같은 component의 list를 render할 때는 key라는 prop을 넣어줘야한다.
7.2 Coin Tracker
암호화페들과 가격을 나열하는 프로젝트
두개의 States를 만들건데 하나는 로딩을 위한거고 다른건 코인 리스트를 잠시 가지고 있기 위한 것이다.
Movie App
로딩화면 보여주기 -> 영화 보여주기
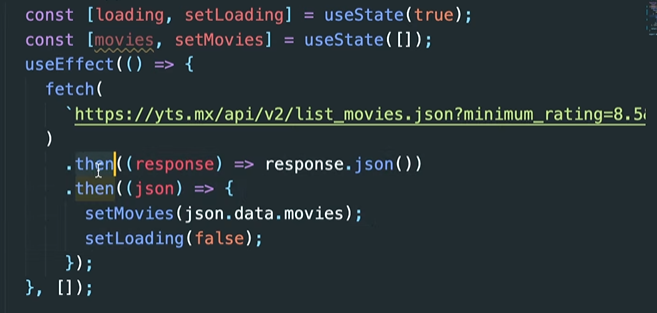
then 대신 async-await를 사용해 더 짧게 만들 수 있다.
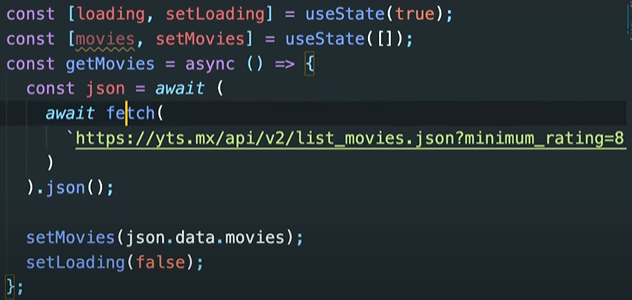
await를 감싸는 await형태(김밥같다)
<map복습>
movies.map()을 사용해 간단하게 사용할 수 있다. 원래 있던 array를 내가 원하는대로 변형해서 return해 주는 것.
map의 argument는 x,m,g등 마음대로 해도 된다. 여기서는 movie라고 정했다.
해당api의 고유번호를 key로 지정해준다.
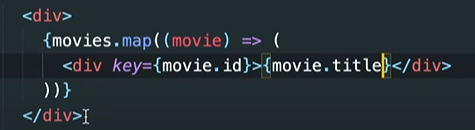
결과


로딩->영화title
<React.js앱에서 페이지를 전환하는 방법> -> react Router
영화 제목을 클릭했을 때 더 구체적인 영화 정보를 볼 수 있도록 할 수 있다. 누르면 어딘가 다른 페이지로 넘어가게 하는것.
npm install react-router-dom을 한다.
스크린(route)단위로 생각한다.
App.js 영화를 보여주던것 -> router를 rander한다.
router은 URL을 보고있는 component이다.
<react-router-dom 사용법>
더이상 Switch는 쓰이지 않는다(버젼 6이상). 이제 그역할은 Routes가 대신한다.
Route 태그의 exact 속성도 더이상 쓰이지 않고 Routes가 알아서 최적의 경로배정을 해주기 때문에 Switch를 썼을 때의 고민을 말끔히 해결해 준다.
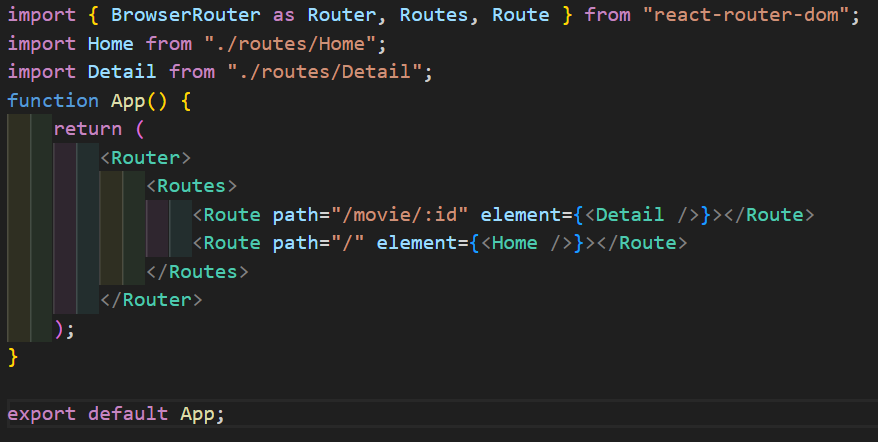
Route path=”/경로명/:변수명”
BROWSER ROUTER가 일반적인 방식이며, HASHROUTER는 잘 쓰이진 않는다.(뒤에 #이런게 붙음)
한 라우트에서 다른 라우트로 가고 싶을 땐 a태그의 href을 속성이 가장 먼저 생각이 나고, 실제로도 그렇게 코드를 작성하면 이동이 가능하다. 하지만 페이지 전체가 새로고침되기 때문에 리액트의 장점을 깎아먹는다. 따라서 재실행되는 것을 막기 위해 react-router-dom에서 import한 link 태그를 사용하면 된다.
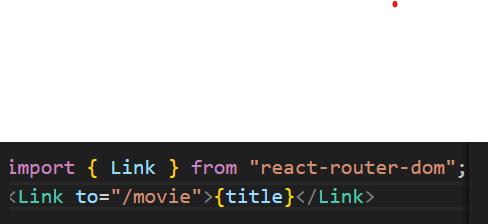
Link to=”/경로명”: 새로고침하지 않고 바로 페이지를 변경할 수 있다.

Bathed in the soft glow emanating from the screen, I surrendered to the captivating allure of cinematic storytelling, eagerly anticipating the vicarious thrill of visual exploration. Tonight's film beckoned me into a realm of possibility and wonder, enticing me with the promise of an unforgettable journey. With each unfolding frame, I found myself transported to new realms and dimensions, where reality blurred and dreams https://kinogo-la.art/ took flight. From the gentle murmurs of romance to the thunderous crescendos of action, I was swept away by the sheer magnitude of emotions evoked by the art of cinema. In those transcendent moments, I felt an indescribable connection to the characters and their narrative, as if their struggles and triumphs mirrored my own.