스타벅스 랜딩 페이지 예제
목표
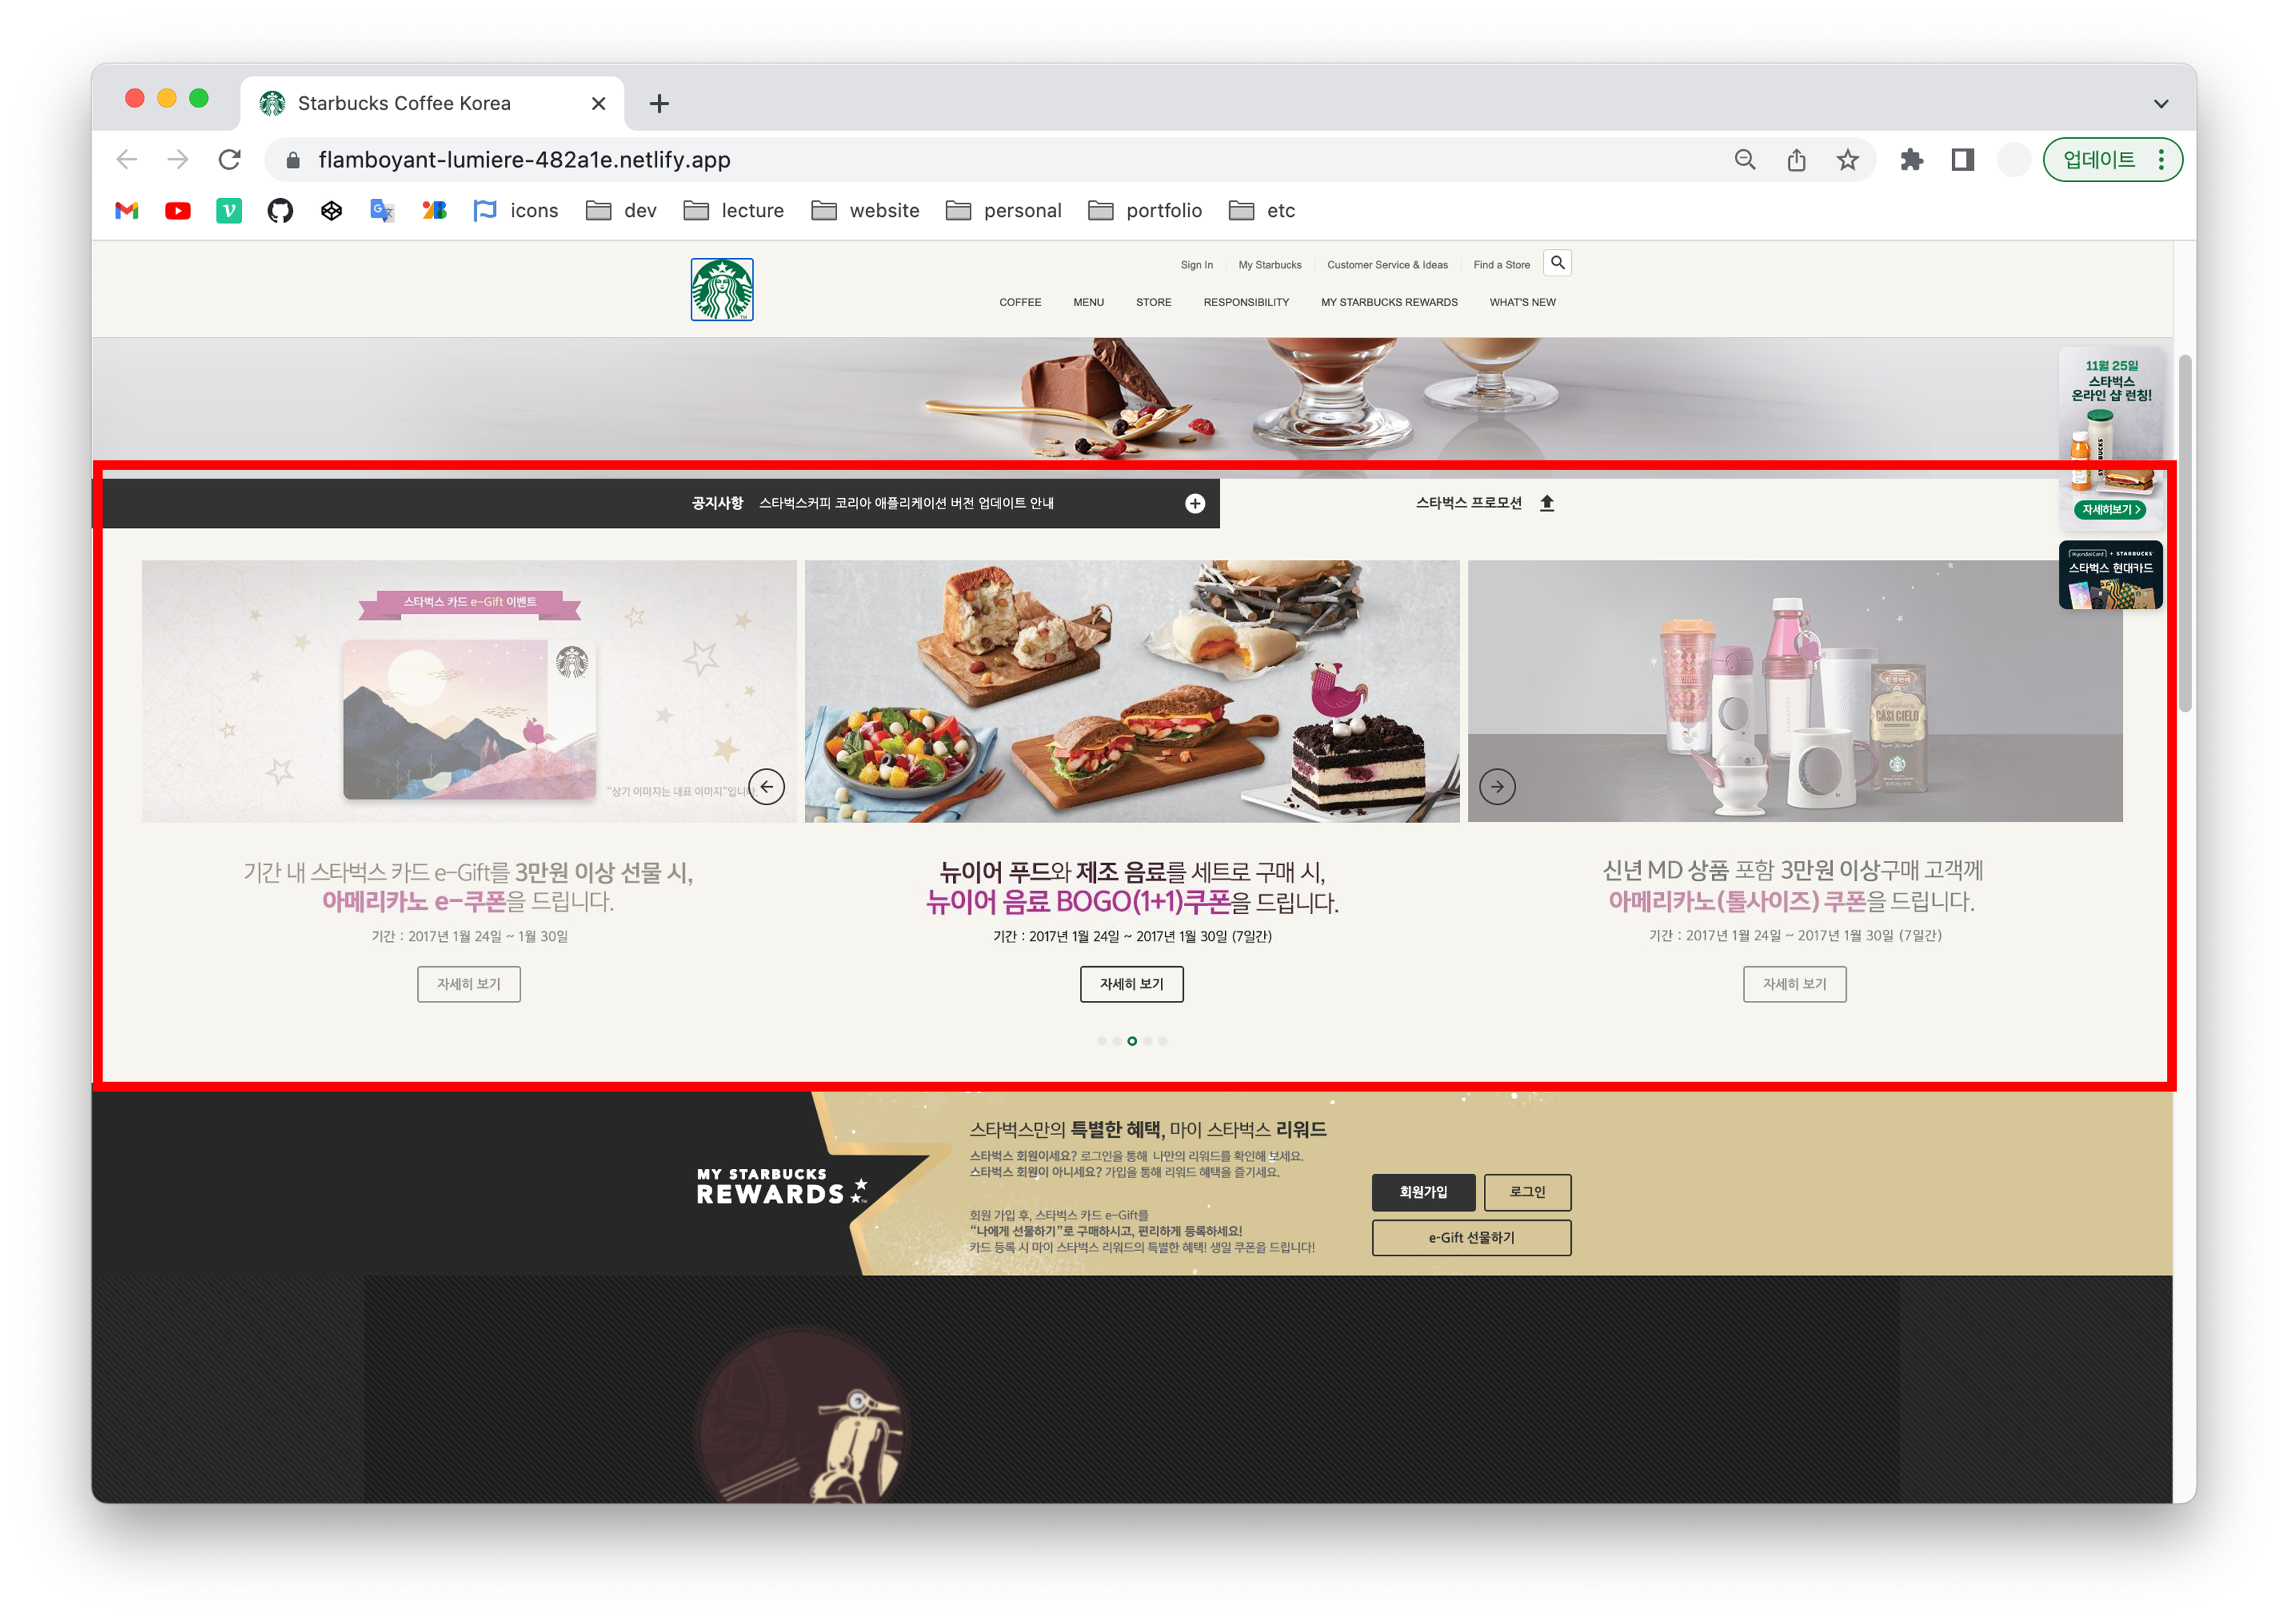
- 공지사항 슬라이드(상하 롤링)
- 프로모션 슬라이드 요소 구현
HTML - notice
<section class="notice">

  <div class="notice-line">
    <div class="bg-left"></div>
    <div class="bg-right"></div>
    <div class="inner">

      <div class="inner__left">
        <h2>공지사항</h2>
        <div class="swiper">
          <div class="swiper-wrapper">
            <div class="swiper-slide">
              <a href="javascript:void(0)">크리스마스 & 연말연시 스타벅스 매장 영업시간 변경 안내</a>
            </div>
            <div class="swiper-slide">
              <a href="javascript:void(0)">[당첨자 발표] 2021 스타벅스 플래너 영수증 이벤트</a>
            </div>
            <div class="swiper-slide">
              <a href="javascript:void(0)">스타벅스커피 코리아 애플리케이션 버전 업데이트</a>
            </div>
            <div class="swiper-slide">
              <a href="javascript:void(0)">[당첨자 발표] 뉴이어 전자영수증 이벤트</a>
            </div>
          </div>
        </div>
        <a href="javascript:void(0)" class="notice-line__more">
          <div class="material-icons">add_circle</div>
        </a>
      </div>
      <div class="inner__right">
        <h2>스타벅스 프로모션</h2>
        <div class="toggle-promotion">
          <div class="material-icons">upload</div>
        </div>
      </div>

     </div>
    </div>
CSS - notice
.notice .notice-line {
  position: relative;
}
.notice .notice-line .bg-left {
  position: absolute;
  top: 0;
  left: 0;
  width: 50%;
  height: 100%;
  background-color: #333;
}
.notice .notice-line .bg-right {
  position: absolute;
  top: 0;
  right: 0;
  width: 50%;
  height: 100%;
  background-color: #f6f5ef;
}
.notice .notice-line .inner {
  height: 62px;
  display: flex;
}
.notice .notice-line .inner__left {
  width: 60%;
  height: 100%;
  background-color: #333;
  display: flex;
  align-items: center;
}
.notice .notice-line .inner__left h2 {
  color: #fff;
  font-size: 17px;
  font-weight: 700;
  margin-right: 20px;
}
.notice .notice-line .inner__left .swiper {
  height: 62px;
  flex-grow: 1;
}
.notice .notice-line .inner__left .swiper-slide {
  height: 62px;
  display: flex;
  align-items: center;
}
.notice .notice-line .inner__left .swiper-slide a {
  color: #fff;
}
.notice .notice-line .inner__left .notice-line__more {
  width: 62px;
  height: 62px;
  display: flex;
  justify-content: center;
  align-items: center;
}
.notice .notice-line .inner__left .notice-line__more .material-icons {
  color: #fff;
  font-size: 30px;
}
.notice .notice-line .inner__right {
  width: 40%;
  height: 100%;
  display: flex;
  justify-content: flex-end;
  align-items: center;
}
.notice .notice-line .inner__right h2 {
  font-size: 17px;
  font-weight: 700;
}
.notice .notice-line .inner__right .toggle-promotion {
  width: 62px;
  height: 62px;
  cursor: pointer;
  display: flex;
  justify-content: center;
  align-items: center;
}
.notice .notice-line .inner__right .toggle-promotion .material-icons {
  font-size: 30px;
}
.notice .notice-line .inner {height: 62px;}inner에만 높이값을 부여하면 부모 요소인 notice-line도 자동으로 62px이 된다.
height 기본 속성은 auto, 세로 너비가 최대한 줄어들려고 노력하다가 inner에서 지정한 62px 에 걸려서 높이값이 62px이 되는 것임.
swiper 라이브러리
https://swiperjs.com/get-started

해당 라이브러리를 사용해서 수직 롤링 되는 슬라이더 구현한 것.
HTML구조는 공식홈페이지에 나와있는대로 class를 지정해야한다.
swiper > swiper-weapper > swiper-slide
JS - notice
// new Swiper(선택자, 옵션)
new Swiper('.notice-line .swiper', {
  direction: 'vertical',
  autoplay: true,
  loop: true
});
HTML - promotion
  <div class="promotion">
    <div class="swiper">
      <div class="swiper-wrapper">
        <div class="swiper-slide">
          <img src="./images/promotion_slide1.jpg" alt="2021 뉴이어, 스타벅스와 함께 즐겁고 활기차게 시작하세요!" />
          <a href="javascript:void(0)" class="btn">자세히 보기</a>
        </div>
        <div class="swiper-slide">
          <img src="./images/promotion_slide2.jpg" alt="2021 뉴이어, 스타벅스와 함께 즐겁고 활기차게 시작하세요!" />
          <a href="javascript:void(0)" class="btn">자세히 보기</a>
        </div>
        <div class="swiper-slide">
          <img src="./images/promotion_slide3.jpg" alt="2021 뉴이어, 스타벅스와 함께 즐겁고 활기차게 시작하세요!" />
          <a href="javascript:void(0)" class="btn">자세히 보기</a>
        </div>
        <div class="swiper-slide">
          <img src="./images/promotion_slide4.jpg" alt="2021 뉴이어, 스타벅스와 함께 즐겁고 활기차게 시작하세요!" />
          <a href="javascript:void(0)" class="btn">자세히 보기</a>
        </div>
        <div class="swiper-slide">
          <img src="./images/promotion_slide5.jpg" alt="2021 뉴이어, 스타벅스와 함께 즐겁고 활기차게 시작하세요!" />
          <a href="javascript:void(0)" class="btn">자세히 보기</a>
        </div>
      </div>
    </div>
    <div class="swiper-pagination"></div>
    <div class="swiper-prev">
      <div class="material-icons">arrow_back</div>
    </div>
    <div class="swiper-next">
      <div class="material-icons">arrow_forward</div>
    </div>
  </div>

</section>
CSS - promotion
.notice .promotion {
  height: 693px;
  background-color: #f6f5e3;
  position: relative;
  transition: height 0.4s;
  overflow: hidden;
}
.notice .promotion.hide {
  height: 0;
}
.notice .promotion .swiper {
  width: calc(819px * 3 + 20px);
  height: 553px;
  position: absolute;
  top: 40px;
  left: 50%;
  margin-left: calc((819px * 3 + 20px) / -2);
}

/* 가운데 이미지 불투명, 양 옆이미지 투명, 버튼 정의 */
.notice .promotion .swiper-slide {
  opacity: 0.5;
  transition: opacity 1s;
  position: relative;
}
.notice .promotion .swiper-slide-active {
  opacity: 1;
}
.notice .promotion .swiper-slide .btn {
  position: absolute;
  bottom: 0;
  left: 0;
  right: 0;
  margin: auto;
}
.notice .promotion .swiper-pagination {
  bottom: 40px;
  left: 0;
  right: 0;
}
.notice .promotion .swiper-pagination .swiper-pagination-bullet {
  background-color: transparent;
  background-image: url("../images/promotion_slide_pager.png");
  width: 12px;
  height: 12px;
  margin-right: 6px;
  outline: none;
}
notice .promotion .swiper-pagination .swiper-pagination-bullet:last-child {
  margin-right: 0;
}
.notice .promotion .swiper-pagination .swiper-pagination-bullet-active {
  background-image: url("../images/promotion_slide_pager_on.png");
}
.notice .promotion .swiper-prev,
.notice .promotion .swiper-next {
  width: 42px;
  height: 42px;
  border: 2px solid #333;
  border-radius: 50%;
  position: absolute;
  top: 300px;
  z-index: 1;
  cursor: pointer;
  outline: none;
  display: flex;
  justify-content: center;
  align-items: center;
  transition: 0.4s;
}
.notice .promotion .swiper-prev {
  left: 50%;
  margin-left: -480px;
}
.notice .promotion .swiper-next {
  right: 50%;
  margin-right: -480px;
}
.notice .promotion .swiper-prev:hover,
.notice .promotion .swiper-next:hover {
  background-color: #333;
  color: #fff;
}- calc 함수를 사용하여 프로모션 영역의 가운데에 위치하도록 함 (left값 50%을 준 뒤, margin-left: -1238.5px; (총 픽셀의 절반 값)을 왼쪽으로 다시 당겨오면 컨테이너가 중앙에 위치한다.
JS - promotion
new Swiper('.promotion .swiper', {
  slidesPerView: 3, // 한번에 보여줄 슬라이드 개수
  spaceBetween: 10, // 슬라이드 사이 여백
  centeredSlides: true, // 1번 슬라이드가 가운데 보이기
  loop: true,
  autoplay: {
    delay: 5000
  },
  pagination: {
    el: '.promotion .swiper-pagination', // 페이지 번호 요소 선택자
    clickable: true // 사용자의 페이지 번호 요소 제어 가능 여부
  },
  navigation: {
    prevEl: '.promotion .swiper-prev', // 이전 슬라이드 보는 기능
    nextEl: '.promotion .swiper-next'  // 다음 슬라이드 보는 기능
  }
});
프로모션 영역 토글
토글을 클릭하면 promotion 클래스 영역 전체를 수직으로 닫아주거나 열어주는 작업
const promotionEl = document.querySelector('.promotion');
const promotionToggleBtn = document.querySelector('.toggle-promotion');
let isHidePromotion = false;
promotionToggleBtn.addEventListener('click', function () {
  isHidePromotion = !isHidePromotion
  if (isHidePromotion) {
    // 숨김 처리!
    promotionEl.classList.add('hide');
  } else {
    // 보임 처리!
    promotionEl.classList.remove('hide');
  }
});- 화면에 슬라이드 부분이 잘 보이고있다가 토글을 클릭하면 promotion 영역에 hide라는 class가 추가가 되는 것
- CSS로 가서 hide라는 클래스가 프로모션에 있는 경우에는 화면에 안보이게 스타일 작업
- click해서 화면에 안보이게 되었으면 그 상태에는 isHidePromotion값이 true로 바뀌었을 것, 결국 이때는 else 조건문이 실행되며 hide 라는 class를 지워서 다시 보이게 처리한다.
!isHidePromotion: 그 값의 반대를 실행 isHidePromotion 값 false 의 반대는 true
.notice .promotion {
  height: 693px;
  background-color: #f6f5e3;
  position: relative;
  transition: height .4s;
  overflow: hidden;
}
.notice .promotion.hide {
  height: 0;
}
회고
자식 요소에만 높이 값 부여하면 부모요소도 자동으로 그 값을 따라간다는 점이 정말 꿀팁! 그렇게 안하면 높이값을 하나씩 명시해줘야하고 한번 수치가 바뀌면 여러곳에 있는 내용을 다같이 바꿔줘야해서 번거롭다. 최대한 상호작용 할 수 있는 구조로 작성하는 것이 매우 중요하다⭐️

Frontend developer