
기본 뷰와 컴포넌트 생성
이제 Vue가 실행되므로 컴포넌트를 생성 할 수 있다. 컴포넌트는 프론트엔드의 빌딩 블록이다.
처음으로 생성할 컴포넌트는 Posts와 Authors를 볼 수 있는 뷰이다. 첫 번째 뷰를 생성하기 전에 정리작업이 필요하다.
기존 뷰 제거
src/views/ 디렉토리에 기본 뷰 두 개가 있다. 이 두 뷰를 제거한다.
(venv) yeryeongseo@seoyelyeong-ui-MacBookPro views % pwd
/Users/yeryeongseo/Documents/dvg/front_end/src/views
(venv) yeryeongseo@seoyelyeong-ui-MacBookPro views % ls
AboutView.vue	HomeView.vue
(venv) yeryeongseo@seoyelyeong-ui-MacBookPro views % rm -rf AboutView.vue
(venv) yeryeongseo@seoyelyeong-ui-MacBookPro views % rm -rf HomeView.vue
(venv) yeryeongseo@seoyelyeong-ui-MacBookPro views % ls
(venv) yeryeongseo@seoyelyeong-ui-MacBookPro views %
뷰 추가
블로그에는 네 가지 뷰가 필요한데 먼저 AuthorView.vue를 생성한다. 이 파일은 Vue Single-File Component(SFC)이다. 이는 컴포넌트의 템플릿, 로직 및 스타일을 하나의 파일로 묶어낸 특수한 파일 형식이다.
<!-- front_end/src/views/AuthorView.vue -->
<script setup>
import PostList from "../components/PostList.vue";
</script>

<template>
  <h2>Author</h2>
  <PostList />
</template>

<style scoped>
  h2 {
    color: red;
  }
</style>
vi 편집기로 추가하였다. 일반적으로 <script> 블록으로 시작하며 여기서 SFC가 사용하는 모든 컴포넌트를 가져온다. 위의 코드에서는 나중에 생성하러 PostList 컴포넌트를 가져온다. HTML은 <template> 블록 내에 있어야하고, 렌더링하려는 컴포넌트는 사용자 정의 HTML 태그를 사용한다. <style>내의 CSS는 스코프가 지정된다. 이는 SFC 내에서 정의된 스타일이 동일 파일의 요소에만 영향을 미친다는것을 의미한다. 기본적으로 자식 컴포넌트는 이 스타일을 상속하지 않는다.
이제 views/ 폴더에 AllPostsView.vue, PostsByTagView.vue, PostView.vue 를 생성한다.
// AllPostView.vue
<script setup>
import PostList from "../components/PostList.vue";
</script>

<template>
  <h2>Recent Posts</h2>
  <PostList />
</template>

<style scoped>
  h2 {
    color: blue;
  }
</style>
//PostsByTagView.vue
<script setup>
import PostList from "../components/PostList.vue";
</script>
<template>
<h2>Posts by Tag</h2>
<PostList />
</template>
<style scoped>
h2 {
color: green;
}
</style>//PostView.vue
<script setup>
import AuthorLink from "../components/AuthorLink.vue";
</script>
<template>
<h2>Post</h2>
<AuthorLink />
</template>
<style scoped>
h2 {
color: orange;
}
</style>기존 컴포넌트 제거
다음 경로의 몇 개의 파일과 'icons/' 폴더를 삭제한다.
src/components/
(venv) yeryeongseo@seoyelyeong-ui-MacBookPro components % ls
HelloWorld.vue	TheWelcome.vue	WelcomeItem.vue	icons
컴포넌트 생성
블로그에 필요한 두 개의 컴포넌트를 생성한다. 먼저 작가의 링크를 표시할 컴포넌트를 생성한다.
'components/' 폴더에 'AuthorLink.vue' 파일을 생성한다.
<!-- front_end/src/components/AuthorLink.vue -->
<template>
  <h3>Author Link</h3>
</template>
다음으로 같은 폴더에 'PostList.vue' 파일을 생성한다.
<!-- front_end/src/components/PostList.vue -->
<script setup>
import AuthorLink from "./AuthorLink.vue";
</script>

<template>
  <h3>Posts List</h3>
  <AuthorLink />
</template>
PostList에서는 AuthorLink 도 렌더링한다. 필요한곳에 컴포넌트를 가져와서 사용 할 수 있다.
라우트 설정
현재 http://localhost:5173 에 방문하면 오류가 발생할것이다. 잘못된 라우트를 수정하고 새 뷰에 대한 라우트를 설정하려면 'src/router/' 폴더의 기존 'index.js' 파일을 열고 아래 코드로 내용을 대체한다.
import { createRouter, createWebHistory } from "vue-router";
import AuthorView from "../views/AuthorView.vue";
import AllPostsView from "../views/AllPostsView.vue";
import PostView from "../views/PostView.vue";
import PostsByTagView from "../views/PostsByTagView.vue";

const router = createRouter({
  history: createWebHistory(import.meta.env.BASE_URL),
  routes: [
    {
      path: "/",
      name: "posts",
      component: AllPostsView,
    },
    {
      path: "/author",
      name: "author",
      component: AuthorView,
    },
    {
      path: "/post",
      name: "post",
      component: PostView,
    },
    {
      path: "/tag",
      name: "tag",
      component: PostsByTagView,
    },
  ],
});

export default router;
이제 라우트가 존재하는 뷰를 가리키므로 Vite 서버 출력에 있는 모든 오류가 사라질것이다. 다른 페이지로 편리하게 이동하려면 'App.vue' 파일에 라우트 링크를 추가한다. 'App.vue' 파일은 Vue 앱이 찾는 기본 컴포넌트이다. 'src/' 폴더에 위치해있다. 'App.vue' 파일의 기존 내용을 아래 내용으로 대체한다.
<script setup>
import { RouterLink, RouterView } from "vue-router";
</script>

<template>
  <header>
    <div class="wrapper">
      <h1>My Blog 🐾</h1>
      <nav>
        <RouterLink to="/">Posts</RouterLink>
        <RouterLink :to="{ name: 'author' }">Author</RouterLink>
        <RouterLink :to="{ name: 'post' }">Post</RouterLink>
        <RouterLink :to="{ name: 'tag' }">Tag</RouterLink>
      </nav>
    </div>
  </header>

  <RouterView />
</template>

<style scoped>
  h1 {
    text-align: center;
    font-weight: bold;
    margin-bottom: 1rem;
  }

  header {
    border-bottom: 1px solid #ccc;
    margin-bottom: 1rem;
  }

  nav {
    text-align: center;
    margin: 1rem 0;
  }

  nav a {
    padding: 0.5rem;
  }
</style>
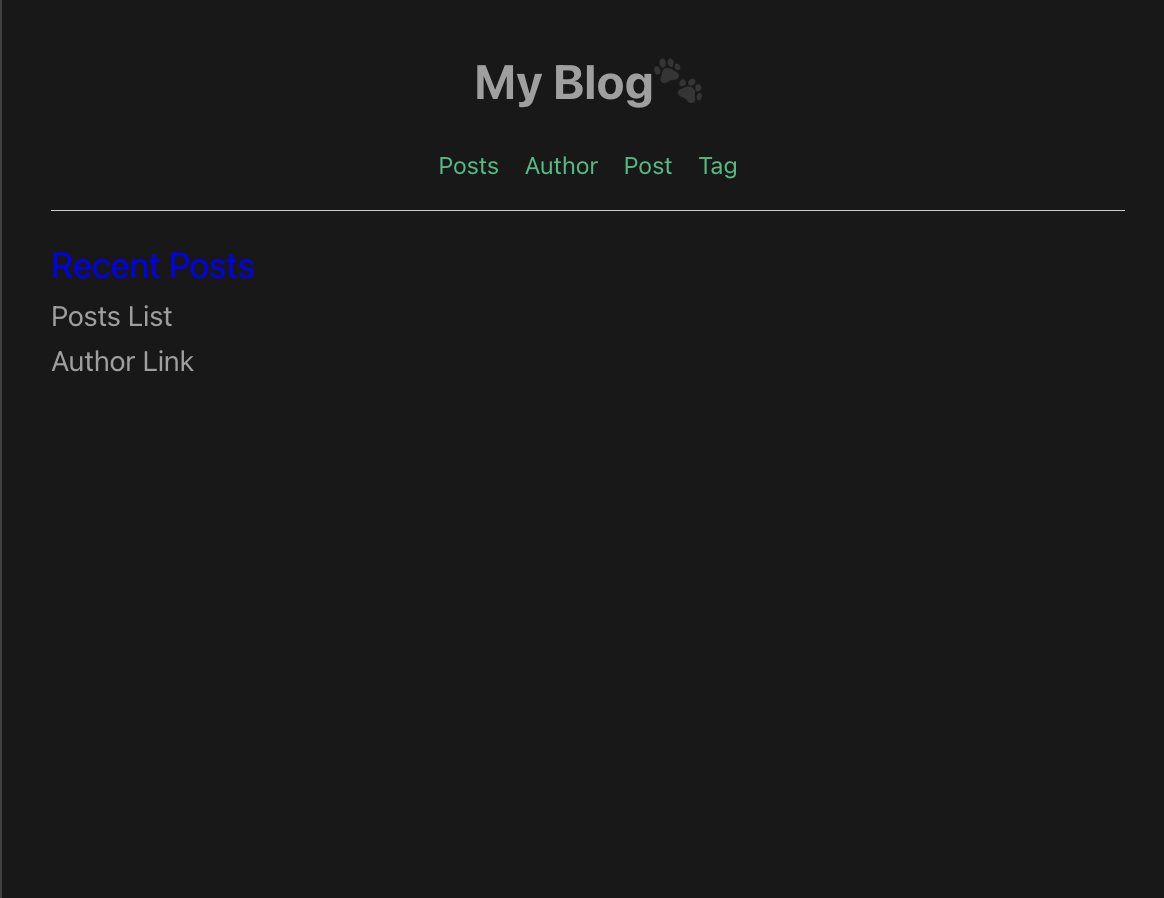
이제 http://localhost:5173/ 에 접속해보면 다음과 같은 화면이 뜬다.
Vue 컴포넌트 업데이트
이제 작은 컴포넌트부터 업데이트하고 이후에는 뷰 컴포넌트를 계속 업데이트할것이다.
AuthorLink: 포스트와 포스트 목록에서 사용되는 주어진 작성자의 페이지로 연결 제공
PostList: 전체 포스트, 작성자 및 태그별 포스트에서 사용되는 블로그 포스트 목록 렌더링
AllPostsView: 모든 포스트 목록 추가
PostsByTagView: 주어진 태그와 연관된 포스트 목록 추가
AuthorView: 작성자에 대한 정보와 그들이 작성한 포스트 목록 표시
PostView: 주어진 포스트에 대한 메타데이터와 콘텐츠 표시
App: 네비게이션에서 일부 링크를 제거
AuthorLink 컴포넌트는 GraphQL API에 대한 작가 데이터와 일치하는 구조의 author prop을 받아들여야한다. Props는 컴포넌트에서 사용 할 수 있는 사용자 정의 속성이다. 이 컴포넌트는 작가의 성과 이름이 제공된 경우 해당 정보를 보여주고, 그렇제 않으면 작가의 이름을 보여주어야한다.
front_end/src/componenets/AuthorLink.vue 파일의 기존 내용을 아래의 코드로 대체한다.
<script setup>
import { computed } from "vue";
import { RouterLink } from "vue-router";

const props = defineProps(["author"]);
const firstName = props.author.user.firstName;
const lastName = props.author.user.lastName;
const displayName = computed(() => {
  if (firstName && lastName) {
    return `${firstName} ${lastName}`;
  } else {
    return `${props.author.user.username}`;
  }
});
</script>

<template>
  <RouterLink
    :to="{ name: 'author', params: { username: author.user.username } }"
  >
    {{ displayName }}
  </RouterLink>
</template>
이 컴포넌트는 GraphQL과 직접적으로 작동하지 않고 다른 컴포넌트에서 제공하는 작가 객체를 전달받는다. 작가 객체와 작업하기 위해 5번째 줄에서 defineProps()로 prop을 정의한다. defineProps() 함수는 변수에 저장 할 수 있는 객체를 반환한다.
게시물 목록 준비
props를 문자열 목록으로 정의 할 수 있지만, object 구문을 사용하여 제공된 props의 정보를 더 세밀하게 설정할 수 있다. PostList 컴포넌트에서는 object 구문을 사용하여 더 복잡한 props를 선언한다. PostList 컴포넌트는 GraphQL API에서 게시물에 관한 데이터와 일치하는 구조를 가진 posts prop을 받아들인다. 컴포넌트는 몇가지 기능을 표시해야한다.
- 게시물의 제목 (게시물 페이지로의 링크)
showAuthor가 true로 설정된 경우 AuthorLink를 사용하여 해당 게시물의 작가에 대한 링크 src/components/ 디렉토리의 PostList.vue 파일을 열고 다음과 같이 파일을 업데이트한다.
<script setup>
import AuthorLink from "./AuthorLink.vue";
import { RouterLink } from "vue-router";

const props = defineProps({
  posts: {
    type: Array,
    required: true,
  },
  showAuthor: {
    type: Boolean,
    required: false,
    default: true,
  },
});
</script>

<template>
  <ol class="post-list">
    <li class="post" v-for="post in posts" :key="post.slug">
      <RouterLink :to="{ name: 'post', params: { slug: post.slug } }">
        {{ post.title }}
      </RouterLink>
      <span v-if="showAuthor"> by <AuthorLink :author="post.author" /> </span>
    </li>
  </ol>
</template>
PostList가 정리되었으니 AllPostView를 업데이트 할 차례이다. 이 컴포넌트킄 블로그의 모든 포스트 목록을 표시해야한다. src/views/ 디렉토리의 AllPosts.vue 컴포넌트를 열고 아래의 내용으로 업데이트한다.
<script setup>
import PostList from "../components/PostList.vue";

const { result, loading, error } = {
  error: { message: "아직 GraphQL API에 연결되지 않았습니다." },
};
</script>

<template>
  <h2>최근 게시물</h2>
  <div v-if="loading">로딩 중...</div>
  <div v-else-if="error" class="warn"></div>
  <PostList v-else :posts="result.allPosts" />
</template>

<style scoped>
  h2 {
    color: blue;
  }
</style>
이제 주어진 태그에 대한 게시물을 표시하기위해 src/views/ 경로의 PostsByTagView.vue 파일을 업데이트한다.
<script setup>
import PostList from "../components/PostList.vue";
import { useRoute } from "vue-router";

const route = useRoute();
const tag = route.params.tag;
const { result, loading, error } = {
  error: { message: "아직 GraphQL API에 연결되지 않았습니다." },
};
</script>

<template>
  <div v-if="loading">로딩 중...</div>
  <div v-else-if="error" class="warn">{{ error.message }}</div>
  <section v-else :set="tagPosts = result.postsByTag">
    <h2>"{{ tag }}" 태그가 지정된 게시물</h2>
    <PostList v-if="tagPosts.length > 0" :posts="tagPosts" />
    <p v-else>이 태그에 대한 게시물을 찾을 수 없습니다</p>
  </section>
</template>

<style scoped>
  h2 {
    color: orange;
  }
</style>
글쓴이에 대한 정보를 표시하기위해 작가의 프로필 페이지로 이동하게하는 AuthorView 컴포넌트에는 다음 정보가 표시되어야한다.
- 글쓴이의 사용자 이름과 제목
- 글쓴이의 풀네임과 부제목
- 글쓴이의 웹사이트 링크
- 글쓴이의 전기
- 글쓴이가 작성한 포스트 목록, showAuthor를 false로 설정
그리고 src/views/ 디렉토리의 AuthorView.vue 파일을 다음과 같이 변경한다.
<script setup>
import PostList from "../components/PostList.vue";

const { result, loading, error } = {
  error: { message: "아직 GraphQL API에 연결되지 않았습니다." },
};
</script>

<template>
  <div v-if="loading">로딩 중...</div>
  <div v-else-if="error">{{ error.message }}</div>
  <section v-else :set="author = result.authorByUsername">
    <h2>{{ author.user.username }}</h2>
    <template v-if="author.user.firstName && author.user.lastName">
      <h3>{{ author.user.firstName }} {{ author.user.lastName }}</h3>
    </template>
    <p v-if="author.bio">
      {{ author.bio }}
      <template v-if="author.website">
        {{ author.user.username }}에 대해 자세히 알아보세요:
        <a :href="author.website">웹사이트</a>.
      </template>
    </p>
    <h3>게시물</h3>
    <PostList
      v-if="author.postSet"
      :posts="author.postSet"
      :showAuthor="false"
    />
    <p v-else>작가가 아직 포스트를 작성하지 않았습니다.</p>
  </section>
</template>

<style scoped>
  h2 {
    color: red;
  }
</style>
PostView 컴포넌트는 포스트의 모든 정보를 표시하는 역할을 한다. 이 컴포넌트는 다음과 같은 포스트 정보를 표시해야한다.
- 제목과 부제목
- 글쓴이
- 게시일
- 메타 설명
- 본문
- 연관된 태그 목록
src/view/ 디렉토리의 PostView.vue 파일을 다음과 같이 업데이트하자.
<script setup>
import AuthorLink from "../components/AuthorLink.vue";

const dateFormatter = new Intl.DateTimeFormat("en-US", { dateStyle: "full" });
const displayableDate = (date) => dateFormatter.format(new Date(date));
const { result, loading, error } = {
  error: { message: "No connection to the GraphQL API yet." },
};
</script>

<template>
  <div v-if="loading">Loading...</div>
  <div v-else-if="error" class="warn">{{ error.message }}</div>
  <section v-else :set="post = result.postBySlug">
    <h2>{{ post.title }}</h2>
    <h3>{{ post.subtitle }}</h3>
    <p>{{ post.metaDescription }}</p>
    <aside>
      Published on {{ displayableDate(post.publishDate) }}<br />
      Written by <AuthorLink :author="post.author" />
      <h4>Tags</h4>
      <ul>
        <li v-for="tag in post.tags" :key="tag.name">
          <RouterLink :to="{ name: 'tag', params: { tag: tag.name } }">
            {{ tag.name }}
          </RouterLink>
        </li>
      </ul>
    </aside>
    <article>{{ post.body }}</article>
  </section>
</template>

<!-- ... -->
다음번엔 App 컴포넌트와 라우트를 다루어볼것이다!