프로젝트에서 사진을 submit 하면 EC2에 있는 Flask에 있는 yolo에서 파일을 처리한 후 다시 받아오는 작업
먼저 프로젝트에 AIController.java를 만들고 아래와 같이 입력
import org.apache.commons.io.FileUtils;
import org.json.simple.JSONObject;
import org.json.simple.parser.JSONParser;
import org.springframework.http.HttpEntity;
import org.springframework.http.HttpHeaders;
import org.springframework.http.MediaType;
import org.springframework.stereotype.Controller;
import org.springframework.util.LinkedMultiValueMap;
import org.springframework.util.MultiValueMap;
import org.springframework.web.bind.annotation.RequestMapping;
import org.springframework.web.bind.annotation.RequestParam;
import org.springframework.web.multipart.MultipartFile;
import org.springframework.web.client.RestTemplate;
import org.springframework.web.servlet.mvc.support.RedirectAttributes;


import java.io.File;
import java.util.Base64;


@Controller
public class AIController {


	    private final String url="http://서버 EC2 IP:5000/detect";

	    private String getBase64String(MultipartFile multipartFile) throws Exception {
	        byte[] bytes = multipartFile.getBytes();
	        return Base64.getEncoder().encodeToString(bytes);
	    }

	    @RequestMapping("test.do")
	    public String requestToFlask(@RequestParam("image") MultipartFile image, RedirectAttributes redirect) throws Exception {
	        RestTemplate restTemplate = new RestTemplate();
	        String fileName = image.getOriginalFilename();
	        // Header set
	        HttpHeaders httpHeaders = new HttpHeaders();
	        httpHeaders.setContentType(MediaType.APPLICATION_JSON);


	        // Body set
	        MultiValueMap<String, String> body = new LinkedMultiValueMap<>();
	        String imageFileString = getBase64String(image);
	        body.add("filename", fileName);
	        body.add("image", imageFileString);

	        // Message
	        HttpEntity<?> requestMessage = new HttpEntity<>(body, httpHeaders);
	        //HttpEntity<JSONObject> httpEntity = new HttpEntity<JSONObject>(jsonObject, httpHeaders);
	        // Request
	        HttpEntity<String> request = restTemplate.postForEntity(url, requestMessage, String.class);

	        // Response 파싱
	        String response = restTemplate.postForObject(url, requestMessage, String.class);
	        //ResponseEntity<Map> response = restTemplate.exchange("http://127.0.0.1:5000/detect",HttpMethod.POST, requestMessage, String.class);

	        //System.out.print(response);
	        JSONParser parser = new JSONParser();
	        JSONObject jsonobject = (JSONObject) parser.parse(response);
	        System.out.print(jsonobject.get("file_name"));
	        //System.out.print(jsonobject.get("image"));

	        // create output file
	        File outputFile = new File("파일이 저장될 위치");
	        byte[] decodedBytes = Base64.getDecoder().decode((String)(jsonobject.get("image")));
	        FileUtils.writeByteArrayToFile(outputFile, decodedBytes);


	        return "redirect:/";
	    }

	}
받은 이미지를 인코딩 후 JSON으로 보내준 다음 EC2 python에서 작업 후 다시 받아와 디코딩 해 이미지를 저장하도록 했습니다.
여러가지 확인을 위해서 콘솔에 받은 데이터를 찍으려고 했는데...! 찍히지 않았다
아마 너무 많은 입력값이 찍혀야 해서 그런것 같다고 추측!
일단 작업이 끝난 후에 인덱스 페이지로 리다이렉트 되도록 해놨다.
EC2 파이썬에는 이 부분을 실행시켜준다
detector.py
import os
import shutil
from flask import Flask, request
import detect as Detect
import base64
import json

prev_id = ''
app = Flask(__name__)

@app.route('/detect', methods=['POST'])
def detect_target():
    filename=request.json['filename']
    f=request.json['image']
    str_filename=''.join(filename)


    file_binary = f[0]
    img = base64.b64decode(file_binary)

    with open(filename[0], 'bw') as  f :
        f.write(img)

    print(str_filename)

    fpath = './' + str_filename


    if os.path.isdir('파일 저장될 경로'):
        shutil.rmtree('파일 저장될 경로')
    Detect.detect(fpath, True, True, 'woori')


    ret_file = open('저장된 경로' + str_filename, 'rb')
    image_binary = ret_file.read()
    encoded_string = base64.b64encode(image_binary)

    image_dict = {
        'file_name': str_filename,
        'image': encoded_string.decode()
    }


    image_json = json.dumps(image_dict)
    print(image_json)
    print("======================================")

    return image_json

if __name__ == '__main__':
    app.run(host='0.0.0.0')
실행할 때는 EC2의 detector.py 파일을
python detector.py
로 실행시켜 준 이후에
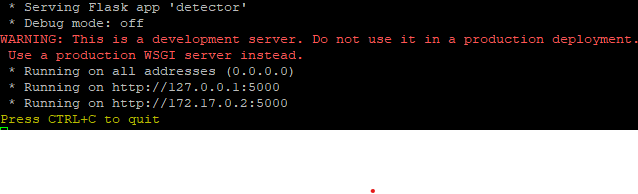
이런 문구가 생긴다면 이제 프로젝트에서 파일을 전송시켜줍니다.
콘솔에 알 수 없는(이미지가 인코딩된) 문자가 막 뜨고 200 알림이 뜨면 데이터 주고받기에 성공!!

이제 EC2에 남은 파일을 정리하는 부분이랑
완성된 파일을 S3에 저장해 불러오기 하도록 하는 작업을 추가할 예정!!!
그리고 완성된 파일의 경로에 이름이 같은 파일이 있으면 저장되지 않아서 uuid도 추가해야함!!
도움 받은 블로그

공부한 것들의 기록