Flexible, Expanded
크기를 %로 주고 싶다면 Flexible을 이용하여 Container를 감싸면 된다.
Widget build(BuildContext context) {
return MaterialApp(
home: Scaffold(
appBar: AppBar(
actions: [Icon(Icons.doorbell_outlined)],
title: Text('앱임'),
),
body: Container(
child: Row(
children: [
Expanded(child:Container(color:Colors.blue)),
Container(width:100,color:Colors.green)
],
),
)));
}
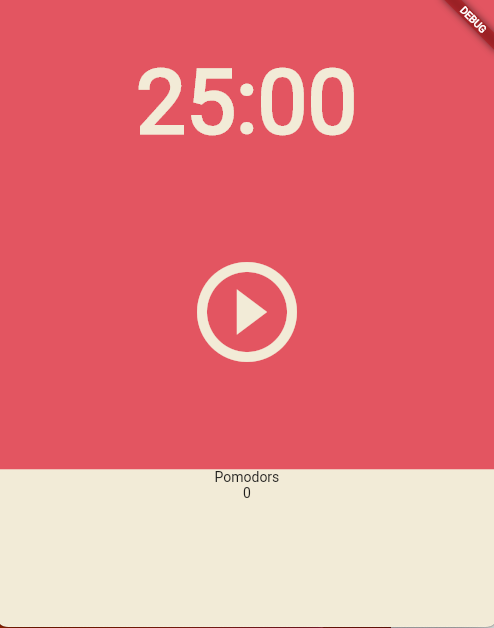
다른 예제. 현재 코드는 아래와 같다. Pomodors를 끝까지 늘리고 싶다면, expand를 이용하면 된다.

           Flexible(
                flex: 1,
                child: Container(
                    decoration:
                        BoxDecoration(color: Theme.of(context).cardColor),
                    child: Column(
                      children: const [
                        Text("Pomodors"),
                        Text('0'),
                      ],
                    )))
Row방향으로 늘어날거니까 Row로 감싸고, Expanded로 다시한번 Container를 감싸면 사진과 같이 잘 늘어난다.
  Flexible(
                flex: 1,
                child: Row(
                  children: [
                    Expanded(
                      child: Container(
                          decoration:
                              BoxDecoration(color: Theme.of(context).cardColor),
                          child: Column(
                            children: const [
                              Text("Pomodors"),
                              Text('0'),
                            ],
                          )),
                    ),
                  ],
                ))
당근마켓 UI따라하기..
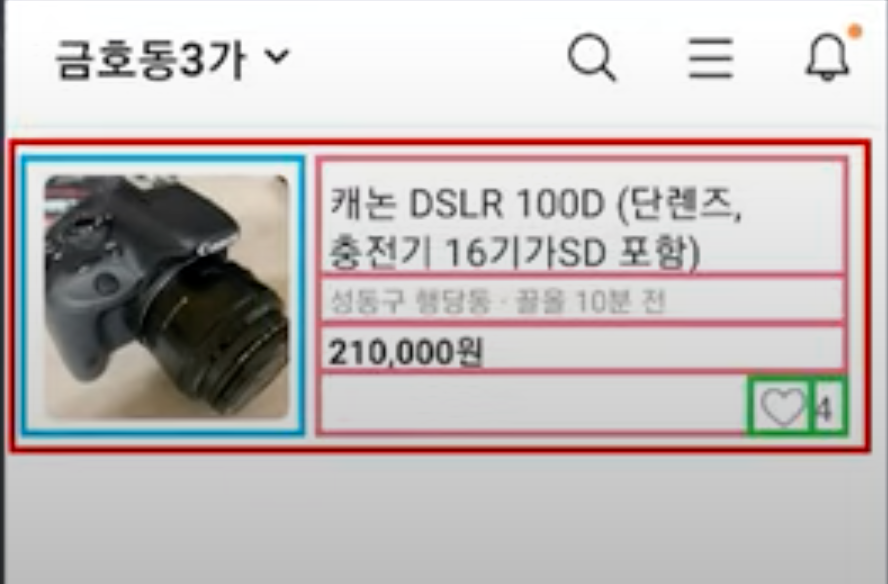
아래 사진 따라서 만드는거다.
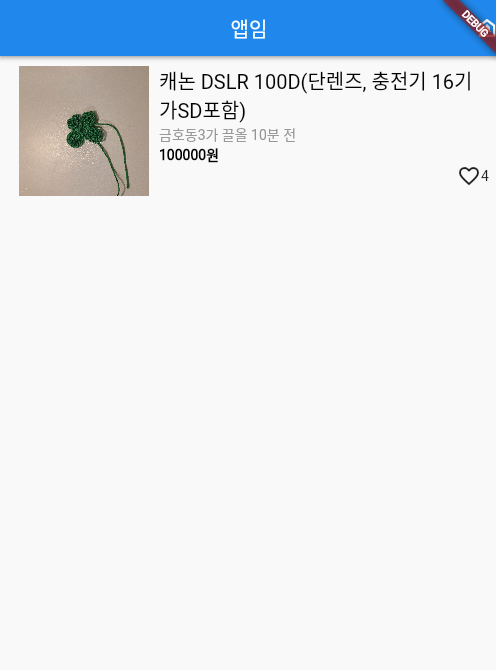
Widget build(BuildContext context) {
return MaterialApp(
home: Scaffold(
appBar: AppBar(
actions: [Icon(Icons.doorbell_outlined)],
title: Text('앱임'),
),
body: Container(
height: 150,
padding: EdgeInsets.all(10),
child: Row(
children: [
Container(
child: Image.asset(
'대충 경로/contact/assets/images/clover.jpeg',
width: 150)),
Expanded(
child: Container(
child: Column(
crossAxisAlignment: CrossAxisAlignment.start,
children: [
Text(
'캐논 DSLR 100D(단렌즈, 충전기 16기가SD포함)',
style: TextStyle(fontSize: 20, color: Colors.black),
),
Text(
'금호동3가 끌올 10분 전',
style: TextStyle(color: Colors.grey),
),
Text(
'100000원',
style: TextStyle(
color: Colors.black, fontWeight: FontWeight.bold),
),
Row(mainAxisAlignment: MainAxisAlignment.end, children: [
Icon(Icons.favorite_border_outlined),
Text('4')
]),
],
)))
],
),
)));
}
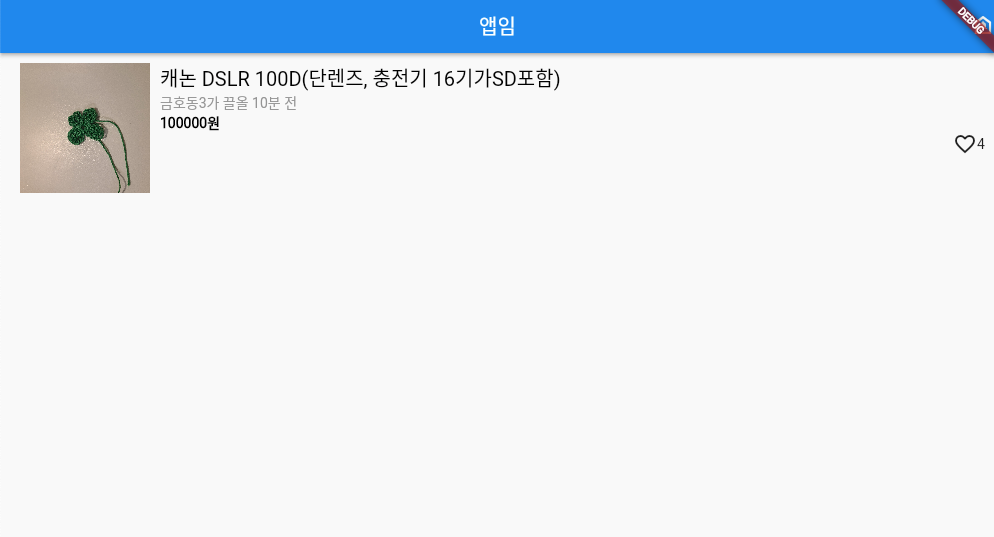
화면 크기 대응방법
사진을 Container에 담아 width를 고정하고, Expanded를 이용해 오른쪽 Container를 감싸주면 아래와 같이 태블릿 사이즈여도 잘 된다.
Custom Widget
문법
- 커스텀 위젯은 class로 만든다.
const ShopItem({Key? key}) : super(key: key);- 위 코드는 class에 어떤 파라미터를 넣을 수 있는지 정의하는 부분이다.
만드는 법
stless라고 타자치고 tab키를 누르면 아래와 같이 custom widget이 나온다.
class extends StatelessWidget {
const ({Key? key}) : super(key: key);
Widget build(BuildContext context) {
return const Placeholder();
}
}ShopItem이라는 커스텀 위젯을 만들면 아래와 같이 만들면 된다.
class ShopItem extends StatelessWidget {
const ShopItem({Key? key}) : super(key: key);
Widget build(BuildContext context) {
return SizedBox(child: Text('안녕'));
}
}변하지 않는 UI들은 변수에 담아도 된다.
var a=SizedBox(child:Text('안녕'));ListView
ListView를 사용하면 스크롤이 자동으로 생긴다.
