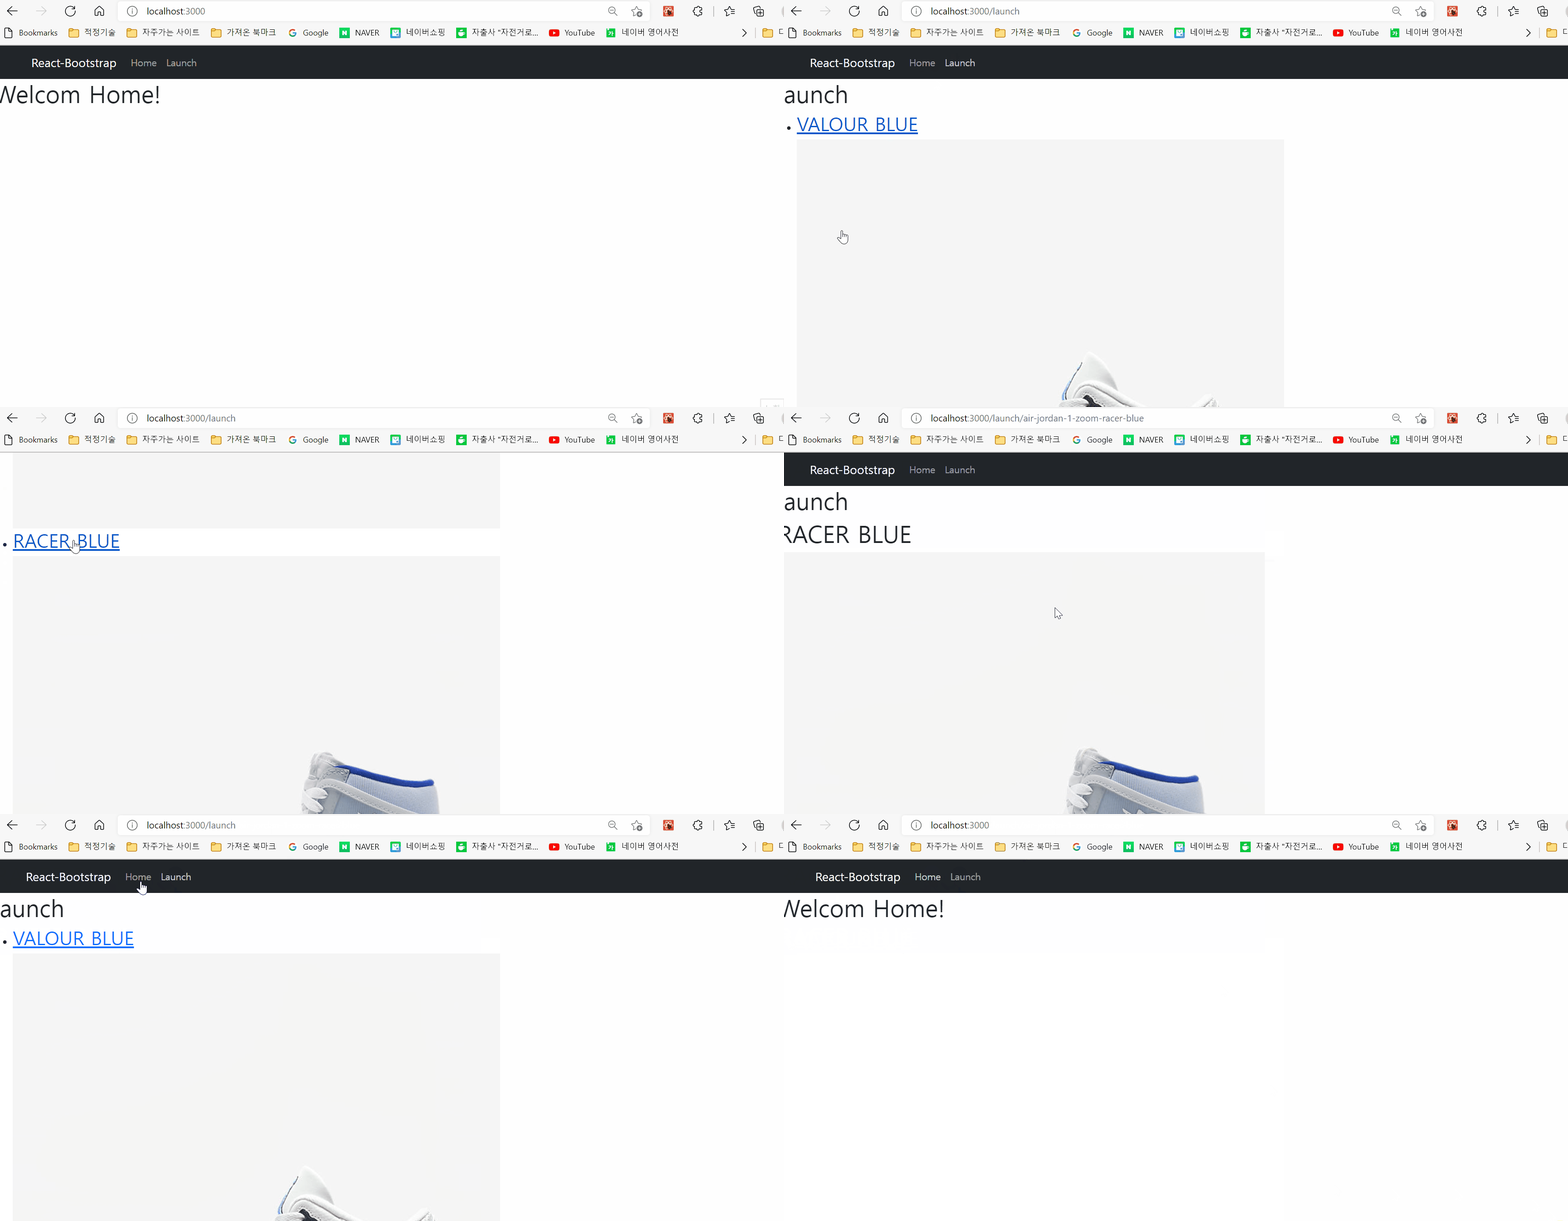
우선 Routes안에서 어느 한쪽 길에 도달하게 되면, 즉 path가 맞아떨어져서 특정 컴포넌트가 랜더링 되면 다른 Route는 실행되지 않는다.
일단 이걸 염두해두고 path에 들어가는 * 기호에 대해서 알아보자.
 <Routes>
  <Route path="/" element={<Home />} />
  <Route path="/launch" element={<Launch />}>
    <Route path="/launch" element={<LaunchIndex />} />
    <Route path=":s" element={<LaunchShoe />} />
  </Route>
  <Route path="*" element={<NotFound />} />
</Routes>
보면은 path * 가 가장 아래에 위치해있다. 즉 현재 url이 어떠한 경로에도 들어맞지 않으면 * 경로로 들어가게 된다. (참고로, 보통 * 기호는 universal한 뜻을 나타낸다.) 즉, NotFound 컴포넌트가 랜더링 된다.
그럼, 각각의 경로에 해당되는 컴포넌트를 살펴보도록 하자.
참고로 간단하고 빠른 랜더링을 위해서 함수 컴포넌트를 사용해보았다.
Home
별거 없다. 그냥 Home이라는 것만 알려주도록 하자.
function Home() {
  return (
    <div>
      <h1>Welcom Home!</h1>
    </div>
  );
}
Launch
Launch 컴포넌트는 점심... 아니 nike shoes를 선택할 수 있는 페이지이다.
그리고 Launch Route안에 LaunchIndex,LaunchShoe 라는 자식 컴포넌트가 있다. 우선 자식 컴포넌트부터 살펴보자.
LaunchIndex / LaunchShoe
const shoes = {
  'air-jordan-3-valor-blue': {
    name: 'VALOUR BLUE',
    img: 'https://secure-images.nike.com/is/image/DotCom/CT8532_104_A_PREM?$SNKRS_COVER_WD$&align=0,1',
  },
  'jordan-mars-270-london': {
    name: 'JORDAN MARS 270 LONDON',
    img: 'https://secure-images.nike.com/is/image/DotCom/CV3042_001_A_PREM?$SNKRS_COVER_WD$&align=0,1',
  },
  'air-jordan-1-zoom-racer-blue': {
    name: 'RACER BLUE',
    img: 'https://secure-images.nike.com/is/image/DotCom/CK6637_104_A_PREM?$SNKRS_COVER_WD$&align=0,1',
  },
};


function LaunchIndex() {
  return (
    <ul>
      {Object.entries(shoes).map(([slug, { name, img }]) => (
        <li key={slug}>
          <Link to={`/launch/${slug}`}>
            <h2>{name}</h2>
            <img src={img} alt={name} />
          </Link>
        </li>
      ))}
    </ul>
  );
}

function LaunchShoe() {
  const { s } = useParams();
  const shoe = shoes[s];
  if (!shoe) {
    return <Link to="*">Not Found Shoes</Link>;

  }
  const { name, img } = shoe;
  return (
    <div>
      <h1>{name}</h1>
      <img src={img} alt={name} />
      <button></button>
    </div>
  );
}
LaunchIndex에서 shoes 를 가지고 map을 해서 상품을 출력한다. 그리고 각 상품을 클릭하면 launch/상품으로 가도록 링크를 달아둔다. 그럼 LaunchShoe에서 useParams 라는 메소드를 이용해 상품명만 url에서 extract한다. 이게 가능한 이유는 , path를 다이나믹하게 설정해뒀기 때문이다. s 라는 단어를 placeholder로 설정했기에 s를 extract한다. 그리고 해당 shoes를 출력하면 된다.
그럼 이 자식들을(?) 어떻게 Lauch에서 출력할까? 아주 간단하다 Outlet 이라는 컴포넌트를 사용하면 된다.
function Launch() {
  return (
    <div>
      <h1>launch</h1>
      <Outlet />
    </div>
  );
}
그럼 맨 위에 gif에서 보는 것 처럼, 자식 컴포넌트가 출력할 내용들이 h1 태그 밑에 출력된다.
그럼 다음엔 useNavigate를 사용하는 법을 알아보자!
