http는 여러 플랫폼 간에 통신하기 위한 수단이 될 수 있다.
http 요청을 간단하기 보내기 위해 http패키지를 사용할 수 있다.
플랫폼 네트워크 권한 설정
플랫폼별로 네트워크 기능을 사용할 수 있도록 풀어줘야 한다.
Android의 경우
프로젝트명/android/app/src/profile/AndroidManifest.xml 파일 안에
<uses-permission android:name="android.permission.INTERNET" />Ios의 경우 참고
프로젝트명/ios/Runner/Info.plist 파일 안에
<key>NSAppTransportSecurity</key>
<dict>
  <key>NSAllowsArbitraryLoads</key><true/>
</dict>
사전 지식
- 직렬화와 역직렬화
- 직렬화 : 내가 쓰기 좋은 포멧에서 통신하기 좋은 포멧으로
- 역직렬화 : 통신하기 좋은 포멧에서 내가 쓰기 좋은 포멧으로 (e.g., 플러터의 경우 JSON -> Class)
- Json - Flutter : decodeJson, encodeJson으로 역직렬화 직렬화 할 수 있다. 근데 더 좋은 방법도 있다. 이 포스트의 아래쪽 '직렬화'부분 참고
- Dart에서 객체 다루기 - Map : 플러터에서 json을 decode하면 일반적으로 Map에 넣어버린다.
Map<String, dynamic> bonjour = jsonDecode(json_data)
- switch expression
return switch(어떤 변수) {케이스1 => 리턴값1, _ => 기본_리턴값,}
- Named Constructor : 생성자를 여러개 둘 수 있다.
- e.g.,
클래스이름.fromJson(){}은클래스이름.fromJson이라는 생성자를 정의한 것. (원래는클래스이름생성자만 있었겠지)
- e.g.,
- factory : 인스턴스를 캐싱하는 생성자. 이미 생성된 인스턴스가 있을 때 생성자를 호출하면, 새 인스턴스가 아니라 원래 있던 인스턴스가 리턴된다. 싱글톤 패턴 구현할 때 잘 쓴다는듯.
CRUD
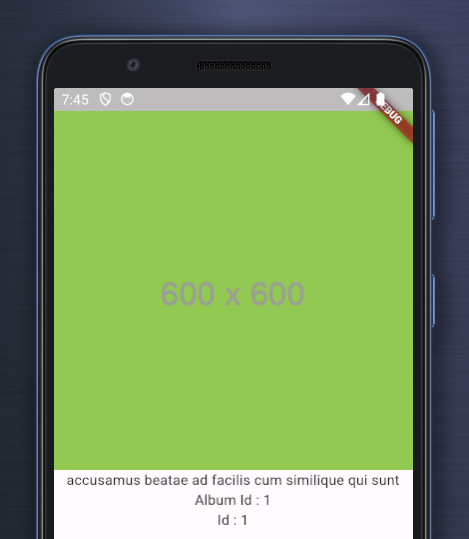
Read : 데이터 Fetch
요청해서 가져온 Json을 object로 바꿔서 써먹는게 키 아이디어다. 좀 더 자세히 설명하자면
- 요청해서 받아온 Json을
Map<String, dynamic>형태로 만든다 (=역직렬화=decode) - 역직렬화한 것을 저장할만한 클래스를 만든다
- Map의 값을 인스턴스에 집어넣는다
- 꺼내서 화면에 뿌린다.
코드로 설명하면 이렇다.
** 코드에서 보면 fetchPhoto 호출을 build가 아닌 initState메소드에서 한다. 매번 빌드될때 패치를 하면 성능이 박살나서 매우 슬프기 때문에 그렇게 한다.
import 'dart:convert';
import 'package:flutter/material.dart';
import 'package:http/http.dart' as http;
void main() {
runApp(const MyApp());
}
class MyApp extends StatelessWidget {
const MyApp({super.key});
Widget build(BuildContext context) {
const appTitle = 'Theme Demo';
return const MaterialApp(
title: appTitle,
home: Scaffold(
body: SafeArea(
child: DemoBody(),
),
),
);
}
}
class DemoBody extends StatefulWidget {
const DemoBody({super.key});
State<DemoBody> createState() => _DemoBodyState();
}
class _DemoBodyState extends State<DemoBody> {
late Future<Photo> photo;
Future<Photo> fetchPhoto() async {
final http.Response res = await http
.get(Uri.parse('https://jsonplaceholder.typicode.com/photos/1'));
print(res);
print('-------------------');
print(res.headers);
print('-------------------');
print(res.body);
if (res.statusCode == 200) {
return Photo.fromJson(jsonDecode(res.body));
// 뒤에 명확하게 decode된 뒤의 타입을 적어줘도 된다.
// return Photo.fromJson(jsonDecode(res.body) as Map<String, dynamic>);
} else {
throw Exception('요청 실패함');
}
}
void initState() {
super.initState();
photo = fetchPhoto();
print(photo);
}
Widget build(BuildContext context) {
return Center(
child: FutureBuilder(
future: photo,
builder: (context, snapshot) {
if (snapshot.hasData) {
return Column(
children: <Widget>[
Image.network(snapshot.data!.url),
Text(snapshot.data!.title),
Text('Album Id : ${snapshot.data!.albumId.toString()}'),
Text('Id : ${snapshot.data!.id.toString()}'),
],
);
} else if (snapshot.hasError) {
return Text('ERROR :: ${snapshot.error}');
}
// photo에 아직 데이터가 안들어왔을 때 보여줄 기본 위젯
return const CircularProgressIndicator();
},
),
);
}
}
class Photo {
final int albumId;
final int id;
final String title;
final String url;
final String thumbnailUrl;
Photo({
required this.albumId,
required this.id,
required this.title,
required this.url,
required this.thumbnailUrl,
});
// 그냥 Photo.fromJson이라는 이름의 생성자임. 별거 아님.
// 근데 factory생성자인.
factory Photo.fromJson(Map<String, dynamic> json) {
return switch (json) {
// 타입과 항목을 잘 맞춰서 들어온 경우, Photo객체 만들기
{
'albumId': int albumId,
'id': int id,
'title': String title,
'url': String url,
'thumbnailUrl': String thumbnailUrl,
} =>
Photo(
albumId: albumId,
id: id,
title: title,
url: url,
thumbnailUrl: thumbnailUrl,
),
// 잘못된게 들어온 경우 에러 뱉기
_ => throw Exception('잘못된 형식의 json입니다.'),
};
}
}Create
get요청이랑 거의 똑같다.
http.post메소드에 데이터유형과 데이터(바디)만 실어 보내주면 된다.
final http.Response res = await http.post(
    Uri.parse('https://jsonplaceholder.typicode.com/photos'),
    headers: <String, String>{
      'Content-Type': 'application/json; charset=utf-8'
    },
    body: jsonEncode(
      <String, String>{'title': title, 'url': url},
    ),
  );
내용 적어서 post(인척 하지만 사실 echo인)하는 예시를 보면 이렇다.

import 'dart:convert';
import 'package:flutter/material.dart';
import 'package:http/http.dart' as http;
// --------------------------------
// UI
void main() {
runApp(const MyApp());
}
class MyApp extends StatelessWidget {
const MyApp({super.key});
Widget build(BuildContext context) {
const appTitle = 'Theme Demo';
return const MaterialApp(
title: appTitle,
home: Scaffold(
body: SafeArea(
child: DemoBody(),
),
),
);
}
}
class DemoBody extends StatefulWidget {
const DemoBody({super.key});
State<DemoBody> createState() => _DemoBodyState();
}
class _DemoBodyState extends State<DemoBody> {
final TextEditingController _titleController = TextEditingController();
final TextEditingController _urlController = TextEditingController();
Future<Photo>? _createdPhoto;
Widget build(BuildContext context) {
return Center(
child: (_createdPhoto == null) ? buildCreateForm() : buildPhotoView(),
);
}
Column buildCreateForm() {
return Column(
children: <Widget>[
TextField(
controller: _titleController,
decoration: const InputDecoration(
labelText: 'Title',
hintText: 'Enter title',
),
),
TextField(
controller: _urlController,
decoration: const InputDecoration(
labelText: 'URL',
hintText: 'Enter URL',
),
),
ElevatedButton(
onPressed: () {
setState(() {
_createdPhoto = createPhoto(
_titleController.text,
_urlController.text,
);
});
},
child: const Text('SUBMIT'),
),
],
);
}
FutureBuilder<Photo> buildPhotoView() {
return FutureBuilder(
future: _createdPhoto,
builder: (context, snapshot) {
if (snapshot.hasData) {
return Column(
children: <Widget>[
Image.network(snapshot.data!.url),
Text(
snapshot.data!.title,
style: const TextStyle(fontSize: 24),
),
],
);
} else if (snapshot.hasError) {
return const Text('에러났다');
}
// 통신 중에 보여줄 것
return const CircularProgressIndicator();
});
}
}
// --------------------------------
// Post 통신 메소드
Future<Photo> createPhoto(String title, String url) async {
// 받는 응답은 내가 보냈던 데이터.
final http.Response res = await http.post(
Uri.parse('https://jsonplaceholder.typicode.com/photos'),
headers: <String, String>{
'Content-Type': 'application/json; charset=utf-8'
},
body: jsonEncode(
<String, String>{'title': title, 'url': url},
),
);
if (res.statusCode == 201) {
final decoded = Photo.fromJson(jsonDecode(res.body));
print(jsonDecode(res.body));
return decoded;
} else {
throw Exception('요청 실패함');
}
}
// --------------------------------
// 모델
class Photo {
final String title;
final String url;
Photo({
required this.title,
required this.url,
});
factory Photo.fromJson(Map<String, dynamic> json) {
return switch (json) {
{
'title': String title,
'url': String url,
} =>
Photo(
title: title,
url: url,
),
_ => throw Exception('잘못된 형식의 json입니다.'),
};
}
}Update
구현에 따라 다르겠지만.
아무튼 put method를 쓴다고 하면
final http.Response res = await http.put(
    Uri.parse('https://jsonplaceholder.typicode.com/photos/1'),
    headers: <String, String>{
      'Content-Type': 'application/json; charset=utf-8'
    },
    body: jsonEncode(
      <String, String>{'title': title, 'url': url},
    ),
  );
Delete
이것도 구현에 따라 다르겠지만
어쨌든 delete method를 꼭 써야겠다고 하면
final http.Response res = await http.delete(
    Uri.parse('https://jsonplaceholder.typicode.com/photos'),
    headers: <String, String>{
      'Content-Type': 'application/json; charset=utf-8'
    },
  );
Authenticated Requests
인증토큰 넣고싶으면 넣으면 된다.
import 'dart:io'; // HttpHeaders가 여기서 나오는듯
import 'package:http/http.dart' as http;

Future<뭐시기> fetchPhoto() async {
    final http.Response res = await http.get(
        Uri.parse('https://jsonplaceholder.typicode.com/photos/1'),
        headers: {
          HttpHeaders.authorizationHeader: 'MY_TOKEN',
        },
    );
}
웹소켓 통신
https://docs.flutter.dev/cookbook/networking/web-sockets
web_socket_channel 패키지로 웹소켓 서버에 연결할 수 있음.
다시 말하면, 제공되는 기능은
- 메시지 listen하기
- 메시지 push하기
// 소켓서버에 연결하기
final channel = WebSocketChannel.connect(
  Uri.parse('웹소켓서버 주소');
);

// 메시지 push하기
channel.sink.add(보낼것);

// 소켓서버 연결 끊기
channel.sink.close();
소켓서버에서 응답받은 내용을 UI에 표시할 때는 StreamBuilder위젯 사용
StreamBuilder(
  stream: channel.stream,
  builder: (context, snapshot) {
    if (snapshot.hasData) {
      return Text('${snapshot.data}');
    } else if (snapshot.hasError) {
      throw Exception('슬프다');
    }

    return Text('기다리는 중');
  },
)
JSON 수동 직렬화
dart.convert로 수동 직렬화를 해보자
- Serialization = Encoding : Data structure -> String
- Deserialiation = Decoding : String -> Data structure
사실 지금까지 이 포스트에서 하던 json직렬화는 모두 (상대적으로 낮은 수준의) 수동 직렬화였다.
아래처럼 jsonDecode만 해서 나온 Map을 그대로 사용해도 된다.
그러나 jsonDecode는 dynamic타입을 리턴하므로 타입체킹이나 프로퍼티 오타의 컴파일시점 체킹이 곤란하다. 근데 아무튼 동작한다.
final somethingMap = jsonDecode(somethingJson) as Map<String, dynamic>;
print (somethingMap.prop1);
그래서 앞서 http통신 부분에서 했던 대로 디코딩된 Map을 모델클래스로 다시 바꾼다.
final somethingMap = jsonDecode(somethingJson) as Map<String, dynamic>;
final something = Something.fromJson(somethingMap);
print (something.member1);

// class def
class Something{
  int member1;
  Something({required int member1});
  Something.fromJson(json) {
    .......
    return Something(json에서 얻은 member1);
  }
}

// 놀랍게도 인스턴스에서 스트링으로 바로 직렬화가 된다.
// String serialized = jsonEncode(something);
이렇게 간단하게 항상 해결이 되면 좋겠지만, 프로젝트가 규모가 커지고 Json의 구조가 복잡해지면 삶이 고달파지기 때문에 외부 라이브러리의 힘을 빌리게 된다.
JSON 자동(?) 직렬화
json_serializable로 직렬화를 날로 먹어보자. 대신 다른 귀찮은일이 생긴다.
그래서 자동인지에는 의문이 생기지만.. 프로젝트가 커지면 도움이 될 듯.
코드생성 라이브러리를 이용해 Json직렬화 보일러플레이트를 자동생성 할 수 있음.
플러터 독스에서 소개 하는 패키지는 json_serializable이고, 어노테이션을 적어서 코드생성을 처리하는 특징이 있음.
설치는 이렇게 (개발종속성에 패키지가 들어감)
flutter pub add json_annotation dev:build_runner dev:json_serializable이 라이브러리를 쓰는 순간 직렬화/역직렬화의 동작은 라이브러리의 책임이다. 테스트 안해도 된다. (라고 주장함)
대충 이런 순서로 작업한다
- 모델 정의하기
- 코드 자동생성 하기
- 모델 갖다쓰기
모델 정의
키 아이디어
json_Serializable을 이용할 때 모델클래스는 이렇게 정의한다.
- 클래스 위에
@JsonSerializable()붙여주면 직렬화 코드를 자동생성 - 라이브러리가 자동생성하는 파일 이름은
클래스명.g.dart- 이 파일에서 클래스 private멤버에 접근할 수 있게 풀어줘야 함
part '클래스명.g.part';
- 자동생성하는 코드가 만들어주는 생성자는 두 가지
_$클래스명FromJson(json): map에서 클래스로 역직렬화_$클래스명ToJson(json): 클래스에서 map으로 직렬화
- 그래서 이런 내용들을 고려해 모델클래스를 짜면 '그딴 파일.. 그딴 생성자는 없다'고 할텐데 정상이다. 곧 코드생성기를 돌리는 방법을 소개한다.
()
class Photo {
final int id;
final String title;
Photo({
required this.id,
required this.title,
});
factory Photo.fromJson(Map<String, dynamic> json) => _$PhotoFromJson(json);
Map<String, dynamic> toJson() => _$PhotoToJson(this);
// 참고로 저 Map타입의 짭Json말고,
// String타입의 진짜배기 Json을 뱉고 싶다면
// 그냥 원래 하던대로 하면 된다
// String str_ㄹㅇ_json = jsonEncode(Photo인스턴스);FieldRename Enum
만약 Map의 key와 모델의 네이밍 케이스가 다르다면 그걸 각각 지정해줄 수 있다. 그러면 Map을 모델로 전환할 때, 모델을 Map으로 전환할 때 문제가 발생할 수 있을 것.
(e.g., Map에서의 키는 user_id인데, 플러터 모델에서 죽어도 userId로 써야겠는 경우)
이 기능은 모델 전체의 멤버에 적용된다.
(fieldRename: FieldRename.snake)
class User {
// Map에서 얘의 key는 'user_id'로 간주된다. 위에서 그렇게 설정했으니까.
final int userId;
...
}@JsonKey
멤버(필드)에 붙이는 어노테이션인데, 여러가지 용도로 사용할 수 있다.
위에서 FieldRename으로 json(map) key와, 모델 필드이름을 각각 지정해줬다.
그것처럼 여기서도 모델 필드이름과 다르게 실제 map에서의 key는 무엇인지 알려줄 수 있다.
(name: 'user_id')
final int userId;이렇게 하면 필수값으로 지정하거나 기본값을 넣어주는 일도 가능하다
(required: true)
final int something;
(defaultValue: 1234)
final int somethingAnother;코드 생성
두 가지 방법이 있다.
- 한 번 생성할까?
- 계속 생성해줄까?
one-time 코드생성
프로젝트 루트에서 이거 하면 된다. 이거 하면 코드 생김.
dart run build_runner build --delete-conflicting-outputs약간 시간이 걸리다가 이렇게 잘 됐다고 한다.
dart run build_runner build --delete-conflicting-outputs
Building package executable... (9.1s)
Built build_runner:build_runner.
[INFO] Generating build script completed, took 343ms
[INFO] Precompiling build script... completed, took 4.8s
[INFO] Building new asset graph completed, took 1.6s
[INFO] Checking for unexpected pre-existing outputs. completed, took 1ms
[INFO] Generating SDK summary completed, took 5.9s
[WARNING] source_gen:combining_builder on lib/main.dart:
main.g.dart must be included as a part directive in the input library with:
    part 'main.g.dart';
[INFO] Running build completed, took 19.8s
[INFO] Caching finalized dependency graph completed, took 86ms
[INFO] Succeeded after 19.8s with 53 outputs (113 actions)
generating code continuously
와쳐를 켜두는 것임. 프로젝트 루트에서 이거 하면 된다.
dart run build_runner watch --delete-conflicting-outputs중첩된 클래스의 Json직렬화
모델의 필드가 다른 클래스인 경우
모델 --> Map 변환이 동작하지 않을 수 있음. (_$UserToJson(this))
@JsonSerializable(explicitToJson: true)
를 붙여서 명시적 JSON직렬화를 시키도록 하자
백그라운드 JSON 파싱
백그라운드에서 무거운 작업을 돌려보도록 하자
왜그래야되는데요내가
플러터는 웬만해서는 버벅거림 없을만큼 잘 만들긴 했다.
근데 아무리 그래도 겁나 복잡하고 거대한 JSON같은거 파싱 시키거나 네트워크 통신을 하면 성능저하가 체감될 수 있다. 보통 16ms이상 걸리면 유저가 버벅거림을 느낀다.
그러니까 오래걸리는건 백그라운드로 보내서 처리되도록 하고, 때가 되면 꺼내오도록 하자.
정확하게 안드로이드에서는 다른 thread로 보내는 것이고, 플러터는 이를 위해 분리된 공간인 Isolate를 제공한다.
방법
아래처럼 compute(함수, 보낼 파라미터)를 호출하면 백그라운드에서 돌아간다.
Future<List<Gorani>> fetchGoranis() async {
  final res = await http.get(Uri.parse('http://example.com/path'));
  return compute( parseGoranis, res.body );
}

List<Gorani> parseGoranis(String body) {
  ...
  return goranis;
}
소개한 방법의 한계. 그리고 대안
compute는 기본형(int, String)이나 단순한 오브젝트(List)는 잘 처리한다
근데 Future, http.Response같은걸 compute로 넘겨서 처리하려면 문제가 생길 수 있다.
그런 복잡한 데이터를 넘겨 처리할 때는 아래와 같은 패키지들을 사용해볼 수 있다.
- worker_manager
- workmanager